
Related Manuals for Samsung HW-Q67CB


Summary of Contents for Samsung HW-Q67CB
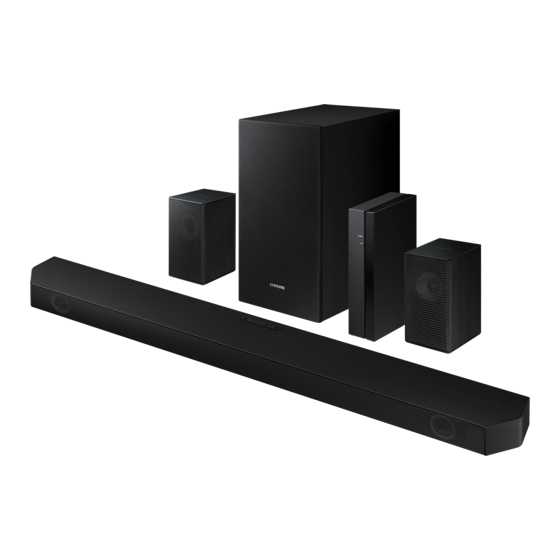
- Page 1 FULL MANUAL HW-Q67CB Imagine the possibilities Thank you for purchasing this Samsung product. To receive more complete service, please register your product at www.samsung.com/register...
- Page 2 • Do not expose this apparatus to dripping or Refer to the table below for an explanation of splashing. Do not put objects filled with symbols which may be on your Samsung product. liquids, such as vases, on the apparatus. • To turn this apparatus off completely, you...
- Page 3 This equipment generates, uses and approved recycler. To find the nearest recycling can radiate radio frequency energy and, if not location, go to our website:www.samsung.com/ installed and used in accordance with the recycling Or call, 1‐800‐SAMSUNG instructions, may cause harmful interference to WARNING: Cancer and Reproductive Harm radio communications.
- Page 4 PRECAUTIONS 8. Do not install near any heat sources such as radiators, heat registers, stoves, or other apparatus (including amplifiers) that produce 1. Ensure that the AC power supply in your heat. house complies with the power 9. Do not defeat the safety purpose of the requirements listed on the identification polarized or grounding-type plug.
-
Page 5: Table Of Contents
CONTENTS Checking the Components Product Overview Front Panel / Top Panel of the Soundbar ------------------------- Bottom Panel of the Soundbar ------------------------- Using the Remote Control Inserting Batteries before using the Remote Control (AAA batteries X 2) ------------------------- How to Use the Remote Control ------------------------- Using the Hidden Buttons (Buttons with more than one function) -------------------------... - Page 6 Connecting a USB drive Connecting a Mobile Device Connecting via Bluetooth ------------------------- Using Tap Sound ------------------------- Installing the Wall Mount Installation Precautions ------------------------- Wallmount Components ------------------------- Installing the Soundbar in front of TV Software Update USB Update ------------------------- Reset ------------------------- Troubleshooting License Open Source License Notice...
-
Page 7: Checking The Components
• For more information about the power supply and power consumption, refer to the label attached to the product. (Label: Bottom of the Soundbar Main Unit) • To purchase additional components or optional cables, contact a Samsung Service Center or Samsung Customer Care. -
Page 8: Product Overview
02 PRODUCT OVERVIEW Front Panel / Top Panel of the Soundbar Top Panel Display Displays the product’s status and current mode. (Power) Button Turns the power on and off. • Auto Power Down Function The unit turns off automatically in the following situations: –... -
Page 9: Bottom Panel Of The Soundbar
• When you turn on this unit, there will be a 4 to 5 second delay before it produces sound. • If you hear sounds from both the TV and Soundbar, go to the Settings menu for the TV audio and change the TV speaker to External Speaker. -
Page 10: Using The Remote Control
03 USING THE REMOTE CONTROL Inserting Batteries before using the Remote Control (AAA batteries X 2) Slide the back cover in the direction of the arrow until it is completely removed. Insert 2 AAA batteries (1.5V) oriented so that their polarity is correct. - Page 11 WOOFER SOUND By pressing the button, you can adjust the volume of the each speaker. MODE TONE CH LEVEL • Press the button to select CENTER LEVEL and then adjust the volume between -6~+6 CONTROL by using the Up/Down buttons. CH LEVEL •...
- Page 12 Press the indicated areas to select Up/Down/Left/Right. Up/Down/ PAIR Left/Right Press Up/Down/Left/Right on the button to select or set functions. SOUND MODE • Repeat To use the Repeat function in “USB” mode, press the Up button. • Music Skip WOOFER Press the Right button to select the next music file.
-
Page 13: Using The Hidden Buttons (Buttons With More Than One Function)
SOUND MODE WOOFER SOUND WOOFER MODE TONE CH LEVEL CONTROL (BASS) LEVEL Push the button up or down to adjust the level of the woofer (bass) to -12 or between -6 to +6. To set the woofer (bass) volume level to 0 (Default), press the button. WOOFER By pressing the button, you can adjust the volume of the treble or bass sound. -
Page 14: Output Specifications For The Different Sound Effect Modes
Output specifications for the different sound effect modes Output With Subwoofer & Effect Input With Subwoofer Only Wireless Rear Speaker 2.0 ch 3.1 ch 5.1 ch SURROUND 5.1 ch 3.1 ch 5.1 ch SOUND Dolby Atmos® 3.1 ch 5.1 ch Bluetooth Surround 2.0 ch 3.1 ch 5.1 ch POWER GAME 5.1 ch... -
Page 15: Adjusting The Soundbar Volume With A Tv Remote Control
• Set the TV speaker to External Speaker to use this function. • Manufacturers supporting this function: Samsung, VIZIO, LG, Sony, Sharp, PHILIPS, PANASONIC, TOSHIBA, Hisense, RCA 1. Turn Off the Soundbar. 2. Push up and hold the WOOFER button for 5 seconds. -
Page 16: Connecting The Soundbar
04 CONNECTING THE SOUNDBAR Connecting Electrical Power Use the power components to connect the Subwoofer and Soundbar to an electrical outlet in the following order: • For more information about the required electrical power and power consumption, refer to the label attached to the product. - Page 17 • The Soundbar will automatically power on when ID SET is complete. ID SET SAMSUNG logo is on the top 5 Sec 3. Check if the LINK LED is solid blue (connection complete). The LINK LED indicator stops blinking and...
- Page 18 Red and blue See the contact information Blinking Malfunction for the Samsung Service Center in this manual. NOTES • Do not connect the power cord of this product or your TV to a wall outlet until all connections between components are complete.
- Page 19 CAUTION • Wireless receiving antennas are built into the wireless subwoofer. Keep the unit away from water and moisture. • For optimal listening performance, make sure that the area around the wireless subwoofer and the Wireless Receiver Module is clear of any obstructions. ENG - 19...
-
Page 20: Connecting An Swa-9100S To Your Soundbar
Connecting an SWA-9100S to your Soundbar Expand to true wireless surround sound by connecting the Samsung Wireless Rear Speaker Kit (SWA-9100S) to your Soundbar. 1. Connect the Wireless Receiver Module to 2 Surround Speakers Use the speaker cables to connect the two surround sound speakers to the Wireless Receiver Module. - Page 21 • The ID SET message appears on the display of the Soundbar for a moment, and then it disappears. • The Soundbar will automatically power on when ID SET is complete. ID SET SAMSUNG logo is on the top 5 Sec CAUTION •...
- Page 22 Connection failure SURROUND SPEAKERS OUT (Red) SPEAKER IMPEDANCE : 3 5 Sec SURROUND SPEAKERS OUT ID SET SPEAKER IMPEDANCE : 3 ID SET 2. Repeat steps 3 through 4. POWER Others Errors Contact a Samsung Service Center. POWER ENG - 22...
-
Page 23: Using A Wired Connection To The Tv
05 USING A WIRED CONNECTION TO THE TV Method 1. Connecting with HDMI Connecting the TV that supports HDMI ARC/eARC (Audio Return Channel/ Enhanced Audio Return Channel) CAUTION • When both the HDMI cable and optical cable are connected, the HDMI signal is received first. •... - Page 24 • To connect with eARC, the eARC function in the TV menu should be set to On. Refer to the TV user manual for details on setting. (e.g. Samsung TV : Home ( ) → Menu → Settings ( ) →...
-
Page 25: Method 2. Connecting Using An Optical Cable
Method 2. Connecting using an Optical Cable Pre-connection Checklist • When both the HDMI cable and optical cable are connected, the HDMI signal is received first. • When you use an optical cable and the terminals have covers, be sure to remove the covers. Bottom of the Soundbar Optical Cable (not supplied) - Page 26 Using the Q-Symphony Function For Q-Symphony, the Soundbar syncs with a Samsung TV to output sound through two devices for optimum surround effect. When the Soundbar is connected, the menu, “TV+Soundbar” appears under the Sound Output menu of the TV. Select the corresponding menu.
-
Page 27: Using A Wireless Connection To The Tv
• After you have connected the Soundbar to your TV the first time, use the “BT READY” mode to reconnect. If the device fails to connect • If a previously connected Soundbar listing (e.g. “[AV] Samsung Soundbar Q6B-Series”) appears in the list, delete it. • Then repeat steps 1 through 3. - Page 28 Disconnecting the Soundbar from the TV Press the (Source) button on the top panel or on the remote control and switch to any mode but “BT”. • Disconnecting takes time because the TV must receive a response from the Soundbar. (The time required may differ, depending on the TV model.) •...
-
Page 29: Connecting An External Device
07 CONNECTING AN EXTERNAL DEVICE Method 1. Connecting using an HDMI Cable (Capable of Dolby Atmos® decoding and playback) Pre-connection Checklist • If the Audio Output options include Secondary Audio, make sure Secondary Audio is set to Off. • Make sure that the content supports Dolby Atmos®. •... -
Page 30: Method 2. Connecting Using An Optical Cable
Open the audio output options on the settings menu of your BD player or other device and make sure that “No Encoding” is selected for Bitstream. For example, on a Samsung BD Player, go to Home Menu → Sound → Digital Output and then select Bitstream (unprocessed). -
Page 31: Connecting A Usb Drive
08 CONNECTING A USB DRIVE You can play music files located on USB drive through the Soundbar. USB port HDMI USB (5V 0.5A) HDMI TO TV (eARC/ARC) DC 24V DIGITAL AUDIO IN (OPTICAL) USB (5V 0.5A) 1. Connect the USB drive to the USB port on the bottom of the product. 2. -
Page 32: Connecting A Mobile Device
Soundbar for more than 5 seconds to display “BT PAIRING”. 2. On your device, select “[AV] Samsung Soundbar Q6B-Series” from the list that appears. • When the Soundbar is connected to the Mobile device, [Mobile Device Name] → “BT” appears in the front display. - Page 33 If the device fails to connect • If you have an existing Soundbar (e.g., “[AV] Samsung Soundbar Q6B-Series”) on the list of speakers on the Mobile device, delete it. • Then repeat steps 1 and 2. What is the difference between BT READY and BT PAIRING? •...
- Page 34 • A Bluetooth device may experience noise or malfunction under in the following conditions: – When the body is in contact with the signal transceiver on the Bluetooth device or Soundbar – In corners or when there is an obstacle in proximity, such as a wall or partition, where electrical changes may occur.
- Page 35 (A device that is not currently playing will be disconnected.) • Only one Samsung TV, or 2 Bluetooth devices can be connected at the same time. • The Soundbar will be disconnected from Bluetooth devices when it receives a connection request from a Samsung TV.
-
Page 36: Using Tap Sound
Tap the Soundbar with your mobile device to play audio from the mobile device through the Soundbar. • This function may not be supported, depending on the mobile device. • This function is only compatible with Samsung mobile devices with Android 8.1 or later. SmartThings App Top of the Soundbar TAP ... -
Page 37: Installing The Wall Mount
10 INSTALLING THE Wallmount Components WALL MOUNT Wall Mount Guide (AH81-09822A) Installation Precautions • Install on a vertical wall only. (M4 x L10) • Do not install in a place with high Holder-Screw Screw temperature or humidity. (AH81-09824A) (AH81-09825A) • Verify whether the wall is strong enough to support the product’s weight. - Page 38 2. Align the Wall Mount Guide’s Center Line 5. Push a screw (not supplied) through each with the center of your TV (if you are Holder-Screw, and then screw each screw mounting the Soundbar below your TV), and firmly into a support screw hole. then fix the Wall Mount Guide to the wall using tape.
-
Page 39: Installing The Soundbar In Front Of Tv
11 INSTALLING THE 7. Install the Soundbar with the attached Bracket-Wall Mounts by hanging the SOUNDBAR IN Bracket-Wall Mounts on the Holder-Screws on the wall. FRONT OF TV Wall Place the Soundbar on a TV stand. 8. Slide the Soundbar down as shown below so that the Bracket-Wall Mounts rest securely on the Holder-Screws. -
Page 40: Software Update
UPDATE USB port on the Soundbar. 5. Turn on the Soundbar and press the (Source) button to select USB source. Samsung may offer updates for the Soundbar’s “UPDATE” will be displayed, this may take up system firmware in the future. to 3 minutes. USB port UPDATE ... -
Page 41: Reset
Reset Top of the Soundbar INIT OK With the Soundbar on, press the (Volume) buttons on the body at the same time for at least 5 seconds. “INIT OK” appears on the display and then the Soundbar is reset. CAUTION •... -
Page 42: Troubleshooting
Refer to the instructions below if this product does not function properly. If the problem you are experiencing is not listed below or if the instructions below do not help, turn off the product, disconnect the power cord, and contact Samsung Electronics at 1-800-SAMSUNG (1-800-726-7864). Soundbar does not turn on. - Page 43 Change the TV’s audio output to if they are located too close to the PCM or Dolby Digital. Soundbar. e. g. microwaves, wireless (For a Samsung TV: Home ( ) → Menu → routers, etc. Settings ( ) → All Settings ( ) →...
-
Page 44: License
The Bluetooth® word mark and logos are ENERGY STAR qualified model only (The other registered trademarks owned by Bluetooth SIG, models) Inc. and any use of such marks by Samsung – As an ENERGY STAR Partner, Samsung has Electronics Co., Ltd. is under license. Other determined that this product or product... -
Page 45: Open Source License Notice
15 OPEN SOURCE LICENSE NOTICE To send inquiries and requests for questions regarding open sources, contact Samsung Open Source (http://opensource.samsung.com) 16 IMPORTANT NOTES ABOUT SERVICE • Figures and illustrations in this User Manual are provided for reference only and may differ from actual product appearance. -
Page 46: Specifications And Guide
+41°F to +95°F (+5°C to +35°C) Operating Humidity Range 10 % ~ 75 % Frequency range 20Hz~20kHz NOTES • Samsung Electronics Co., Ltd reserves the right to change the specifications without notice. • Weight and dimensions are approximate. ENG - 46... - Page 47 LIMITED WARRANTY TO ORIGINAL PURCHASER This SAMSUNG brand product, as supplied and distributed by SAMSUNG and delivered new, in the original carton to the original consumer purchaser, is warranted by SAMSUNG against manufacturing defects in materials and workmanship for a limited...
- Page 48 QUESTIONS OR COMMENTS? Country Samsung Service Center Web Site Address Samsung Electronics America, Inc. IN THE US 1-800-SAMSUNG (726-7864) www.samsung.com/us/support 85 Challenger Road Ridgefi eld Park, NJ 07660 © 2022 Samsung Electronics Co., Ltd. All rights reserved.