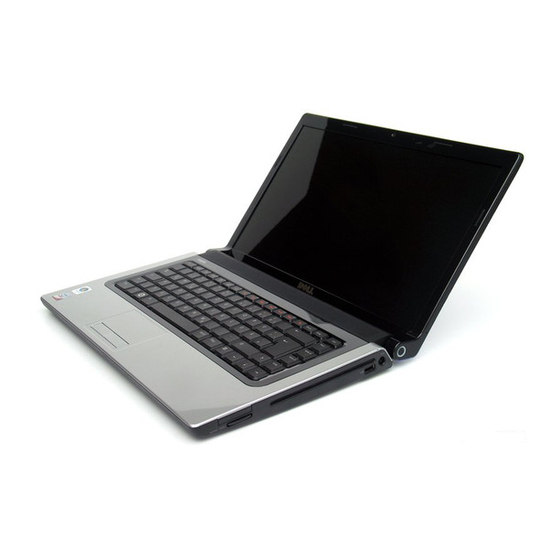
Dell Studio 1555 Service Manual
Hide thumbs
Also See for Studio 1555:
- User manual (354 pages) ,
- Setup manual (102 pages) ,
- Service manual (50 pages)
Table of Contents
Advertisement
Quick Links
Dell Studio™ 1555 Service Manual
Before You Begin
Base Cover
Hard Drive
Memory
Communication Cards
Coin-Cell Battery
Center Control Cover
Keyboard
Display
Power Button Board
Camera (Optional)
Palm Rest
Notes, Cautions, and Warnings
NOTE:
A NOTE indicates important information that helps you make better use of your computer.
CAUTION:
WARNING:
Information in this document is subject to change without notice.
© 2008 Dell Inc. All rights reserved.
Reproduction of these materials in any manner whatsoever without the written permission of Dell Inc. is strictly forbidden.
Trademarks used in this text: Dell and the DELL logo are trademarks of Dell Inc.; Bluetooth is a registered trademark owned by Bluetooth SIG, Inc. and is used by Dell under
license; Microsoft, Windows, Windows Vista, and Windows Vista start button logo are either trademarks or registered trademarks of Microsoft Corporation in the United States and/or
other countries.
Other trademarks and trade names may be used in this document to refer to either the entities claiming the marks and names or their products. Dell Inc. disclaims any
proprietary interest in trademarks and trade names other than its own.
Model PP39L
December 2008 Rev. A00
Great user manuals database on
A CAUTION indicates potential damage to hardware or loss of data if instructions are not followed.
A WARNING indicates a potential for property damage, personal injury, or death.
UserManuals.info
Speaker Assembly
Optical Drive
ExpressCard Board
AC Adapter Connector
USB Connector
System Board Assembly
Processor Heat Sink
Processor Module
Fan
Subwoofer Assembly
Battery Latch Assembly
Flashing the BIOS
Advertisement
Table of Contents

Related Manuals for Dell Studio 1555


Summary of Contents for Dell Studio 1555
- Page 1 Reproduction of these materials in any manner whatsoever without the written permission of Dell Inc. is strictly forbidden. Trademarks used in this text: Dell and the DELL logo are trademarks of Dell Inc.; Bluetooth is a registered trademark owned by Bluetooth SIG, Inc. and is used by Dell under license;...
-
Page 2: Removing The Base Cover
WARNING: Before working inside your computer, read the safety information that shipped with your computer. For additional safety best practices information, see the Regulatory Compliance Homepage at www.dell.com/regulatory_compliance. WARNING: Before performing these procedures, turn off the computer, disconnect the AC adapter from the electrical outlet and the computer, disconnect the modem from the wall connector and the computer, and remove any other external cables from the computer. -
Page 3: Before You Begin
Regulatory Compliance Homepage at www.dell.com/regulatory_compliance. CAUTION: Only a certified service technician should perform repairs on your computer. Damage due to servicing that is not authorized by Dell is not covered by your warranty. CAUTION: To avoid electrostatic discharge, ground yourself by using a wrist grounding strap or by periodically touching an unpainted metal surface, such as a connector on the back of the computer. - Page 4 To help prevent damage to the system board, you must remove the battery from the battery bay before you service the computer. CAUTION: To avoid damage to the computer, use only the battery designed for this particular Dell computer. Do not use batteries designed for other Dell computers. ...
-
Page 5: Flashing The Bios From A Cd
1. Ensure that the AC adapter is plugged in, the main battery is properly installed, and a network cable is attached. 2. Turn on the computer. 3. Locate the latest BIOS update file for your computer at support.dell.com. 4. Click Download Now to download the file. ... - Page 6 CAUTION: Do not interrupt this process once it begins. Doing so may cause system damage. 9. Double-click the file icon on the desktop and follow the instructions on the screen. Back to Contents Page Great user manuals database on UserManuals.info...
-
Page 7: Camera (Optional)
WARNING: Before working inside your computer, read the safety information that shipped with your computer. For additional safety best practices information, see the Regulatory Compliance Homepage at www.dell.com/regulatory_compliance. CAUTION: To avoid electrostatic discharge, ground yourself by using a wrist grounding strap or by periodically touching an unpainted metal surface (such as a connector on the back of the computer). -
Page 8: Removing The Center Control Cover
WARNING: Before working inside your computer, read the safety information that shipped with your computer. For additional safety best practices information, see the Regulatory Compliance Homepage at www.dell.com/regulatory_compliance. CAUTION: To avoid electrostatic discharge, ground yourself by using a wrist= grounding strap or by periodically touching an unpainted metal surface (such as a connector on the back of the computer). -
Page 9: Replacing The Center Control Cover
Replacing the Center Control Cover 1. Follow the procedures in Before You Begin. 2. Align the hooks beneath the center control cover to the slots on the palm rest and snap the cover in place. 3. Close the display and turn over the computer. ... -
Page 10: Removing The Coin-Cell Battery
WARNING: Before working inside your computer, read the safety information that shipped with your computer. For additional safety best practices information, see the Regulatory Compliance Homepage at www.dell.com/regulatory_compliance. CAUTION: To avoid electrostatic discharge, ground yourself by using a wrist= grounding strap or by periodically touching an unpainted metal surface (such as a connector on the back of the computer). -
Page 11: Removing The Processor Module
WARNING: Before working inside your computer, read the safety information that shipped with your computer. For additional safety best practices information, see the Regulatory Compliance Homepage at www.dell.com/regulatory_compliance. CAUTION: To avoid electrostatic discharge, ground yourself by using a wrist grounding strap or by periodically touching an unpainted metal surface (such as the back panel) on the computer. - Page 12 NOTE: If a new processor is installed, you will receive a new thermal-cooling assembly, which will include an affixed thermal pad, or you will receive a new thermal pad along with documentation to illustrate proper installation. 1. Follow the instructions in Before You Begin.
-
Page 13: Removing The Processor Heat Sink
WARNING: Before working inside your computer, read the safety information that shipped with your computer. For additional safety best practices information, see the Regulatory Compliance Homepage at www.dell.com/regulatory_compliance. WARNING: If you remove the processor heat sink from the computer when the heat sink is hot, do not touch the metal housing of the processor heat sink. - Page 14 NOTE: The original thermal pad can be reused if the original processor and heat sink are reinstalled together. If either the processor or heat sink is replaced, use the thermal pad provided in the kit to ensure that thermal conductivity is achieved. NOTE: This procedure assumes that you have already removed the processor heat sink and are ready to replace it.
-
Page 15: Display Assembly
WARNING: Before working inside your computer, read the safety information that shipped with your computer. For additional safety best practices information, see the Regulatory Compliance Homepage at www.dell.com/regulatory_compliance. CAUTION: To avoid electrostatic discharge, ground yourself by using a wrist grounding strap or by periodically touching an unpainted metal surface (such as a connector on the back of the computer). -
Page 16: Display Bezel
7. Remove the keyboard (see Removing the Keyboard). 8. Disconnect the camera cable, display cable, and power button cable from their connectors on the system board and release it from the routing guides. 9. Pull the antenna cables through the routing hole and release them from the routing channel. ... -
Page 17: Display Panel
WARNING: The following instructions are not applicable to Edge-to-Edge display panels, which should not be disassembled. 1. Follow the instructions in Before You Begin. 2. Remove the display assembly (see Removing the Display Assembly). CAUTION: Removal of the bezel from the display bottom cover requires extreme care to avoid damage to the bezel and the display panel. ... - Page 18 1 screws (4) 2 camera cable pull-tab 3 camera cable 4 display panel 6. Lift the display panel out of the display cover. 7. Remove the four screws (two on each side of the display panel) securing the brackets to the display panel and remove the brackets. ...
- Page 19 3. Replace the four screws (two on each side of the display panel) to secure the display brackets to the display panel. 4. Connect the camera cable to the connector on the camera. 5. Align the screw holes on the display bracket with the corresponding screw holes and guide pins on the display cover and gently lower the display panel into place.
-
Page 20: Removing The Expresscard Board
WARNING: Before working inside your computer, read the safety information that shipped with your computer. For additional safety best practices information, see the Regulatory Compliance Homepage at www.dell.com/regulatory_compliance. CAUTION: To avoid electrostatic discharge, ground yourself by using a wrist grounding strap or by periodically touching an unpainted metal surface (such as the back panel) on the computer. - Page 21 Back to Contents Page Great user manuals database on UserManuals.info...
-
Page 22: Removing The Fan
WARNING: Before working inside your computer, read the safety information that shipped with your computer. For additional safety best practices information, see the Regulatory Compliance Homepage at www.dell.com/regulatory_compliance. CAUTION: To avoid electrostatic discharge, ground yourself by using a wrist grounding strap or by periodically touching an unpainted metal surface (such as a connector on the back of the computer). - Page 23 5. Replace the optical drive (see Replacing the Optical Drive). Back to Contents Page Great user manuals database on UserManuals.info...
-
Page 24: Removing The Hard Drive
Dell does not guarantee compatibility or provide support for hard drives obtained from sources other than Dell. NOTE: If you are installing a hard drive from a source other than Dell, you need to install an operating system, drivers, and utilities on the new hard drive (see the Dell Technology Guide). -
Page 25: Replacing The Hard Drive
7. Install the operating system for your computer, as needed (see the Dell Technology Guide). 8. Install the drivers and utilities for your computer, as needed (see the Dell Technology Guide). Back to Contents Page Great user manuals database on... -
Page 26: Removing The Keyboard
WARNING: Before working inside your computer, read the safety information that shipped with your computer. For additional safety best practices information, see the Regulatory Compliance Homepage at www.dell.com/regulatory_compliance. CAUTION: To avoid electrostatic discharge, ground yourself by using a wrist grounding strap or by periodically touching an unpainted metal surface (such as a connector on the back of the computer). - Page 27 2. Slide the keyboard cable into the keyboard connector. 3. Rotate the keyboard connector latch to secure the cable. 4. Align the tabs along the bottom of the keyboard and slide them into the slots of the palm rest. ...
-
Page 28: Removing The Battery Latch Assembly
WARNING: Before working inside your computer, read the safety information that shipped with your computer. For additional safety best practices information, see the Regulatory Compliance Homepage at www.dell.com/regulatory_compliance. CAUTION: To avoid electrostatic discharge, ground yourself by using a wrist grounding strap or by periodically touching an unpainted metal surface (such as a connector on the back of the computer). -
Page 29: Replacing The Battery Latch Assembly
Replacing the Battery Latch Assembly CAUTION: Ensure the battery latch assembly is properly oriented. The indent for the screw should face up when installing the assembly. 1. Slide the battery latch assembly into place. 2. Replace and tighten the screw securing the battery latch to the battery release latch. ... -
Page 30: Removing The Memory Module(S)
WARNING: Before working inside your computer, read the safety information that shipped with your computer. For additional safety best practices information, see the Regulatory Compliance Homepage at www.dell.com/regulatory_compliance. CAUTION: To avoid electrostatic discharge, ground yourself by using a wrist grounding strap or by periodically touching an unpainted metal surface (such as a connector on the back of the computer). - Page 31 As the computer boots, it detects the additional memory and automatically updates the system configuration information. To confirm the amount of memory installed in the computer, click Start ® Help and Support® Dell System Information. Back to Contents Page ...
-
Page 32: Communication Cards
Press the SIM into the slot to release it. When it is partially ejected, remove the SIM from the battery bay. Wireless Mini-Cards NOTE: Dell does not guarantee compatibility or provide support for Mini-Cards from sources other than Dell. Your computer supports three Mini-Card slots: ®... - Page 33 Wireless Personal Area Network (WPAN) or Internal Card with Bluetooth Wireless Technology — Full Mini-Card NOTE: Your computer can only support two Full Mini-Cards and one Half Mini-Card at a time. NOTE: The WLAN slot supports a half Mini-Card. Removing the Mini-Card ...
- Page 34 9. Slide the battery into the bay until it clicks into place. 10. Install the drivers and utilities for your computer, as required. For more information, see the Dell Technology Guide. Back to Contents Page Great user manuals database on...
-
Page 35: Removing The Optical Drive
WARNING: Before working inside your computer, read the safety information that shipped with your computer. For additional safety best practices information, see the Regulatory Compliance Homepage at www.dell.com/regulatory_compliance. CAUTION: To avoid electrostatic discharge, ground yourself by using a wrist grounding strap or by periodically touching an unpainted metal surface (such as the back panel) on the computer. -
Page 36: Removing The Palm Rest
WARNING: Before working inside your computer, read the safety information that shipped with your computer. For additional safety best practices information, see the Regulatory Compliance Homepage at www.dell.com/regulatory_compliance. CAUTION: To avoid electrostatic discharge, ground yourself by using a wrist grounding strap or by periodically touching an unpainted metal surface (such as the back panel) on the computer. -
Page 37: Replacing The Palm Rest
1 screws (10) 2 power button connector 3 touch pad connector 4 display cable connector 5 camera cable connector 6 speaker connector 9. Carefully lift the palm rest along the rear edge, near the hinge brackets, then gently lift the palm rest to remove it from the computer. Replacing the Palm Rest ... -
Page 38: Removing The Power Button Board
WARNING: Before working inside your computer, read the safety information that shipped with your computer. For additional safety best practices information, see the Regulatory Compliance Homepage at www.dell.com/regulatory_compliance. CAUTION: To avoid electrostatic discharge, ground yourself by using a wrist grounding strap or by periodically touching an unpainted metal surface (such as a connector on the back of the computer). -
Page 39: Removing The Ac Adapter Connector
WARNING: Before working inside your computer, read the safety information that shipped with your computer. For additional safety best practices information, see the Regulatory Compliance Homepage at www.dell.com/regulatory_compliance. CAUTION: To avoid electrostatic discharge, ground yourself by using a wrist grounding strap or by periodically touching an unpainted metal surface (such as the back panel) on the computer. - Page 40 5. Replace the optical drive (see Replacing the Optical Drive). Back to Contents Page Great user manuals database on UserManuals.info...
-
Page 41: Removing The Speaker Assembly
WARNING: Before working inside your computer, read the safety information that shipped with your computer. For additional safety best practices information, see the Regulatory Compliance Homepage at www.dell.com/regulatory_compliance. CAUTION: To avoid electrostatic discharge, ground yourself by using a wrist grounding strap or by periodically touching an unpainted metal surface (such as the back panel) on the computer. - Page 42 2. Route the speaker cables carefully through the securing tabs on the palm rest. 3. Turn the palm rest over. 4. Replace the screw on the palm rest. 5. Replace the palm rest (see Replacing the Palm Rest).
- Page 43 WARNING: Before working inside your computer, read the safety information that shipped with your computer. For additional safety best practices information, see the Regulatory Compliance Homepage at www.dell.com/regulatory_compliance. CAUTION: To avoid electrostatic discharge, ground yourself by using a wrist grounding strap or by periodically touching an unpainted metal surface (such as a connector on the back of the computer).
- Page 44 4. Replace the six screws that secure the system board to the computer base. 5. Connect the AC adapter connector cable, USB cable, fan cable, and the subwoofer cable to their respective connectors on the system board. 6. Replace the optical drive (see Replacing the Optical Drive).
-
Page 45: Removing The System Board Assembly
WARNING: Before working inside your computer, read the safety information that shipped with your computer. For additional safety best practices information, see the Regulatory Compliance Homepage at www.dell.com/regulatory_compliance. CAUTION: To avoid electrostatic discharge, ground yourself by using a wrist grounding strap or by periodically touching an unpainted metal surface (such as the back panel) on the computer. -
Page 46: Replacing The System Board Assembly
9. Remove the Mini-Card from the system board (see Removing the Mini- Card). 10. Remove the system board. NOTE: Depending on your system configuration, the number of screws shown here may be greater than the number of screws present on your computer. - Page 47 Reproduction of these materials in any manner whatsoever without the written permission of Dell Inc. is strictly forbidden. Trademarks used in this text: Dell and the DELL logo are trademarks of Dell Inc.; Bluetooth is a registered trademark owned by Bluetooth SIG, Inc. and is used by Dell under license;...
-
Page 48: Usb Connector
WARNING: Before working inside your computer, read the safety information that shipped with your computer. For additional safety best practices information, see the Regulatory Compliance Homepage at www.dell.com/regulatory_compliance. CAUTION: To avoid electrostatic discharge, ground yourself by using a wrist grounding strap or by periodically touching an unpainted metal surface (such as the back panel) on the computer. - Page 49 CAUTION: Before turning on the computer, replace all screws and ensure that no stray screws remain inside the computer. Failure to do so may result in damage to the computer. 5. Replace the AC adapter connector (see Replacing the AC Adapter Connector).