Table of Contents
Advertisement
Quick Links
Advertisement
Table of Contents

Related Manuals for Sharp ROUVO V


Summary of Contents for Sharp ROUVO V
- Page 2 Revision History Date Ver. Revised Sections Descriptions (yyyy/mm/dd) 2022/01/26 Preliminary release Updated Table of Contents. Table of Contents, 2022/02/11 Modified the Starting Your Phone Getting Started for the First Time section. Copyright disclaimer, Revised the descriptions in terms of 2022/02/18 Warranty, and Device logo and entity.
- Page 3 About this Guide Thank you for choosing ROUVO V. To ensure optimal conditions of the handset, please read through this manual and keep it for future reference. Trademarks • microSD Logo is a trademark of SD-3C LLC. • The Bluetooth word mark and logos are owned by the Bluetooth SIG, Inc.
- Page 4 For more information about usage, downloads, FAQ, software updates or licenses about this product, please go to https://www.sharp-rouvo.com/.
-
Page 5: Table Of Contents
Table of Contents Getting Started..................12 Parts and Functions....................13 Setting Up Your Phone....................15 Formatting or replacing microSD card............15 Charging Your Phone....................16 Powering On.........................18 Emergency, Power off, Restart or Screenshot..........18 Starting Your Phone for The First Time............19 About Google account...................24 Home Screen......................25 Status bar icons......................26 Using the touchscreen...................27 Basic Operations..................30... - Page 6 Notification history....................45 Conversations......................45 Bubbles..........................46 Device & app notifications..................47 Notification on lock screen..................47 Do Not Disturb......................48 Wireless emergency alerts..................49 Hide silent notifications in status bar.............50 Allow notification snoozing..................50 Notification dot on app icon................50 Enhanced notification....................50 Widgets..........................51 Wallpapers........................53 Text Input on Gboard....................56 Touch-screen keyboard (Gboard)..............56 Useful text input features..................57 Settings..........................61...
- Page 7 Turning Bluetooth on....................82 Pairing with another Bluetooth device............83 Sharing with paired Bluetooth device.............83 USB..........................84 Transferring files via USB..................84 Android Auto™ ......................85 Making Calls....................86 How to Make a Call....................87 Dialing and Ending a Call..................88 International call.......................89 Emergency call......................89 During a call........................89 Answering and declining incoming call............90 Voice search.......................90 Contacts........................91...
- Page 8 Sounds and vibration.....................102 Quick responses.....................103 Calls..........................104 Blocked numbers....................105 Voicemail........................106 Accessibility.......................108 About..........................109 Importing and Exporting Contacts..............110 Messages....................112 Creating a New Message..................113 Search messages....................113 Starting your message..................114 Attaching files to message..................116 Attaching multimedia files to message............116 Attaching emoji to message................117 Recording audio for message................118 Inviting to Duo......................118 Adding people......................120 Message Settings....................122...
- Page 9 Pinch to zoom conversation text..............130 Your current country....................130 Automatic previews....................131 Spam protection......................132 Advanced........................132 About, terms & privacy..................134 Help & feedback......................135 Camera.....................136 Opening the Camera App...................137 Taking a Picture.......................138 Recording a Video....................138 Taking Special Shots.....................140 Panorama mode......................140 Time-lapse.........................141 Selfie..........................142 Camera Settings......................142 Gallery...........................143 Editing a photo......................144 Google Lens......................149...
- Page 10 Google TV........................158 Duo..........................158 Files..........................158 Calendar........................158 Keep..........................159 Assistant........................159 Tools & Utilities..................160 Calculator........................Clock..........................162 Alarm..........................163 Timer..........................163 Stopwatch........................164 Bedtime........................165 Settings......................168 Network & internet....................169 Connection preferences..................182 Apps..........................188 Battery........................205 Sound..........................209 Display..........................210 Accessibility.......................217 Security........................236 Privacy......................... Location........................242 Safety & emergency.....................243 Passwords & accounts..................244 Digital Wellbeing & parental controls............245 Google........................250 System........................252...
- Page 11 About phone......................257 System updates......................258 Safety and Compliance...............260 Airplane Mode......................262 Safety Precaution....................262 Maintenance & Care....................263 Protection against Theft..................263 Safe and Responsible Driving.................264 Privacy.........................264 Portrait Rights......................264 Copyrights........................264 Important Notes about Bluetooth and Wi-Fi..........265 FCC Compliance....................265 Specific Absorption Rate (SAR)..............266 Cellular Networks and Maximum Output Power........267 Preventing Hearing Loss..................267 Hearing Aid Compatibility (HAC)..............268 Cautions for Battery and Accessories............268...
-
Page 12: Getting Started
Getting Started • Parts and Functions • Insert SIM Card and microSD Card • Charging Your Phone • Powering On • Setting Up Your Phone for the First Time • Home Screen • Using the Touchscreen... -
Page 13: Parts And Functions
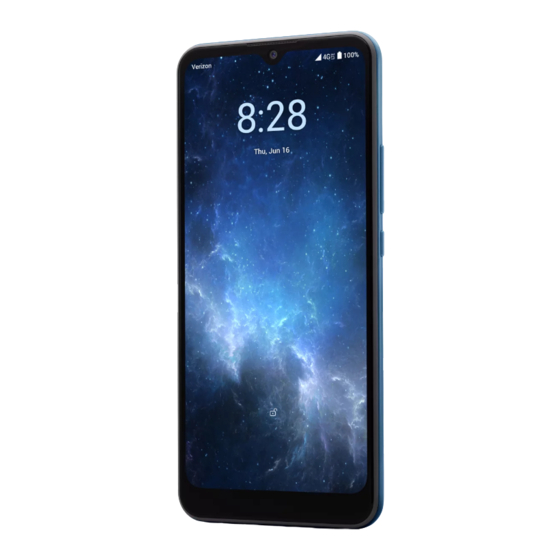
Parts and Functions Proximity / Front Camera Rear Camera Flash Light sensor SIM & MicroSD Card Slot Power / Speaker Headset USB-C / Volume Fingerprint Lock Key Port Charger Up / Down Sensor Port NOTE: Devices and software are constantly evolving. The screen images and icons you see here are for reference only. - Page 14 Parts Description • Press to turn the screen on/off • Press and hold to popup menu to select Emergency, Power Off, or Restart Power/Lock key • Press it along with Volume Down key to capture screenshot • Long press to force reboot SIM/microSD card slot Insert or removal SIM card/microSD card •...
-
Page 15: Setting Up Your Phone
Setting Up Your Phone Your new phone should already have SIM card preinstalled. If you purchase this phone without SIM card pre-installed, follow the steps below. The following steps also guide you to install your microSD card. 1. Use the supplied SIM ejector tool to insert into the small hole on the SIM/ SD Card tray. -
Page 16: Charging Your Phone
Charging Your Phone Your phone and battery are unibody device and the battery is unremovable. The battery can only be replaced by authorized technician. Do not attempt to disassemble the battery from the phone yourself; otherwise, it will void your warranty. - Page 17 USB-C Connector Caution: Do not charge your phone if the USB-C port or the AC adapter is wet. To charge via a vehicle power charger in car, Make sure the engine has been started already. Prepare an in-car charging adapter (optional accessory) with available USB port(s) and connect with the vehicle power charger in your car.
-
Page 18: Powering On
Warning: Your wireless carrier is not liable for any damage resulted from any misconduct in charging your phone. Powering On Long press the Power Key to power on your phone. You will see the starting- up screen. Note: you may have to unlock the screen if you have set screen lock such as PIN or Face Key. -
Page 19: Starting Your Phone For The First Time
Starting Your Phone for The First Time 1. Once you have turned on and initialized your phone, tap to select your preferred language for your phone, then tap 2. From the Phone Activation screen, tap Next (assuming you have activated your SIM card as instructed in the Welcome Guide). - Page 20 3. You will be prompted to connect to an available Wi-Fi network to setup. Enter password if required. If there is no available Wi-Fi network nearby, tap Set up offline. 4. To Copy apps & data from another device, tap Next, or tap Don’t copy to continue.
- Page 21 5. To Sign in with your Google™ account, enter your account information and tap Next, or tap Skip to skip to the next step. If you sign in your Google™ account, tap I agree to the Google Terms and Services shown on the screen. Note: It is suggested to sign in or create your Google™...
- Page 22 7. Set PIN for screen lock, or tap Skip to continue. 8. Set your Verizon Services. Tap ACCEPT to use the default settings for the services.
- Page 23 9. Set your Verizon Cloud. Tap NEXT to enter Verizon Cloud Setup. Select what to backup and then tap NEXT. 10. Choose Wi-Fi only or Both Wi-Fi and Mobile Networks to back up your content on Verizon Cloud. You may change it anytime in Settings.
-
Page 24: About Google Account
11. When you see Ready to go, tap GOT IT to complete the initial setup. About Google account Your device runs on Android™ 12 operating system developed by Google™. A Google™ account provides accesses to all the Google apps and services available for your device, including Gmail™, Google Play™, Google Maps™, YouTube™, Google Drive™, Chrome™, Google Photos™, and more. -
Page 25: Home Screen
Home Screen Home Screen is where you start your operations with your new phone. Status Bar & Notification Google Search Bar Swipe left/right to view extended screens Quick-Access Apps Tray Recent Button Back Button Home Button Items Description • Displays status of your phone and notifications. Status Bar &... -
Page 26: Status Bar Icons
Status Bar Icons The icons in the Status Bar indicate status and notifications of your phone. Icons Description Incoming Gmail message Charging the battery 4G LTE data service Mobile network signal strength Hotspot on Wi-Fi® active SD card detected Airplane mode Bluetooth®... -
Page 27: Using The Touchscreen
Using the Touchscreen Tapping Gently touch the touchscreen with your fingertip. A tapping action can: • Open or select an item • Check or uncheck an option • Initiate on-screen keyboard Tapping and Holding Tap and hold on an item or a space of the touchscreen. A tapping and holding action can: •... - Page 28 Dragging Hold onto an item and drag it. A dragging action can: • Move an item to a targeted position • Create an app folder Pinching & Spreading Pinch and spread on the touchscreen with two fingers. A pinching/spreading action can •...
- Page 29 Swiping Gently swipe on the touchscreen. A swiping action can: • Scroll Up / Down on a page, a menu list or a screen. • Scroll Left / Right to browse between extended screens.
-
Page 30: Basic Operations
Basic Operations • Navigating the Home Screen • Accessing apps from the Home Screen • Capturing a screenshot • Notifiction panel • Customizing the Home Screen • Text input on Gboard • Voice typing • Google Assistant • Adjusting volumes... -
Page 31: Navigating The Home Screen
Navigating the Home Screen All the apps and features of your phone starts from the Home Screen. To access all your apps from the Home Screen, simply swipe up from the Home Screen and you will be able to view and access all your apps. You may swipe up and down to locate the app you want to access. -
Page 32: Quick-Access Apps Tray
Quick-Access Apps Tray Quick-Access Apps Tray consists of basic functions of the phone, but may be customized by personal preference. You may perform the following actions for the Quick-Access Apps Tray. • Reposition: touch and hold onto an app icon in the Quick-Access Apps Tray to move it to another position in the tray. -
Page 33: Opening The Quick Setting Panel
Opening the Quick Setting Panel The Quick Setting Panel allows you to conveniently manage some commonly used setting options. To access the Quick Setting Panel, swipe down twice from the top of the phone screen, and then swipe left or right to find the setting you need to turn on/off. - Page 34 Customizing your Quick Setting Panel You may customize your Quick Setting Panel to meet your preferred usage. Simply tap the Edit icon and you will enter the Edit screen for the Quick Setting Panel. In the Hold and drag to rearrange tiles, Hold onto a shortcut icon in this tile and when you hear a light "click"...
-
Page 35: Auto-Rotate For Viewing Preference
Auto-rotate for viewing preference The phone screen is oriented in portrait mode by default. You may turn on Auto-rotato to change the phone screen to landscape orientation for your viewing preference when you rotate your phone. To enable Auto-rotate, swipe down from the top of the phone screen to display the Quick Setting Panel and gently tap on the Auto-rotate icon. - Page 36 Auto-rotate...
-
Page 37: Accessing Apps From The Home Screen
Accessing Apps from the Home Screen You can access all your apps, whether pre-installed by default, transferred from your last phone or downloaded, from the Home Screen. Simply swipe up from the Home Screen and you will be able to view and access all your apps. You may swipe up and down to locate the app you want to access. - Page 38 To launch an app 1. From the Home Screen, swipe up to access all your apps. 2. Tap on the app icon to launch the app. To move an app 1. From the Home Screen, swipe up to access all your apps. 2.
- Page 39 To remove or uninstall an app 1. Tap and hold onto the app you want to remove. 2. You will feel a light "click" vibration, indicating you can start dragging the app. 3. Drag the app to Remove or Uninstall. To group the apps 1.
-
Page 40: Switching Between The Apps
Edit the name here Switching between the apps To switch between recently opened apps, Tap on the Recent button at the bottom right of the screen. Swipe left or right to switch between recently opened apps. Then, • To access a recently opened app, tap onto the selected app. •... -
Page 41: Capturing A Screenshot
Swipe it up to close CLEAR ALL Recent Button Capturing a Screenshot You can capture the screen image. Press Power key and Volume down to capture a screenshot. The screenshot is automatically saved in Photos, or long press Power Key, wait for the Screenshot option to appear, then tap on You may also Share or Edit the screenshot you captured. -
Page 42: Notification Panel
Notification Panel Notifications like messages or downloads will appear in the Status Bar, which is at the top of the phone screen. To check details of your notifications, swipe down from the top of the phone screen to open the Notification Panel. Then tap on a selected notification to check the details or status. -
Page 43: Customizing The Home Screen
Customizing the Home Screen You may customize the Home Screen to meet your preference and usages. To display customization options, press onto anywhere on the Home Screen to enable an option menu which shows: • Home settings • Widgets • Wallpapers Home settings When tapping Home settings, you will see the following options:... -
Page 44: Notification Dots
Notification dots If you tap Notification dots in Home settings, you will see full setting options for Notifications, as shown in the screen below. Descriptions of the setting options are in the sub-sections as follows: App settings Manage notifications from individual apps. Use the toggle switch enable or disable notifications from certain apps. -
Page 45: Notification History
Notification history Show recent and snoozed notifications. If you tap on it, you will be asked whether you want to Use notification history. Use the toggle switch to enable or disable this setting. When it is enabled, you will see recent notifications and snoozed notifications here. -
Page 46: Bubbles
Bubbles When it is on, conversations can appear as floating icons. If you tap on it, you will enter a sub-screen with option Allow apps to show bubbles. If it is on, some conversations will appear as floating icons on top of other apps. Use the toggle switch to enable or disable this feature. -
Page 47: Device & App Notifications
Device & app notifications This controls which apps and/or devices can read notifications. Notification on lock screen Set options for notification on lock screen. • Show conversations, default, and silent: If this option is selected, the lock screen will show conversations, default, and silent notifications. •... -
Page 48: Do Not Disturb
Do Not Disturb When you tap Do Not Disturb, you can set your preferences for this feature. If you tap TURN ON NOW , you will only receive notifications from important people or apps. You may further set what can interrupt when Do Not Disturb is enabled. -
Page 49: Wireless Emergency Alerts
Wireless emergency alerts Configure wireless emergency alerts. Allow alerts: use the toggle switch to enable or disable it. Alerts • Extreme threats: warns the users about extreme threats to life and property. Use the toggle switch to enable or disable it. •... -
Page 50: Hide Silent Notifications In Status Bar
Hide silent notifications in status bar If enabled, you will not see silent notifications in the Status Bar. Use the toggle switch to enable or disable it. Allow notification snoozing If enabled, notifications will be snoozed. Use the toggle switch enable or disable it. -
Page 51: Widgets
Widgets When tapping Widgets, you can manage available Widgets of your phone. Widget functions like a shortcut of the app(s) on the Home Screen, and you can view the updated status of the app(s) directly on the Home Screen without locating and entering the app(s). For instance, a calendar widget allows you to see your calendar event on the Home Screen without entering the calendar app. - Page 52 If you decide not to add the widget, simply drag the widget to Cancel.
-
Page 53: Wallpapers
To remove the widget, Tap and hold onto the widget you want to remove. When you hear a light "click" vibration, you can start moving the widget. Drag the widget to Remove. To setup the widget, Tap and hold onto the widget you want to set. When you hear a light "click"... - Page 54 When you select a wallpaper, you will see a preview by Home screen or Lock screen, and there are setting options: Info Zoom Exit Wallpaper Set Wallpaper...
- Page 55 • Set Wallpaper: tap to set the image as wallpaper for Home screen and/or Lock screen (refer to the image below). • Zoom: tap to allow you to zoom in/out the image. • Info: tap to view info of the photo. You will first see the name of the provider of the photo, and you may tap Explore to view further information of the photo provider.
-
Page 56: Text Input On Gboard
Text Input on Gboard Your phone comes with the touch-screen keyboard (Gboard) to enter texts. The touch-screen keyboard appears automatically when you are on a text entry field of the apps that requires text input, such as search bar, text messages, instant messaging and social network apps. -
Page 57: Useful Text Input Features
Useful text input features Predictive texts Predictive texts make typing easier by suggesting the words based on the letters you have entered. Quick-editing Tap and hold onto the text you want to edit. Drag the tabs at the beginning and/or the end of the highlighted texts to adjust the highlighted portion, and options such as Copy, Cut, Paste, Select All, Share or Translate. - Page 58 One-handed mode to enable One-handed mode. Use to align the keyboard to the left or right respectively. To exit One-handed mode, tap...
- Page 59 Theme Select the theme for your keyboard. You will see a preview before you apply. Clipboard Clipboard saves any text you copy. Use to pin, add or delete clips. Note: you may have to tap to enable this function when you use Clipboard for the first time.
- Page 60 Menu to display the menu. Displays an expanded panel Text with text editing tools, like Editing arrows, copy, paste and other tools. Share Share Gboard to others and Gboard select the language. You will be asked if you want to Translate use Google Translate Enables floating keyboard...
-
Page 61: Settings
Settings to display the settings. Languages Language allows you to set your Gboard languages and layouts. Tap on the language and the layout on the screen, and you will enter a sub- screen with more keyboard layout options, including • QWERTY (default), Handwriting, QWERTZ, AZERTY, Dvorak, Colemak, PC or Morse Code. - Page 62 Preferences Enter Preferences to set preferenece for your Gboard. Keys • Number row: always shows number row in QWERTY, QWERTZ, and AZERTY layouts. Use the toggle switch to enable or disable it. • Show emoji switch key: shows a dedicated key to access emoji. When enabled, the language switch key will not be shown.
- Page 63 • Popup on keypress: use the toggle switch to enable or disable popup on keypress. • Long press for symbols: long press keys to acess hinted symbols. Use the toggle switch to enable or disable it. • Key long press delay: tap to use a slider to set time for long press delay (default is 300ms).
- Page 64 Corrections • Auto-correction: corrects words while typing. Use the toggle switch to enable or disable it. • Undo auto-correct on backspace: returns to original text when backspacing after an auto-correction. Use the toggle switch enable or disable it. • Autospace after punctuation: inserts space after punctuation (only available in US English keyboard setting).
- Page 65 Glide typing Sets Glide typing preferences. • Enable glide typing: inputs a word by sliding through the letters. Use the toggle switch to enable or disable it. • Show gesture trail: if enabled, a swipe on the keyboard will create a line showing the trail.
- Page 66 Clipboard Displays options for clipboard settings. • Show recently copied text and images in suggestions bar: use the toggle switch to enable or disable it. • Show items such as address/phone number within recently copied text: use the toggle switch to enable or disable it.
- Page 67 Dictionary Enter Dictionary to create your personal dictionary. Tap Personal dictionary. Tap on the language on the screen, for example, English (US). Use the + icon on the top right corner of the screen to add a new word in your phone dictionary. Type your word and type in the Shorcut for your phone to recognize.
- Page 68 Emoji, Stickers & GIFs Enter Emoji, Stickers & GIFs to set your preferences for emoji, stickers and GIFs. Layout • Emoji fast-access row: shows popular and frequently used emojis on the main keyboard. Use the toggle switch to enable or disable it. •...
- Page 69 Share Gboard See Share Gboard in Menu. Advanced Enter Advanced to access advanced setting options. • Share usage statistics: automatically sends keyboard usage statistics to Google. Use the toggle switch to enable or disable it. • Show app icon: displays application icon in the launcher. Use the toggle switch to enable or disable it.
-
Page 70: Voice Input
Rate us When you tap on it, you will be asked the question Are you enjoying Gboard? If you tap Yes, you will be redirected to Play Store to give your rating. • If you tap No, you will be redirected to an email page requesting you to •... -
Page 71: Google Assistant
Google Assistant Google Assistant is an AI-empowered voice assistant that allows you to execute commands, open on-device apps, or activate functions by speaking to your device. If Google Assistant is unavailable in your service areas, or is unable to meet your requests, you will be directed to Google search. To use Google Assistant, Press and hold onto the Home button Once activated, speak to Google Assistant about your request. -
Page 72: Adjusting Volumes
Adjusting Volumes When using any functions or apps that requires user voices or generates volumes, such as Google Assistant, music, or YouTube, always adjust volume to appropriate levels in order to protect your hearing and avoid disturbing others. Volume Up/Down... -
Page 73: Getting Connected
Getting Connected • Checking your mobile data service • Checking your Wi-Fi connection • Hotspot and tethering • Connecting to VPN • Bluetooth • • Android Auto... -
Page 74: Checking Data Service Signal
Checking Data Service Signal Assuming you have SIM card installed in your phone, as described in Setting Up Your Phone, and activate it the way described in the Welcome Guide, your phone should automatically connect to mobile data service as your SIM card should be pre-activated by your cellular service providers. -
Page 75: Checking Wi-Fi Connection
Checking Wi-Fi Connection If there is any accessible Wi-Fi hotspot or AP (access point) around where you are using the phone, connect to the Wi-Fi for secure and reliable network and enter the password if required. It is strongly suggested that you perform the following actions to check if you have connected to a Wi-Fi network. -
Page 76: Hotspot And Tethering
Note: if your phone is connected to both mobile data network and Wi-Fi network, the phone will prioritize Wi-Fi network over cellular network by default to save on usage of your data plan. Hotspot and Tethering The Hotspot and Tethering setting allows you to share mobile data connection with other nearby devices. -
Page 77: Wi-Fi Hotspot
Wi-Fi hotspot You can turn your phone into a Wi-Fi mobile hotspot to share your mobile data connection with nearby device(s). To enable mobile Wi-Fi hotspot on your phone, Go to Settings --> Network & internet --> Hotspot & tethering --> Wi-Fi hotspot. -
Page 78: Usb Tethering
USB tethering Use USB tethering to share the phone's mobile data connection with other devices, such as laptops and desktop computers, through USB connections. To use this function, you must have first established USB connection with a laptop or desktop computer. Then use the toggle switch to enable or disable it. -
Page 79: Bluetooth Tethering
Bluetooth tethering Use Bluetooth tethering to share the phone's mobile data connection with other nearby Bluetooth device(s) through Bluetooth connections. Use the toggle switch to enable or disable it. Notes: • Make sure your phone and nearby devices have been paired through Bluetooth. -
Page 80: Ethernet Tethering
Ethernet tethering To enable this function, you need additional accessories such as USB OTG adapter and USB-to-Ethernet adapter in order to establish Ethernet (LAN) connections for your phone. -
Page 81: Connecting To Vpn
Connecting to VPN This phone can connect to virtual private network (VPN) that enables you to connect to services or resources inside a secured private network from a public network. VPN is commonly deployed by large corporations and educational institutes for security purposes. If you want to connect to the VPN of your office or school on this phone, Go to Settings -->... -
Page 82: Turning Bluetooth On
Turning Bluetooth on There are two ways to turn your Bluetooth on: via Quick Setting Panel or Settings Using the Quick Setting Panel: Swipe down twice from the top of your screen to open the Quick Setting Panel. Find the Bluetooth tab. Tap it to turn on. -
Page 83: Pairing With Another Bluetooth Device
Pairing with another Bluetooth device If your Bluetooth is on, Tap Settings --> Connected devices --> + Pair new device. Wait for searching available devices. Select the device you want to pair with (it is strongly recommended to pair with the device that you recognize and trust). Wait a moment for the pairing process. -
Page 84: Usb
You can use USB to transfer files with a connected device. Use the supplied USB Type-C cable to connect with the device you want to transfer files. For proper connection, plug in the USB Type-C end of the cable into the USB Type-C port of your phone (follow the same instruction in Charging Your Phone... -
Page 85: Android Auto
Android Auto™ Your phone comes with Android Auto™ to mirror features of your phone on your car's display unit, such as dashboard information and/or infotainment head unit. Once the pairing between your phone and the car's display unit, you can mirror the apps of your phone onto the car's display. Most supported applications are related to GPS mapping, navigations, music playback, telephone and voice commands. -
Page 86: Making Calls
Making Calls • Dialing and ending calls • Contacts • Recents • Favorites • Call settings • Importing and exporting contacts... -
Page 87: How To Make A Call
How to Make a Call Tap the Phone app from the Home Screen to make a call. You may make a call with any of the following options: • Use the dial pad to manually enter the number you want to call •... -
Page 88: Dialing And Ending A Call
Dialing and Ending a Call The Dial pad allows you to manually enter the number you want to dial. Then Tap the Delete icon to erase digits if you make a mistake. *Hold onto the 1 key on the pad to enter voicemail. Enter Voicemail To hang up a call, tap... -
Page 89: International Call
International call To make an international call, hold onto the 0 key to input +, and then enter the required country code, area code and/or mobile code followed by the phone number. Then tap to dial. Note: additional charges may apply. Emergency call If you are making a call within cellular network coverage, enter the emergency number in your area and tap... -
Page 90: Answering And Declining Incoming Call
Answering and declining incoming call When receiving an incoming call, a incoming call window with caller ID appears on the top of the screen. To answer the call • ANSWER on the call window to answer the call. To decline the call •... -
Page 91: Contacts
Contacts to display your contact list sorted by predefined orders and find the contact you want to call. Creating new contact Create new contact to add new contact number(s). Then, you will be prompted to fill out the required fields, such as name, phone numbers, or emails. -
Page 92: Calling A Contact
Calling a contact To make a call from a saved contact, tap the contact you want to call. Then tap on the phone icon beside the contact's number. -
Page 93: Sending Message To A Contact
Sending message to a contact If you want to send a message to a contact, then tap on the message icon beside the contact's number. You will be redirected to a message composing screen. Contact editing You may tap the edit icon to edit information of the selected contact. -
Page 94: Contact Setting
Contact setting To make some setting for a selected contact, tap to display setting options: • Link: this option allows you to set a contact to link with the selected contact. • Delete: delete the contact from the Contact list. You will see a dialogue box asking if you want to delete this contact. -
Page 95: Adding Contact To Favorites
Adding Contact to Favorites Tap on the star icon to add the selected contact to Favorite. Recents to display recent call logs (call history). To make a call from a recent call log, tap next to the contact's phone number. - Page 96 If you tap on a call log, you may • Create new contact: store contact as Phone contact or Google contact. Refer to Create new contact Contacts • Add to a contact: redirected to Contacts and tap Create new contact. •...
-
Page 97: Send A Message
Send a message Tap Send a message to enter a message composing screen. Make a Call Invite to Google Duo Attach Emoji Multimedia Files Record Audio Attach GIFs, Stickers, Files, Location tag, Contacts or Schedule send Block number Tap Block number to block the selected number and you will no longer receive calls from this number. -
Page 98: Call Details
Call details Tap Call details to view details (such as date and time) and status (such as outgoing call, incoming call or replied call). -
Page 99: Favorites
Favorites to display your favorite contacts. If you have not placed any of your contact as Favorites, you may tap ADD A FAVORITE. Then you may select a saved contact from your Contact list. Once you selected a contact, tap on the star icon to complete and this selected contact will appear on FAVORITE. -
Page 100: Call Settings
Call Settings to display Call history and Settings. Call history Call history is sorted by ALL, MISSED, INCOMING, and OUTGOING call logs. To clear call history, tap and then Clear call history. -
Page 101: Settings
Settings Tap Settings to access all the setting options for phone calls. Display options Display options allows you to sort your contacts by First name or Last name, as well as the Name format by First name first or Last name first. -
Page 102: Sounds And Vibration
Sounds and vibration You can adjust the Media volume, Call volume, Ring & notification volume, and Alarm volume. You may also set the following features: • Do Not Disturb: enter Do Not Disturb setting. • Phone ringtone: select a ringtone from the pop-up list •... -
Page 103: Quick Responses
Quick responses You can edit the quick responses that can be used to decline an incoming call by sending a selected response to the caller. The sample image below shows the default responses and you may edit them to meet your needs. -
Page 104: Calls
When receiving an incoming call at an inconvenient situation to answer the call, tap on the screen and you will see these quick responses. Tap here Calls This option allows you to access call settings. • Wi-Fi calling: tap to set Wi-Fi calling preferences. Use the toggle switch to enable or disable Wi-Fi calling. -
Page 105: Blocked Numbers
Blocked numbers Use this feature to block calls from unidentified callers. Use the toggle switch to enable or disable it. If enabled, you won't receive calls or texts from blocked numbers. To start, tap Add a number and enter the phone number in the pop-up number-entry-field. -
Page 106: Voicemail
Voicemail You can use this setting to initialize your voicemail if you cannot activate your voicemail by pressing the 1 key on the dial pad. • Notifications: tap to access the full setting menu for your voicemail notifications. • Visual voicemail: use the toggle switch to activate or deactivate visual voicemail. - Page 107 Default May ring or vibrate based on your phone settings. • Pop on screen: when the device is unlocked, notifications will be displayed as banners across the top of the screen. Use the toggle switch to enable or disable it. •...
-
Page 108: Accessibility
Advanced setting Service: displays service carrier. Setup: tap to enter a voicemail number. Accessibility The Accessibility menu provides useful tools for users to easily interact with the phone. • TTY mode: tap to display a list of TTY Off, TTY Full, TTY HCO (Hearing Carry Over), and TTY VCO (Voice Carry Over). -
Page 109: About
About • Build version: displays build version number. • Open source licenses: tap to view license details for open source software • Privacy policy: tap to view the entire Privacy Policy by Google. • Terms of Services: tap to view the entire Terms of Services by Google. -
Page 110: Importing And Exporting Contacts
Importing and Exporting Contacts This phone enables you to import or export your contacts. To import or export contacts Tap on Contacts app from the Home Screen (if you don't have Contacts app on the Home Screen, swipe up from the Home Screen to access all your apps and tap on Contacts). -
Page 112: Messages
Messages • Create a new message • Attach files to your message • Personalizing your message use... -
Page 113: Creating A New Message
Creating a New Message Create, edit, send/receive, and manage your text messages on this phone. to start text messaging. Search messages You may search existing messages before composing one. Touch Search Conversations at the top of the screen and use the displayed categories to search your messages. -
Page 114: Starting Your Message
Starting your message Tap Start chat to start typing a message. Enter a name, phone number or email you want to send the message in the To entry-field. Enter name, phone number, or email here... - Page 115 Once you have entered the contact, phone number or email in the To entry- field, you can start SMS/MMS messaging with the touch-screen keyboard shown below. After you input your message, tap if you are sending a text-only message or if you attach a multimedia file to your message.
-
Page 116: Attaching Files To Message
Attaching files to message to attach files to your message. This feature allows you to attach GIFs, Stickers, Files, Location, Contacts, and Schedule Send. • GIFs: attach GIFs to your message • Stickers: attach Stickers to your message • Files: attach a file from the internal storage of your phone •... -
Page 117: Attaching Emoji To Message
Tap here to use camera Attaching emoji to message to attach GIFs, Emoji or Stickers to your message. -
Page 118: Recording Audio For Message
Recording audio for message Touch and hold to start recording. While recording, you have to hold onto this icon. When you finish recording, release your finger from that icon. You will then be able to attach your recorded audio with your message. Inviting to Google Duo to invite the contact or the phone number to Google Duo. - Page 119 Tap New Call to start video chat with your contacts. Select a contact on the list to start your call.
-
Page 120: Adding People
to shoot a photo or video like a preview or introduction to share with your friend on Google Duo. to make a voice call with the selected individual. to make video call with with the selected individual. Note: once you have completed this setup, Google Duo may appear as an app on your phone's screen. - Page 121 Switching between ABC and 123 modes When adding more people, tap the keypad icon on the top right corner to switch to the 123 mode. The icon will change to ABC mode icon...
-
Page 122: Message Settings
Message Settings Tap the setting icon to view the setting options for your messages. • Details: tap to enter a sub-menu to set Notifications, App settings, and Block & report spam. • Starred: search starred message(s). • Archive: search archived message(s). •... -
Page 123: Personalizing Your Messaging Use
Personalizing Your Messaging Use To personalize your message use, tap the setting icon at the top right corner of the initial Message screen to set your message preferences. The options include • Mark all as read • Device pairing • Choose theme •... -
Page 124: Device Pairing
Device pairing Tap Device pairing to enable you to check, send or receive messages on a web browser on your device, like a PC or a tablet. To do so, Touch the QR code scanner to activate Open the Messages for web http://messages.google.com/web in a browser (such as Chrome or Safari) on your computer or tablet to display the device-unique QR code. -
Page 125: Choose Theme
Choose theme Set the theme of your Message app as • Light • Dark • System default Starred Tap Starred to search starred messages. Archived Tap Archived to access your archived messages. Spam & blocked Tap Spam & blocked to view messages that have been detected as spam and blocked by your phone. -
Page 126: Settings
Settings Tap Settings to access the full options to configure your Message app, including • Chat features • Notifications • Bubbles • Hear outgoing message sounds • Pinch to zoom conversation text • Your current country • Automatic previews • Spam protection •... -
Page 127: Chat Features
Chat features Chat features offers rich messaging experiences for your Message app with the following upgrades: • Let others know when you are typing • Provide read receipts that let others know you have read their messages • Send messages through Wi-Fi or mobile data Use the toggle switch to enable Chat features. -
Page 128: Notifications
Notifications Tap Notifications to access the full setting options for notifications of the Message app. All Messages notifications: if enabled, you will be able to configure all the notification settings. If disabled, Android is blocking the notifications of the Message from appearing on this device and no setting will appear on the screen. -
Page 129: Bubbles
Bubbles Tap Bubbles to access settings for Bubbles. You may set • All conversations can bubble • Selected conversations can bubble • Nothing can bubble. -
Page 130: Hear Outgoing Message Sound
Hear outgoing message sound Use the toggle switch to enable or disable outgoing message sound. Pinch to zoom conversation text Use the toggle switch to enable or disable pinching to zoom conversation text. Your current country Tap Your current country to display a pop-up list of countries. If you check Automatically detected, the phone will automatically detect the country where you use the phone based on the service carrier of inserted SIM card. -
Page 131: Automatic Previews
Automatic previews Tap Automatic previews to use the toggle switch to enable or disable Show all previews, Show only web link previews, or Only download data on Wi-Fi. -
Page 132: Spam Protection
Spam protection Tap Spam protection to use the toggle switch to enable or disable spam protection. The default spam protection is executed by on-device intelligence. Advanced Tap Advanced for further settings. - Page 133 • Group messaging: send an SMS/MMS reply to all recipients.
-
Page 134: About, Terms & Privacy
• Auto-download MMS: use the toggle switch to enable or disable auto-download MMS. • Auto-download MMS when roaming: use the toggle switch enable or disable auto-download MMS when roaming is on. • Use simple characters: use the toggle switch to enable or disable simple characters. -
Page 135: Help & Feedback
Help & feedback Tap Help & feedback to access online Help resources. -
Page 136: Camera
Camera • Taking a picture • Recording a video • Taking special shots • Camera settings • Gallery • Editing your photo and video... -
Page 137: Opening The Camera App
Opening the Camera App From the Home Screen, tap the camera icon to open the camera. If the phone is locked, press Power key twice to directly open the camera. Beauty Mode Aspect Ratios Countdown Timer Settings Flash Google Lens Video Mode Panorama Mode Time-Lapse Mode... -
Page 138: Taking A Picture
Taking a Picture Aim the object or landscape to your desired position in the viewfinder. You may rotate the phone to auto-rotate the camera. Touch the screen to enable focus. Tap the Capture icon to take a picture. Tap the Gallery icon to view or edit the picture you have captured. - Page 139 Settings Flashlight Switch Gallery Camera Record Switch camera Switch between front/rear camera Record Record a video Recording in This icon shows recording is in progress. progress Tap it to stop recording. Stop recording Gallery View the last captured photo/video Settings Enter setting menu Enable or disable full HD recording Flashlight...
-
Page 140: Taking Special Shots
Taking Special Shots Panorama mode Panorama mode enables you to take a wider angle views of the images as you are moving your phone camera lens through the scene and to stitch multiple images together. To capture panorama images, Tap Panorama mode on the screen. Touch the Capture icon (shutter) to start. -
Page 141: Time-Lapse
Time-lapse Time-lapse enables you to capture still images or slow processes hard to notice. To create a video with time-lapse, Tap Time-lapse mode on the screen. Aim at the subject or landscape to your desired position in the viewfinder. Tap the Record icon to start recording. -
Page 142: Selfie
Selfie To take a selfie photo or video, tap the to switch to the front camera. You can use all the features in Photo or Video modes when you are using the front camera to shoot a photo or video, like HDR, FHD and Beauty Mode. Camera Settings on the top left corner of the camera screen to access settings. -
Page 143: Gallery
• Mirror photos for front camera: saves photos in mirror mode. Use the toggle switch to enable or disable it. • Location tag: if enabled, photo location information will be saved. When enabling it the first time, you will be asked for your permission to allow the Camera app to access your phone's location. -
Page 144: Editing A Photo
Share your photos through emails, Bluetooth, Share Messages or instant messaging apps Edit Edit your photos or videos with useful tools Lens Enter Google Lens Delete Delete this photo Camera Switch back to camera Photos Enter Google Photos Favorites Tap to add this photo to Favorites Settings Tap to access further settings and view details Editing a photo Tap Edit... - Page 145 Suggestions Tap Edit --> Suggestions to use the Suggestions for image enhancements. The Suggestions provides some AI-enabled tools for you to apply to your photo, including Enhance, Warm and Cool. When you are done, tap Save copy to save edited photo. To exit, tap Cancel.
- Page 146 When using the on-screen angle tool, a grid will appear to help you align. When you are done, tap Save copy to save edited photo. To exit, tap Cancel.
- Page 147 Adjust Tap Edit --> Adjust to make adjustments to your images. On this tab, you may adjust Brightness, Contrast, White point, Highlights, Shadows, Black point, Saturation, Warmth, Tint, Skin tone, Blue tone, Pop, Sharpen, Denoise, and Vignette. When you are done, tap Save copy to save edited photo. To exit, tap Cancel.
- Page 148 Markup Tap Edit --> Markup to edit your photo with creativity. The Markup option provides you useful tools to make marks to decorate your photos, including Pen , Highlighter , and Text When you are done, tap Save copy to save edited photo. To exit, tap Cancel.
-
Page 149: Google Lens
Google Lens Tap Lens to use Google Lens. Google Lens allows you to explore with what you have captured with your phone camera. Select an image you capture and use Google Lens to search for information about your image, like the name of the animal or plant in your image, or shopping information about the shoes in your image. -
Page 150: Editing A Video
Editing a video Select a video and tap Edit to use some tools to edit your recorded video. Edit... - Page 151 Video Tap Edit --> Video to start editing your recorded video. You may use the Editing handle to adjust the sequence and frames of your video clip. During the editing, you may • to mute/unmute the video. • to stabilize. •...
- Page 152 Crop Tap Edit --> Crop to use options in cropping. You may rotate , adjust ratio or transform the image you want to crop. To make minor adjustment for the angle, you may use the on-screen angle tool When you are done, tap Save copy to save edited photo. To exit, tap Cancel.
- Page 153 Adjust Tap Edit --> Adjust to make adjustments to your images. On this tab, you may adjust Brightness, Contrast, White point, Highlights, Shadows, Black point, Saturation, Warmth, Tint, Skin tone, Blue tone, and Vignette. When you are done, tap Save copy to save edited photo. To exit, tap Cancel.
- Page 154 Filters Tap Edit --> Filters to filter your image. On this tab, you may filter your photo with various styles, including Vivid, West, Palma, Metro, Eiffel, Blush, Modena, Reel, Vogue, Ollie, Bazaar, Alpaca, and Vista. When you are done, tap Save copy to save edited photo. To exit, tap Cancel.
- Page 155 Markup Tap Edit --> Markup to edit your photo with creativity. The Markup option provides you useful tools to make marks to decorate your photos, including Pen or Highlighter When you are done, tap Save copy to save edited photo. To exit, tap Cancel.
-
Page 156: Google Applications
Google Applications • Chrome • Play Store • Photos • Maps • YouTube • YouTube Music • • Drive • Google TV • Calendar • Files • Keep... -
Page 157: Gmail
Overview Google apps are preinstalled in your phone for enhanced user experience. To enjoy the convenience brought by Google apps, you have to register a Google™ account. If you already have a Gmail™ account, you can use it as a Google™... -
Page 158: Youtube
YouTube YouTube™ is an online video-sharing and streaming application where users can upload, real-time broadcast, watch and share videos. It also offers social network functions where users can leave comments and interact with other users. YouTube Music YT Music™ (YouTube Music™) is a music streaming application allowing users to browse and view through songs and music videos based on genres, playlist and recommendations. -
Page 159: Keep
Keep Keep™ is a note-taking service with useful tools to creatively capture your thoughts. It offers content input by text, images and audio by voice transcribing. Assistant See Google Assistant in Basic Operations. -
Page 160: Tools & Utilities
Tools & Utilities • Calculator • Clock • Alarm • Timer • Stopwatch • Bedtime... -
Page 161: Calculator
Overview Your phone is preinstalled with tools and utilities provided by Google™ to improve productivity. This chapter only gives a general instructions of these applications. For more details, refer to their official manuals. Calculator Your phone is preinstalled with a calculator app. To use the calculator, From the Home Screen, swipe up to access apps and tap Calculator Tap the numbers and mathematic functional buttons to perform your... -
Page 162: Clock
Clock Your phone is preinstalled with a clock app. To use the clock, From the Home Screen, swipe up to access apps and tap Clock to add another time zone. Type the name of the city in the search bar. -
Page 163: Alarm
Alarm From the Clock screen, tap to set alarm(s). You may • Use the toggle switch to enable or disable the selected alarm. • to add another alarm. • to set details of the alarm, such as days of the week, alarm sound selection, vibration on/off, and Google Assistant routine. -
Page 164: Stopwatch
Stopwatch From the Clock screen, tap to run stopwatch. You may to run the stopwatch. to show stopwatch records to reset the stopwatch. to stop. -
Page 165: Bedtime
Bedtime From the Clock screen, tap to set bedtime timer. You may to start setting your regular wake-up alarm and bedtime reminder. - Page 166 Clock settings to open clock settings. • Screen saver: enter screen saver • Settings: enters detailed setting menu • Send feedback: you will be redirected to an email screen and write your feedback to Google. • Help: enter the Support site. -->...
- Page 167 Alarms • Silence after: if a certain time period is set, the alarm will be in silence after the set period of time. Tap to set 1 minute, 5 minutes, 10 minutes, 15 minutes, 20 minutes, 25 minutes or Never. •...
-
Page 168: Settings
Settings • Network & internet • Connected devices • Apps • Notifications • Battery • Storage • Sound • Display • Wallpaper • Accessibility • Security • Privacy • Location • Safety & emergency • Passwords & accounts • Digital Wellbeing & parental controls •... -
Page 169: Network & Internet
Overview The Settings allows you to customize your preferences in using the phone's functions. Network & internet From the Settings screen, tap Network & internet to set network connections. - Page 170 Wi-Fi To enable Wi-Fi network on your phone, Use the toggle switch to enable Use Wi-Fi. From Network & internet screen, tap on Wi-Fi to see a list of available Wi-Fi networks and select a network to conect. The status icon indicates your signal strength.
- Page 171 Mobile network Your phone should have connected to the mobile network once you have inserted SIM card in your phone. The status icon and the name of the service carrier under Mobile network suggest you have connected to mobile network.
- Page 172 From the Network & internet screen, tap on Mobile network if you want to set your mobile data • Mobile data: if enabled, your phone accesses data using mobile network. Use the toggle switch to enable or disable it. • Roaming: if enabled, your phone connects to data service when roaming.
- Page 173 Airplane mode From the Network & internet screen, use the toggle switch to enable Airplane mode to meet the aviation safety regulation when you are boarding an airplane. Wi-Fi Calling From the Network & internet screen, tap Wi-Fi Calling to enable or disable Wi-Fi calling and its features •...
- Page 174 Hotspot & tethering From the Network & internet screen, tap on Hotspot & tethering. The Hotspot and Tethering setting allows you to share mobile data connection with other nearby devices. You may create a portable, personal hotspot with this phone through •...
- Page 175 Wi-Fi hotspot To enable mobile Wi-Fi hotspot on your phone, From the Hotspot & tethering screen, tap Wi-Fi hotspot. Use the toggle switch to enable or disable it. To edit the hotspot name, tap Hotspot name to display a text entry field to enter a new hotspot name.
- Page 176 USB tethering To use this function, you must have first established USB connection with a laptop or desktop computer. Then use the toggle switch to enable or disable it. Note: if you enable this function, you cannot transfer data between the phone's internal storage and the laptop or desktop computer.
- Page 177 Bluetooth tethering Use Bluetooth tethering to share the phone's mobile data connection with other nearby Bluetooth device(s) through Bluetooth connections. Use the toggle switch to enable or disable it. Notes: • Make sure your phone and nearby devices have been paired through Bluetooth.
- Page 178 Data Saver From the Network & internet screen, tap on Data Saver. Use the toggle switch to enable or disable Use Data Saver. Data Saver helps reduce data usage by preventing some apps from sending or receiving data in the background. You may also tap Unrestricted data to select certain apps to use unrestricted data even when Data Saver is on.
- Page 179 If you want to connect to the VPN of your office or school on this phone, From the Network & internet screen, tap VPN. Tap on the + icon at the top right corner. For details about how to fill in VPN profiles show in the image below, contact the IT administrators or managers of your office or school.
- Page 180 Connected devices From the Settings screen, tap Connected devices to configure connection preferences with connected devices. Note about USB: you have to connect your phone with another device via USB connection to use this feature.
- Page 181 Pair new device From the Connected devices screen, tap Pair new device to scan and pair a Bluetooth device. Wait for the phone to scan nearby Bluetooth devices. Select a device to pair (it should be the device that you know and trust). Wait a moment for the pairing process.
-
Page 182: Connection Preferences
Connection preferences From the Connected devices screen, tap Connection preferences to set preferences with peripheral devices. - Page 183 Bluetooth From the Connection preferences screen, tap Bluetooth to enter preference setting for Bluetooth. Use the toggle switch to enable or disable Use Bluetooth. Tap Device name to change your device name to be visible by other Bluetooth devices. Tap Pair new device to pair with a nearby Bluetooth device. See the Pair new device section for steps.
- Page 184 Printing From the Connection preferences screen, tap Printing to set printing service on your phone. To set up printing service on your phone, • Make sure your Default Print Service is on. If it is off, tap Default Print Service to enter and use the toggle switch to enable or disable Use print service.
- Page 185 Chromebook From the Connection preferences screen, tap Chromebook to set connections with a Chromebook device. Connecting your phone to Chromebook allows you to send/receive text, synchronize chat notifications, share files, and share mobile data conection with your Chromebook. You may also unlcok your Chromebook with your phone.
- Page 186 Android Auto™ To pair your phone with your car for the first time, Tap Settings --> Connected devices --> Connection preferences --> Android Auto. Touch + CONNECT A CAR Connect the supplied USB cable between your phone and your car's car's Android Auto - compatible USB port.
- Page 187 General • Customize launcher: tap to enter setting for which apps are shown in Android Auto and how the apps appear in your car's display unit. You may add a shortcut by calling a contact or triggering an Assistant action, and sort the launcher by A-Z or your custom order. •...
-
Page 188: Apps
Notifications • Show first line of conversations: use the toggle switch to enable or disable showing first line of conversations. • Show conversations: use the toggle switch to enable or disable whether conversations will be shown. • Show group conversations: if enabled, group conversations will be shown on the car's display unit. - Page 189 • OPEN , DISABLE , or FORCE STOP : Tap the respective icons to open, disable or force stop the selected app. • Notifications: tap to set notification preferences for the selected app. • Permissions: tap to see which apps are allowed and which apps are not allowed for this app to access.
- Page 190 • Battery: manage your battery usage of this app. You may set Unrestricted, Optimized, or Restricted. • Open by default: allows app to open supported links. Unused apps • Remove permissions and free up space: use the toggle switch enable or disable this function to optimize performance. Store •...
- Page 191 Instant apps Instant apps: if enabled, links will be opened in apps even if you don't have the apps installed. Use the toggle switch to enable or disable it. Instant Apps preferences: tap to enable or disable Upgrade web links provided by Google Play Instant.
- Page 192 Unused apps From the Apps screen, tap Unused apps to the list of unused apps. Special app access From the Apps screen, tap Special app access to set special access types for your apps. Select the special access type and set the related apps.
- Page 193 Notifications From the Settings screen, tap Notifications to see full setting options for Notifications, as shown in the screen below. Descriptions of the setting options are in the sub-sections as follows: App settings Manage notifications from individual apps. Use the toggle switch enable or disable notifications from certain apps.
- Page 194 Notification history Show recent and snoozed notifications. If you tap on it, you will be asked whether you want to Use notification history. Use the toggle switch to enable or disable this setting. When it is enabled, you will see recent notifications and snoozed notifications here.
- Page 195 Conversations Only priority or modified conversations (e.g. messages) will appear here. You may tap on available conversation(s) on the screen to set it as Priority, Default, or Silent. Notes about marking a conversation as Priority: • Open the message and tap -->...
- Page 196 Bubbles When it is on, conversations can appear as floating icons. If you tap on it, you will enter a sub-screen with option Allow apps to show bubbles. If it is on, some conversations will appear as floating icons on top of other apps. Use the toggle switch to enable or disable this feature.
- Page 197 Notification on lock screen From the Notifications screen, tap Notification on lock screen to set options for notification on lock screen. • Show conversations, default, and silent: If this option is selected, the lock screen will show conversations, default, and silent notifications. •...
- Page 198 • Schedules: This option allows you to set types of conditions that can interrupt when Do Not Disturb is turned on, for example, Sleeping and Event. You may tap Add more to add more condition types, check the box to enable or tap on the setting icon at the right for further scheduling options.
- Page 199 Apps From Do Not Disturb screen, tap Apps to set the preferred apps that can interrupt when Do Not Disturb is turned on. Users may add and select the apps that can interrupt.
- Page 200 Alarms & other interruptions From Do Not Disturb screen, tap Alarms & other interruptions to enable or disable interruptions that make sounds when Do Not Disturb is turned on. The configurable interruptions include: • Alarms • Media sounds (sounds from video, games or other multimedia types) •...
- Page 201 When tapping for Sleeping • Use schedule: use the toggle switch to enable or disable it • Edit : edit a schedule name • Delete : delete "Sleeping" rule • Days: tap to display days of a week and check boxes of the days you prefer •...
- Page 202 When tapping for Event • Use schedule: use the toggle switch to enable or disable schedule for Event • Edit : edit a schedule name • Delete : delete "Event" rule • During events for: select "Any calendar" or "PC sync" •...
- Page 203 You may also tap + Add more to add more schedules. Wireless emergency alerts Configure wireless emergency alerts. Allow alerts: use the toggle switch to enable or disable it. Alerts • Extreme threats: warns the users about extreme threats to life and property.
- Page 204 Alert preferences • Vibration: use the toggle switch to enable or disable vibration for alerts • Alert reminder: tap to display a pop-up menu for alert reminder including Once, Every 2 minutes, Every 15 minutes or Never. • Spanish: receive alert in Spanish if possible. Use the toggle switch to enable or disable it.
-
Page 205: Battery
Battery From the Settings screen, tap Battery to view battery usage and manage your battery use. - Page 206 Battery Usage From the Battery screen, tap Battery Usage to view battery usage since last full charge in graphical presentation. You can also view the apps that consume power by percentage. Battery Saver From the Battery screen, tap Battery Saver to set preferences for Battery Saver.
- Page 207 Battery Manager From the Battery screen, tap Battery Manager to manager your battery. • Use Battery Manager: if enabled, apps that drain the battery will be to enable or disable Use Battery detected. Use the toggle switch Manager. • Restricted apps: tap to view which apps are restricted to limit battery usage.
- Page 208 Battery percentage From the Battery screen, use the toggle switch to enable or disable Battery percentage. If enabled, the remaining battery percentage will appear in the status bar. Storage From the Settings screen, tap Storage to view and manage your storage. You may use the following options to manage your storage: •...
-
Page 209: Sound
Sound From the Settings screen, tap Sound to manage sounds for media, call or notifications. Use the slider to adjust volume for Media volume, Call volume, Ring & notification volume and Alarm voluem. • Do Not Disturb: refer to Do Not Disturb Notifications under Settings. -
Page 210: Display
Display From the Settings screen, tap Display to adust display parameters for your phone. - Page 211 Brightness level From the Display screen, tap Brightness level to use the slider bar on the top of the screen to adjust the brightness level of your phone. Dark theme From the Display screen, use the toggle switch to enable or disable Dark theme, which uses a black background to help reduce power consumption on some screens.
- Page 212 Night Light From the Display screen, use the toggle switch to enable or disable Night Light, which tints the screen amber, ideal for reading in dim light. Tap on Night Light to access detailed adjustments for Night Light. to enable or disable Use Night Light. If •...
- Page 213 Adaptive brightness From the Display screen, tap Adaptive brightness to use the toggle switch to enable or disable Use adaptive brightness. If enabled, the screen brightness will automatically adjust to your surroundings or activities. Wallpaper From the Display screen, tap Wallpaper to access your wallpaper or image folders.
- Page 214 Screen timeout From the Display screen, tap Screen timeout to set the time for screen timeout. Auto-rotate screen From the Display screen, tap Advanced and use the toggle switch to enable or disable Auto-rotate screen. Font size From the Display screen, tap Advanced and tap Font size to adjust your preferred font size.
- Page 215 Display size From the Display screen, tap Advanced and tap Display size to adjust your preferred display size. The screen features a sample instant-messaging image and a slider at the bottom to adjust the display size for your phone. Whenever you use the slider to adjust the display size, the sample instant messaging image will change its size accordingly for your preview.
- Page 216 Screen saver From the Display screen, tap Advanced and tap Screen saver to set your screen saver. to enable or disable Use screen saver. • Use the toggle switch • Tap the Setting icon beside Current screen saver to set the style (Digital or Analog) or enable Night mode.
-
Page 217: Accessibility
Wallpaper From the Settings screen, tap Wallpaper to access wallpaper or image folders. Refer to Wallpapers Basic Operations about how to set wallpaper for your phone once you have accessed the wallpaper or image folders. Accessibility From the Settings screen, tap Accessibility to use the features designed for improved accessibility usage. - Page 218 Accessibility Menu From the Accessibility screen, tap Accessibility Menu to open the accessibility menu. The Accessibility Menu is a large, on-screen menu to control and navigate your phone.
- Page 219 Accessibility Menu shortcut: when using the toggle switch to enable Accessibility Menu shortcut, a pop-up message will appear with some introductions and ask for your permission to allow it to have full control of your device. Tap ALLOW to enable or tap DENY to not enable it. •...
- Page 220 Select to Speak From the Accessibility screen, tap Select to Speak to use this accessibility feature. If enabled, you may select items on your screen, like texts or images, to hear them read or described aloud. Select to Speak shortcut: when using the toggle switch to enable Select to Speak shortcut, a pop-up message will appear with some introductions and ask for your permission to allow it to have full control of...
- Page 221 Select to Speak Settings From the Select to Speak screen, tap Settings to enable or disable further options. • Text to speech settings: tap to set Preferred engine (Google Text-to- Speech), language, speech rate or pitch. You may press PLAY or RESET for simulation.
- Page 222 Switch Access From the Accessibility screen, tap Switch Access to use this accessibility feature. Switch Access allows you to select, scroll, or type on your phone through one or more switches, such as external switches, keyboard, or hardware buttons, instead of the touchscreen. Switch Access can be helpful if you can't interact directly with your device.
- Page 223 Switch Access Settings From the Switch Access screen, tap Settings to enable or disable further options. Help • Help & feedback: tap to be redirected to the Support site of Google. • Open setup guide: tap to choose a switch type: USB, Bluetooth or Camera.
- Page 224 Menu Customization • Enable Menu Customization: use the toggle switch to enable or disable menu customization feature on the Switch Access menu. • Revert to Default Menu: tap to reset the Switch Access menu to default (when you tap on it, you will be asked once again whether you want to proceed).
- Page 225 TalkBack From the Accessibility screen, tap TalkBack to use the screen reader that speaks text and image content on your screen.
- Page 226 Use TalkBack: when using the toggle switch to enable Use TalkBack, a pop-up message will appear with some introductions and ask for your permission to allow it to have full control of your device. Tap ALLOW to enable or tap DENY to not enable it. TalkBack shortcut: when using the toggle switch to enable Use TalkBack, a pop-up message will appear with some introductions and ask for...
- Page 227 • Customize menus: tap to customize your TalkBack menu and reading controls. • Braille keyboard: tap to set up braille keyboard, typing languages, and layout. • Tutorial and help: tap to enter Tutorial, Practice gesture, and Help & feedback. • Advanced settings: tap to set Speak Password, Custom lables, Element description order, Typing preference, Keyboard shortcut, and other information.
- Page 228 Text and display From the Accessibility screen, tap Text and display to adjust text and display preferences. • Font size: tap to to adjust your preferred font size. The screen features a nearly full page sample text and a slider near the bottom to adjust your font size.
- Page 229 Extra dim From the Accessibility screen, use the toggle switch to enable or disable Extra dim, which makes the screen dimmer than the phone's minimum brightness.
- Page 230 From the Accessibility screen, tap Extra dim to access full settings. • Make screen extra dim: use the toggle switch to enable or disable Make screen extra dim. If enabled, you may use the Intensity slider to adjust the screen to be dimmer or brighter. •...
- Page 231 Magnification From the Accessibility screen, tap Magnification to manage your screen zoom-in options. • Magnification shortcut: to enable this option with the toggle switch , choose to tap the Accessibility button first or hold both volume keys. • Magnification type: tap to set Magnify full screen, Magnify part of screen, or Switch between full and partial screen.
- Page 232 System controls From the Accessibility screen, tap System controls to set your system navigation preferences. • System navigation: tap to set Gesture navigation (go Back, Home, and switch apps with swiping gestures) or 3-button navigation (use the 3 buttons at the bottom: Back, Home, and Recent). You may tap further set gesture options including sensitivity and how to invoke digital assistant app.
- Page 233 Vibration & haptic strength From the Accessibility screen, tap Vibration & haptic strength to set your preferences in Ring vibration, Notification vibration, and Touch feedback. • Ring vibration: tap to turn Ring vibration on or off. • Notification vibration: tap to turn Notification vibration on or off. •...
- Page 234 Caption preferences From the Accessibility screen, tap Caption preferences to set your caption preferences. • Show captions: use the toggle switch to enable or disable Show captions • Caption size and style: tap to set Text size and Caption style. Available text sizes include Very small, Small, Default, Large, and Very large.
- Page 235 Accessibility shortcuts From the Accessibility screen, tap Accessibility shortcuts to set further accessibility options. • Accessibility button: set the location, size and transparency for the Accessibility button. To get started, select an Accessibility feature, such as Select to Speak, Accessibility Menu, or TalkBack, to enable the shortcut and select the Accessibility button.
-
Page 236: Security
Text-to-speech output From the Accessibility screen, tap Text-to-speech output to set Preferred engine (Google Text-to-Speech), language, speech rate or pitch. You may press PLAY or RESET for simulation. Security From the Settings screen, tap Security to set phone protection features. Security status Security status displays preinstalled security applications by Google Android. - Page 237 Screen lock From the Security screen, tap Screen lock to choose a screen lock method. • None: no screen lock; simply swipe up to unlock the screen. • Swipe: set screen lock by swipe. • Pattern: tap to enter screen lock pattern. Draw a screen lock pattern first, and then re-draw to confirm.
- Page 238 Smart lock From the Security screen, tap Smart Lock to set Smart Lock. Note that you must have enabled a screen lock before using the Smart lock. • On-body detection: keep your phone unlocked when it is on you. Use the toggle switch to enable or disable it.
- Page 239 SIM card lock From the Security screen, tap SIM card lock to set security measures for your inserted SIM card. • Lock SIM card: enter a PIN to enable this feature. • Change SIM PIN: tap it to change the PIN for SIM lock.
- Page 240 Encryption & credentials From the Security screen, tap Encryption & credentials to view encryption status and set credential storage. Encryption • Encrypt phone: encrypted Credential storage • Trusted credentials: tap it to view the list of trusted credentials preinstalled in the system or installed by the user. •...
-
Page 241: Privacy
Privacy From the Settings screen, tap Privacy to manage your privacy preferences. • Privacy dashboard: tap to view the privacy dashboard which apps are using permissions. • Permission manager: manage and control the permissions for apps using your phone's functions, such as Phone, Contacts, Media, Location, Camera, Body sensors and more. -
Page 242: Location
Location From the Settings screen, tap Location to set Location services. You can see the apps that access this service. • Use location: use the toggle switch to enable or disable Google location service. • App location permissions: tap to view the apps with permission to access this device's location. -
Page 243: Safety & Emergency
Safety & emergency From the Settings screen, tap Safety & emergency to set emergency information and SOS, as well as medical information. • OPEN EMERGENCY INFORMATION: tap open and fill out your medical information and emergency contacts. • Emergency information: same as OPEN EMERGENCY INFORMATION. •... -
Page 244: Passwords & Accounts
Passwords & accounts From the Settings screen, tap Passwords & accounts to access Password Manager of your Google account, set Autofill service or automatically synchronize app data. Passwords Tap to enter your Google account (Gmail account) and then select an account to access Password Manager. -
Page 245: Digital Wellbeing & Parental Controls
Automatically sync app data: this features lets apps refresh data automatically. Use the toggle switch to enable or disable it. Digital Wellbeing & parental controls From the Settings screen, tap Digital Wellbeing & parental controls to use the tools and features for digital wellbeing and parental controls. - Page 246 Dashboard From the Digital Wellbeing & parental controls screen, tap Dashboard to view the phone usage times, and you may tap to view by Screen time, Notification received, or Times opened. Tap to Set timers for your apps. When the app timer ends, the app will be paused for the rest of the day. Bedtime mode From the Digital Wellbeing &...
- Page 247 Focus mode From the Digital Wellbeing & parental controls screen, tap Focus mode to select distracting apps to pause them. To enable Focus mode Select the app you want to pause. Tap TURN ON NOW or Set a schedule.
- Page 248 Manage notifications From the Digital Wellbeing & parental controls screen, tap Manage notifications to use the the toggle switch to enable or disable notifications for selected apps. Tap to sort the app list by MOST RECENT, MOST FREQUENT, ALL APPS, and TURNED OFF. Do Not Disturb From the Digital Wellbeing &...
- Page 249 Parental controls From the Digital Wellbeing & parental controls screen, tap Set up parental controls to set content restrictions and other limits to balance screen time and phone usage. Tap Get started to begin.
-
Page 250: Google
From the Who will be using this device screen, select Child or teen or Parent. • Child or teen: if you select Child or teen, you will be guided to set links to your child's Google account, choose apps for this phone, set app filter, and set bedtime and screen time limits. - Page 251 • Find My Device: tap to enabe or disable Find My Device (Google Location service must have been activated first) • Mobile data & messaging: tap to access Data management and Device phone number. • Parent controls: enter Parental controls. For instructions, refer to Parental controls Digital Wellbeing &...
-
Page 252: System
System From the Settings screen, tap System to manage detailed settings of your phone. Languages & input From the System screen, tap Languages & input to set keyboard and text inputs. Languages: tap to show the default display language of your phone. Tap + Add a language to select and add another language. - Page 253 Tools • Spell checker: tap to enable or disable spell checker. • Personal dictionary: add words to be used for quick-typing in apps. For detailed instructions, refer to Dictionary Text input on Gboard Basic Operations. • Pointer speed: tap to use a slider to adjust the pointer speed on your Gboard.
- Page 254 Date & time From the System screen, tap Date & time to set options for your phone's date and time. • Set time automatically: tap to select Use network-provided time, Use GPS-provided time, or Off. • Set date: you can only set the date manually if you select Off for Set time automatically.
- Page 255 Backup From the System screen, tap Backup to access and manage your account storage and enable/disable Backup by Google One.
- Page 256 Reset options From the System screen, tap Reset options to select an option if you want to reset your phone. • Reset Wi-Fi, mobile & Bluetooth • Reset app preferences • Erase all data (factory reset)
-
Page 257: About Phone
About phone From the Settings screen, tap About phone to view some detailed information about your phone. Basic info • Device name: displays the device name of your phone. • Phone number: displays the phone number. Legal & regulatory • Legal information: tap to read Third-party licenses, Google legal, Google Play system update licenses and System WebView licenses. -
Page 258: System Updates
System updates From the Settings screen, tap System updates to check for available updates. • Check for new system update: tap to start checking for available system update. • Show system update history: tap to display system update history • Use software update assistant: this lets you use the Software Upgrade Assistant tool to install system updates. -
Page 260: Safety And Compliance
Safety and Compliance • Responsible Driving • Safety Precaution • Maintenance & Care • Privacy • Important Notes about Bluetooth and WiFi • FCC Compliance • • • Preventing Hearing Loss • Cautions for Battery and Accessories • Warranty • Disposal and Recycling... - Page 261 Read before Use We recommend you read the following sections regarding safety and compliances thoroughly before use. The manufacturer is not liable for malfunctions or damages resulted from misuse of the handset. This product meets applicable national SAR limits of 1.6 W/kg.
-
Page 262: Airplane Mode
Airplane Mode Switch your phone off when you are on an airplane, as the radio waves from your device may affect in-flight piloting instruments, which may impact safety during the flight. The use of phone functions on an aircraft is against the laws and be sure to follow the regulations imposed by your government. -
Page 263: Maintenance & Care
Caution • Avoid placing handset on unstable surface to prevent damage. • Do NOT pull the cord when disconnecting the charger. • Keep handset and charger away from children and pets. • Handset must be disposed of in accordance with the locally applicable. environmental regulations. -
Page 264: Safe And Responsible Driving
Safe and Responsible Driving Abide the laws and regulations on the use of wireless phones in the jurisdictions where you drive. It is users' sole responsibility to pay full attention to driving. Use a hands-free accessory if available. In some places where phone use is strictly prohibited during driving, pull over or park the car before making or taking a call. -
Page 265: Important Notes About Bluetooth And Wi-Fi
Important Notes about Bluetooth and Wi-Fi Bluetooth Your wireless carrier is not liable for any data/information leakage due to use of handset Bluetooth function. Users are advised to ensure no other radio stations sharing the same frequency band are in use nearby. In the event that interference occur between handset and other radio stations, move to another location or disable Bluetooth functions immediately. -
Page 266: Specific Absorption Rate (Sar)
Specific Absorption Rate (SAR) Your mobile device meets governmental regulations for radiation exposure. Your phone includes a radio transmitter and receiver. This phone is designed and manufactured not to exceed the emission limits for exposure to radio frequency (RF) set by the Federal Communications Commission (FCC) of the U.S. -
Page 267: Cellular Networks And Maximum Output Power
Cellular Networks and Maximum Output Power You can use your device on the following cellular network frequency bands: • 4G LTE: B2 (1850 MHz - 1910 MHz), B4 (1710 MHz - 1755 MHz), B5 (824 MHz - 849 MHz), B12 (698 MHz - 716 MHz), B13 (777 MHz - 787 MHz), and B66 (1710 MHz - 1780 MHz) Maximum conducted output power The maximum conducted output power of this device, including the tune-up... -
Page 268: Hearing Aid Compatibility (Hac)
Hearing Aid Compatibility (HAC) This mobile device is rated M4/T4. The Federal Communications Commission (FCC) has defined standards for wireless mobile devices to be compatible with hearing aid instruments. The current standard is set by American National Standard Institute (ANSI). The HAC standard adopts a M/T rating system. -
Page 269: Disposal And Recycling
(1) year from the original date of purchase shown on your original invoice or receipt. If any such defects are found in this product within the applicable warranty period, Sharp (Taiwan) Electronics Corporation shall, at its discrete options during the applicable warranty period, carry out repair or replacement for the defected product or part. - Page 270 • Damage caused by connection with accessories, equipment, or peripherals that are not specified by the manufacturer or not compatible with this product. • Damage caused by disassembly, modification or repair performed by unauthorized technician or individual. • Damage caused by non-compliance with the recommended device use instructed in the User’s Manual.
-
Page 271: Specifications
Specifications... - Page 272 Operating system Android 12 MediaTek MT6761V/WB SoC, Quad-core up to Chipset 1.8 GHz RAM: 3GB Memory ROM: 32GB (Expandable to 128GB via microSD) 6.52" HD+ with 2.5D NEG Display & Touchscreen 720 x 1600 resolution 20:9 aspect ratio Rear: 8MP Camera Front: 5MP Mobile network...
-
Page 273: Appendix 1: Troubleshooting
Appendix 1: Troubleshooting Before calling the customer service, please check if any of your issue(s) with your phone is described in the following, and attempt the solutions. Issue Solution It could be the case that your Wi-Fi or Mobile Data is disabled or at a place with weak signal strength. - Page 274 If your phone is frozen and doesn’t respond, try to restart your phone. My phone seems frozen • Press and hold the Power Key and tap and doesn’t respond Restart. If the problem remains, contact authorized repair or customer service for help. Check the volume of your phone.
- Page 275 You may have to check the followings: The voice volume of your phone. You may use the Volume Up/Down Keys on the side of your phone during the phone call to see if you can hear the sound of the other party. I can’t hear the other You might be in place where signal is blocked, party over the call...
- Page 276 There are some possible causes with their respective ways to solve Your phone storage might be full • Some SMS/MMS messages may take up storage space in your phone. Clean I can’t receive text up some files to have the available message from my storage space.
- Page 277 Appendix 2: Bluetooth Profiles Supported on this Phone Defines how audio is streamed from one A2DP Bluetooth device to another. For instance, music (Advanced Audio is streamed from the phone to a Bluetooth Distribution Profile) headset. AVCTP Defines the way to transport and exchange (Audio/Video Control commands and messages for controlling A/V Transport Protocol)
- Page 278 Defines the basis for Bluetooth device discovery and connection. This profile also (General Access Profile) serves as the basis for many Bluetooth profiles. Defines the communications and functions between a handset and a mono Bluetooth (Handset Profile) headset. Functions as an extension of HSP. This profile is intended for in-car communication devices (Hands Free Profile) that support Bluetooth protocol.