Table of Contents
Advertisement
Quick Links
Advertisement
Table of Contents

Related Manuals for Teac SDB452


Summary of Contents for Teac SDB452
- Page 2 The warranty does not cover freight or insurance. In all cases of transit damage or lost, a claim must be filed against the carrier by the purchaser, even if shipment is arranged by TEAC. TEAC in- home service may also be available at a fee upon request.
- Page 3 10. No one is authorised to assume any liability on behalf of TEAC or impose any obligation on it, in connection with the sale of any equipment other than as stated in this warranty and outlined above.
- Page 4 Dealer’s Address Postcode Please ensure that your product is packed appropriately upon return to the service centre. If you have any other queries regarding service or warranty please contact the TEAC Customer Care Centre below: service@teac.com.au www.teac.com.au 1800 656 700...
-
Page 5: Table Of Contents
CONTENT Contents………………………………………………………….…………….……. Notice…………………………………………………………………………… 1.1 Warning, Caution and Note……………………………………..……………….………. 1.2 Safety and Warning……………………………………………..…………….…………... What’s in the box……………………………………………………….…….. Main Unit………………………………………………………………….……. 3.1 Front Panel……………………………………………………………………….…………. 3.2 Rear Panel……………………………………………………………….………………….. Remote Control…………………………………………………………..…… Connection………………………………………………….………….……… 5.1 Connecting to TV………………………………………………………………..…………. 5.2 Best Possible Connections……… …………………………………………...……..…. First Time Install………………………………………………………………. Digital TV……………………………………………………….………..……. 7.1 Basic Operations……………………………………………………..……………………... -
Page 6: Notice
1. Notice Read this manual carefully and make sure you understand the provided instruction well. For your safety, know what the reaction upon each action will be. 1.1 Warning, Caution and Note Pay special attention to all warnings and cautions. Warning It indicates a hazardous situation which could result in (serious) injury if it is not avoided. - Page 7 Liquids The unit should not be exposed to any liquids such as dripping or splashing. In addition, no objects filled with liquids, such as vase, shall be placed on the apparatus. Cleaning Disconnect the unit from the wall outlet before cleaning. Use a light damp cloth (no solvents) to dust the unit.
-
Page 8: What's In The Box
13. Replacement of Parts When the replacement parts are required, be sure the service technician uses replacement parts specified by the manufacturer or those have the same characteristics as the original part. Unauthorized substitutions may result in additional damage to the unit. Warnings Follow these directions in order not to damage the power cord or plug. -
Page 9: Main Unit
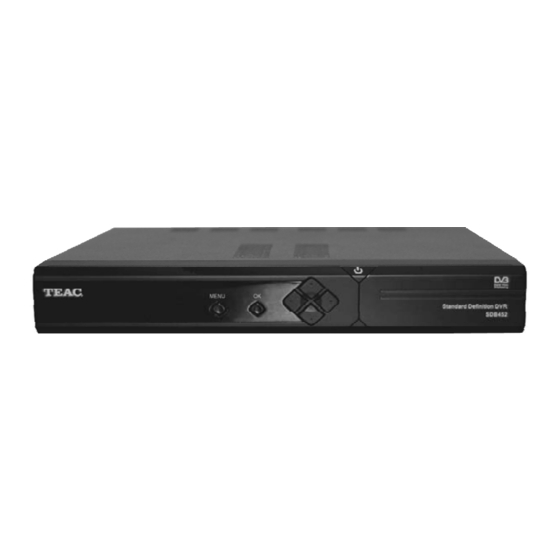
3. Main Unit 3.1 Front Panel Fig3-1 Front panel ① --- 4-digit channel displayer ② --- MENU key: Displays the main menu, or return to the previous menu ③ --- OK Key: Selects menu, or confirms the selected operation. It is also a shortcut to enter into “QUICK SELECT”... -
Page 10: Remote Control
4. Remote Control Fig4-1 Appearance of remote control... - Page 11 Ref. Keys on remote Functions POWER Switches between operation and standby mode. Audio/LR Selects audio mode: Left, right or stereo channel MUTE Turns on/off the volume. Select channel numbers. You can also use them to enter numbers and characters in menus. TV/RADIO Switches between TV and Radio mode RECALL...
-
Page 12: Connection
5. Connection 5.1 Connecting to TV Connecting to CVBS/L/R/S-Video ports: Put your unit on a firm, level surface with at least a 10 cm gap around all the sides and the TV you are going to connect it to. Turn off the mains socket your TV is plugged into or pull the plug out of the socket. Take the aerial lead out of the TV and connect it to the RF IN connector on the back panel of the unit. -
Page 13: Best Possible Connections
Use the remote controller to finish the installation. When the unit is turn on, “TEAC” logo will be displayed on the screen as shown in Fig6-1. Consequently, the “Initial Install” menu will be displayed on screen as shown in Fig6-2. -
Page 14: Digital Tv
Fig6-1 Open logo Fig6-2 “Initial Install” menu Fig6-3 Setup dialog box Fig6-4 “Channel Search” menu Press OK key, another dialogue box will pop up on screen as shown in Fig6-3. It’s recommended to choose “Yes” for auto setup at the first time. Choose “No” to exit Setup. Once you choose auto setup, “Channel Search”... - Page 15 7.1.2 Changing Channels You can change the current channel using one of the following methods: Press UP/DOWN keys to go to previous/next channel. Enter your desired channel number using NUMERICAL (0-9) keys to switch to the channel directly. Note: If the channel number you have entered is not a stored channel, you will remain in the original channel unchanged.
- Page 16 Whenever you change channel, using the UP/DOWN keys or the numeric keys, the unit displays the channel picture along with an information banner at the bottom of the screen, as shown in Fig7-3. This will remain on the screen for approximately three seconds. The information banner can also be displayed at any time while watching TV by pressing the INFO key on the remote control.
- Page 17 Fig7-7 “QUICK SELECT” menu Fig7-8 Sports sub-menu 7.1.9 Switching Between TV and Radio Channels Press TV/RADIO key on your remote control to switch between TV channels and Radio channels. Note: If you changed the TV/Radio channels, the channel list mode will also be changed. 7.1.10 EPG Besides broadcasting TV and Radio programs, some broadcasters also send information about current and future program such as: program titles, show times and brief descriptions of what...
-
Page 18: Main Menu
Fig7-9 Daily Mode of EPG Fig7-10 Extended Mode of EPG Fig7-11 Weekly Mode of EPG 7.2 Main Menu Press MENU key to enter into “Main Menu” menu, as shown in Fig7-12. There are 6 sub-menus. They are Digital TV, Movie, Music, Photo, Games and Disk Manager. Digital TV: Setup and manage TV channel and unit. -
Page 19: Channel Manager
Fig7-12 “Main Menu” of system Fig7-13 “Digital TV” menu 7.3 Channel Manager Channel Manager offers some useful functions such as channel organizer, sorting, grouping, edit and delete all. There are two independent pages for TV and RADIO channel management. You can enter the page via “Digital TV Channel Manager”, as shown in Fig7-14. - Page 20 Switching of TV/Radio channel list: Press TV/RADIO key to switch between TV channel list and radio channel list. Favorite channel edit: Press UP/DOWN keys to select a channel. Press the red key on remote control to set the favorite channel. A heart shape indicator will show at the end of the channel name.
- Page 21 7.3.2 Channel Sorting The channels can be listed according to certain sequence so that the user can easily find them. Do as the following instructions to sort the channels. 1) Enter “Channel Sorting” menu via “Main Menu ->Digital TV-> Channel Manager -> Channel Sorting”.
- Page 22 7.3.4 Edit Channel The channel names can be edited in order to remember or find them easily. Do as the following instructions to edit the channels. Fig7-19 “Edit Channels” menu Fig7-20 “Add Channel” menu Under TV mode, press TV/RADIO key to select TV or radio mode. Enter “Edit Channels”...
- Page 23 Fig7-21 Edit window Fig7-22 “Edit Channels” menu If editing a channel, the “Edit channels” menu will display as shown in Fig7-22. Edit channel name: Press LEFT or RIGHT key. An edit window will display. Input the new channel name in according to the indications on screen. Press OK to confirm and return.
-
Page 24: Installation
7.4 Installation To enter into “Installation” menu, you are required to input a 4-digit password. The default password is “0000”(four zeros). There are two kinds of Installation mode as below: Auto Search Manual Search Fig7-25 Installation menu Fig7-26 “Manual Search” menu 7.4.1 Auto Search Auto search is the most convenient way to search channels. -
Page 25: Configuration
7.5 Configuration Configuration provides individualized system setup function. You can configure the system according to your own desire and demand. You can enter “Configuration” menu via “MENU->Digital TV->Configuration”, as shown in Fig7-27. Fig7-27 “Configuration” menu Fig7-28 “OSD” menu 7.5.1 OSD In “OSD”... - Page 26 7.5.2 TV TV setup provides convenient TV settings. You can enter TV set menu via menu “MENU->Digital TV->Configuration -> TV”, as shown in Fig7-29. Fig7-29 TV setting menu All options are listed on the left of the menu. Navigate the cursor to the right if you want to change the setting for the selected option.
- Page 27 7.5.2.4 Brightness If the brightness is not satisfactory during watching, you can adjust the current brightness according to your demand. 1) Move the cursor to “Brightness” option. Press LEFT/RIGHT key to change value of the brightness and the setting will be effective immediately. Brightness can be set to 0%, 10%, 20 %, 30%, 40%, 50%, 60%, 70%, 80%, 90%...
- Page 28 7.5.3 System Setup You can enter “System Setup” menu via “MENU->Digital TV->Configuration -> System Setup”, as shown in Fig7-30. Fig7-30 “System Setup” menu 1) Press UP/DOWN key to move the cursor upward or downward to choose option; 2) Press LEFT/RIGHT key to select desired setting. 3) Once you choose the desired option, press OK key to save the setting.
- Page 29 7.5.4 Clock Via menu (MENU->Digital TV->Configuration -> Clock), you can enter into time setting options, as shown in Fig7-31. You can set clock, date, GMT offset and summer clock in “Clock” menu. Fig7-31 Date setting Menu Fig7-32 Date setting menu Move the cursor upward or downward to the option you want to set.
- Page 30 7.5.5 Wakeup Timer If you want to set channel playing at certain time or to give some hint information such as Birthday. You can set via “Wakeup Timer” menu, as shown in Fig7-33. Fig7-33 “Wakeup Timer” menu In “Wakeup Timer” menu, you can set the following options. Timer No: Set wakeup event number.
-
Page 31: Software Upgrade
7.6 Software Upgrade You can update the software of the equipment via USB port. The software of the new version can support more areas and more functions or solve more problems. Via “MENU->Digital TV-> Software Upgrade”, you can enter into “Software Upgrade” menu, as shown in Fig7-34. Insert an USB storage devise into the USB socket. -
Page 32: Factory Default
Fig7-36 In upgrading Fig7-37 “Version“ page 7.7 Factory Default If you want to restore the system settings to initial status, please enter into “Factory Default” menu via menu “MENU->Digital TV->Factory Default. Move cursor to “Factory Default” option. Press OK to start setting. You are required to enter password. -
Page 33: Usb Media Play
8. USB Media Play This unit integrates some powerful functions to support multimedia playback stored in external USB storage device such as USB flash drive and USB hard disk via USB port. This model of unit supports the file playing of music, digital photos, movies, etc. It can support the file formats listed in the following table. -
Page 34: Usb Movie
8.1 USB Movie Do as the following instructions to play movies stored in the USB storage device. In main menu, press UP/DOWN key to select “Movie” option. Press OK key to enter “Movie” menu. It will list the files or directory in the USB device. Select the desired movie file using the UP/DOWN key. -
Page 35: Usb Music
8.2 USB Music Do as the following instructions to play music files stored in the USB storage device. In main menu, press UP/DOWN key to choose “Music” option. Press OK key to enter “Music” menu. It will list the files or directory in the USB device as shown in Fig8-3. Select the desired music file in the list or directories by UP/DOWN/OK keys. -
Page 36: Usb Photo
8.3 USB Photo Do as the following instructions to play movies stored in the USB storage device. Fig8-5 “Photo” menu Fig8-6 Displaying photo In main menu, press UP/DOWN to choose “Photo” option. Press OK key to enter “Photo” menu. It will list the file or directory names in the USB device as shown in Fig8-5. Select the desired photo in the list or directories by UP/DOWN/OK keys. -
Page 37: Games
9. Games This unit has provided three built-in games. They are Box Man, Tetris and Hit Rat. Use the remote control to play the games. To enter into game function, press MENU key under digital TV mode and press UP/DOWN/OK keys via “Main Menu ->... -
Page 38: Tetris
Fig9-1 “Native Games” menu Fig9-2 Playing “Box Man” game How to play: Box Man includes 29 on-the-fly levels. To complete the levels, you must control the box-man to push all the boxes into the defined area by UP/DOWN/LEFT/RIGHT keys. Once you pass all the levels, you will win. -
Page 39: Hit Rat
Fig9-3 Main menu of “Tetris” game Fig9-4 Playing “Tetris” game 9.3 Hit Rat In “Native Games” menu, choose “Hit Rat” option, it will enter the interface shown in Fig9-5. Description for option menu: Start Game: Start a game or re-start a new game Speed N: Set the game speed. -
Page 40: Recorder
Fig9-5 Menu of “Hit Rat” game Fig9-6 Playing “Hit Rat” game Recorder The unit supports TV program recording. While watching TV program, you can record the program into the USB storage device (USB flash drive or USB hard disk) via USB port. It also supports timer recording. -
Page 41: Working Partition Setting
Fig10-1 Sample of working partition path Fig10-2 Setting working partition 4. Recording limitation The language option of Teletext, subtitle, EPG and Audio will be disabled in the process of recording. 5. Recording content The recording content only includes audio and video from current playing TV program, excludes Teletext, subtitle and EPG. -
Page 42: Start Recording
10.3 Start Recording Press REC key under TV mode to start recording. While recording, an icon will be displayed on the top-left corner of the screen (as shown in Fig10-3) for 3 seconds and then text “REC” will alternatively display on front panel with channel number. Fig10-3 In recording Fig10-4 Information for full disk Press Info key to check the recording information, e.g. -
Page 43: Signal Interruption
10.5 Signal Interruption If TV signal interrupts during recording, an icon will be displayed on the top-left corner of the screen and a message box “No or bad signal” will pop up as shown in Fig10-6. Once the signal restores, it will continue the recording. Fig10-6 Signal Interruption Note: It is suggested to record program under the condition that TV signal is good and the disk... -
Page 44: Playback
Fig10-7 Timer recording by EPG Move the cursor to “Wakeup Mode” option. It has 5 options: OFF, Message, Channel, On and Recorder. Press LEFT/RIGHT key to choose “Recorder”. Move the cursor to “Wakeup Channel” option. Press RIGHT to move cursor to the option on the right. -
Page 45: Disk Manager
File List mode: Press RECLIST key on remote control under TV mode to enter FILE LIST menu as shown in Fig10-8. Press UP/DOWN key to move cursor and select the movie file that will be played. Press OK key to play the movie file of FILE LIST as shown in Fig11-9. Please refer to the instructions in section of “USB Movie”... -
Page 46: Help And Advice
11. Help and Advice If you have difficulties using your unit and none of the suggestions below work, try switching your unit off and then on again. If this does not work, contact the shop you bought your unit from or a qualified repair technician. -
Page 47: Specification
12. Specification General Unit size(L x D x H) 230 x 170 x 32 mm Net weight 0.86Kg Power consumption 12W Max Standby power <1W System SPHE1002 32bit@200MHz Processor 8Mbit Flash memory 64Mbit Reception 147~858MHz Frequency range Signal level -87 to -20 dBm Transmission standards DVB-T, MPEG-2 Demodulation... - Page 48 TEAC AUSTRALIA PTY.,LTD. A.B.N.: 11 113 998 048 Service Providers in Australia Please contact one of the following service providers in your area if you require service for your product. For more up to date list please visit our website.
- Page 49 2209 Hans Electronic Services 147 Magellan Street LISMORE LISMORE 2480 (02)66 21 9311 (02)66 21 9711 2789 Astron Electronics 2/62 Macquarie Street LIVERPOOL LIVERPOOL 2170 (02)98 21 2190 (02)98 21 2728 2610 Robert Peatfield 2 West Street MACKSVILLE MACKSVILLE 2447 (02)65 68 2867 (02)65 68 2867 2643 Mullumbimby TV Service...
- Page 50 Name Address Phone 4240 McMahon Electrical Traders 23 Mabel Street ATHERTON ATHERTON 4883 (07)40 91 1788 (07)40 91 1741 4265 Beerwah Electronics Peachester Road BEERWAH BEERWAH 4519 (07)54 94 0466 (07)54 94 0416 4098 Bremer Television Service 36 Station Road BOOVAL BOOVAL 4304...
- Page 51 Name Address Phone 5142 The Television Workshop Shop 1, 14 Elder St Centre ALICE SPRINGS ALICE SPRINGS 0870 (08)89 52 8555 (08)89 52 5557 5193 New Age Electronics Unit 1/21 Delatour Street COCONUT GROVE DARWIN 0810 (08)89 48 1755 (08)89 48 1766 Name Address Phone...
- Page 52 (08)96 22 3168 5408 Kabelco Electronics Unit 3 / 55 Murray Street NURIOOTPA NURIOOTPA 5355 (08)85 62 3833 (08)85 62 3877 6010 TEAC Perth Service Centre 30 Hargreaves Street BELMONT PERTH 6104 (08)94 79 6499 (08)94 79 6544 6919 Charles Hunt Electronics...
- Page 53 TEAC CUSTOMER CARE CENTRE (TCCC) Free call: 1800 656 700 Between Monday to Friday – EST 9AM to 5PM...