
Related Manuals for PANNOMED VET LIFT 7H9.6P1


Summary of Contents for PANNOMED VET LIFT 7H9.6P1
- Page 1 Instruction Manual VET LIFT VET LIFT INSTRUCTION MANUAL For optimal and safe handling of the product, thoroughly reading and following the present Instruction Manual is essential. Page 1 of 27 Version 2.02...
- Page 2 Instruction Manual VET LIFT Instruction Manual for VET LIFT Veterinary Treatment and Surgery Equipment Item code.: 7H9.6P1 VET LIFT movable (double castors) with stationary top 7H9.6P2 VET LIFT movable (double castors) with tilting top 7H9.6P5 VET LIFT fixed (one-sided castors) with stationary top 7H9.6P6 VET LIFT fixed (one-sided castors) with tilting top 7H9.6P7...
-
Page 3: Table Of Contents
Instruction Manual VET LIFT Table of contents Scope of application ........................4 Technical specifications ........................5 Installation guidelines ........................6 Operation and handling ......................... 7 Height adjustment (electrical or battery-powered version) ........... 7 Height adjustment (hydraulic version) ..................7 Adjustment of the tilting mechanism (version with tilting top) ..........8 Maneuverability (movable version with double castors) ............ -
Page 4: Scope Of Application
Instruction Manual VET LIFT Scope of application According to its specifications, options and accessories, the present equipment is intended for exclusive use in veterinary examinations, treatments as well as surgeries within a veterinary clinic, veterinary practice, or other veterinary facilities. Intended purpose of Instruction Manual This instruction manual is intended to introduce you to the use, maintenance, servicing, and safety of your new, veterinary device. -
Page 5: Technical Specifications
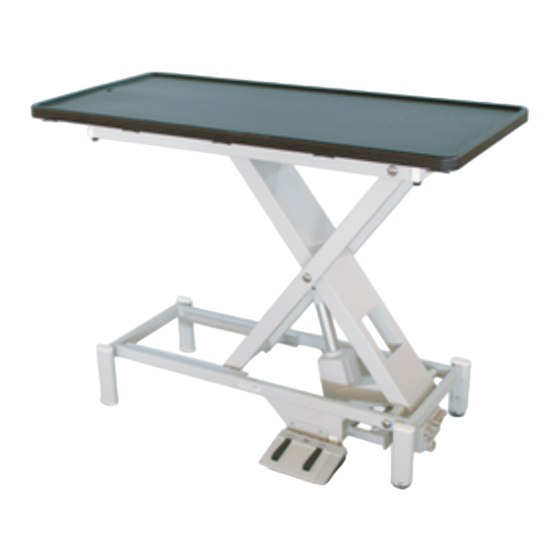
Instruction Manual VET LIFT Technical specifications Table top length: 1300 mm (= 51.2 inch) Table top width: 600 mm (= 23.6 inch) Height adjustment: from ca. 310 – 1010 mm (=12.2 – 39.8 inch) Maximum load capacity (electric): 120 kg (= 265 lbs) Maximum load capacity (hydraulic): 100 kg (= 220 lbs) Net weight:... -
Page 6: Installation Guidelines
Instruction Manual VET LIFT Installation guidelines Before the initial operation of your product (only necessary for electric or battery-powered versions), the supplied foot switch and console must be mounted and connected to the device. The foot switch console can be mounted on any longitudinal side of the base frame of your product using the two screws included in the scope of delivery as well as the Allen key. -
Page 7: Operation And Handling
Instruction Manual VET LIFT Operation and handling The adjustment of the product is usually carried out either by a foot switch or a hydraulic pump, depending on the selected product configuration. These operational elements are attached to the side of the table. Consequently, the corresponding mechanism must be operated to adjust the height of the table. -
Page 8: Adjustment Of The Tilting Mechanism (Version With Tilting Top)
Instruction Manual VET LIFT Lifting (Pumping) Lowering (Hold) For lowering the table top, press the left (shorter) pedal. When doing so, however, it is necessary to push this pedal and hold it down until the table top has again reached the desired height. -
Page 9: Maneuverability (Fixed Version With One-Sided Castors)
Instruction Manual VET LIFT Moveable (push lever up) Fixed (push lever down) Should the product be returned to a movable configuration, the lever between the two castors of each table leg must be pushed upwards again. It is explicitly pointed out at this point that for a firm and stable positioning of the product (especially during operation as well as regular use), all four double castors must be blocked in order to enable a safe positioning of the table. -
Page 10: Charging The Table (Battery-Powered Version)
Instruction Manual VET LIFT A suitable power cord including a power plug is included in the scope of delivery. To avoid injuries and other malfunctions, only connect the power cord to a power circuit when the table is actually in operation. Charging the table (battery-powered version) In case you have chosen a battery-powered version of the present product, a sophisticated battery system has already been pre-installed within your table. -
Page 11: Weighing Functionality (Version With Integrated Scale)
Instruction Manual VET LIFT The supplied power charger has to be connected to the external power socket on the one hand and to the socket on the battery's front with the connector on the other hand during the charging process, as well as disconnected again after the charging process is finished. Having a second spare battery plugged into the charger meanwhile proves to be very useful in this case. - Page 12 Instruction Manual VET LIFT Before the first use of your product, the batteries must be inserted into the display of the scale and subsequently the display mounted onto the table. To do so, proceed as described in the following illustrations. Prior to inserting the batteries, the cover flap on the rear side of the scale display must be opened.
- Page 13 Instruction Manual VET LIFT The functionality and operation of the scale via the display is described on the following pages by the instructions of the relevant manufacturer. Thereby, especially the general safety instructions for the scales must be followed meticulously beforehand. Particularly, the following recommendations of the scale manufacturer must always be complied with: ➢...
- Page 14 Instruction Manual VET LIFT Page 14 of 27 Version 2.02...
- Page 15 Instruction Manual VET LIFT Page 15 of 27 Version 2.02...
- Page 16 Instruction Manual VET LIFT Page 16 of 27 Version 2.02...
-
Page 17: Error Handling & Troubleshooting
Instruction Manual VET LIFT Error handling & Troubleshooting This section describes how to proceed if a problem or error occurs with your panno-med product. Please follow the steps and recommended actions in detail. In case none of the described solutions and recommendations achieve the desired result or eliminate the existing problem, as well as in case of any further queries, please contact the authorized distributor from whom you purchased your panno-med product. -
Page 18: Cleaning And Disinfection Instructions
Instruction Manual VET LIFT Cleaning and disinfection instructions Regular and proper cleaning ensures an extensive lifespan of your product. Failure to comply with the cleaning measures as recommended may result in serious infection hazards! The present product is equipped with either a stainless steel or synthetic top as well as a powder-coated steel chassis or a frame made of top-quality, electropolished stainless steel. -
Page 19: Cleaning Synthetic Top
Instruction Manual VET LIFT Never use steel wool or steel brushes, as otherwise micro particles could penetrate the surface of the stainless steel top and cause corrosion. If necessary, only use nylon or other plastic brushes. To remove calcium deposits or such limestones, preferably use vinegar and subsequently rinse the surface with clean water. -
Page 20: Special Cleaning And Care Instructions (Stainless Steel Versions)
Instruction Manual VET LIFT Special cleaning and care instructions (STAINLESS STEEL versions) In case you have chosen a VET LIFT with a stainless steel frame, the following instructions for cleaning the stainless steel frame are applicable in supplement to the general cleaning and care instructions already provided above. - Page 21 Instruction Manual VET LIFT Page 21 of 27 Version 2.02...
- Page 22 Instruction Manual VET LIFT Page 22 of 27 Version 2.02...
-
Page 23: Maintenance & Repair
Instruction Manual VET LIFT Maintenance & Repair Repair work may only be carried out by personnel who have been authorized by the manufacturer. In the event of a malfunction or deficiency, the device can only be repaired by a qualified technician approved by panno-med. -
Page 24: Spare Parts And Accessories
Instruction Manual VET LIFT Spare parts and accessories Use only spare parts or accessories which have been approved by panno-med. Do not make any modifications to the product without prior permission from the manufacturer: Any modification may result in unpredictable and unanticipated malfunctions and thus in damage or injury to the patient. - Page 25 Instruction Manual VET LIFT Accessories & Supplies Product description Item code OP-rail long side (1 unit) 602.596 OP-rail short side (1 unit) 602.597 OP-rails long side (1 pair) 602.598 OP-rails short side (1 pair) 602.599 OP-rails (set of 4 pieces) 602.600 Tie-down cleat 602.601...
-
Page 26: Safety Responsibility
Instruction Manual VET LIFT Safety responsibility Responsibility for ensuring that the product guarantees the safety of the patient during its entire lifespan resides with the person instructed in the use of the product. Furthermore, we recommend that all mechanical functions are checked before each operation. If you suspect that the device is damaged or not functioning correctly, discontinue its use immediately. -
Page 27: Special Warnings
Instruction Manual VET LIFT Special warnings Trapping or pinching is possible at various spots on the product. Particular attention must be paid that: • Parts of the patient’s body are not located within this range • Parts of the user’s body are not located within this range or •...