Table of Contents
Advertisement
Quick Links
Advertisement
Table of Contents

Related Manuals for C.Nord GSM

Summary of Contents for C.Nord GSM
- Page 1 Nord GSM / Nord GSM WRL Operation manual October 12, 2018...
-
Page 2: Table Of Contents
Contents 1 Technical Description 1.1 Purpose and Capabilities ......... . 1.2 Power Supply . - Page 3 3.7.2 Check of GSM Signal Level ........
- Page 4 ......5.8.5 Transmission Parameters via GSM voice channel ......
- Page 5 6 Remote Access to Device 6.1 Description of Remote Access Technology ....... . . 6.1.1 Communication Channel Device Receiver...
-
Page 6: Technical Description
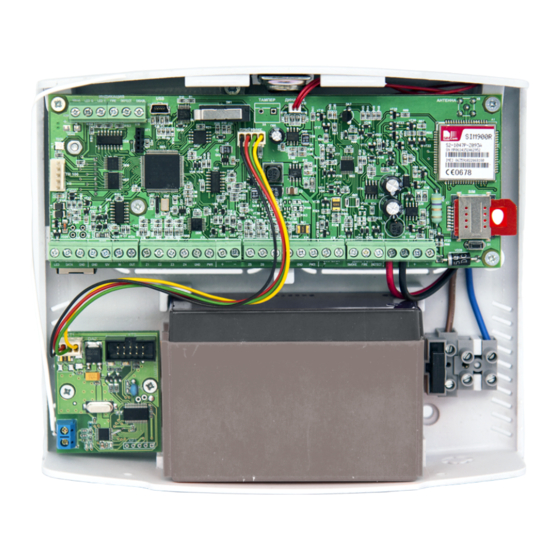
Purpose and Capabilities The “Nord GSM” device is intended for operation as the head unit of the security and fire complex - the receiving and monitoring security and fire alarm device (PKKOP), installed in the premises at the protected sites. -
Page 7: Notification Channels
“TR-100 OUT” of the product (for the product in a metal case). The product in a plastic case is equipped with a small GSM stub antenna without a feeder with an angular connector of SMA-male type, connected to the connector type of SMA-female type. For products in a plastic case, it is possible to connect a remote dipole antenna (with a connector of the same type) to improve the communication quality with the base station of the carrier. -
Page 8: Main Technical Characteristics
The number of wireless (stand-alone) terminal units supported by the product when installing the radio channel signaling zone extension unit CN-WRL is up to 31; For joint operation with the product in the version of the “Nord GSM/WRL” (with the installed radio expander CN-WRL), the following radio channel terminal units can be used: –... -
Page 9: Scope Of Delivery, Marking And Package
- 0,6; Scope of Delivery, Marking and Package 1.6.1 Scope of Delivery Receiving and monitoring security and fire alarm device “Nord GSM”/“Nord GSM WRL” 1 pcs. Output resistor 0.25 W (0.16 W) - 2.2 kOm 16 pcs. Output resistor 0.25 W (0.16 W) - 4.3 kOm 16 pcs. -
Page 10: Marking
Plastic battery retainer with a capacity of 1.2 Ah in the product case 1 pc. Grounding set ZK-15 (m) 1 pc. Set of fasteners (m) 1 pc. Remote GSM antenna 2J520-SMA-male (or similar) (m) 1 pc. Certificate 1 pc. Packing 1 pc. -
Page 11: Device Control
Device Control The following control devices can be used to for the device arming/disarming: TM-key; keypad K14-LED; keypad K16-LCD; wireless keyfob CN-Keyfob; mobile application MyAlarm. TM-Key Figure 1: TM-reader and TM-key The device has a built-in interface for connecting the TM-key readers. In addition, the device provides the ability to connect the LED indicator, which is located directly in the case of some models of TM-key readers. -
Page 12: Disarming Indication
2.1.3 Disarming Indication If the key, with which you can change the partition status and this partition is armed, is read, then the partition is disarmed. The disarming is indicated after the reading is completed. Disarming indication: the LED turns on for 5 seconds and turns off. After the disarming indication is displayed, the standby mode indicator is enabled. -
Page 13: K14-Led Keypad
One Partition If only one partition is configured in the device, then the LED indicates the partition status, the presence of an alarm during protection and faulty zones: LED is on continuously if the partition is armed; LED is not on if the partition is disarmed; the LED “flashes”... -
Page 14: Getting Information About Site Status
Using the K14-LED keypad, the user can perform the following tasks: check the partition status (armed/disarmed); arm or disarm a partition; check about the beginning or active exit or entry delay; check the protection state of the entire device; The K14-LED keypad has green and red LEDs: the red LED is on continuously if all device partitions are armed;... - Page 15 Figure 3 If several partitions are assigned to the user code, then first the user shall click the “house” button, select the partition, which state he/she wants to change, and then type the code. Figure 4: Example of partition arming Arming Rejection “Arming rejection”...
-
Page 16: Sound And Voice Indication
2.2.4 Sound and Voice Indication The keypad has a built-in speaker, through which the voice indication and beep indication are made. Pressing the buttons on the keypad is accompanied by a beep that confirms the press. The voice indicates the following: Arming and disarming of the partitions and the entire site;... -
Page 17: K16-Lcd Keypad
K16-LCD Keypad Figure 7: K16-LCD Keypad Using the K16-LCD keypad, the user can perform the following tasks: check the partition status (armed/disarmed); arm or disarm a partition; check about the beginning or active exit or entry delay; check the entire device status; find out if there is a power failure of the device;... -
Page 18: Led Indication
If arming is enabled, then arming is performed, or the exit delay interval is started, which is accompanied by a sound, LED and screen indication. If arming is prohibited, then a sound indication of the rejection is made, and the reason for which the arming is impossible is displayed on the keypad screen. -
Page 19: Sound Indication
”Emergency” LED The LED is intended to indicate the absence of main power, as well as a malfunction of the backup power source: the LED is on if the main power is present and the backup power source is missing, discharged or defective; the LED “flashes slowly”, if there is no main power;... - Page 20 The line is displayed if the device case is open. OPEN CASE! The line is displayed if a fault is detected in the wired or wireless zone connected NN ZONE FAULT to the device: an open or short circuit in the zone, no communication with the wireless device, discharged power supply of the wireless device, etc.
- Page 21 Disarming Indication If the disarming is allowed, then DISARMING... is displayed on the first line of the keypad screen for 3 seconds, after which the keypad screen switches to the standby mode corresponding to the device security status. If according to the site settings in the Security Center software the user shall be informed about the need to pay for security services during arming and disarming, the second line of the keypad screen displays the phrase FOR SECURITY! .
-
Page 22: Cn-Keypad Wireless Keypad
The device state can be controlled or its status can be recognized using the “CN-Keypad” wireless keypad. All wireless devices are connected to the “Nord GSM” device via the CN-WRL expander. To add a keypad to the device configuration, it is necessary to do the following. -
Page 23: Arming And Disarming
Figure 9: Battery compartment of the CN-Keypad keypad The device can connect no more than four wireless keypads, and the device can work with all simultaneously. 2.4.1 Arming and Disarming The device has the ability to arm and disarm several partitions with one user code. The partitions that can be armed or disarmed with a specific code are configured during the device configuration. -
Page 24: Getting Information About Status
Arming Rejection “Arming rejection” is the impossibility to arm the site, if the security alarm on the site is faulty, or arming is prohibited due to lack of payment for security services. There are the following reasons for arming rejection: malfunction of one or more zones;... -
Page 25: Panic Button
The MyAlarm application is available only to security company customers. With the help of the mobile application, it is possible to control the state of “Nord GSM” devices, operating over GPRS or Ethernet. To do this, it is necessary to give access to the site in the Security Center software to the person in charge. -
Page 26: Installation And First Start
Installation and First Start Device Wiring Diagram Figure 14... -
Page 27: Connection Of Wired Zones
Connection of Wired Zones The signal cables of the zones are connected to the terminals “Z1”-“Z8”. The common zone cables are connected to the “GND” terminals. The plus power supply cables of the security zones (12 V) are connected to the “PWR” terminals. The plus power supply cables of the fire zones (12 V) are connected to the “SMOKE”... -
Page 28: Zone With One Terminating Resistor
Figure 16: Normally closed zone 3.2.4 Zone with One Terminating Resistor Figure 17: Normally open zone Figure 18: Normally closed zone 3.2.5 Zone with Two Terminating Resistors Figure 19: Normally open zone... -
Page 29: Wired Zones In Configurator
Figure 20: Normally closed zone 3.2.6 Wired Zones in Configurator When configuring the device, it is necessary to explicitly specify the rate for the wired zone, and the number of terminating resistors. It is possible to do this on the “Zones” tab. -
Page 30: Connection Of Fire Detectors
Connection of Fire Detectors 3.3.1 Four-wire Fire Detectors The signal cables to which the four-wire fire detectors are connected are connected to the terminals “Z1”-“Z8”. The common zone cables are connected to the “GND” terminals. If it is necessary to reset the power of the fire detectors after an alarm, the plus power cable of the zone shall be con- nected to the SMOKE terminal. -
Page 31: Connection Of Temperature Sensors
Connection of Expander “EW-12” “EW-12” is an expander of the wired zones for the “Nord GSM” control panels, with its help it is possible to increase the number of zones up to 16 or the number of outputs of the “open collector” type. - Page 32 Figure 24: EW-12 Connection to Device The expander is connected to the device via group of terminals “Reader”, which is located on the left edge of the device terminals: the “1WR” terminal of the expander is connected to the “DATA” terminal of the device, and the “1WR GND”...
- Page 33 Figure 25: Diagram of ”EW-12” connection to device If the expander is connected correctly, the LED on it shall flash, zones will appear in the configurator automatically on the Zones tab. Expander Power The expander is powered via terminals marked “GND PWR” and “+ 12V”. Power can be supplied in two ways: From the device itself, it shall be noted that the maximum load is 200 mA.
- Page 34 As in the device, up to two resistors can be connected to each zone in the expander. Resistor ratings and wiring diagrams are listed in the Connection of Wired Zones section. Each of terminals “Z1”-“Z8” can be a zone or an open collector output, which is indicated when configuring the control panel: If the zone is disabled in the configurator, then it can be used as an open collector.
-
Page 35: Connection Of Expander "Ew-8
Connection of Expander “EW-8” Figure 26: Diagram of “EW-8” connection to device... -
Page 36: Gsm Channel Setting
Figure 27: Diagram of connection of two zones via “EW-8” GSM Channel Setting The device is equipped with an built-in GSM-modem, which can work alternately with one of the two installed SIM-cards. 3.7.1 SIM Card Installation The SIM card holder is located on the right side of the device board. -
Page 37: Check Of Gsm Signal Level
Hubble Configurator “State panel” tab. For more information on checking the communication channels, see section 5.14. If the GSM signal level is weak, it is necessary to move the device to another location, or to install a remote GSM antenna. 3.7.3... -
Page 38: Connection Of Touch Memory Reader
Connection of Touch Memory Reader The device has a built-in interface for connecting the TM-key readers. It is possible to can add up to 32 TM keys to the device. Touch Memory reader is connected to the device to LED, DATA and GND terminals of the “Reader” group. Figure 28: Touch Memory card reader connection diagram Instead of the TM-reader, it is possible to connect any reader with the Dallas Touch Memory protocol emulation (DS1990A). -
Page 39: Software Update
USB. The software package that will be required to connect the device to the computer and update the software version can be downloaded from the official support site of C.Nord company(support.cnord.ru), from page Files for download The package for updating the software version of the devices comes in the form of a zip-archive with the name of type CnordFirmware-YYYYMMDD-XX.XX.zip, where YYYYMMDD is the release date of the software,... - Page 40 Figure 30 Figure 31 Right-click on the Soyuz CDC device and select the menu item “Update drivers”.
- Page 41 Figure 32 Reject the proposal to automatically find the driver for the new hardware, select the driver installation manually. Figure 33: Selection of manual installation Specify the path to the Driver folder and click Next.
- Page 42 Figure 34: Selection of driver location The driver for the Nord GSM device does not have a digital signature. Therefore, you shall explicitly confirm to the operating system the need to install it. Figure 35: Confirming the driver installation without a digital signature...
- Page 43 Figure 36: Completing the driver installation To make sure that the driver for the device is installed, open the Windows Device Manager and find the virtual serial port that corresponds to the device connected to the computer. Figure 37: Device serial port of in the ”Device Manager”...
-
Page 44: Driver Installation In Windows 8
Driver Installation in Windows 8 Windows 8 operating system does not allow you to install drivers without a digital signature, as it was possible in previous versions. Therefore, before installing the driver for the device in this operating system, load it in a special mode - with the mandatory check of driver signature disabled. - Page 45 Figure 40: Advanced diagnostics parameters In the “Additional parameters” window, select “Boot parameters”: Figure 41: Operating system boot parameters In the “Boot parameters” window, left-click the “Reboot” button:...
- Page 46 Figure 42: Reboot The operating system will reboot again, after which the “Boot parameters” window will appear. In this window, press the F7 button to continue loading the operating system with driver signature verification disabled: Figure 43: Disabling mandatory driver signature verification After the operating system starts, install the device driver in the same way as in the operating systems Windows XP/Windows 7.
-
Page 47: Utility To Update Software
Utility to update software The executable utility file is called CnordFirmware.exe, this file shall be run to update the software version of the device. After the start, the utility searches for the device that is connected to the computer, determines its type, and displays the version of the software that is installed on it: Figure 44: Display of software version on the device If the software version on the device is smaller than the version of the update, it is necessary to update the firmware... - Page 48 Figure 46: Software version update is complete After that, the utility for updating the firmware via USB can be closed. If an error message appears during the update process, it is recommended to disconnect the device from the computer, close the utility for updating the firmware, then reconnect the device to the computer and start the utility.
-
Page 49: Device Configuration
Device Configuration A special configurator, called “Hubble”, is used to configure (change settings of) the device. The current version of the configurator can be downloaded from the official support site of C.Nord company (support.cnord.ru), from page Files for download The configurator is supplied as a zip-archive with the name hubble-X.XX.zip, where X.XX is digits corresponding to the configurator version. - Page 50 The “Record” button is needed to save the configuration changes made in the configurator to the device. The “Save. . . ” button is designed to save the current settings to the file, which are displayed in the configurator. Use the “Open. . . ” button to load the settings from the file. To avoid errors related to setting up communication channels, it is recommended to save all settings related to connection to the Security Center and Cloud to the file on the disk, and begin to configure the device installed on the site with loading the file with these settings to the configurator.
-
Page 51: Tab Panel
Adapter module is connected to the device. The parameters of cellular operators, such as the access point name (APN), user name and password for access to packet data services, can be changed on the “GSM Operators” tab. The “Automatic controls” tab is intended for programming the device behavior de- Figure 48: Tab panel pending on various conditions. -
Page 52: Zones
Expanders Without the use of additional equipment, up to 8 wired zones can be connected to the “Nord GSM” device. If the EW-8 or EW12 expander of wired zones is used, the number of wired zones can be increased to 16. -
Page 53: Turning Zone On And Off
5.3.3 Turning Zone On and Off The on/off button of the zone is in the left column, just behind the zone number. The button color reflects the current status of the zone: if the button is green, the zone is on, if the button is red, then it is off. The inscription on the button corresponds to the operation that will be performed when the button is pressed: the green button says “Disable”, because when the button is pressed, the zone is turned off, and the red button says “Enable”, because when the red button is pressed, the zone is turned on. - Page 54 Differences between the types of wired zones are shown in the table below: Zone type Event codes Arming/disarming Siren Note E130 / R130 Arm without siren E146 / R146 Bypass E130 / R130 Zone alarm is specially handled during arming and disarming (see below).
-
Page 55: Zone Normal State
The alarm repeat interval set for the device is not used for this type of zone. Instead, it is set to a value of 5 seconds. Thus, pressing the panic button again not earlier than after 5 seconds will result in the transition of another event to the panel. -
Page 56: Exit Delay
armed or disarmed: they are always armed. As for the “Bypass” zone, the zones of this type are handled during arming or disarming in a special way, as described above, in the section “Zone Types”. “Probable Alarm” Event If the zone with entry delay is violated, the device certainly generates the “Probable alarm” event (** E138 **). The number of the violated zone and the smallest number of the part, into which this zone is included, are transmitted as the event arguments. -
Page 57: Wireless Devices
Use the “Wireless devices” tab to record wireless devices and their parameters, such as type, entry delay, exit delay, etc. All wireless devices are connected to the “Nord GSM” device via the CN-WRL expander. The expander supports connection of 31 devices. The entire list of devices is on the [site] (https://shop.cnord.ru/sn.html). -
Page 58: Assembly Instructions
After at least one repeater is connected to the device, on the “Wireless devices” tab in the column “Via repeater” for each device it will be possible to select how it shall transmit signals to the device: directly or via the specified repeater. -
Page 59: Users
Users On the “Users” tab, the users of the site are created. It is possible to create up to 32 users in the device, and each user, in addition to personal code, can also have wireless keyfobs and TM-keys. Figure 52: “Users” tab To create a new user, it is necessary to click the Add user button and enter the code in the new window, which the user will use when arming or disarming the site. - Page 60 Figure 55: “Users” tab, manually adding TM-key number If the wireless keyfob is attached to the device, it is possible to add it to a specific user using the Add keyfob button. Connect the wireless keyfob to the device on the “Wireless devices”...
-
Page 61: Partitions
Partitions The “Partitions” tab configures the partitions of the site. It is possible to create up to 32 partitions i the device with the possibility of their independent arming and disarming. Figure 57: “Partitions” tab To create a partition, click the “Add partition” button. Each partition is assigned its own number, the numbers are given sequentially from 1 to 32. -
Page 62: Miscellaneous
Miscellaneous On the “Miscellaneous” tab, it is possible to specify various parameters that determine the device operation. 5.7.1 Intervals Figure 58: “Miscellaneous” tab, “Intervals” section Interval for repeating alarms Use the “Interval for repeating alarms” parameter to specify the interval with which the device will generate similar alarms and transmit them to the receiver. - Page 63 The “Do not repeat” value means that a repeated zone alarm can only be transmitted after a reset of the previous alarm is transmitted on the zone. The “Interval for repeating alarms” parameter does not relate to the alarms that are generated when the device tamper is triggered.
- Page 64 The argument for the event with code E754 is the type of communication channel that stopped the event transfer (1 – Ethernet or GSM, 3 – radio). The argument value is transferred to the field assigned to the zone or user number.
-
Page 65: Siren
5.7.2 Siren Figure 59: “Miscellaneous” tab, “Siren” section ** Siren connected** If the siren is connected to the same name output “Siren”, then it is necessary to check the appropriate box. This will turn on the monitoring of the communication line with the siren, which allows to detect break and short circuit of the line, both with the siren turned off... -
Page 66: Arm And Disarm
Check battery quality. To check the battery quality, the device periodically connects the load and monitors the voltage drop. If the voltage drop under the load exceeds 2 V, the event E309 - Faulty battery is generated. If UPS is connected Figure 61: “Miscellaneous”... -
Page 67: Control And Indication
Automatic controls tab. Rif-KTM (C.Nord) keypad connected If Rif-KTM (C.Nord) wireless keypad is used, it is necessary to check the corresponding box to ensure that the keypad display is working correctly. User codes containing 6 numbers To use six-digit codes for arming and disarming, first it is necessary to set this parameter, and then create users. - Page 68 Figure 64: “Miscellaneous” tab, “Configuration protection” section Password for access to the device Mandatory password authentication during connection to the device via USB is another way to ensure security. By default, the password for connecting to the device via USB is 0000. To increase security, it is necessary to change the default access password to a new one.
- Page 69 Figure 67: “Miscellaneous” tab, “Configuration protection” section, warning about enabling ”Theft protection” The “Theft protection” function can be enabled both for USB connection and for remote programming. It is possible to disable the “Theft protection” function only by contacting the company technical support with an official request to “C.Nord”.
-
Page 70: Security Center
Security Center Settings that the device Security Center use when transmitting events via GSM and Ethernet channels can be specified on the “Security Center” tab. 5.8.1 Device Identification Figure 68: “Security Center” tab, “Identification” section In the “Identification” section it is possible to specify the number of the site that will be used when transmitting events from the device. -
Page 71: Gprs Transmission Parameters
To receive events from the device via TCP/IP (GSM/GPRS and Ethernet) in the Security Center software it is necessary to use the “C.Nord GSM (CML)” event source. This source of events can be added or it can be changed in the “Event manager” module. -
Page 72: Transmission Parameters Over Ethernet
Figure 72: Menu of settings window of event source service Figure 73: Event settings window of “C.Nord GSM (CML)” See more information about the parameters of the source of events for “C.Nord GSM (CML)” in the documentation for the Security Center software. -
Page 73: Transmission Parameters In Gsm Csd-Channel
“Security Center” tab, partition “Transfer via GSM CSD channel” In the “Transfer via GSM CSD channel” section it is possible to specify the phone numbers that will be used for dialing to the receiver when transmitting events in the GSM CSD channel. -
Page 74: Sms Transmission Parameters
Reception of Events in Security Center To receive events from the device via the SMS channel in the Security Center software it is necessary to use “GSM Events Source”. This source of events can be added or it can be changed in the “Event manager” module. - Page 75 Figure 77: Diagram of communication channel switching The order of switching IP channels in the absence of events is shown in the figure with blue dashed lines. Black solid lines show the scheme for switching all configured channels when there are events for transmission.
-
Page 76: Radio
Radio “Nord GSM” can transmit events to the receiver not only via GSM and Ethernet, but also via the radio channel. Radio transmission can be done both in the duplication mode, when all events are always sent by radio, and in the backup mode, when the events are transmitted by radio if there is no IP communication with the receiver. -
Page 77: Partition Site Numbers
CN-WRL wireless expander. Thus, up to 16 wired zones and up to 31 wireless devices can be connected to the “Nord GSM” device in the metal case; it is possible to install a battery of a larger capacity - up to 7.2 A*h. -
Page 78: Cloud
On the “Cloud” tab it is possible to choose to which “Cloud” the device shall be connected. If you use the public “C.Nord Cloud” for work, then everything is simple - you need to click the button with the same name: Figure 80: ”Cloud”... -
Page 79: Ethernet
5.11 Ethernet The tab is used to display and change the connection settings over the Ethernet network. The “Ethernet” tab is displayed in the configurator only if the “Ethernet Adapter” is connected to the device. The tab displays the MAC address that is used by the Ethernet Adapter. This information can be useful if the settings for connecting to a public network are set individually for each device. -
Page 80: Gsm Operators
Figure 86: ”GSM Operators” tab, operator settings. By default, the configurator lists the most common carriers. Before starting the device via GSM it is important to make sure that the parameters of the SIM card used in the device are indicated. If there are no parameters for the selected carrier in the listed blocks, it is necessary to specify them manually, by filling in the fields Name, PLMN,... -
Page 81: Automatic Controls
5.13 Automatic controls “Automatic controls” mechanism is designed to program the behavior of the device depending on certain conditions. Any events formed by the device or time can act as the conditions. Arming or disarming and actions with open collectors are actions that the device can perform. Automation can be used to solve the following tasks on sites: scheduled arming and disarming;... - Page 82 Figure 88: Light indicator connection to the device If the EW-12 expander is connected to the Nord, then the terminals “Z1” - “Z8” of the expander can be used. Any light indicator with a voltage of 12 V can be connected to the devices. The maximum current shall not exceed 250 mA.
-
Page 83: Siren
The light indicator is continuously lit if all partitions are armed; The light indicator does not light if at least one of the partitions is disarmed; The light indicator flashes if there is at least one partition in the alarm; The light indicator flashes with double flashes during the exit delay. - Page 84 Figure 91: Window for creating rule Rule setting Let’s consider setting up rules for a specific example. Task Configure arming of partition No. 1 on a schedule at 19.30 on Tuesdays and Wednesdays. Solution To solve the task, it is necessary to create an action that arms the partition on a schedule. 1.
- Page 85 Figure 92: Window for creating rule 7. Click “OK” to save the rule. The rules will take effect after recording the settings in the device. Figure 93: All created rules In this example, automatic arming is considered, but it is possible to specify the site disarming as an action. In this case, the site will be disarmed according on a specified schedule.
-
Page 86: Event History
5.14 Event History The tab is intended for displaying events that are stored in the device non-volatile memory. Figure 94: “Event history” tab To load events from the device to the configurator, click the “Update” button. The list of events that is displayed on the “Event history” tab is not automatically updated: to see what changes have occurred in the history of events over time, click the “Update”... -
Page 87: State Panel
5.15 State panel When performing work on the installation of a site, the engineer usually needs to check that the placement and connection of the sensors is correct and there are no malfunctions in their operation. In the configurator, the “State panel” tab displays the current information on the status of wired zones, wireless devices connected to the device, and the status of communication channels. -
Page 88: Wireless Devices
Figure 97: “State panel” tab, Zones in states: norm, alarm, short circuit, break 5.15.3 Wireless devices For wireless devices, the following information is displayed in the “State panel”: Evaluation of the communication quality; Current status of the device. Figure 98: “State panel” tab, at the top - icons of wireless devices, at the bottom - detailed information Device status The “Wireless devices”... - Page 89 All the above functions require a compatible remote software, for example, “Security Center”. In addition, to operate the functions of remote firmware update, configuration and arming/ disarming by the user, it is necessary to connect the device to the “Cloud” (C.Nord public cloud - cloud.cnord.net - or the private Cloud of the security organization).
- Page 90 In case of using the public “Cloud” the device connects to the “Cloud” via the Internet. If the Private Cloud is used, it is possible to connect through dedicated internal subnets of GSM carriers or local Ethernet networks. To operate all service functions, the device shall have IP connection with the “Cloud” via Ethernet or GPRS.
- Page 91 Figure 100 In the opened window fill in all fields with information about the engineer: Figure 101 Pay particular attention to the “Email” field. It is to the e-mail address specified in this field that an email will be sent with a link where the engineer will need to go to complete the registration of the account in the “Cloud”. The engineer’s email serves to identify him in the “Cloud”.
- Page 92 6.2.2 Granting Permissions to Engineer To give the engineer permission to remote access to equipment installed on the site in the Security Center software, the following actions shall be performed: 1. Run the “Site manager” module 2. Select the site to which you want to allow remote access 3.
- Page 93 Figure 104 This tab displays a list of sites that are available to the engineer for configuration at the moment. The list and duration of the permissions are set in the Security Center software. To configure, click the corresponding site number. 6.3.2 Working with Configuration The opened window for setting up the device is similar to the configurator intended for setting up the device...
- Page 94 Information about Sites on Receiver To remotely update the “firmware” in devices, the tab “Site software update” is located in the engineering panel: Figure 106 This tab displays statistics on software versions, grouped by device types. For example, for the “Nord GSM” device:...
- Page 95 Figure 107 20 “Nord GSM” devices work for this receiver Current software version for “Nord GSM” - 5.40 10 devices are currently working on the old version, of which: – 6 - marked red - no plans to update – 4 - marked yellow - are in the process of updating 10 devices work on the current software version for this equipment To open the software update page on devices of this type, click the “Update .
- Page 96 6.4.3 Updating Software on Selected Site If it is necessary to check the functions of the new software version on one or more sites before mass installation, it is possible to use the software update on the selected site. To do this, click the “Update using site number. . . ” button on the software update page: Figure 108 In the dialog that appears, enter the site number for the update: Figure 109...
- Page 97 6.4.5 Update Process Stopping If for some reason there is a need to stop the update process, it can be interrupted until the device has completely downloaded the update file. To do this, click “Cancel update. . . ” and confirm the action.
- Page 98 Event codes Contact ID EPAF Event Note E110 Fire Fire alarm E118 Warning Fire danger E120 Alarm Panic button E121 Alarm Forced disarming E130 AA..DR Alarm Armed zone E133 AA..DR Alarm 24-hour armed zone E137 Alarm Open device case (tamper) E138 Warning Possible alarm...
- Page 99 E474 – Arming rejection Fault in E475 – Arming rejection Alarm in zone which is included in partition to be armed E476 Arming rejection Open device body E499 QT..23 Disarming Disarming from receiver E521 – System Siren is disabled in settings E601 Test Event is generated when channel is enabled in state panel...
- Page 100 R384 DS..HJ Restoration Wireless device backup battery is connected R401 OV..WX Arming Arming by user code R403 Arming Automatic arming R499 OV..WX Arming Arming from receiver R521 – System Siren enabled in device settings R751 – System Open discrete output R752 –...