Table of Contents
Advertisement
Quick Links
Registration applies to the Boulder, Colorado facility.
HandiLaz Mini
Operator's Manual
PARTICLE MEASURING SYSTEMS HEADQUARTERS
5475 Airport Blvd., Boulder, CO 80301, USA
(303) 443-7100 1-800-238-1801 FAX: (303) 449-6870
Instrument Service & Support: 1-800-557-6363
Customer Response Center: 1-877-475-3317
www.pmeasuring.com
PARTICLE MEASURING SYSTEMS EUROPE
Tel: +44 (0)1684-581000 FAX: +44 (0)1684-560337
PMSEurope@pmeasuring.com
PARTICLE MEASURING SYSTEMS ASIA PACIFIC
Tel: (65) 8460-500 FAX: (65) 8460-700
PMSAsiaPacific@pmeasuring.com
PARTICLE MEASURING SYSTEMS, JAPAN
Tel: (81) 3-5298-8175 Fax: (81) 3-3255-8155
PMSJapan@pmeasuring.com
PARTICLE MEASURING SYSTEMS, CHINA
Tel: (86) 21-6113-3688 Ext. 751 Fax: (86) 21-6113-3683
PMSChina@pmeasuring.com
PARTICLE MEASURING SYSTEMS, MEXICO
Tel: 52 55 22 71 51 06
PMSMexico@pmeasuring.com
PARTICLE MEASURING SYSTEMS , PUERTO RICO
Tel: 787-380-5468 or 787-380-5446
PMSPuertoRico@pmeasuring.com
P/N 1000010551 Rev E
Advertisement
Table of Contents

Related Manuals for Particle Measuring Systems HandiLaz Mini

Summary of Contents for Particle Measuring Systems HandiLaz Mini
- Page 1 PARTICLE MEASURING SYSTEMS, CHINA Tel: (86) 21-6113-3688 Ext. 751 Fax: (86) 21-6113-3683 PMSChina@pmeasuring.com PARTICLE MEASURING SYSTEMS, MEXICO Tel: 52 55 22 71 51 06 PMSMexico@pmeasuring.com PARTICLE MEASURING SYSTEMS , PUERTO RICO Tel: 787-380-5468 or 787-380-5446 PMSPuertoRico@pmeasuring.com P/N 1000010551 Rev E...
-
Page 2: Quality Policy
Systems. Quality Policy The Quality Policy of Particle Measuring Systems is to strive to meet or exceed the needs and expectations of our customers and to align the activities of all employees with the common focus of customer satisfaction through continuous improvement in the quality of our products and services. - Page 3 89 / 336 /EEC, 73 / 23 /EEC Standard(s) to which Conformity is Declared: EN 61326: 1997/A1: 1998/A2: 2001 Safety EN 61010-1: 2001 Manufacturer’s Name: Particle Measuring Systems, Inc. Manufacturer’s Address: 5475 Airport Boulevard, Boulder, CO 80301 USA Manufacturer’s Telephone/FAX: (303) 443-7100 / (303) 449-6870 Distributor’s Name: Particle Measuring Technique, Great Britain Distributor’s Address...
- Page 4 This page is intentionally left blank.
-
Page 5: Table Of Contents
Table of Contents Quality Policy - - - - - - - - - - - - - - - - - - - - - - - - - - - - - - - - - - - - - - - - Environmental Information - - - - - - - - - - - - - - - - - - - - - - - - - - - - - - - Chapter 1: Introduction - - - - - - - - - - - - - - - - - - - - - - - - - - - - - - - - - - - - - - 1-1 Control Keys - - - - - - - - - - - - - - - - - - - - - - - - - - - - - - - - - - - - - - - - - 1-2... - Page 6 Start HandiLaz Mini and Verify or Set its Address - - - - - - - - - - - - - E-6 Set HandiLaz Mini to Upload Data - - - - - - - - - - - - - - - - - - - - - - - E-6...
- Page 7 View the Details of a Data Record - - - - - - - - - - - - - - - - - - - - - - - - E-13 Change the Current Time on the HandiLaz Mini - - - - - - - - - - - - - - E-13...
- Page 8 Table of Contents This page is intentionally left blank. viii...
- Page 9 HandiLaz Mini - - - - - - - - - - - - - - - - - - - - - - - - - - - - - - - - - - - - - -...
- Page 10 List of Figures This page is intentionally left blank.
-
Page 11: Chapter 1: Introduction
It can be powered either from a direct AC source, or from four internal NiMH batteries that can be recharged. The HandiLaz Mini is ergonomically designed to fit in the palm of your hand. The Mini is rugged and dependable, providing tremendous value for cost- conscious users who want a reliable, easy-to-use, handheld particle counter. -
Page 12: Control Keys
• Toggles between screen displays (e.g., from 0.5 to 5.0 µm, or from #/Ft. to #/M ) or • Moves to the next stored record START/STOP • Starts or Stops sampling or • Starts display or printing of records Page 1-2 HandiLaz Mini Operator’s Manual... -
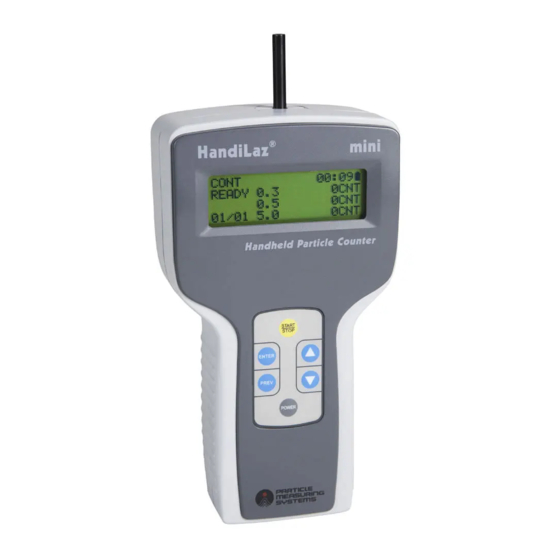
Page 13: Handilaz Mini
Control Keys START/STOP ENTER Key Arrow Keys PREVIOUS Screen Key Power and communications POWER connectors On/Off Key Figure 1-1: HandiLaz Mini Page HandiLaz Mini Operator’s Manual... -
Page 14: Specifications
(real-time): • Exceeds Alarm Limits • Laser Power • Low Battery, Printer Buffer External software: Downloads CSV file Data storage: Up to 10,000 samples. Calculations and ISO modes take more than one storage space Page 1-4 HandiLaz Mini Operator’s Manual... - Page 15 4 rechargeable, AA NiMH batteries (1.2 VDC, 2100 mA) Operating time on battery: 3 hours Battery charging: External; 3.5 hours Operating environment: • Temperature: 10-35° C • Humidity: 0–85%, non-condensing • Area type: cleanroom NOTE: Specifications are subject to change without notice. Page HandiLaz Mini Operator’s Manual...
- Page 16 Chapter 1: Introduction This page is intentionally left blank. Page 1-6 HandiLaz Mini Operator’s Manual...
-
Page 17: Chapter 2: Taking Samples
Taking Samples Introduction While the HandiLaz Mini offers 5 different sampling modes, the setup and screens are quite similar for all. In fact, if you want to use the same setup you used last time, it takes as few as 6 key pushes to start sampling. If this isn’t fast enough, you can use the HOTKEY option (see Chapter 5) to reduce this to only two key pushes. -
Page 18: Changing Sampling Settings
(If INT set = Sample time, then Inter-sample Delay = 0. Once unit notices, it will reset the lower value to = Sample time) Sampling setup is NOT completed Sampling setup IS completed, ready to start sampling Page 2-2 HandiLaz Mini Operator’s Manual... -
Page 19: Data Display
Units set to show as raw Counts (alternatively, choose #/Ft or #/M # Samples Completed / # Samples Scheduled Example: “02/03” means the program completed 2 samples at this location, compared to the 3 samples scheduled. Figure 2-2: Data Display Screen: REPEAT Mode Page HandiLaz Mini Operator’s Manual... - Page 20 Chapter 2: Taking a Quick Sample This page is intentionally left blank. Page 2-4 HandiLaz Mini Operator’s Manual...
-
Page 21: Chapter 3: Measure Mode Settings
SINGLE Use this sampling mode to take a single sample from a location. CONT (i.e., Continuous) Use this sampling mode to continuously sample until the operator stops the HandiLaz Mini by pressing the key. START STOP CALC (i.e., Calculate) -
Page 22: Repeat Sample Parameters
Taking REPEAT Samples From the SAMPLING display, press the key. During the initial delay, ENTER the HandiLaz Mini displays WAIT. When READY is displayed, press START to begin sampling. Alternatively, the unit can be set to AUTOSTART STOP sampling. See “Setting AUTOSTART (AUTOST)” on page 5-6. -
Page 23: Single Sampling Mode
NO at the lower-right corner of the display. ENTER Use the up ▲ or down ▼ key to toggle the NO to OK. Press the key. ENTER The SAMPLING display will appear. SAMPLING SAMPLE TIME 00:00:45 TOTAL TIME 00:01:15 FREE REC.:09500 Page HandiLaz Mini Operator’s Manual... -
Page 24: Using Cont (Continuous) Sampling Mode
START STOP Using CONT (Continuous) Sampling Mode Use this sampling mode to continuously sample until the operator stops the HandiLaz Mini by pressing the key. The maximum duration of a START STOP continuous sample is 99 minutes and 59 seconds. -
Page 25: Taking Cont (Continuous) Sample
START Sampling continues until the operator stops it. CALC (Calculation) Mode Use this sampling mode to have the HandiLaz Mini take the preset number of samples, calculate the Average, Standard Deviation, Minimum, and Maximum values for each size channel. To open the CALC sampling mode: Use either arrow key (▲... -
Page 26: Setting Calc (Calculation) Sample Parameters
8. The ISO measurement mode considers only 0.5 and 5.0 µm particles. To open the ISO sampling mode: From the main menu, use either arrow key to navigate to MEASURE MODE. Press the key. ENTER The MEASURE MODE menu will open. Page 3-6 HandiLaz Mini Operator’s Manual... -
Page 27: Setting Iso Sample Parameters
ENTER Use the up ▲ or down ▼ key to toggle the Press the key. ENTER The SAMPLING display will appear. SAMPLING SAMPLE TIME 00:00:45 TOTAL TIME 00:01:15 FREE REC.:09500 Page HandiLaz Mini Operator’s Manual... -
Page 28: Taking Iso Sample
POINT?”. EDIT TIMES? Pressing allows the user to change the number of ENTER samples to be taken at the next location. ERASE DATA? Pressing erases the data from the most recent location ENTER sampled. Page 3-8 HandiLaz Mini Operator’s Manual... -
Page 29: Chapter 4: Data Processing Settings
• UPLINK • PRINT • CLEAR DISPLAY This function allows the user to review the records stored in the HandiLaz Mini. NOTE: The HandiLaz Mini only stores records when STR (store) has been set to Y (yes) before sampling. To open the DISPLAY function: From the main menu, use the up ▲... - Page 30 In this example, trying to change any of the first three digits on the left will cause the HandiLaz Mini to generate three rapid “beeps”, indicating an error. The digits in those leading positions cannot be changed because there are only 50 records.
-
Page 31: Calc (Calculation) Records
UPLINK The UPLINK function is used with PC Link software (also referred to as the Data Retrieval Software) to copy data from the HandiLaz Mini to a PC. See Chapter 6, "Downloading Data to PC". The data cannot be retrieved unless the particle counter is first placed in UPLINK mode. -
Page 32: Print
See Chapter C, "Printer Setup". To print from the HandiLaz Mini: Connect the printer cable from the HandiLaz Mini to the printer. Ensure that HandiLaz Mini communications setting is RS232C. From the main MENU select DATA PROCESSING and press the key. -
Page 33: Clear
START STOP CLEAR The CLEAR function deletes all the sample data stored in the HandiLaz Mini. To clear all the sample data stored in the HandiLaz Mini: From <MENU> select DATA PROCESSING and press ENTER In the <DATA PROCESSING> menu, navigate to CLEAR and press... - Page 34 Chapter 4: DATA PROCESSING Settings This page is intentionally left blank. Page 4-6 HandiLaz Mini Operator’s Manual...
-
Page 35: Chapter 5: Options Settings
➢ AUTOSTART: ON/OFF Setting ALARM HandiLaz Mini can be set to generate an alarm when particle concentration exceeds a user-set level for the particle size channels. When the concentration level is exceeded in a size channel, the channel size label (0.3, 0.5, and 5.0) will begin blinking. -
Page 36: Setting Units
SETUP 1.PTCL Press the up ▲ or down ▼ key to toggle through the available units settings. When the desired units setting is displayed, press the key to exit the PREV UNITS SETUP display. Page 5-2 HandiLaz Mini Operator’s Manual... -
Page 37: Setting Utilities
About the Instrument ID The Instrument ID is the unique address the PC- LINK software must use to communicate with the HandiLaz Mini. No other HandiLaz Mini should be assigned the same number. To change the date, time, or instrument ID: Navigate to OPTIONS on the main menu. -
Page 38: Setting Communications Protocol
Chapter 5: OPTIONS Settings Setting Communications Protocol The HandiLaz Mini can be set to communicate with a PC by means of the following communications protocols: • RS232C or • RS485 To set the Communications protocol: If the <UTILITIES> screen is not visible, complete the following 3 steps (step 2–4). -
Page 39: Taking Samples Using Hotkey
HOTKEY Measuring Mode appearing on the left of the display. When the initial delay expires, the HandiLaz Mini will do one of the following, depending on its settings: • Begin sampling immediately if AUTOST (Autostart) is set to ON. -
Page 40: Setting Autostart (Autost)
This eliminates the need to manually start sampling after the READY message is displayed. In other words: after the initial delay, the HandiLaz Mini will do one of the following things: • When AUTOSTART is ON, HandiLaz Mini will start counting particles without requiring any operator action. -
Page 41: Chapter 6: Downloading Data To Pc
Start the software by going into the PMS directory (C:\Program Files\PMS) and double-clicking on the file entitled “Handheld LPC Data Retrieval Software.” Set the address to match the ID number (from 1–31) set on the HandiLaz Mini. Confirm the Port is set for COM1. -
Page 42: Notes
>800 × 600 resolution, with 32 true colors Display Interface 9-pin COM port or USB 1.1 interface* *If USB is used, a USB-RS232c converter required. Communications Requirements COM Port COM1---COM8 Baud Rate Data Bit Stop Bit 1(fixed) Page 6-2 HandiLaz Mini Operator’s Manual... -
Page 43: Troubleshooting Data Download
“Start Time” to “Stop Time”) are set widely enough to include the time at which the samples of interest were taken. If you do change the time range, you must click “Data List” afterward to reset the list of data records to be displayed. Page HandiLaz Mini Operator’s Manual... - Page 44 Chapter 6: Downloading Data to PC This page is intentionally left blank. Page 6-4 HandiLaz Mini Operator’s Manual...
-
Page 45: Appendix A Menu Tree
ALARM (Set alarm values for 0.3, 0.5, or 5.0 µm channels) UNITS (CNT, /cf, or m3) UTILITIES HOTKEY AUTOST (AUTOSTART) <UTILITIES> DATE (yyyy/mm/dd) TIME ID (0-31) COMMUNICATION (RS232C, RS485) <AUTOSTART> DELAY (10-99 SEC) AUTOSTART (ON, OFF) HandiLaz Mini Operator’s Manual Page A-1... - Page 46 Appendix A: Menu Tree This page left blank intentionally. Page A-2 HandiLaz Mini Operator’s Manual...
-
Page 47: Appendix B: Abbreviations And Definitions
Error: LASER Screen, Printout Error: OVER Max. Concentration EDIT TIMES? Iso Screen Change number of samples at next location Screen Last record to be printed ENTER Screen, Key current command or parameter value ENTER HandiLaz Mini Operator’s Manual Page B-1... - Page 48 SAMPLETIME Screen Total time sampling at location. Screen Standard Deviation SINGLE Screen, Printout SINGLE Sample Mode: Takes a single sample as defined in sampling settings) START Screen First record to be Displayed or Printed Page B-2 HandiLaz Mini Operator’s Manual...
- Page 49 UNIT Screen Set data UNITS (i.e., CNTS, Cnts/Ft. or Cnts/M UPLINK/LINK Screen Connects HandiLaz Mini to PC; PC can then copy sample records from HandiLaz Mini UTILITY Screen Set Time, Date, Address & Comm Format wait Screen Unit not yet prepared to sample...
- Page 50 Appendix B: Abbreviations and Definitions This page left blank intentionally. Page B-4 HandiLaz Mini Operator’s Manual...
-
Page 51: Appendix C Printer Setup
Appendix C Printer Setup The HandiLaz Mini can directly produce print output by means of an optional printer and print cable. Before the printer is used for the first time, its Mode settings and Serial settings must be set to be compatible with HandiLaz Mini. - Page 52 Then, press (yes) FEED = 9600 After FEED (yes) is pressed in response to the print line BAUD RATE = 9600 the printer will respond with SETTING COMPLETED The printer is ready for use. Page C-2 HandiLaz Mini Operator’s Manual...
-
Page 53: Appendix D Error Messages And Alarms
Appendix D Error Messages and Alarms When sampling, HandiLaz Mini monitors its operation, available power, and alarm settings. When an error or warning condition occurs, the display changes to alert the user. Indications of an error appear in the following forms: •... -
Page 54: Error Code And Symbol Legend
The indication of low battery power appears in two stages. When the batteries have discharged to a level less than 4.1 Volts, the first indicator appears as an empty battery icon. After a few minutes, the HandiLaz Mini will stop sampling and saving data. Page D-2 HandiLaz Mini Operator’s Manual... -
Page 55: Appendix E: Data Retrieval Software, Installing And Running
Appendix E Data Retrieval Software, Installing and Running This software enables data to be downloaded from the HandiLaz Mini to a PC. Minimum System Requirements The following minimum system requirements must be provided for the software: IBM Compatible PC, Pentium Communications •... -
Page 56: Software Installation
Software Installation Insert the installation CD into the CD-ROM drive. The “welcome” dialog box will open. Click on the OK button. Figure E-1: Welcome Dialog Box If after a few seconds the installation software does not start up automatically, use the following steps to open the .exe file manually: Using Explorer®, find the CD drive and open it. - Page 57 Software Installation The Directory Selection dialog box will open. Installation Icon Figure E-2: Start Installation Use the default directory, or click on to choose the folder Change Directory that will contain the software. Click on the installation icon. Page HandiLaz Data Retrieval Software, Installing and Running...
- Page 58 Software Installation Choose the Program Group for software installation. The installation program defaults to the group “PMS”. Figure E-3: Program Group Box Click on the button, when the correct Program Group has been Continue selected. The progress dialog box will appear, and after a few seconds the software will begin loading.
-
Page 59: Using The Retrieval Software
Figure E-5: Installation Successful Using the Retrieval Software HandiLaz Mini must be physically connected to the PC on which the retrieval software is loaded. Connect the PC to the HandiLaz Mini Use the following figures to connect HandiLaz Mini to the PC:... -
Page 60: Start The Retrieval Software
Retrieval Software dialog box will appear on the monitor. Start HandiLaz Mini and Verify or Set its Address Press the key to start the HandiLaz Mini. The <MENU> display will POWER appear on the HandiLaz Mini. From the MENU display use the up ▲ or down ▼ key to navigate to OPTIONS. -
Page 61: Upload Data To The Pc
PC by means of a communication cable and the HandiLaz Mini Data Retrieval software. Upload Data to the PC HandiLaz Mini Data Retrieval Software makes it possible to download (save) data to a PC that has the retrieval software. Sampling Mode... -
Page 62: Select The Sampling Mode Of The Data To Be Uploaded
Using the Retrieval Software Select the Sampling Mode of the Data to be Uploaded At the top of the Data Retrieval Software, click on the appropriate tab for the mode (Repeat, Single, etc.) to be displayed. Type the HandiLaz address (00–31) in the Address: field. Set the Port: field to COM1–COM8. -
Page 63: Error Messages
Using the Retrieval Software Error Messages If there is a problem with communications or data, one of the following error messages will appear: If this RS 232 message appears, check the cable connections. If this message appears, no data exists for the selected sampling mode. Try selecting another sampling mode. -
Page 64: Save All Data
Using the Retrieval Software Save all Data Click the button. The dialog box will open. Save All Records Save Data Figure E-10: File Location, Name, and Extension In the Save as type: field, select the file type. In the field, change the file name as needed. File name: In the Save in:... -
Page 65: View The Csv File With Microsoft Excel
Using the Retrieval Software When all fields are correct, click the Save button. The data will be uploaded to the PC as specified. View the CSV File with Microsoft Excel To view the CSV file in Excel: Open Excel. Choose Open In the dialog box, find File of type... -
Page 66: Print All Records
Using the Retrieval Software Print all Records Ensure that the PC and HandiLaz are running, connected appropriately, and that the Data Retrieval software is running. From the Data Retrieval software dialog box, click on Print All Records Set the Printer dialog box as you would for any other print job. Click on the Print button. -
Page 67: View The Details Of A Data Record
“Details”. Change the Current Time on the HandiLaz Mini 1 Ensure that the HandiLaz Mini is connected to the PC. 2 At the top of the Data Retrieval software dialog box, click on Time Setting . -
Page 68: Set Handilaz Mini System Time From Data Retrieval Software
Using the Retrieval Software Figure E-11: Set HandiLaz Mini System Time from Data Retrieval Software 3 Click the button. The current time from the HandiLaz Mini will Read Time be read to the Read Time/Date: and Time: fields. 4 Type the new date and time into the Set Time/Date: and Time: fields respectively. -
Page 69: Appendix F: International Precautions
PRECAUSION Este equipo es un producto laser de Clase I. La utilización de controles, ajustes o procesos diferentes de los especificados aquí, pueden dar lugar a exposiciones a radiaciones peligrosas. HandiLaz Mini Operator’s Manual Page F-1... -
Page 70: Hazard Symbols
Des symboles représentant les risques sont placés sur l'appareil. Leur signification est la suivante: Symbole Nature du risque Attention, consulter les documents d’accompagnement Danger Electricite Warnschilder Die, an dem Gerat angebrachten Warnschilder haben folgende Bedeutungen: Symbol Gefahrenart Achtung! In den beiliegenden Unterlagen nachschlagen Achtung Hochspannung Page F-2 HandiLaz Mini Operator’s Manual... -
Page 71: Simboli Di Pericolo
Simboli di pericolo Simboli di pericolo Il significato dei simboli di pericolo che appaiono sugli strumenti il seguente: Simbolo Natura del pericolo Attenzione. Consultare i documenti allegati Tensione Pericolosa Simbolos de peligro Los simbolos de peligro que aparecen en el equipo significan: Símbolo Naturaleza del Peligro Atención, consultar los... - Page 72 Appendix F: International Precautions This page is intentionally left blank. Page F-4 HandiLaz Mini Operator’s Manual...
- Page 73 Communications Protocol, Setting 5-4 Abbreviations and Definitions B-1, C-1 Communications Requirements 6-2 About the Instrument ID 5-3 Connect the PC to the HandiLaz Mini E-5 Alarm Locations, Error Code and D-1 Connection by means of RS-232 Cable E-5 ALARM settings, changing 5-1...
- Page 74 Light source 1-4 Error Code and Alarm Locations D-1 Link Software, Using PC 6-1 Error Code and Symbol Legend D-2 Linking with PC, Preparing HandiLaz Mini for Error Code Priority D-2 Error Messages E-9 Location Number 2-2 Error messages (real-time)
- Page 75 PC Link Software, Using 6-1 Samples, Taking 2-1 PC, Downloading Data to 6-1 Sampling Mode 2-2, 2-3 PC, Preparing HandiLaz Mini for Linking with Sampling Mode, ISO 3-6 Sampling Mode, Using CONT (Continuous) 3- Power 1-5 Power, Low Battery D-2...
- Page 76 Setting HandiLaz Mini to Upload Data E-6 UPLINK 4-3 Setting HOTKEY 5-4 UPLINK mode, put the unit in 4-3 Setting ISO Sample Parameters 3-7 Upload Data to a PC E-7 Setting SINGLE Sample Parameters 3-3 Using REPEAT Sampling Mode 3-1...