Table of Contents
Advertisement
Quick Links
Advertisement
Table of Contents

Related Manuals for AEG LAVATHERM 8DEE48S


Summary of Contents for AEG LAVATHERM 8DEE48S
- Page 1 LAVATHERM 8DEE48S User Manual Tumble Dryer USER MANUAL...
-
Page 2: Table Of Contents
13. ACCESSORIES......................22 FOR PERFECT RESULTS Thank you for choosing this AEG product. We have created it to give you impeccable performance for many years, with innovative technologies that help make life simpler features you might not find on ordinary appliances. Please spend a few minutes reading to get the very best from it. -
Page 3: Safety Information
ENGLISH SAFETY INFORMATION Before beginning the installation and use of this appliance, carefully read the supplied instructions. The manufacturer is not responsible for any injuries or damages that are the result of incorrect installation or usage. Always keep the instructions in a safe and accessible location for future reference. - Page 4 Read it carefully before installation (Refer to the Installation leaflet). The appliance can be installed as freestanding or •...
-
Page 5: Safety Instructions
ENGLISH Do not run the appliance without a filter. Clean the lint • filter before or after each use. Do not dry unwashed items in the tumble dryer. • Items that have been soiled with substances such as • cooking oil, acetone, alcohol, petrol, kerosene, spot removers, turpentine, waxes and wax removers should be washed in hot water with an extra amount of detergent before being dried in the tumble dryer. - Page 6 2.2 Electrical connection • Visible LED radiation, do not look directly into the beam. WARNING! • The type of light bulb or halogen Risk of fire and electrical lamp used for this appliance is only shock. for household appliances. Do not use it for house lighting.
-
Page 7: Product Description
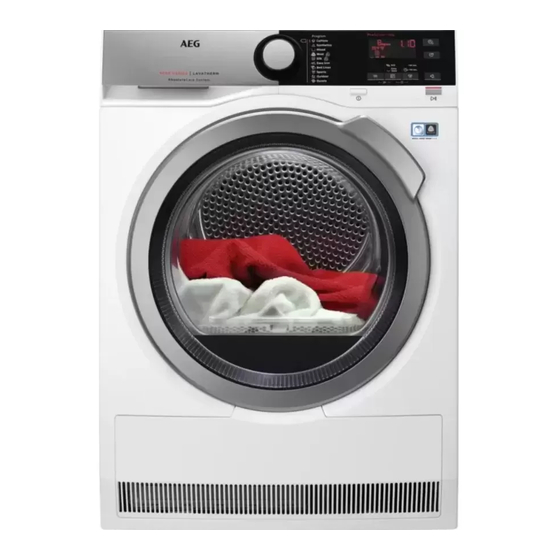
ENGLISH 3. PRODUCT DESCRIPTION Water container Airflow slots Control panel Condenser lid Internal light Condenser cover Appliance door Adjustable feet Filter Rating plate For ease of loading laundry or ease of installation the door is reversible. (see separate leaflet). -
Page 8: Control Panel
4. CONTROL PANEL Program dial Auto Off On/Off button with Display function Programs Start/Pause button Options 4.1 Display Symbol on the display Symbol description laundry maximum load delay start option on delay start selection (30min-20h) cycle time indication buzzer off... -
Page 9: Program
ENGLISH Symbol on the display Symbol description child lock on laundry dryness: iron dry, cupboard dry, cupboard dry +, extra dry drain the water container indicator: clean filter indicator: do the check of the heat exchanger indicator: anti-crease phase duration: default, interval (30min - 120min) time dry option on time programme selection (10min-2h) - Page 10 Program Properties / Fabric mark Load Wool fabrics. Gentle drying for hand-washable woollens. Remove immediately the items when the program is completed. 1 kg Wool The wool drying cycle of this machine has been approved by The Woolmark Company for the drying of wool garments labelled as "hand...
- Page 11 ENGLISH Program Properties / Fabric mark Load Single or double duvets and pil- 3 kg lows (with feather, down or syn- Duvets thetic fillings). 1) The maximum weight refers to dry items. 2) The cupboard dry Cottons program in combination with the Dryness selection is the “Stand- ard cotton program”.
-
Page 12: Options
Energy Program Spun at / residual humidity Drying time consump- tion 1000 rpm / 60% 154 min 1,99 kWh 1400 rpm / 50% 97 min 1,21 kWh iron dry 1000 rpm / 60% 118 min 1,51 kWh Synthetics 3,5 kg... -
Page 13: Before First Use
ENGLISH 1. Set the drying program and options. Time to start decreases on the display. 2. Touch Delay Start button again 6.9 Buzzer and again. Time of delay is on the display (e.g. The sound is heard at the: if the program has to start after 12 •... - Page 14 Fabric label Description Laundry is suitable for tumble drying at low temperatures only. Laundry is not suitable for tumble drying. 8.2 Loading the laundry 8.5 Setting a program CAUTION! Ensure the laundry is not trapped between the appliance door and rubber seal.
- Page 15 ENGLISH To activate or deactivate an option touch To start the program: the relevant button or 2 buttons Touch the Start/Pause button. combination. The appliance starts and the LED above When the option is activated, the LED the button stops flashing and stays on. above the button or symbol illuminates on the display.
-
Page 16: Hints And Tips
9. HINTS AND TIPS 9.1 Ecological hints Dryness lev- Display symbol • Spin the laundry well before drying. • Do not exceed the load sizes which Extra dry- are specified in the programs chapter. ness • Clean the filter after each drying cycle. -
Page 17: Care And Cleaning
ENGLISH 10. CARE AND CLEANING 10.1 Cleaning the filter 5. If necessary, remove fluff from the filter socket and gasket. You can use a vacuum cleaner. Place the filter Filter At the end of each cycle the back inside the filter socket. symbol comes on the display and you must clean the filter. - Page 18 3. Push the plastic connection back in and place the water container back into position. 4. To continue the programme press Start/Pause button. 10.3 Cleaning the condenser Condenser flashes on If the symbol the display, inspect the condenser and its compartment.
-
Page 19: Troubleshooting
ENGLISH CAUTION! CAUTION! Do not use abrasive Do not use furniture materials or steel wool to cleaning agents or cleaning clean the drum. agents which can cause corrosion to clean the appliance. 10.5 Cleaning the control panel and housing 10.6 Cleaning the airflow slots Use a standard neutral soap detergent to Use a vacuum cleaner to remove fluff clean the control panel and housing. - Page 20 Possible cause Remedy Problem The filter is not locked into posi- Put the filter in the correct posi- The loading tion. tion. door does not Laundry is trapped between the Remove trapped items and close close door and the seal.
-
Page 21: Technical Data
ENGLISH Possible cause Remedy Problem The filter is clogged. Clean the filter. The load is too large. Do not exceed the maximum load size. The laundry was not spun suffi- Spin the laundry well. Drying cycle too ciently. long Too low or too high room temper- Ensure a room temperature higher ature - this is not the appliance than +5°C and lower than +35°C. -
Page 22: Accessories
Type of use Household Permitted ambient temperature + 5°C to + 35°C Level of protection against ingress of solid IPX4 particles and moisture ensured by the pro- tective cover, except where the low voltage equipment has no protection against mois-... - Page 23 ENGLISH After installation, the water container is Available from your authorised vendor. drained automatically. The water For increasing the height of the container must stay in the appliance. appliance in order to ease loading and The installed hose must be minimum 50 unloading of laundry.
- Page 24 www.aeg.com/shop...