Table of Contents
Advertisement
Quick Links
Advertisement
Table of Contents

Related Manuals for Buffalo TeraStation WS


Summary of Contents for Buffalo TeraStation WS
- Page 1 TeraStation WS Setup Manual www.buffalotech.com 35011179 ver.01...
-
Page 2: Table Of Contents
Contents Chapter 1 Getting started ..............3 Package Contents ..............3 Diagrams ................. 4 Initial Setup ................7 Log in to Windows Storage Server .......... 14 Chapter 2 Additional Information ............ 15 Optional Software ..............15 Troubleshooting ..............16 System Recovery ..............18 Appendix .............. -
Page 3: Chapter 1 Getting Started
Ethernet cable ..............1 □ TeraNavigator DVD ............1 □ TeraStation WS Quick Setup Guide .........1 □ Warranty Statement ............1 * The keys are required to open the front cover and access the hard drives or execute a system recovery. Keep them in a safe place. -
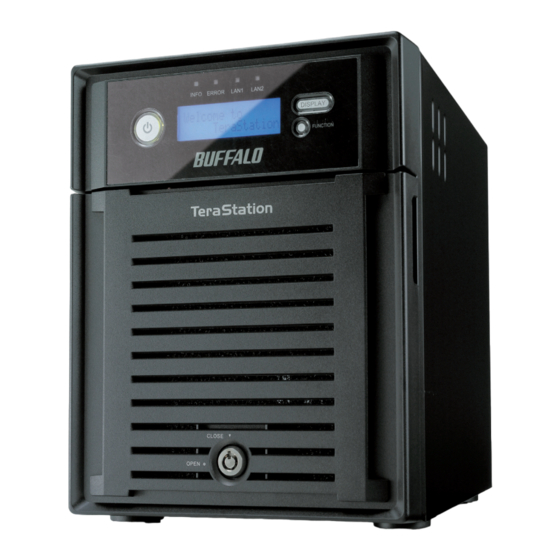
Page 4: Diagrams
The red Error LED is illuminated when an error occurs. Check the LCD display for more information. LAN1 LED When the LAN Port is connected, this LED glows green. Not used LCD Display Displays the status of the TeraStation. Display Toggle Button Switches between different display modes. Not used TeraStation WS Setup Manual... - Page 5 11 Status LED 1 - 4 LED 1 to 4 will be illuminated in green when the corresponding hard drive is accessed. When an error occurs on a hard drive, the corresponding LED will turn red. TeraStation WS Setup Manual...
- Page 6 Turning Off the TeraStation Click [Start] – [Shut down] – [Yes] from the Windows Storage Server desktop to shut down the TeraStation. Do not unplug the TeraStation without shutting it down first, or it may be damaged. TeraStation WS Setup Manual...
-
Page 7: Initial Setup
When [A program needs your permission to continue] is displayed, click [Continue]. For OS X, double-click on the disk image, WSQL-xxx.dmg (xxx is a 3-digit number) from the TeraNavigator DVD and mount it. Then double-click [TeraNavigator]. TeraStation WS Setup Manual... - Page 8 "ms-license.doc", located on your TeraNavigator DVD. You’ve connected to the TeraStation and installed NAS Navigator2. Click in the top right corner of TeraNavigator to close it. (On a Mac OS, click the red button in the top left corner.) TeraStation WS Setup Manual...
- Page 9 Launch NAS Navigator2. * From Windows, double-click the [BUFFALO NAS Navigator2] icon on your desktop. * From OS X, click on the [NAS Navigator2] icon in the Dock. In Windows, right-click on the TeraStation icon, and click [Properties] - [IP Address].
- Page 10 Click [Start] – [All Programs] – [Windows Update]. Step through the wizard to complete the update. The TeraStation must be connected to the Internet to perform the update. Screen on Remote Desktop Anti-virus software is strongly recommended for Windows Storage Server. TeraStation WS Setup Manual...
- Page 11 Screen on Remote Desktop Check [Full Control] from [Permission to Guest] menu, then click [OK]. 12. Click [Local User and Group (Local)] in [Buffalo Tool]. 13. Select [Local Users and Groups (Local)] – [Users]. Double-click [Guest] from [Name]. Guest Properties will be displayed.
- Page 12 In OS X, the TeraStation is mounted as a drive icon on the desktop, and displayed in the sidebar of the Finder. Setup is complete. You can now use the TeraStation's shared folders to save files just like other hard drives. TeraStation WS Setup Manual...
- Page 13 Drive D, a RAID 5 array accross drives 1, 2, 3 and 4. Other configurations are available. Changing the RAID configuration will erase all data on the drives. Back up any important data before changing RAID mode. To change RAID settings, consult the TeraStation WS User Manual. The following RAID modes are available: RAID 5 array - 3 or 4 hard drives are combined in a single array.
-
Page 14: Log In To Windows Storage Server
To log in to Windows Storage Server, follow the procedure below. Launch NAS Navigator2. * In Windows, double-click the [BUFFALO NAS Navigator2] icon on your desktop. * In OS X, click on the [NAS Navigator2] icon in the Dock. Right-click on the TeraStation icon (in OS X, hold control and click the icon), and select [Open Remote Desktop] from the dropdown menu. -
Page 15: Additional Information
TeraStation. Always back up your data on a regular basis! One simple way to back up data is to connect a Buffalo external USB hard drive to the TeraStation and configure the TeraStation to back up all important data to it regularly. -
Page 16: Troubleshooting
Before using the TeraStation with an OS X Mac, download and install the Remote Desktop Connection Client for Mac from Microsoft's web site. Use version 1.0.3 if you are using Mac OS X 10.3.9, or version 2 for later versions of OS X. TeraStation WS Setup Manual... - Page 17 The TeraStation’s firmware may be corrupted. Use the TeraNavigator DVD included with your TeraStation to perform a system recovery. Note that all data on drive 1 (and any array that uses it) will be erased by the system recovery process. TeraStation WS Setup Manual...
-
Page 18: System Recovery
To build a RAID array using Drive 1, you must convert the usable space on drive 1 from [Basic Disk] to [Dynamic Disk]. Right-click the basic disk in the Windows Disk Management and select [Convert to Dynamic Disk]. TeraStation WS Setup Manual... -
Page 19: Appendix
D is a RAID 5 array accross drives 1, 2, 3 and 4. If a hard drive malfunctions, replace it with another Buffalo OP-HD series drive of the same capacity, or larger. Spare drives are available from Buffalo Technology and selected retailers. -
Page 20: Compliance Information
• The take-back systems will reuse or recycle most of the materials of your end of life equipment appropriately. • The crossed-out wheeled bin symbol invites you to use those systems. • If you need more information on the collection, reuse and recycling systems, please contact your local or regional waste administration. TeraStation WS Setup Manual... -
Page 21: Contact Information
North American Technical Support by phone is available 24 hours a day, 7 days a week. (USA and Canada). Toll-free: (866) 752-6210 | Email: info@buffalotech.com Europe Buffalo Technology provides technical support in English, German, French, Italian, and Spanish. 0845 3511005 Austria... -
Page 22: Asia Pacific
Taiwan TEL: 65-6297-2085 TEL: 0800-660-886 e-mail: buffalo@blumm.com e-mail: support@buffalo-tech.com.tw Thailand TEL: 02-716-6669 Other Areas Please contact the shop or distributor where you purchased the unit, referring to the at- tached warranty card issued by the distributor. TeraStation WS Setup Manual...