
Related Manuals for Bosch DIP-7040-00N


Summary of Contents for Bosch DIP-7040-00N
- Page 1 DIVAR IP 7000 1U DIP-7040-00N, DIP-7042-2HD, DIP-7042-4HD Quick Installation Guide...
-
Page 3: Table Of Contents
Turning on the system System setup - first steps Introduction Setup instruction Starting the application Using Configuration Wizard Using Bosch VMS Configuration Client Using Bosch VMS Operator Client Additional documentation and client software Service and repair Bosch Sicherheitssysteme GmbH Quick Installation Guide... -
Page 4: Safety Precautions
AC adaptors. Using any other cables and adaptors could cause a malfunction or a fire. Electrical Appliance and Material Safety Law prohibits the use of UL or CSA-certified cables (that have UL/CSA shown on the code) for any other electrical devices. 2013.10 | V1 | DOC Quick Installation Guide Bosch Sicherheitssysteme GmbH... -
Page 5: Electrical Safety Precautions
Installation should only be carried out by qualified customer service personnel in accordance with the applicable electrical regulations. Disposal Your Bosch product has been developed and manufactured using high- quality materials and components that can be reused. This symbol means that electronic and electrical devices that have reached the end of their working life must be disposed of separately from household waste. -
Page 6: Esd Precautions
The chassis cover must be in place when the system is operating to assure proper cooling. Out of warranty damage to the system can occur if this practice is not strictly followed. 2013.10 | V1 | DOC Quick Installation Guide Bosch Sicherheitssysteme GmbH... -
Page 7: Important Notices
Operation of this equipment in a residential area is likely to cause harmful interference, in which case you will be required to correct the interference at your own expense. Bosch Sicherheitssysteme GmbH Quick Installation Guide 2013.10 | V1 | DOC... -
Page 8: System Overview
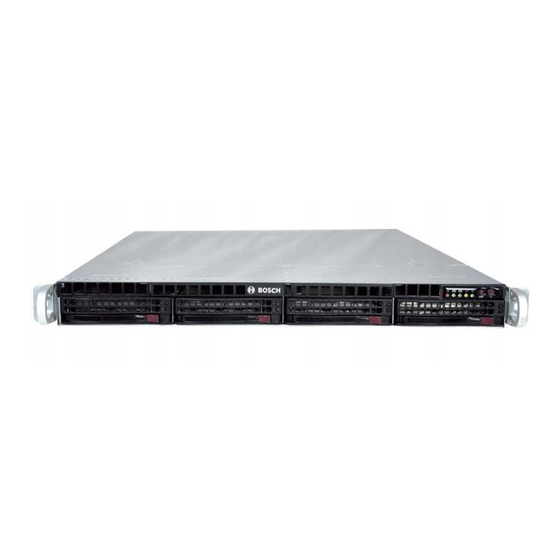
Running the full Bosch VMS (Video Management System) solution and powered by Bosch VRM (Video Recording Manager) software, the DIVAR IP 7000 1U is an intelligent IP storage device that eliminates the need for separate NVR (Network Video Recorder) server and storage hardware. - Page 9 2x USB 2.0 1x graphic card (1x Display Port, Note: Connect mouse and keyboard 1x DVI) here. Note: DVI port must be used for configuration. Serial interface COM Bosch Sicherheitssysteme GmbH Quick Installation Guide 2013.10 | V1 | DOC...
-
Page 10: System Setup - Hardware
You should inspect the box the chassis was shipped in and note if it was damaged in any way. If the chassis itself shows damage, file a damage claim with the carrier who delivered it and notify the respective Bosch RMA desk. You will also need it placed near at least one grounded power outlet. -
Page 11: Rack Precautions
Equipment should be mounted into a rack so that the amount of airflow required for safe operation is not compromised. Mechanical loading Equipment should be mounted into a rack so that a hazardous condition does not arise due to uneven mechanical loading. Bosch Sicherheitssysteme GmbH Quick Installation Guide 2013.10 | V1 | DOC... -
Page 12: Rack Mounting Instructions
Two pairs of short brackets to be used on the front side of the outer rails are also included. 3.4.2 Installing the inner rails Both the left and right side inner rails have been pre-attached to the chassis. Proceed to the next step. 2013.10 | V1 | DOC Quick Installation Guide Bosch Sicherheitssysteme GmbH... -
Page 13: Installing The Outer Rails To The Rack
Telco rack. Finish by sliding the chassis into the rack and tightening the brackets to the rack. Bosch Sicherheitssysteme GmbH Quick Installation Guide 2013.10 | V1 | DOC... -
Page 14: Turning On The System
Plug the power cord from the power supply unit into a high-quality power strip that offers protection from electrical noise and power surges. We recommended using an uninterruptible power supply (UPS). Press the power button on the control panel to turn on the system. 2013.10 | V1 | DOC Quick Installation Guide Bosch Sicherheitssysteme GmbH... -
Page 15: System Setup - First Steps
IP addresses to the video devices. Consult the local IT administrator to obtain a valid IP address range to be used with DIVAR IP and associated devices. – The default iSCSI settings are optimized for use with Bosch VMS/VRM. User with administrator rights: –... -
Page 16: Using Configuration Wizard
14. Configure the system using the Configuration Wizard. Notice! If the IP addresses of devices that should be added don’t fall within the same IP range as the DIVAR IP we recommend using the Bosch VMS Configuration Client. In all other cases use the Configuration Wizard. Notice! To perform administrative tasks, the BVRAdmin account can be entered when Bosch VMS default screen is displayed. - Page 17 Video Streaming Gateway – all advanced configurations beyond a basic setup (maps or alarms, for example) For these tasks refer to the Bosch VMS manual (see Additional documentation and client software, page 29). To achieve a quick configuration using the Configuration Wizard: On the Bosch VMS default screen, double-click the Bosch VMS Wizard icon.
- Page 18 If a DHCP server is employed in the network for the dynamic assignment of IP addresses, activate acceptance of IP addresses automatically assigned to the device. Certain applications (VRM, Bosch Video Management System, Bosch Video Client, Configuration Manager) use the IP address for the unique assignment of the device. If using...
- Page 19 System setup - first steps | en Time settings page You configure the time settings of the operating system. Note: We highly recommend defining a time server in a video surveillance environment. Bosch Sicherheitssysteme GmbH Quick Installation Guide 2013.10 | V1 | DOC...
- Page 20 This page displays the devices and services that are included in the latest saved configuration. You can import a configuration. Note: If the wizard fails in this step, close the wizard and start it again. 2013.10 | V1 | DOC Quick Installation Guide Bosch Sicherheitssysteme GmbH...
- Page 21 Deselect the devices that should not be added to the configuration, then click Next. Note: The device scan can take a time. The device scan may be stopped, when all devices are shown in the table. Bosch Sicherheitssysteme GmbH Quick Installation Guide 2013.10 | V1 | DOC...
- Page 22 Client must be used in order to set or change device passwords. Password check is performed automatically, when you do not enter a character in a password field for a few seconds or you click outside the password field. 2013.10 | V1 | DOC Quick Installation Guide Bosch Sicherheitssysteme GmbH...
- Page 23 Before selecting a recording profile observe the following: – Recording profile details All video devices use the default recording profile details. To change these use the Bosch VMS Configuration Client. – Stream quality settings All video devices use the default settings for Stream 1 to record.
- Page 24 The Night schedule is active from 6 p.m. until 8 a.m., Monday through Friday. The Weekend schedule is active 24 hours a day for Saturday and Sunday. To change the schedule use the Bosch VMS Configuration Client. 2013.10 | V1 | DOC...
- Page 25 Notice! If the wizard stops and the message appears, that the internal iSCSI storage is not ready for recording because the LUNs are not formatted, you must format the LUNs using Bosch VMS Configuration Client. To format the LUNs, see Bosch VMS Configuration Manual, Chapter Formatting a LUN.
- Page 26 | System setup - first steps DIVAR IP 7000 1U User accounts page You can add users and passwords. Use Configuration Client to add user groups and to change permissions. 2013.10 | V1 | DOC Quick Installation Guide Bosch Sicherheitssysteme GmbH...
-
Page 27: Using Bosch Vms Configuration Client
If the IP addresses of devices that should be added do not fall within the same IP range as the DIVAR IP, we recommend using the Bosch VMS Configuration Client. To assign device IP addresses: On the Bosch VMS default screen, double-click the Configuration Client icon change device network settings. The application starts. Enter the following, then click OK. -
Page 28: Using Bosch Vms Operator Client
| System setup - first steps DIVAR IP 7000 1U Using Bosch VMS Operator Client Use Bosch VMS Operator Client to verify the live, recording and playback functionality of DIVAR IP. To verify live image functionality in the Operator Client On the Bosch VMS default screen, double-click the Operator Client icon . -
Page 29: Additional Documentation And Client Software
Additional documentation and client software | en Additional documentation and client software Documentation for Bosch Security System products can be found as follows: www.boschsecurity.com > select your region and your country > select Product Catalog > start a search for your product > select the product in the search results to show the existing documents. -
Page 30: Service And Repair
DIVAR IP 7000 1U Service and repair The storage system is backed by a 3-year warranty. Issues will be handled according to Bosch Support and Service guidelines. The standard Bosch support way of working applies. The following modules may be replaced on-site in case of a failure without returning the unit: –... - Page 32 Bosch Sicherheitssysteme GmbH Robert-Bosch-Ring 5 85630 Grasbrunn Germany www.boschsecurity.com © Bosch Sicherheitssysteme GmbH, 2013...