Table of Contents
Advertisement
Quick Links
Advertisement
Table of Contents

Related Manuals for Bosch WTW85450GB


Summary of Contents for Bosch WTW85450GB
- Page 1 Tumble dryer WTW85450GB en Installation and operating instructions...
- Page 2 Caution! To meet the high quality demands required by Bosch, every tumble dryer This signal word indicates a possibly that leaves our factory is carefully dangerous situation. Not heeding the checked to ensure that it functions caution can cause property and/or correctly and is in perfect condition.
-
Page 3: Table Of Contents
Contents e n I n s t a l l a t i o n a n d o p e r a t i n g i n s t r u c t i o n s Changing the programme Intended use. -
Page 4: Intended Use
Intended use Intended use Safety instructions The following safety information This appliance is intended for private ■ I n t e n d e d u s e S a f e t y i n s t r u c t i o n s and warnings are provided to domestic use only. -
Page 5: Installation
Safety instructions Do not allow children to Keep packaging, plastic film ■ clean or maintain this and packing components away appliance unsupervised. from children. Keep children under 3 years ■ Warning and pets away from this Risk of poisoning! appliance. Detergents and care products Do not leave the appliance ■... - Page 6 Safety instructions The mains voltage on your must not come into contact with ■ power socket matches the any heat sources. rated voltage specified on Warning the appliance (identification Risk of fire/material damage/ plate). The connected loads damage to the appliance! and the required fuse The use of extension cords or protection are specified on...
-
Page 7: Operation
Safety instructions Incorrectly placing (stacking) The appliance has sharp ■ ■ this appliance on top of a edges on which you could washing machine may result cut your hands. in injury, material damage Do not take hold of the and/or damage to the appliance by its sharp appliance. - Page 8 Safety instructions During the last part of the Warning ■ drying cycle, the laundry in Risk of explosions/fire! the drum is not heated If there is any residual ■ (cooling cycle). This is to material left in the fluff filter, ensure that it remains at a this may ignite when drying temperature at which it will...
- Page 9 Safety instructions If you operate the appliance Warning ■ without a fluff filter, or if the Risk of injury! fluff filter is defective, this If you support your weight/sit ■ may result in damage to the on the appliance door when appliance.
-
Page 10: Cleaning/Maintenance
Safety instructions If the appliance overheats, it Repairs and any other work ■ ■ may not be able to operate on the appliance must only properly, or this may result in be conducted by our material damage or damage customer service or by an to the appliance. - Page 11 Safety instructions Warning Risk of injury/material damage/damage to the appliance! The use of spare parts and accessories supplied by other brands is dangerous and may result in injury, material damage or damage to the appliance. For safety reasons, use genuine spare parts and accessories only.
-
Page 12: Environmental Protection
Environmental protection Energy-saving tips Environmental protection Spin the laundry before drying. ■ The drier the laundry, the shorter the drying time will be, thus Packaging/old appliance consuming less energy. E n v i r o n m e n t a l p r o t e c t i o n Load the dryer with the maximum Dispose of packaging in an ■... -
Page 13: Installation And Connection
Installation and connection Warning Installation and Children could lock themselves in the connection dryer, putting their lives at risk! Do not set up the dryer behind a door Scope of delivery or sliding door as this may obstruct the I n s t a l l a t i o n a n d c o n n e c t i o n dryer door or prevent it from opening. -
Page 14: Changing The Condensation Drain
Installation and connection During installation ensure that: Changing the condensation drain The dryer is placed on a clean, level ■ and firm surface, The mains plug can be accessed at Notes ■ all times, The condensation from the dryer can ■... - Page 15 Installation and connection Take the drain hose from the accessories and secure it to the free connecting piece.
- Page 16 Installation and connection Fasten the other end of the drain hose with the remaining accessories, depending on the connection situation (A, B or C). Caution! Accumulated water can be drawn back into the dryer and may cause material damage. Check that the water drains away from the wash basin quickly. The drain must not be sealed or blocked.
- Page 17 Installation and connection Turn the condensation container 180° onto its underside and remove the stopper that is fitted.Turn the condensation container back over and insert the stopper into the recess in the top of the condensation container. Pull the filter out of the lock-in slot and place it into the recess in the top of the condensation container.
-
Page 18: Optional Accessories
Installation and connection Optional accessories Transport and frost protection Order optional accessories from the Empty the condensate container. after-sales service: Select any programme using the programme selector. Washer-dryer stack connection set: Press the Start button. ■ To save space, the dryer can be Wait for 5 minutes. -
Page 19: The Main Points In Brief
The main points in brief The main points in brief T h e m a i n p o i n t s i n b r i e f Load the laundry and close Switch on the dryer. Select a programme and, the door. -
Page 20: Getting To Know Your Appliance
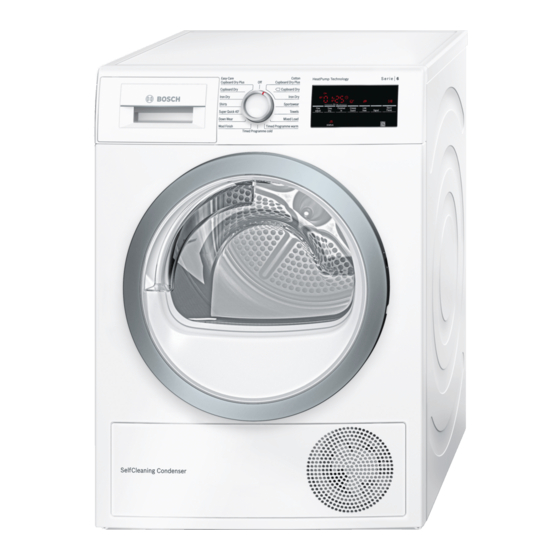
Getting to know your appliance Getting to know your appliance Dryer G e t t i n g t o k n o w y o u r a p p l i a n c e ( Condensate container 0 Control and display panel 8 Drum interior light (depending on the model) @ Dryer door... -
Page 21: Control Panel
Getting to know your appliance Control panel ( Use the programme selector to switch the dryer on and off and to select the programme. 0 Programmes ~ Page 24. 8 Start button for starting or interrupting the programme ~ Page 26. @ Buttons ~ Page 26. -
Page 22: Display Panel
Getting to know your appliance Display panel Display panel Buttons in the display panel Anti-Crease selected. ” Fine adjustment of the dryness – level. ( Select the degree of dryness. Timed programme selected. 0 Select the drying time. "Ready in" time selected. 8 Select the Ready in time. -
Page 23: Laundry
Laundry – Clean the moisture sensor Laundry regularly ~ Page 33. P reparing the laundry Sorting washing according to: L a u n d r y Warning c Suitable for tumble drying Risk of explosion/fire! a Dry at normal temperature Remove any cigarette lighters and ` Dry at low temperature matches from pockets. -
Page 24: Programmes And Buttons
Programmes and buttons Programmes and buttons Programmes P r o g r a m m e s a n d b u t t o n s Programme and fabrics Maximum load and programme settings/info Name of the programme The maximum load is based on the dry weight of the fabrics Which fabrics is the programme suitable for? Possible programme settings... - Page 25 Programmes and buttons Timed Programme warm 3 kg All types of fabric; time programme. You can adjust the programme length using the button for Suitable for pre-dried or slightly damp laundry and for drying off the drying time. multi-layered, thick laundry. Notes Only dry wool, sports shoes and soft toys with the basket for ■...
-
Page 26: Buttons
Programmes and buttons Buttons Buttons Explanations and notes Not all buttons and their functions can be selected in all programmes. Note: Fine adjust If the laundry is too damp after drying, you can finely adjust the dryness level e.g. (Degree of dry- Cupboard Dry. -
Page 27: Operating The Appliance
Operating the appliance Default programme settings Note: Operating are standard settings that are already defined when a programme the appliance is selected. After selecting a programme, you can see the default Loading laundry and programme settings in the display O p e r a t i n g t h e a p p l i a n c e switching on the dryer panel. -
Page 28: Changing The Programme Or Adding Laundry
Operating the appliance Changing the programme or Programme end adding laundry “Ÿš appears in the display panel. You can remove or add laundry and Removing laundry and change or alter the programme at any time during drying. switching off the dryer To pause the programme, open the Remove the laundry. -
Page 29: Clean The Fluff Filter
Operating the appliance Clean the fluff filter Open both filters and remove all the fluff. During drying, fluff and hair from Note: the laundry is trapped by the fluff filter. If the fluff filter is blocked or dirty, this reduces the flow of air, which prevents the dryer from achieving its maximum performance. -
Page 30: Emptying The Condensate Container
Operating the appliance Emptying the condensate Pour out the condensation water. container Notes You can drain off the condensation ■ into the waste-water system using an optional condensation drain . For installation, see ~ Page 14. If you drain the condensation using ■... -
Page 31: Signal Setting
Signal setting The volume of the audible signal at Signal setting the end of the programme is shown in the display. You can change the following settings: S i g n a l s e t t i n g The spin speed that is used for ■... -
Page 32: Noises
Noises The condensation is pumped into > Noises the condensate container by a pump. This generates pumping noises. During drying, particularly in the N ote: N o i s e s initial phase, operation of the appliance results in noise from the compressor and pump. -
Page 33: Cleaning
Cleaning Cleaning the moisture sensor Cleaning The dryer is equipped with a Note: C leaning the dryer and the stainless-steel moisture sensor. The C l e a n i n g control panel moisture sensor measures how damp the laundry is. After long periods of usage the moisture Warning sensor may become covered by a fine... -
Page 34: Cleaning The Filter In The Condensate Container
Cleaning Cleaning the filter in the condensate container The filter in the condensate Note: container cleans the condensation water that is used during the dryer's automatic cleaning cycle. Pull out the condensate container horizontally. Pour out the condensation water. Remove the filter. Clean the filter under warm, running water or in the dishwasher. -
Page 35: Faults And What To Do About Them
Faults and what to do about them Faults and what to do about them F a u l t s a n d w h a t t o d o a b o u t t h e m Faults Cause/remedy ð... - Page 36 Faults and what to do about them Faults Cause/remedy Drying time too long? The fluff filter may be dirty and cause a longer drying time. Clean the fluff fil- ■ ter. If the air inlet on the dryer is blocked or not freely accessible, this may ■...
-
Page 37: After-Sales Service
After-sales service After-sales service After-sales service A f t e r - s a l e s s e r v i c e If you cannot rectify the fault yourself (faults, what to do?), please contact our after-sales service. We will always find an appropriate solution to avoid unnecessary visits by engineers. -
Page 38: Consumption Values
Consumption values Consumption values Consumption values table C o n s u m p t i o n v a l u e s Programme Spin speed used for Duration** Energy consumption** spinning the laundry Cottons 8 kg 4 kg 8 kg 4 kg Cupboard Dry*... -
Page 39: Technical Data
Technical data Technical data Dimensions: T e c h n i c a l d a t a 85 x 60 x 60 cm Height x width x depth Weight: Approx. 56 kg Maximum load: 8 kg Condensate container: 4,6 l Connected voltage: 220 - 240 V Connected load:... - Page 40 0344 892 8979 (Calls charged at local or mobile rate.) 01450 2655 (0.03 € per minute at peak. Off peak 0.0088 € per minute.) You can find the contact information for all countries in the attached after-sales service directory. Robert Bosch Hausgeräte GmbH Carl-Wery-Straße 34 81739 München, GERMANY *9001199567*...