
Related Manuals for Cisco Explorer 8300


Summary of Contents for Cisco Explorer 8300
-
Page 1: Digital Video Recorder
User Guide Explorer 8300 Digital Video Recorder CH + GUIDE POWER VOL - VOL + INFO CH - SELECT EXIT LIST AUDIO VIDEO... - Page 2 Notice for Installers The servicing instructions in this notice are for use by qualifi ed service personnel only. To reduce the risk of electric shock, do not perform any servicing other than that contained in the operating instructions, unless you are qualifi ed to do so. Note to System Installer For this apparatus, the coaxial cable shield/screen shall be grounded as close as practical to the point of entry of the cable...
-
Page 3: Table Of Contents
Change the Way You Watch TV ...1 Safety First ...1 Serial Number...1 Front Panel Features ...2 Back Panel Connectors ...3 Connecting the DVR ...4 Connections for a Standard-Defi nition TV and VCR ...5 Watch TV ...6 Performance Tips ...7 Frequently Asked Questions...7 Connecting to a Standard TV ...8... -
Page 4: Important Safety Instructions
Read These Instructions Keep These Instructions Heed All Warnings Follow All Instructions Power Source Warning A label on this product indicates the correct power source for this product. Operate this product only from an electrical outlet with the voltage and frequency indicated on the product label. If you are uncertain of the type of power supply to your home or business, consult your service provider or your local power company. - Page 5 Protect from Exposure to Moisture and Foreign Objects Do not use this apparatus near water. WARNING: Avoid electric shock and fi re hazard! Do not expose this product to liquids, rain, or moisture. WARNING: Avoid electric shock and fi re hazard! Unplug this product before cleaning.
-
Page 7: Change The Way You Watch Tv
If the DVR requires troubleshooting in the future, your service provider may ask for the serial number. To fi nd the serial number for your DVR, look on the back panel for a label that is similar to the example shown here. The serial number begins with “SA” and is located in the lower left corner of the bar code. -
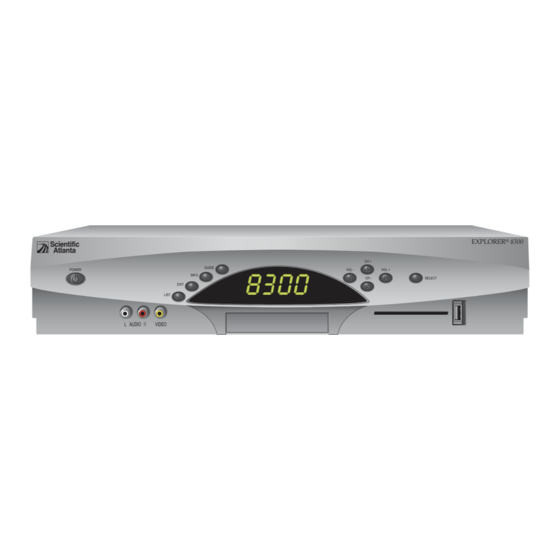
Page 8: Front Panel Features
LIST AUDIO VIDEO 1 Power Turns the DVR on and off 2 Video and Connects to video and left/right (L/R) audio outputs of an external Audio Input* device to deliver the audio and video to a TV or other device... -
Page 9: Back Panel Connectors
6 Secondary Connects to either a VCR for archiving saved content from the Video and DVR or connects to another set of inputs (composite) on your TV Audio Out 7 S-Video Connects to an S-Video cable that sends an S-Video signal to your TV or VCR. -
Page 10: Connecting The Dvr
It may take several minutes for the DVR to receive the latest software, programming, and service information. Wait until one of the following appears on the front panel of the DVR to indicate the update is complete: • Current time Note: If four dashes appear, your DVR is not authorized. -
Page 11: Connections For A Standard-Defi Nition Tv And Vcr
Connections for a Standard-Defi nition TV and VCR When using the DVR with an SDTV, you must make one of the following connections to view content. Some SDTVs may not have all of these connections. In addition, you can make connections to a VCR to archive recordings to a VCR tape. Refer to your TV and VCR user guides and the cabling diagrams in this guide for more information. -
Page 12: Watch Tv
When two of your favorite programs are scheduled at the same time, you can record one program on the built-in DVR while watching the other. Use the DVR keys on the remote control to record programs or to play back recorded programs. -
Page 13: Performance Tips
• Verify that the power to your TV is turned on. • If the DVR is plugged into a wall switch, verify the wall switch is in the ON position. Note: You should avoid plugging the DVR into an outlet that is controlled by a wall switch. -
Page 14: Connecting To A Standard Tv
Connecting to a Standard TV WARNING: Electric shock hazard! Unplug all electronic devices before connecting or disconnecting any device cables to the DVR. Explorer 8300 DVR THIS DEVICE IS INTENDED TO BE ATTACHED TO A RECEIVER THAT IS NOT USED TO RECEIVE OVER-THE-AIR BROADCAST SIGNALS. -
Page 15: Connecting To A Stereo Tv
Connecting to a Stereo TV Explorer 8300 DVR THIS DEVICE IS INTENDED TO BE ATTACHED TO A RECEIVER THAT IS NOT USED TO RECEIVE OVER-THE-AIR BROADCAST SIGNALS. CONNECTION OF THIS DEVICE CABLE IN ANY OTHER FASHION MAY CAUSE HARMFUL INTERFERENCE TO RADIO COMMUNICATIONS AND IS IN VIOLATION OF THE FCC RULES, PART 15. -
Page 16: Connecting To A Home Theater Receiver And Stereo Tv
Connecting to a Home Theater Receiver and Stereo TV WARNING: Electric shock hazard! Unplug all electronic devices before connecting or disconnecting any device cables to the DVR. Explorer 8300 DVR THIS DEVICE IS INTENDED TO BE ATTACHED TO A RECEIVER THAT IS NOT USED TO RECEIVE OVER-THE-AIR BROADCAST SIGNALS. -
Page 17: Connecting An External Sata Hard Disk Drive (Optional)
• If it is a new eSATA drive or one used on another device, you will be asked to format it. • If the drive is formatted and will work with this DVR, you will get a confi rmation that the drive is working. - Page 18 • Do not plug in the power cord for the eSATA drive to an outlet controlled by a wall switch or to the AC outlet on the DVR. • Do not turn off, disconnect, or unplug the eSATA drive while the DVR is plugged in. Disconnecting the eSATA Hard Disk Drive Complete the following steps to disconnect the eSATA drive safely.
-
Page 19: Fcc Compliance
Cet appareil numérique de la class B est conforme à la norme NMB-003 du Canada. 20060628 FCC Standard Trademarks Cisco, Cisco Systems, the Cisco logo, the Cisco Systems logo, Scientifi c Atlanta, the Scientifi c Atlanta logo, Explorer, and Multi-Room are registered trademarks or trademarks of Cisco Systems, Inc. - Page 20 Lawrenceville, GA 30042 This document includes various trademarks of Cisco Systems, Inc. Please see the Trademarks section of this document for a list of the Cisco Systems, Inc., trademarks used in this document. All other trademarks mentioned in this document are the property of their respective owners.