Table of Contents
Advertisement
Quick Links
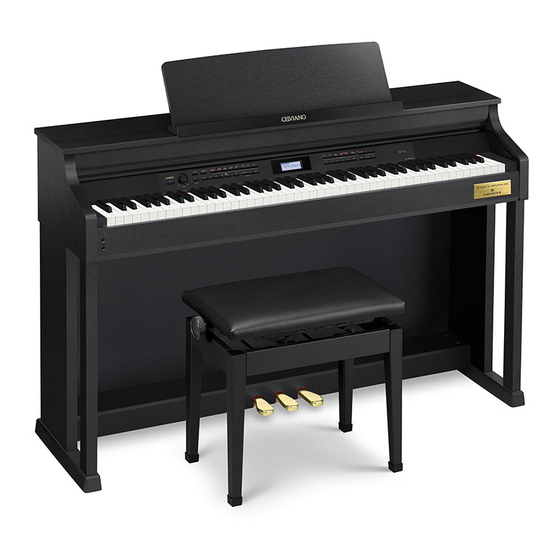
AP-710
USER'S GUIDE
GUÍA DEL USUARIO
Please keep all information for future reference.
Por favor guarde toda la documentación para futuras consultas.
Safety Precautions
Before trying to use the piano, be sure to read
the separate "Safety Precautions".
Precauciones de seguridad
Antes de intentar usar el piano, asegúrese de
leer las "Precauciones de seguridad" separadas.
AP710-ES-1A
EN/ES
Advertisement
Table of Contents

Related Manuals for Casio Celviano AP-710


Summary of Contents for Casio Celviano AP-710
- Page 1 EN/ES AP-710 USER’S GUIDE GUÍA DEL USUARIO Please keep all information for future reference. Por favor guarde toda la documentación para futuras consultas. Safety Precautions Before trying to use the piano, be sure to read the separate “Safety Precautions”. Precauciones de seguridad Antes de intentar usar el piano, asegúrese de leer las “Precauciones de seguridad”...
- Page 2 Changes or modifications not expressly approved by the party responsible for compliance could void the user’s authority to operate the equipment. Declaration of Conformity Model Number: AP-710 Trade Name: CASIO COMPUTER CO., LTD. Responsible party: CASIO AMERICA, INC. Address: 570 MT. PLEASANT AVENUE, DOVER, NEW JERSEY 07801 Telephone number: 973-361-5400...
- Page 3 CASIO website by accessing the nearby QR code or the URL below. About Music Score data You can download music score data as a PDF file from the CASIO website, which you can access using the URL or QR code below. You will then be able to view music scores on your smart device.
-
Page 4: Table Of Contents
Contents Getting Ready EN-55 Assembling the Stand ....EN-55 Removing the Protective Tape from the Keyboard ..... . . EN-61 To connect the cables . - Page 5 • Any reproduction of the contents of this manual, either in part or its entirety, is prohibited. Except for your own, personal use, any other use of the contents of this manual without the consent of CASIO is prohibited under copyright laws.
- Page 6 General Guide • The following explains the meaning of the $ symbol that appears on the product console and with the key names below. $ :Indicates a function that is enabled by holding down the button for some time. • The names shown here are always indicated in bold when they appear within the text of this manual. bk bl bm bo bp bq br bs bt cm cn co cp...
-
Page 7: Assembling The Stand
General Guide Bottom Pedal connector Rear DC 24V terminal Front USB port LINE IN R, L/MONO jacks MIDI OUT/IN Power lamp terminals USB Flash Drive LINE OUT R, L/MONO jacks Port PHONES jacks Pedal Height Adjustment • Pressing the pedals without adjusting the height adjustment screw can result in abnormal noise and/or damage to the crosspiece. - Page 8 Power Outlet After you finish assembling the stand, turn on the Auto Power Off Digital Piano. For details, see “Getting Ready” on page This Digital Piano is designed to turn off automatically EN-55. to avoid wasting power after no operation is performed for a preset amount of time.
-
Page 9: Adjusting Display Contrast
Power Outlet Adjusting Display Contrast Operation Lock Enable this setting when you want to protect against Press the 3SETTING button to display the unintentional button operations. setting screen. It locks most of the Digital Piano’s buttons, so their operations are disabled. Use the clw and q arrow buttons to Only operation of the 1P (Power) and select “General”... -
Page 10: About The Home Screen
Operations Common to All Modes bl bm The operations described in this section are common to Selecting an Item (Parameter) all modes and functions. to Change Its Setting About the Home Screen A dot (0) or arrow () mark to the left of a parameter name indicates that the parameter is selected. -
Page 11: Setting Shortcut Menus
Operations Common to All Modes Setting Shortcut Menus Holding down a button displays a menu of functions and/or tones like the one shown below to appear. The content of the menu depends on the button that is held down. Button Name Shortcut Menu Contents More Information DUET... -
Page 12: Playing With Different Tones
Playing with Different Tones cm cn co Your Digital Piano has 26 built-in tones, which include To use the tone list to select a tone those of the world-renowned grand pianos. It also has With this method, all of the Digital Piano’s tones are a Hall Simulator and other features (page EN-13) that included in the list, including those not assigned to a let you add effects that give you the feel of playing in... -
Page 13: Using The Digital Piano's Pedals
Playing with Different Tones To adjust the half pedal trigger position Using the Digital Piano’s Press the 3SETTING button to display the Pedals setting screen. Your Digital Piano comes equipped with three pedals: damper, soft, and sostenuto Use the clw and q arrow buttons to select “General”... -
Page 14: Adjusting Acoustic Piano Sound Characteristics
Playing with Different Tones Adjusting Acoustic Piano Sound Characteristics The tones of your Digital Piano have built-in elements that give them the characteristic reverberation of an acoustic piano. Each of these elements can be individually adjusted as described below. Display Name Description Setting Range Hammer Response... -
Page 15: Using Effects
Playing with Different Tones Press the 3SETTING button to display the To apply a hall simulator setting screen. Press one of the 7HALL SIMULATOR buttons to select a hall simulator. Hall simulator Number Description Name ROOM Room SALON Salon Use the clw and q arrow buttons to DUTCH Amsterdam church with select “Acoustic Simulator”... -
Page 16: To Apply Chorus To A Tone
Playing with Different Tones To apply chorus to a tone Splitting the Keyboard for Press the 3SETTING button to display the Duet Play setting screen. You can split the keyboard in the center for duet play so the left and right sides have the same ranges. Use the clw and q arrow buttons to The left pedal operates as the left side damper pedal, select “Effect”... -
Page 17: To Change The Octaves Of The Duet Keyboards
Playing with Different Tones Each press of the bkDUET button cycles the To change the octaves of the duet duet setting between the settings below. keyboards Enabled (Both left and right You can change the ranges of the left and right keyboard sounds are input from the keyboards in octave units from their initial default left and right speakers.) -
Page 18: Layering Two Tones
Playing with Different Tones To cancel layering and switch to a single tone Layering Two Tones (Upper 1), press the cnLAYER button or ckEXIT button. Use the following procedure to layer two tones, so they sound at the same time. •... -
Page 19: To Change The Octave Of Each Layer
Playing with Different Tones To change the octave of each layer Splitting the Keyboard You can use the procedure below to change the octave between Two Different Tones of each layer. You can use the procedure below to assign different Hold down the cnLAYER button until the tones to the right range and left range of the keyboard, screen shown below appears. -
Page 20: To Modify Split Settings
Playing with Different Tones Select the tone for the right side range. To modify split settings • Use the clw and q arrow buttons to select “U1” Hold down the cnLAYER button until the and then press the cmENTER button. screen shown below appears. -
Page 21: Using The Metronome
Playing with Different Tones To configure metronome settings Using the Metronome Hold down the 8METRONOME button until The metronome lets you play and practice along with a the screen shown below appears. steady beat to help keep you on tempo. To start and stop Press 8METRONOME button. -
Page 22: Changing Keyboard Response To
Playing with Different Tones Use the clu and i arrow buttons to select Changing Keyboard Response one of the settings below for touch response. to Touch Pressure Touch Response disabled. Sound (Touch Response) Disabled (Off) volume is fixed, regardless of key press speed. -
Page 23: Fine Tuning (Tuning
Playing with Different Tones Fine Tuning (Tuning) To change the tuning curve (Stretch Tuning) Use the tuning feature when you need to adjust the pitch slightly to play along with another musical Generally, a piano is tuned so high notes are sharper instrument. -
Page 24: Octave Shift
Playing with Different Tones Octave Shift Changing the Temperament of Octave Shift lets you raise or lower the pitch of the the Keyboard keyboard notes in octave units. • The octave shift setting range is –2 to +2 octaves. You can use the following procedure to select from among 17 preset temperaments, including the standard Equal Temperament. -
Page 25: Using Built-In Songs (Concert Play, Music Library
Using Built-in Songs (Concert Play, Music Library) br bs bt Your Digital Piano comes with 15 built-in piano and • Use of the Digital Piano’s metronome is not supported during Concert Play. orchestra tunes (Concert Play 1 through 15), and 60 •... -
Page 26: To Play Along With An Orchestra Using
Using Built-in Songs (Concert Play, Music Library) If you want to play back at a slower tempo To play along with an orchestra using (80%), press the 8METRONOME button so Concert Play (Play Mode) “SLOW” is displayed. Perform steps 1 and 2 of the procedure under “To listen to a Concert Play Song (Listen Mode)”... -
Page 27: To Adjust The Playback Volume Level Of A
Play songs obtained with a computer, etc. on the see “About the Home Screen” (page EN-8). Digital Piano. • For details, visit the CASIO website (page EN-1). Music Library To save Concert Play songs obtained with You can use the Music Library for your listening a computer, etc. -
Page 28: To Play Back A Specific Music Library Song
Using Built-in Songs (Concert Play, Music Library) To play back a specific music library song To practice with a music library song You can turn off the left hand part or right hand part of Press the bsSONG button. a song and play along on the Digital Piano. •... -
Page 29: Playing Back Song Data Stored On A
*1 WAV format (Linear PCM, 16bit, 44.1 kHz, Stereo) *2 Standard MIDI files (SMF format 0/1), MIDI Recorder song files (CSR format), CASIO MIDI files Use the clw and q buttons to select the (CM2 format) song data type you want. -
Page 30: Demo Song
Demo Song br bs To change to another song, use the clw All of the Digital Piano’s built-in songs can be played back for your listening enjoyment. and q arrow buttons to select a song name Grand Piano demo songs: 6 and then press the cmENTER button. -
Page 31: Comparing Grand Piano Tones
Demo Song Comparing Grand Piano Tones A simple operation lets you play demo songs that highlight the particular characteristics of each of the following grand piano tones so you can hear the difference between them: BERLIN GRAND, HAMBURG GRAND, VIENNA GRAND. Hold down the button of the tone whose demo song you want to hear (5BERLIN GRAND, HAMBURG GRAND, or VIENNA... -
Page 32: Recording And Playback
• CASIO COMPUTER CO., LTD. takes no responsibility for any damages, lost profits, or claims by third parties arising from the deletion of recorded data due to malfunction, repair, or for any other reason. - Page 33 Recording and Playback ■ Playback Features MIDI Recorder Audio Recorder Plays back Track 1 and Track 2 (simultaneously or You can play back audio data from a USB flash drive. individually). • The Audio Recorder plays back the waveform of sound •...
-
Page 34: Midi Recorder
Recording and Playback Press the bqREC button. MIDI Recorder (Recording to • “Rec Wait...” appears on the display indicating Digital Piano Memory) record standby. After recording to either of the tracks of a song, you can record to the other track while listening to playback what you recorded in the first track. - Page 35 Recording and Playback Use the bqREC button to select a track for To record the other track of a song recording. You can listen to playback of the track you recorded as • L: Track 1 you record to the other track. R: Track 2 •...
-
Page 36: To Play Back From Digital Piano Memory
Recording and Playback To play back from Digital Piano memory To adjust the playback volume level of a MIDI Recorder song Press the bsSONG button. Press the btVOLUME button. Use the clu and i arrow buttons to select “MIDI PLAY”. Use the clu (–) and i (+) arrow buttons to M I D I P L A Y adjust the volume. -
Page 37: Audio Recorder
Recording and Playback Press the cli arrow button to execute the To record keyboard play to a USB flash delete operation. drive PREPARATION • Be sure to format the USB flash drive on the Digital Piano before using it. See “USB Flash Drive” on page EN-44 for more information. -
Page 38: To Record Keyboard Play While Playing Back A Midi Recorder Song Or Song Data
Recording and Playback To record keyboard play while playing To play back data recorded on a USB flash back a MIDI Recorder song or song data drive • Use the steps below to play back the last song you Hold down the bqREC button until the setting recorded. -
Page 39: To Delete The Currently Selected Audio Recorder Song Data
Recording and Playback To delete the currently selected Audio Recorder song data • The procedure below deletes all of the data of the selected file. Note that the delete operation cannot be undone. Check to make sure you really do not need the data in Digital Piano memory before you perform the following steps. -
Page 40: Configuring Digital Piano Settings
Configuring Digital Piano Settings bq br bs cm cn Use the clu and i arrow buttons to The setting screens explained in this section can also be displayed using the 3SETTING button. This section change the currently selected value or explains how to display settings and parameter list. -
Page 41: Parameter List
Configuring Digital Piano Settings Parameter List Go here for more Display Text Description Settings information Duet >Ent Duet Mode parameters. Duet Mode Duet Mode setting (See the page Splitting the Keyboard for • The Hall Simulator and chorus cannot be applied to the right.) Duet Play (page EN-14) while in the Duet Pan Mode. - Page 42 Configuring Digital Piano Settings Go here for more Display Text Description Settings information Keyboard >Ent Keyboard parameters Touch Response Touch Response (See the page Changing Keyboard Response to the right.) to Touch Pressure (Touch Response) (page EN-20) Keyboard Volume Keyboard Volume. Adjusts the volume levels of all 0 to 127 –...
- Page 43 Configuring Digital Piano Settings Go here for more Display Text Description Settings information Song >Ent Song data parameters • The editing screen can also be displayed by holding down the bsSONG button. MIDI Volume Music Library, MIDI Recorder, Standard MIDI file, (See the page To adjust the playback playback volume...
- Page 44 Configuring Digital Piano Settings Go here for more Display Text Description Settings information General >Ent Other Digital Piano parameters LCD Contrast Digital Piano display contrast (See the page Adjusting Display Contrast to the right.) (page EN-7) Auto Resume Digital Piano setup backup. When this setting is –...
- Page 45 Configuring Digital Piano Settings Go here for more Display Text Description Settings information MIDI >Ent MIDI parameters Local Control Local Control. Selecting “Off” for Local Control cuts off the Digital Piano’s sound source, so no sound is (Disabled), produced by the Digital Piano when keys are pressed.
-
Page 46: Usb Flash Drive
USB Flash Drive Your Digital Piano supports the following USB flash drive operations. USB Flash Drive Digital Piano (1) USB Flash Drive on the Digital Piano (2) Saving Digital Piano Data to a USB Flash Drive 1-1. Playing back audio data •... -
Page 47: Preparing A Usb Flash Drive
USB Flash Drive Preparing a USB Flash Drive This section explains the information below, which is required to prepare a USB flash drive before using it with the Digital Piano. • USB flash drive supported for use with the Digital Piano •... -
Page 48: Data Types Supported By The Digital Piano
.WAV) is required for playback on a computer or portable music player. MIDI data • CSR format: CASIO original file format. This file format adds CASIO proprietary data to MIDI data. (File name extension: .CSR) • CM2 format: CASIO original file format. This file format adds CASIO proprietary data to MIDI data. (File name extension: .CM2) -
Page 49: To Connect A Usb Flash Drive To And To Detach It From The Digital Piano
USB Flash Drive ■ To insert a USB flash drive To connect a USB flash drive to and to detach it from the Digital Piano As shown in the illustration below, insert the USB flash drive into the Digital Piano’s USB flash drive port. -
Page 50: To Format A Usb Flash Drive
Press the cpUSB button. treaties. CASIO COMPUTER CO., LTD. shall not be held in any way liable for any use of this Digital Piano that is illegal under copyright laws. -
Page 51: Saving Digital Piano Data To A Usb Flash Drive
USB Flash Drive Press the cli arrow button to execute the Saving Digital Piano Data to a save operation. USB Flash Drive • To cancel the save operation, press the clu arrow button. Digital Piano memory data (MIDI recorder songs) can •... -
Page 52: Loading Usb Flash Drive Data Into Digital Piano Memory
MIDI data (MIDI Recorder songs, songs downloaded • The message “Please Wait...” will remain on the from the CASIO website, standard MIDI files, etc.) display while the operation is being performed. Do stored on a USB flash drive can be loaded to Digital not perform any operation while this message is on the display. -
Page 53: Deleting Usb Flash Drive File
USB Flash Drive Deleting USB Flash Drive File Renaming a USB Flash Drive File You can use the procedure below to delete a specific file from a USB flash drive. Use the procedure below to rename a file on a USB flash drive using Digital Piano operations. -
Page 54: Error Indicators
USB Flash Drive Error Indicators The table below shows messages that appear on the Digital Piano display when data transfer fails or when another type of error is generated. • To clear an error display, press the ckEXIT button. Display Cause Action No Media... -
Page 55: Connecting To A Computer
10.11, 10.12, 10.13 Configure the music software settings to *1: Windows 7 (32-bit, 64-bit) select “CASIO USB-MIDI” as the MIDI device. *2: Windows 8.1 (32-bit, 64-bit) *3: Windows 10 (32-bit, 64-bit) • For information about how to select the MIDI device, see the user documentation that comes with the •... -
Page 56: Using Midi
USB cable, a separately available MIDI cable that is compatible with both connectors, or a commercially available MIDI cable to connect them. • For detailed information about MIDI Implementation, visit the CASIO website (page EN-1). EN-54... - Page 57 Doing so risks damage to the stand and/or Digital Piano. • You can find the screws in a plastic bag inside of the packing material. • If anything is missing or damaged, contact your local CASIO service provider. EN-55...
- Page 58 Getting Ready Unfasten the band that bundles the pedal Slide back panel into the grooves cable to the back of crosspiece and pull the side panels. the pedal cord out from the crosspiece. • When installing back panel , make sure that the widely spaced screw holes along the bottom of the panel are on the left (when viewed from the front of...
- Page 59 Getting Ready Next, secure the bottom of the back panel Place the piano onto the stand. with the six screws. • In order to ensure you do not get your fingers pinched between the piano and the stand, grasp the ...
- Page 60 Getting Ready First, use the two screws to secure the To connect the cables back of the piano (both left and right side) to the stand. Next, use the two screws Insert the plug of the AC adaptor that comes secure the front of the piano (both left and with the Digital Piano into its power terminal right side).
- Page 61 Getting Ready Orienting the pedal plug as shown in the To install the music stand and illustration, plug it into the pedal connector on headphones hook the bottom of the piano. • Secure the pedal cord with the clip Insert music stand into the groove on the Pedal plug Digital Piano console as shown in the figure...
- Page 62 Getting Ready To close the lid Opening and Closing the Piano Lid Carefully lift up slightly on the lid. Use the fingers of your left hand to press back on the support bracket () as you • Use both hands whenever opening or closing the lid, slowly and carefully lower the lid.
- Page 63 Getting Ready ■ Disconnect Protection Precautions Removing the Protective Tape (1) Never pull on the cord with excessive force. from the Keyboard (2) Never repeatedly pull on the cord. (3) Never twist the cord at the base of the plug or Protective tape is affixed to the front edges of the connector.
- Page 64 Getting Ready Connecting Headphones Connecting Audio Equipment or an Amplifier Front PHONES jacks You can connect audio equipment or a music amplifier to the Digital Piano and then play through external speakers for more powerful volume and better sound quality. •...
- Page 65 • You can get information about accessories that are the amplifier. Use the Digital Piano’s 2VOLUME sold separately for this product from the CASIO catalog available from your retailer, and from the controller to adjust the volume level.
-
Page 66: Troubleshooting
Troubleshooting Problem Cause Action Page 1. The 2VOLUME controller is set 1. Rotate the 2VOLUME controller more EN-6 No sound is produced when I press a keyboard to “MIN”. towards “MAX”. key. EN-62 2. Headphones or an adaptor plug is 2. - Page 67 Troubleshooting Problem Cause Action Page A tone’s quality and volume This is an unavoidable result of the digital sampling process, and does not indicate malfunction. * Multiple digital samples are taken for the low range, middle range, and high range of the sounds slightly different depending where it is original musical instrument.
-
Page 68: Reference
Reference Product Specifications Model AP-710BK Keyboard 88-key piano keyboard • Layer, Split • Duet: Adjustable tone range (–2 to +2 octaves) • Transpose: 2 octaves (–12 to 0 to +12) • Octave shift: 4 octaves (–2 to 0 to +2) Sound Source •... - Page 69 Reference Inputs/Outputs • PHONES jacks: Stereo standard jacks × 2 • Power: 24V DC • MIDI OUT/IN terminals • LINE IN R, L/MONO jacks: Standard jacks × 2 Ω Input impedance: 9.0k Input voltage: 200mV • LINE OUT R, L/MONO jacks: Standard jacks × 2 Ω...
-
Page 70: Operating Precautions
Reference ■ AC Adaptor Handling Precautions Operating Precautions • Use a power outlet that is easily accessible so you can unplug the AC adaptor when a malfunction Be sure to read and observe the following operating occurs or whenever else you need to do so. precautions. - Page 71 Reference AC Adaptor Handling Precautions Model: AD-E24500LW 1. Read these instructions. 2. Keep these instructions on hand. 3. Heed all warnings. 4. Follow all instructions. 5. Do not use this product near water. 6. Clean only with a dry cloth. 7.
-
Page 72: Appendix
Appendix/Apéndice Tone List/Lista de tonos • Each of the grand piano tones has its own distinctive characteristics. Each tone has its own distinctive Bank Program Select merits, so you should select the tone that suits the Tone Group/ Tone Name/ Change/ MSB/ Grupo de... -
Page 73: Concert Play List
Appendix/Apéndice Concert Play List/ • Cada uno de los tonos de piano de cola tiene sus Lista de Interpretaciones de características propias que los distinguen. Cada tono concierto se caracteriza por un valor expresivo propio, de manera que es importante seleccionar el tono que No./Nº... -
Page 74: Music Library List
Appendix/Apéndice Music Library List/ Grand Piano Demo Song List/ Lista de la biblioteca musical Lista de canciones de demostración del piano de No./Nº Song Name/Nombre de la canción cola Nocturne Op.9-2 Fantaisie-Impromptu Op.66 Étude Op.10-3 “Chanson de l’adieu” • The length of a Grand Piano demo song built into Étude Op.10-5 “Black Keys”... - Page 77 This recycle mark indicates that the packaging conforms to the environmental protection legislation in Germany. Esta marca de reciclaje indica que el empaquetado se ajusta a la legislación de protección ambiental en Alemania. MA1906-A Printed in China...