Table of Contents
Advertisement
Quick Links
Advertisement
Table of Contents

Related Manuals for Fujitsu 628WSL110H2


Summary of Contents for Fujitsu 628WSL110H2
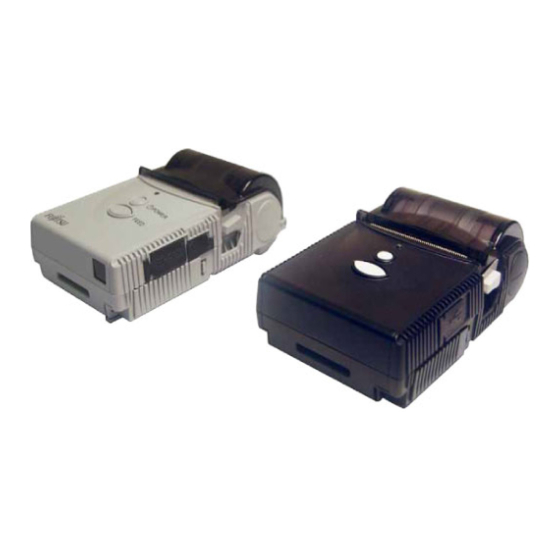
- Page 1 Portable Thermal Printer FTP-628WSL User’s Manual FUJITSU COMPONENT LIMITED ...
-
Page 2: Preface
<<Preface>> Thank you for purchasing Fujitsu Thermal Printer FTP-628WSL. This product is a small-sized, lightweight, high-speed printer driven by battery (one Lithium-ion battery) and has IrDA (infrared) and RS-232C Bluetooth (radio transmission) communication functions. Before using, you are suggested to read this User’s Manual carefully and handle the product properly so that its functions may be utilized to the fullest extent. -
Page 3: Table Of Contents
Contents <<Preface>>‧ ‧ ‧ ‧ ‧ ‧ ‧ ‧ ‧ ‧ ‧ ‧ ‧ ‧ ‧ ‧ ‧ ‧ ‧ ‧ ‧ ‧ ‧ ‧ ‧ ‧ ‧ ‧ ‧ ‧ ‧ 1 ■ Notes on Safety ‧ ‧ ‧ ‧ ‧ ‧ ‧ ‧ ‧ ‧ ‧ ‧ ‧ ‧ ‧ ‧ ‧ ‧ ‧ ‧ ‧ ‧ ‧ ‧ ‧ ‧ ‧ ‧ ‧ 3 ■ ... -
Page 4: Notes On Safety
■ Notes on Safety Before using this product, carefully read and understand the contents of this Manual. Be sure to keep this Manual at a handy spot for easy reference during the use of this product. Do not change or repair this product yourself to avoid any unexpected failures. Products listed in this Manual are not authorized for use as critical component in applications requiring extremely high reliability such as medical devices for life support, submarine repeaters, aerospace uses, or atomic power control. - Page 5 ■ Warning Label Never erase or peel off the warning label. If the message on the label is unreadable due to stain or otherwise, please contact the sales representatives of the Company. Warning Content of warning display HEAD Since the print head and its support plate get a high temperature during printing, do not touch them directly.
- Page 6 ■ Warnings Warning Type of Warning message level danger Pay attention so that your fingers, hairs, etc. may not be withdrawn into the moving parts such as gear, belt, etc. to avoid a risk of injury. Injury When replacing the paper, be careful not to jam your fingers with the paper cover or not to touch the paper cutter.
-
Page 7: Precautions In The Handling Of Ac Adapter
■ Precautions on the Handling of AC Adapter Do not remove, disassemble, repair or remodel the cover. Such action may cause electric shock. Use inlet power within specified range of voltage and frequency and outlet power within the specified range of voltage and current. Otherwise, it may cause a fire or electric shock. -
Page 8: Prohibitions/Precautions On Battery Handling
■ Prohibitions/Precautions on Battery Handling Disassembly of battery pack and battery Never disassemble the battery pack and battery. Disassembling the battery pack may destroy internal circuits leading to inoperable safety system for charging and discharging that generates heat, fire, or destruction. -
Page 9: Precautions In The Use
1. Precautions in the Use Use the printer keeping it horizontally or vertically as practically as possible. Avoid the use of Product at a place exposed to direct sunlight; in high temperature, low temperature or highly humid atmosphere; or in the environment with much garbage and dust. - Page 10 (14) Use only power supplies listed in the following. product manufacturer model note Battery FUJITSU COMPONENT LIMITED NA02001-L032 AC adapter1 KAMI ELECTRONICS INDUSTRY KSW523U Co., Ltd AC adapter2 Nagano Japan Radio Co., Ltd SQS15W5P-10 AC adapter2 code setA Longwell LP-21 CEE 7 XVII AC adapter2 code setB KAWASAKI ELECTRIC KP-610 BS1363 WIRE CO.,LTD ...
-
Page 11: Printer Interface Configuration
2. Printer Interface Configuration Interface Type RS232C IrDA Bluetooth ○ ○ ○ FTP-628WSL110 ○ ○ − FTP-628WSL120 ○: with interface function ◇This manual is an explanation of the content of the above-mentioned main body. ◇As for the following accessories such as AC adaptors and the belt fixture, an accesso ry composition is different because of the order printer type. -
Page 12: Name Of Respective Parts
3. Name of Respective Parts 11 ... - Page 13 12 ...
-
Page 14: Operation Of Respective Parts
4. Operation of Respective Parts ・Cover open lever/Roll paper cover The cover open lever is used when the roll paper cover is opened for replacement of paper roll and recording paper roll is set. If you move the cover open lever, roll paper cover will open. ・Status indication lamp This lamp is on when power is switched on. - Page 15 ・AC adapter connection Open the cover of AC adapter connection from the side marked with △ mark and connect the plug of AC adapter with internal connector. Then insert the power plug to AC outlet. Internal Connector AC Adapter Plug Plugging of power cable enables you to recharge battery and to operate printer with AC adapter.
- Page 16 ・Dip switch operating part Open cover of the dip switch operating part from the side marked with △ and manipulate the dip switch inside. This is used when printer setting is changed. Dip Switch ・RS-232C connecting part Open the cover of RS-232C connecting part from the side marked with △, and connect RS-232C cable (separately available) to internal connector.
- Page 17 ・ Battery lid/Battery locking plate These are used when the battery is mounted or replaced. If the sequence of the steps is wrong, they will not open. Operate in accordance with the following steps: [Mounting] 1) Turn the Printer upside down and put it on the table. 2) Remove the battery lid.
- Page 18 3) Lift the side marked with △ of battery locking plate. In this case, if you lift it with too much vigor the battery locking plate may break. Handle carefully. 4) Mount the battery. Make sure that the (+,-) sides of the battery is in the same direction as the (+,-) indication on the battery locking plate.
- Page 19 5) While pressing the battery, push the battery locking plate at the side indicated with △ mark. 6) Fix the battery lid. While pushing the lid to the direction indicated by arrow ①、push the hook of battery lid to the direction indicated by arrow ② to close the lid. ...
- Page 20 [Exchange of battery] 1) Follow the same steps 1 to 3 for mounting. 2) Tilt the printer and take out the battery pack. 3) Follow the same steps 4 to 6 for mounting. ...
- Page 21 ・IrDA light-receiving and sending part This is for sending and receiving data by way of IrDA communications. * Do not peep into through IrDA communication window. Especially, pay special attention when communication is being carried out. For data transmission, use under the following conditions: 300 mm (angle ± ...
- Page 22 ・Belt fixture With the use of enclosed belt fixture, you may hand-carry this Printer. Fix the belt fixture with the screws attached to the Printer. Portions indicated with circles function as stoppers for belt fixture. Belt fixture may be mounted in the following three manners: *Belt fixture should not touch or run on battery locking plate or stopper.
- Page 23 Fixing of belt fixture An example of holding the Printer *Only in the case of the following example, the position of the hole for fixing the belt fixture is different from other cases. Be careful. Fixing of belt fixture An example of holding the Printer 22 ...
-
Page 24: Mounting Of Paper Roll
5. Mounting of Paper Roll This printer uses thermal paper to be printed by means of heat. The method for mounting the paper roll is explained below: 1) Move the cover open lever to the direction indicated by arrow. Enlargement of encircled portion 2) This is the state when paper cover is opened. - Page 25 3) Place the paper roll into the paper holder. In the case of new roll, the end of the paper may still hold adhesive. Draw the paper a little longer and set it. 4) Press the center part of the paper cover and close it firmly. 24 ...
- Page 26 5) Cut the paper by moving it to the direction indicated by arrow. 25 ...
-
Page 27: Selecting Power Source Of Ac Adapter And Battery
6. Selecting Power Source of AC Adapter and Battery This printer is operable with the lithium ion secondary battery and the AC adapter Item Description (1) When the printer power is ON and the AC adapter is connected, the AC adapter supplies the power. -
Page 28: Status Indication Function By Led
8. Status Indication Function by LED (Printer status indication) LED indication Printer status Orange Green On-off cycle (ms) Printer operation Normal status ◎ status (radio transmission 1,000 interface) Normal status ◎ (RS-232C interface) 1,000 1,000 Link in progress ◎ (Bluetooth) 1,000 Link in progress (IrDA) ○ 1,000 At the power-off ○ power-off 500(green) 500(green) 500(green) Low battery ◎... - Page 29 (Battery charge status indication) This indicates the battery charge status. ○ indicates lighting, and ◎ indicates blinking. Note 1) Note 2) For on-off cycle, upper side indicates lighting, and lower side indicates extinction. (Maintenance status indication) This indicates the printer maintenance status. LED indication Printer status ...
-
Page 30: Interface Connector Connection (Rs-232C Connecting Part)
9. Interface Connector Connection (RS-232C Connection Part) 1) Part No.: RL01-R12P (Japan Aviation Electronics Industry, Ltd.) or equivalent 2) Signal pin assignment Signal name Direction Function --------- Signal ground Input Receive data Output Send data Output Data terminal ready Input Data set ready 6-12 N.C. -
Page 31: Function Specification
11. Function Specification <1> List of Commands Interface Item Command Command name ◎ ◎ ◎ Horizontal tab ◎ ◎ ◎ Line feed with printing ◎ ◎ ◎ Forms feed ◎ ◎ ◎ ESC RS Black-white reversed printing specification ◎ ◎ ◎... - Page 32 Interface Item Command Command name ◎ ◎ ◎ GS '+m+n Print registered image data ◎ ◎ ◎ GS < Mark detection execution ◎ ◎ ◎ GS A+m+n After-mark-detection head distance setting ◎ ◎ ◎ GS B+n Bar code angle setting ◎...
-
Page 33: 2> Test Printing
<2> Test Printing 1) This printer is provided with test printing function. 2) To make test printing, press power switch while pressing “feed switch” of operating switch. The status indication lamp will put on green and the test printing is started. The printer will stop printing after printing a certain set length. -
Page 34: Hardware Specification
12. Hardware Specification Printing system Thermal line-dot printing Resolution : 8 dots/mm Thermal head Dot pitch : 0.125 mm (Length) x 0.125 mm (side) configuration Number of dot : 384 dots/line Effective printing area : Approx. 48 mm Printing speed Max. -
Page 35: Recording Paper (Recommended Paper)
13. Recording Paper (Recommended Paper) Highly sensitive paper TF50KS-E4 (Nippon Paper) Standard paper TF-60KS-E (Nippon Paper) PD150R (Oji Paper) Specified paper Medium term storage paper TP60KS-F1 (Nippon Paper) PD170R (Oji Paper) P220VBB-1 (Mitsubishi Paper) Long term storage paper HA220AA (Mitsubishi Paper) Paper width 58 mm Paper type... - Page 36 <3> Clean-up and Care of Printer * Take off the battery pack and AC adapter before carrying out the followings: □ Clean-up of the thermal head (Once a month) 1) Open the roll paper cover (Refer to Page 22, 5. Paper setting 1)) 2) Moist cotton swab with alcohol and wipe the thermal head until the stain is removed.
- Page 37 □ Cleaning of photo-sensor (Once a month) 1) Open the roll paper cover (Refer to Page 22, 5. Paper setting 1) 2) With nylon brush, etc., brush off the paper dust, etc. * Portion indicated by a box is photo-sensor. □...
- Page 38 <4> Fixing Paper Cover When the paper cover is removed, take the following steps for correction. 1) Keep the printer with paper cover opened. Press the opening/closing supporting points of the paper cover to the frame and fix the cover. * ...
- Page 39 <5> Troubleshooting Symptom Possible cause Corrective action ・ Is the battery mounted? ・ Mount the battery. ・ Isn’t the battery run out of ・ Recharge the battery capacity? ・ Isn’t the battery mounted to the ・ Reset the battery correcting its No power reverse direction? polarity.
- Page 40 15. Regulatory Compliance <1> CE-Marking This equipment is in conformance with the requirements of European Council Directive : R&TTE Directive 1995/5/EC Applied standards: EN 60950-1 EN 300 328 EN 301 489-1 EN 301 489-17 <2> FCC FCC statement This equipment has been tested and found to comply with the limits for a Class B digital device, pursuant to Part 15 of the FCC Rules.