
Related Manuals for Philips HTB5570D/55


Summary of Contents for Philips HTB5570D/55
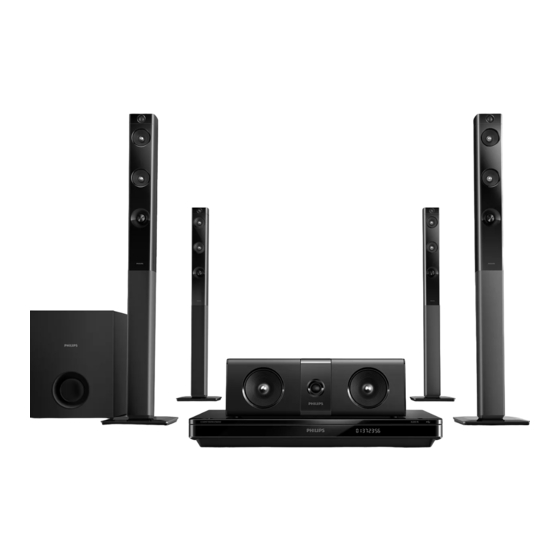
- Page 1 Always there to help you Register your product and get support at www.philips.com/support HTB5510D HTB5540D Question? Contact HTB5570D Philips User manual...
-
Page 3: Table Of Contents
Contents 5 Change settings 1 Important Language settings Safety Picture and video settings 3D health warning Audio settings Care for your product Parental control settings Care of the environment Display settings Energy saving settings 2 Your home theater Speaker settings Main unit Restore default settings Remote control... -
Page 4: Important
1 Important wall mount to a wall that can support the combined weight of the product and the wall mount. Koninklijke Philips Electronics N.V. bears no responsibility for improper Read and understand all instructions before you wall mounting that results in accident, use your product. -
Page 5: Health Warning
(for example driving a human health. car) until your symptoms have disappeared. Please visit www.recycle.philips.com for If symptoms persist, do not resume additional information on a recycling center in watching 3D without consulting a medical your area. -
Page 6: Your Home Theater
Remote control theater This section includes an overview of the remote control. Congratulations on your purchase, and welcome to Philips! To fully benefit from the support that Philips offers(e.g. notification of product software upgrade), register your product at www.philips.com/welcome. Main unit This section includes an overview of the main unit. -
Page 7: Connectors
c Source buttons n TOP MENU DISC/POP-UP MENU : Switch to disc • Access the main menu of a disc. source.Access or exit the disc menu o OPTIONS when you play a disc. • Access more play options while playing •... - Page 8 Connect the supplied AC power cable. b SPEAKERS Connect to the supplied speakers and subwoofer. c Wireless Rear Audio Connect to a Philips wireless module. (Model: Philips RWSS5512, optionally available in your region) d DIGITAL IN-COAXIAL Connect to a coaxial audio output on the TV or a digital device.
-
Page 9: Connect And Set Up
3 Connect and set FRONT FRONT RIGHT LEFT WOOFER FRONT CENTER This section helps you connect your home theater to a TV and other devices, and then set it up. For information about the basic connections of your home theater and accessories, see the quick start guide. -
Page 10: Connect To Tv
HDMI cable. What you need • A Philips wireless module. (Model: Philips RWSS5512, optionally available in your region) Connect the wireless transmitter to the Wireless Rear Audio connector on your home theater. -
Page 11: Connect Digital Devices Through Hdmi
Option 2: Connect to TV through Option 3: Connect to the TV through standard HDMI composite video Best quality video Basic quality video If your TV is not HDMI ARC compliant, connect If your TV does not have HDMI connectors, use your home theater to the TV through a a composite video connection. -
Page 12: Connect Audio From Tv And Other Devices
• video is automatically displayed on your Option 1: Connect audio through a TV, and digital optical cable • audio is automatically played on your home theater. Best quality audio Using a High Speed HDMI cable, connect the HDMI OUT connector on your digital device to the HDMI IN 1/2 on your home theater. -
Page 13: Set Up Speakers
Depending on the manufacturer, HDMI-CEC is known by many names. For information on your device, see the user manual of the device. • Philips does not guarantee 100% interoperability with all HDMI-CEC devices. Before you start • Connect your home theater to the HDMI-... -
Page 14: Connect And Set Up A Home Network
• Check that you have enabled EasyLink read documentation that accompanies the network on all the devices, (see 'Set up EasyLink components. Philips is not responsible for lost, damaged, (HDMI-CEC control)' on page 11) and or corrupt data. • on your TV, set the audio output to "Amplifier"... - Page 15 Set up the wired network What you need • A network cable (RJ45 straight cable). • A network router (with DHCP enabled). Press (Home). Select [Setup], and then press OK. Select [Network] > [Network installation] > [Wireless (Wi-Fi)], and Using a network cable, connect the LAN then press OK.
-
Page 16: Use Your Home Theater
4 Use your home [Setup]: Access menus to change video, • audio and other settings. theater Press (Home) to exit. Discs This section helps you use the home theater to play media from a wide range of sources. Your home theater can play DVDs, VCDs, CDs, Before you start and Blu-ray discs. - Page 17 The video display returns to 3D when Button Action you resume play. DISC/ Access or exit the disc menu. POP-UP MENU Note OPTIONS Access the advanced options • To avoid flickering, change the brightness of the display. when you play your audio, video, or media files (see 'Audio, video, and picture options' on page 18).
-
Page 18: Play Audio Through Bluetooth
Bluetooth device. What you need • Philips does not guarantee 100% compatibility with all • A Bluetooth device which supports Bluetooth devices. Bluetooth profile A2DP, and with Bluetooth version as 2.1 + EDR. -
Page 19: Usb Storage Devices
To stop play, press . Character Language • To resume the video from where you stopped, press (Play). [Central Albanian, Croat, Czech, Dutch, • To play the video from the start, press Europe] English, German, Hungarian, Irish, Polish, Romanian, Slovak, Slovene and Serbian Note [Cyrillic]... -
Page 20: Audio, Video, And Picture Options
[Info]: Display information about what Connect a USB storage device to the • (USB) connector on your home theater. is playing. • [Character set]: Select a character set Press (Home). that supports the DivX subtitle. Select [browse USB], and then press OK. [Time search]: Skip to a specific part •... -
Page 21: Radio
[Rotate -90]: Rotate the picture Connect the FM antenna to the FM • ANTENNA on your home theater. 90 degree counter-clockwise. • [Zoom]: Zoom into a video scene or • For the best reception, place the picture. Press the Navigation buttons antenna away from your TV or other (left/right) to select a zoom factor. -
Page 22: Mp3 Player
Personalize the network name for your home theater (see 'Personalize the iPod or iPhone network name' on page 13). Download Philips MyRemote application • Through the home theater, you can play audio on your mobile device. files from your iPod or iPhone. -
Page 23: Browse Pc Through Dlna
Browse PC through DLNA (SimplyShare) Access and play the pictures, audio and video Philips SimplyShare allows you to use your files from a computer or media server on the smartphone to stream multimedia content home network through your home theater. - Page 24 In the Media Sharing screen, make sure • Enable media sharing of files. For ease of that you see a device marked as Unknown use, we have included the steps for the following applications: Device. • Windows Media Player 11 (see »...
-
Page 25: Karaoke
Select [browse PC], and then press OK. Select the media program and click Allowed. » A content browser is displayed. » A green arrow appears next to the Select a device on the network. media program. » The folders in the selected device are By default, Windows Media Player shares displayed. -
Page 26: Choose Sound
Press the Navigation buttons (up/down) Press the Navigation buttons (up/down) and OK to change the following settings: to select a setting from your display: • [Microphone]: Turn the microphone • [Auto]: Surround sound based on the on or off. audio stream. [Microphone volume]: Change the [Multi-channel]: Traditional 5.1 channel •... - Page 27 Equalizer Change the high frequency (treble), mid frequency (mid), and low frequency (bass) settings of the home theater. Press . Select [Sound] > [Personal], and then press Navigation buttons (right). Press the Navigation buttons (up/down) to change bass, mid or treble frequency. Press OK to confirm.
-
Page 28: Change Settings
5 Change settings Picture and video settings Press (Home). The home theater settings are already Select [Setup], and then press OK. configured for optimal performance. Unless Select [Video], and then press OK. you have a reason to change a setting, we recommend that you keep the default setting. -
Page 29: Audio Settings
Audio settings Display settings Press (Home). Press (Home). Select [Setup], and then press OK. Select [Setup], and then press OK. Select [Audio], and then press OK. Select [Preference], and then press OK. Press the Navigation buttons and OK to Press the Navigation buttons and OK to select and change: select and change: [Night mode]: For quiet listening,... -
Page 30: Speaker Settings
Speaker settings Press (Home). Select [Setup], and then press OK. Select [Advanced], and then press OK. Press the Navigation buttons and OK to select and change: [Enhanced audio]: Select [On] to • enable audio post processing at the speaker and enable karaoke settings (if your product supports Karaoke). -
Page 31: Update Software
• Do not install a lower version of software than the UPG_ALL folder of your USB flash current version installed on your product. Philips is not liable for problems caused due to software downgrade. drive. Disconnect the USB flash drive from your computer. -
Page 32: Update Software Through The Internet
Update software through the Internet Connect your home theater to a home network with a high-speed Internet access (see 'Connect and set up a home network' on page 12). Press (Home). Select [Setup], and then press OK. Select [Advanced] > [Software update] > [Network]. -
Page 33: Product Specifications
7 Product File formats specifications • Audio: • .aac, .mka, .mp3, .wma, .wav, .mp4, .m4a, .flac, .ogg • .ra (Available only in Asia Pacific and China) • Video: Note • .avi, .divx, .mp4, .m4v, .mkv, .asf, .wmv, • Specifications and design are subject to change without .m2ts, .mpg, .mpeg, .flv, .3gp notice. - Page 34 Cook 96469 bps Audio codec Video codec Bit rate .flac FLAC FLAC Upto 24 bps H.264/AVC 25 Mbps HiP@4.2 .ogg Vorbis Variable bit rate, maximum .mkv files in MKV container block size 4096 Upto 320 kbps Audio codec Video codec Bit rate PCM, Dolby DivX Plus 30 Mbps Digital, DTS...
- Page 35 .mpg and .mpeg files in PS container Audio Audio codec Video codec Bit rate • S/PDIF Digital audio input: PCM, DTS MPEG 1, 40 Mbps • Coaxial: IEC 60958-3 core, MPEG, MPEG 2 • Optical: TOSLINK • Sampling frequency: • MP3: 32 kHz, 44.1 kHz, 48 kHz .flv files in FLV container •...
- Page 36 Subwoofer Laser • Output power: 166 W RMS (30% THD) • Laser Type (Diode): InGaN/AIGaN (BD), • Impedance: 4 ohm AIGaInP (DVD/CD) • Speaker drivers: 203 mm (8") woofer • Wave length: 405 +7 nm/-7 nm (BD), • Dimensions (WxHxD): 655 +10 nm/-10 nm (DVD), 233 x 365 x 310 mm 790 +10 nm/-20 nm (CD)
-
Page 37: Troubleshooting
No sound from home theater speakers. If you still have a problem, get support at www. • Connect the audio cable from your home philips.com/support. theater to your TV or other devices. However, you do not need a separate Main unit audio connection when: •... - Page 38 Switch to the correct HDMI source on • Make sure that the home theater is the TV. connected to a Philips brand EasyLink TV, and the EasyLink option is turned on (see 'Set up EasyLink (HDMI-CEC control)' on page 11).
- Page 39 • If the wireless network does not work Bluetooth properly, try a wired network installation (see 'Set up the wired network' on page A device cannot connect with the home 13). theater. • The device does not support the compatible profiles required for the home theater.
-
Page 40: Notice
9 Notice Open source software Open source software This section contains the legal and trademark Philips Electronics Hong Kong Ltd. hereby offers notices. to deliver, upon request, a copy of the complete corresponding source code for the copyrighted open source software packages used in this... - Page 41 DTS, Inc. All Rights Reserved. The Bluetooth word mark and logos are registered trademarks owned by Bluetooth SIG, Inc. and any use of such marks by Philips is under license. Other trademarks and trade names are those of their respective owners.
-
Page 42: Language Code
10 Language code Inupiaq 7375 Pushto 8083 Abkhazian 6566 Afar 6565 Irish 7165 Russian 8285 Afrikaans 6570 Íslenska 7383 Quechua 8185 Amharic 6577 Italiano 7384 Raeto-Romance 8277 Arabic 6582 Ivrit 7269 Romanian 8279 Armenian 7289 Japanese 7465 Rundi 8278 Assamese 6583 Javanese 7486... -
Page 43: Index
11 Index connect to TV connectors control buttons (disc) control buttons (USB) 2nd audio language 2nd subtitle language data files deep color default settings device name 3D disc in 2D mode disc language 3D safety disc menu 3D video display panel DivX 5.1 speakers Easylink (HDMI-CEC) - Page 44 media sharing subtitle position menu language surround sound musical slideshows synchronize picture and sound network troubleshooting (network) night mode troubleshooting (picture) troubleshooting (play) troubleshooting (sound) tuning grid one-touch play one-touch standby options update software (through Internet) USB storage device parental control PBC (play back control) picture options picture resolution...
- Page 46 Specifications are subject to change without notice © 2016 Koninklijke Philips N.V. All rights reserved. Trademarks are the property of Koninklijke Philips N.V. or their respective owners. HTB5510D/5540D/5570D_55_UM_V3.0...