Table of Contents
Advertisement
Quick Links
Advertisement
Table of Contents

Related Manuals for Keith McMillen Instruments QuNeo


Summary of Contents for Keith McMillen Instruments QuNeo
-
Page 1: 1�6 Led Behavior
s e r s a N u a l... -
Page 2: Table Of Contents
1�6 LED Behavior ��������������������������������������������������������������������������������������������������������������������������������������������������������������������� 1 1 Local LED Control ����������������������������������������������������������������������������������������������������������������������������������������������������������� 1 1 Remote LED Control ������������������������������������������������������������������������������������������������������������������������������������������������������� 1 1 CHAPTER 2 - QUNEO EDITOR SOFTWARE ����������������������������������������������������������������������������������������������������������������������������������� 14 2�1 System Requirements ��������������������������������������������������������������������������������������������������������������������������������������������������������� 14 2�2 Installing the Software ������������������������������������������������������������������������������������������������������������������������������������������������������ 14 2�3 Updating the Firmware ����������������������������������������������������������������������������������������������������������������������������������������������������� 14 2�4 Main Window Overview ��������������������������������������������������������������������������������������������������������������������������������������������������... -
Page 3: T C Ontents Qn
Up/Down Buttons - LEDs Tab ����������������������������������������������������������������������������������������������������������������������������� 26 Editing Rhombus Button ������������������������������������������������������������������������������������������������������������������������������������������������ 26 Rhombus Button - Basic Tab ������������������������������������������������������������������������������������������������������������������������������� 26 Rhombus Button - LEDs Tab �������������������������������������������������������������������������������������������������������������������������������� 27 APPENDIX A: QUNEO 2�0 FACTORY PRESETS: ��������������������������������������������������������������������������������������������������������������������������� 29 TROUBLESHOOTING �������������������������������������������������������������������������������������������������������������������������������������������������������������������� 42 SAFETY PRECAUTIONS ����������������������������������������������������������������������������������������������������������������������������������������������������������������� 45... - Page 4 Getting Started...
-
Page 5: Q U N Eo
In this manual you will find detailed information to help answer all of your questions about QuNeo hardware and software. uesTioNs eedbaCk oNTaCT Any questions or feedback that may come up regarding QuNeo or its software can be directed to us here: • Technical Support: https://support.keithmcmillen.com • General Questions: contact@keithmcmillen.com... - Page 6 QuNeo Hardware...
-
Page 7: Chapter 1 - Quneo Hardware
To connect QuNeo to an iPad, you will need the iPad Camera Connection Kit (sold by Apple). Attach the camera connector to the iPad and then use a USB cable to connect the QuNeo USB port to the camera connector. It is recommended that you supply power to the QuNeo and iPad by either plugging the Camera Connection Kit to a power supply, or by using a KMI USB Y-cable. -
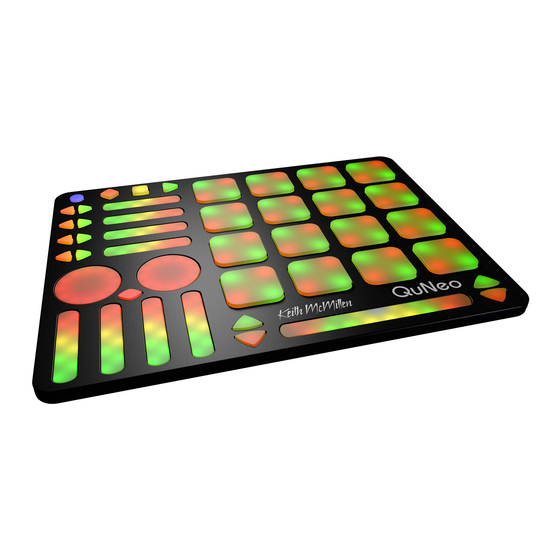
Page 8: 1�3 Understanding The Quneo
Plug MIDI devices into the MIDI Expander. The QuNeo will now send MIDI messages through the MIDI Expander. Note: It is necessary to put QuNeo into MIDI Expander mode every time it is connected to a MIDI Expander. 1.3 u NdersTaNdiNG The There are many useful types of sensors that can be found on the QuNeo. -
Page 9: Banks
ardWare Tip: It is possible to set the X and Y Axis to either latch where you left it or return to a value. When an X or Y Return value is set the X or Y Axis CC values will always go back to that number when the pad is released. The Factory Preset Guides provide details about which presets have x or y set to latch and which use a return value. -
Page 10: 1�4 The Mode Button
Editor. See the QuNeo Editor chapter for more information about editing presets. 1.4 T uTToN The Mode button is a small circular button in the upper left corner of the QuNeo. Use the Mode button to select presets and enter CoMA mode (the Controller Mapping Assistant). eleCTiNG reseTs When QuNeo is plugged in it will automatically load the last preset used. -
Page 11: Mapping Sliders In Coma Mode
QuNeo’s LEDs provide a great way to visualize interactions with the QuNeo. Local or Remote control is available. Local LED Control means the action on sensors will determine the LED behavior, while remote LED Control means note or CC data sent to the QuNeo will determine LED behavior. Local and Remote control can be used simultaneously. - Page 12 ardWare LED control will temporarily override the Remote LED Control for as long as the sensor is engaged. The Sensors respond to incoming MIDI data in the following ways: Pad LEDs • In Drum Mode, pads will respond to MIDI notes sent on Channel 1* to engage the red and green LEDs.
- Page 13 QuNeo Editor...
-
Page 14: Chapter 2 - Quneo Editor Software
The irMWare When the QuNeo Editor opens, it checks to make sure the firmware on the device is compatible with the application. If the firmware is not compatible, an update prompt will appear. Click ok and wait until the blue Mode button light stops flashing and the “Update Complete”... -
Page 15: 2�4 Main Window Overview
Editor and QuNeo has been made. Selecting a sensor on the QuNeo image will open an edit pane in the box to the right. In the edit pane, one can adjust the settings and MIDI data for the selected sensor. -
Page 16: Edit Menu
Firmware...” option will open up a firmware update prompt. Click ok and the firmware will update. (See the “Updating the Firmware” chapter of this manual for more information). The “Swap Pad LEDs” option swaps the red and green LED behavior on the QuNeo pads. 2.7 Q... - Page 17 diTor or other MIDI routing software. For Windows users, this allows you to route QuNexus MIDI to a DAW or soft synth using a virtual MIDI port, bypassing the Windows limitation where multiple applications cannot share class compliant MIDI USB devices.
-
Page 18: Editing Pads
2.8 p roGraMMiNG The Selecting a sensor on the QuNeo image will open an edit panel in the box to the right. Each edit panel has three different tabs with options to customize your QuNeo curface: “BASIC”, “ADVANCED” and “LEDS”. -
Page 19: Pads - Advanced Tab
diTor To the right of the toggle menu are number boxes for setting Velocity and Pressure values. By default these boxes are set to “var” for “Variable Velocity” and “con” for “Continuous Pressure”. In default mode the sensor will send out a Velocity value related to how hard the pad was struck, and a continuous CC# value corresponding to the pressure exerted on the sensor. -
Page 20: Pads - Leds Tab
diTor The Velocity Table drop down menu lets you select a lookup table to shape the Velocity output of the Pads. There are 6 different velocity tables, and they are applied globally. They are: • Dynamic - This table is good for getting varied velocity values with very little change in pressure. •... -
Page 21: Sliders - Advanced Tab
diTor numerical value in the number box will override the default behavior and output just that value. The Global Sensitivity dial adjusts the sensitivity of the sensors. The higher the sensitivity, the easier it is to get pressure and velocity in the higher value ranges. The lower the sensitivity, the more difficult (or impossible) it will be to get the pressure and velocity to the higher value ranges. -
Page 22: Editing Rotaries
diTor diTiNG oTaries oTaries asiC Each Rotary sensor has four Banks, and you can set values for the Note, Pressure CC#, Location CC# or Direction CC#, and MIDI Channel parameters of each Bank. To disable a source, set the number box below 0 to “off” (-1). The Direction CC# sends a repeated value as you rotate your finger on the sensor. -
Page 23: Rotaries - Leds Tab
The Transport buttons are the 3 buttons at the top of the QuNeo next to the Mode button. The diamond button with the red LED is the record button, the square button with the yellow LED is the stop button, and the triangular button with the green LED is the play button. -
Page 24: Transport Buttons - Leds Tab
diTor - led raNsporT uTToNs The LEDs tab is where you set which MIDI Channel the transport button LEDs will listen to for Remote LED Control. This parameter is global for all transport buttons. For more information see Section 2.6.2 Remote LED Control. -
Page 25: Left/Right Buttons - Leds Tab
diTor The Global Sensitivity dial adjusts the sensitivity of the sensors. The higher the sensitivity, the easier it is to get pressure and velocity in the higher value ranges. The lower the sensitivity, the more difficult (or impossible) it will be to get the pressure and velocity to the higher value ranges. The Sensitivity dial is global for all controls of that sensor type. -
Page 26: Up/Down Buttons - Leds Tab
diTor “Continuous Pressure”. In default mode, the sensor will send out a Velocity value related to how hard the sensor was struck, and a continuous CC# value corresponding to the pressure exerted on the sensor. Setting a numerical value in the number box will override the default behavior and output just that value. -
Page 27: Rhombus Button - Leds Tab
diTor continuous CC# value corresponding to the pressure exerted on the sensor. Setting a numerical value in the number box will override the default behavior and output just that value. The Global Sensitivity dial adjusts the sensitivity of the sensors. The higher the sensitivity, the easier it is to get pressure and velocity in the higher value ranges. - Page 28 Appendices...
-
Page 29: Appendix A: Quneo 2�0 Factory Presets
Widths for the rotaries are set to 127. The Pad X/Y Return values are set to 63. Velocity is variable and pressure is continuous on the Pads; velocity is fixed at 127 for notes on other sensors. Our Serato Template uses Presets 1-3 and is included in the QuNeo Software Installer. Scratch Live (Serato) Mappings for Preset 1, 2, & 3: Global: 1. - Page 30 A14/B14 - Set Cue Point 4 QuNeo Preset 3: A15/B15 - DJ/FX On/Off For more information read Serato’s Quickstart document in the QuNeo directory: “Documentation/Template Quickstarts”. Algoriddm’s djay MIDI Mappings for Preset 1 & 2: For more information read djay’s Quickstart document in the QuNeo directory: “Documentation/Template...
- Page 31 Presets 9 (Ableton Live Clip Launching): The QuNeo Ableton Live Remote Control Surface contains a variety of Modes. Modes remap the 8x8 Grid and non Global Buttons into various functions for Ableton Live. Modes include Clip Launch, Step Sequencer, and Note Mode.
- Page 32 Clip Launch Mode represents an overview of the current Ableton Live Session. Clip Launch Mode enables the QuNeo to launch clips within Ableton’s clip slots and control volume parameters assigned to the first 4 volume Sliders within Ableton’s highlighted red box. Other controls include: overdub - on/off, metronome - on/off, tempo - up/down, and transport functionality including: play, stop, and record.
- Page 33 The X/Y Return values are set to 63 on the Pads. Velocity response is variable for the Pads and fixed at 127 for the Buttons. All Pressure sources send out continuous CC values. For more information about using the Ableton Live Template, read its Quickstart document in the QuNeo directory: “Documentation/Template Quickstarts”.
- Page 34 Preset 11 (Logic): This turns QuNeo into a drum synth controller using the Ultrabeat software instrument that comes with Apple’s Logic Pro. Below is an image showing how this preset is mapped to the Logic Template: This image shows what MIDI data will output for each sensor in the “Logic” preset. The Pads are in Drum Mode.
- Page 35 Preset 12 (Traktor - DJ / Mixxx): The Traktor DJ Preset turns QuNeo into a full-fledged DJ controller for Native Instruments’ Traktor. This preset is designed with a more traditional approach to digital DJing in mind, with play, sync, cue, monitor, fx, filter, loop points, cue points, crossfading, deck control, and various volume controls accessible from QuNeo.
- Page 36 This preset turns QuNeo into a full-fledged DJ controller using Mixxx as well. It includes controls for 2 players: play, sync, cue, tempo controls, crossfading, scratching, and various volume controls accessible from QuNeo. The image below shows what each sensor controls in our Mixxx Template (included in the QuNeo Software Installer): This image shows what MIDI data will output for each sensor in the “Traktor - DJ / Mixxx”...
- Page 37 The Reason Preset turns QuNeo into a full fledged master keyboard controller for Propellerhead’s Reason. The pads give one octave of notes while sliders control an ADSR envelope and various effects parameters. The image below shows what each sensor controls in our Reason Template (included in the QuNeo Software Installer): This image shows what MIDI data will output for each sensor in the “Reason”...
- Page 38 Preset 14 (Battery): This preset is for use with our Native Instrument’s Battery 3 template file. This template will turn the QuNeo into a sampler with loops on the left 8 pads and both rotaries and quick drum hit samples on the right 8 pads. The sliders provide additional control and effects.
- Page 39 Presets 15 (Korg iMS-20 - iPad): This preset is for use with Korg’s iMS-20 synthesizer for iPad. This allows the QuNeo to play minor pentatonic notes from the iMS-20 and adjust voltage controlled oscillators and effects. Each pad will send out the same pressure CC# to control a low pass filter cutoff frequency.
- Page 40 Preset 16 (BeatMaker - iPad): Below is an image showing how the QuNeo is mapped to BeatMaker’s controls in factory preset #16. Each pad is in Drum Mode and outputs a MIDI note to trigger one of BeatMaker’s drum pads. The vertical sliders each output a location CC to control the volume for tracks 1-4 in BeatMaker.
- Page 41 Troubleshooting...
-
Page 42: Troubleshooting
Unpowered hubs typically divide the power coming from the computer’s USB port and split it up between all of the hub’s ports — providing less power than if the QuNeo were to be directly connected to the computer’s USB port. If a USB hub is absolutely necessary, it is recommended to always use a powered hub. - Page 43 We fully understand that it seems like using different USB cables shouldn’t matter, but it really can have a drastic effect on operation, not just with QuNeo, but with all USB devices. Very often the only thing needed is to swap out the USB cable for another one.
- Page 44 Safety Precautions...
-
Page 45: Safety Precautions
TMospheres Do not use QuNeo in any area with a potentially explosive atmosphere, such as a fueling area, or in areas where the air contains chemicals or particles (such as grain, dust, or metal powders). Obey all signs and instructions.