Table of Contents
Advertisement
Quick Links
Advertisement
Table of Contents

Related Manuals for AEG T7DBK841N


Summary of Contents for AEG T7DBK841N
- Page 1 T7DBK841N User Manual Tumble Dryer USER MANUAL...
-
Page 2: Table Of Contents
1369/2017........................25 FOR PERFECT RESULTS Thank you for choosing this AEG product. We have created it to give you impeccable performance for many years, with innovative technologies that help make life simpler - features you might not find on ordinary appliances. Please spend a few minutes reading to get the very best from it. -
Page 3: Safety Information
ENGLISH SAFETY INFORMATION Before beginning the installation and use of this appliance, carefully read the supplied instructions. The manufacturer is not responsible for any injuries or damage that are the result of incorrect installation or usage. Always keep the instructions in a safe and accessible location for future reference. - Page 4 Keep detergents away from children. • Keep children and pets away from the appliance when • the door is open. If the appliance has a child safety device, it should be • activated. Children shall not carry out cleaning and user •...
- Page 5 ENGLISH The appliance contains flammable gas, propane (R290), a gas with a high level of environmental compatibility. Keep fire and ignition sources away from the appliance. Be careful not to cause damage to the refrigerant circuit containing propane. WARNING: In the appliance enclosure or in the built - •...
-
Page 6: Safety Instructions
Before any maintenance operation, deactivate the • appliance and disconnect the mains plug from the socket. 2. SAFETY INSTRUCTIONS 2.1 Installation 2.2 Electrical connection WARNING! Risk of fire and electric Warning: Risk of fire / Flammable shock. - Page 7 ENGLISH • Do not dry damaged (torn, frayed) • The compressor and its system in the items that contain padding or fillings. tumble dryer is filled with a special • If laundry has been washed with a agent which is free from fluoro-chloro- stain remover, carry out an additional hydrocarbons.
-
Page 8: Product Description
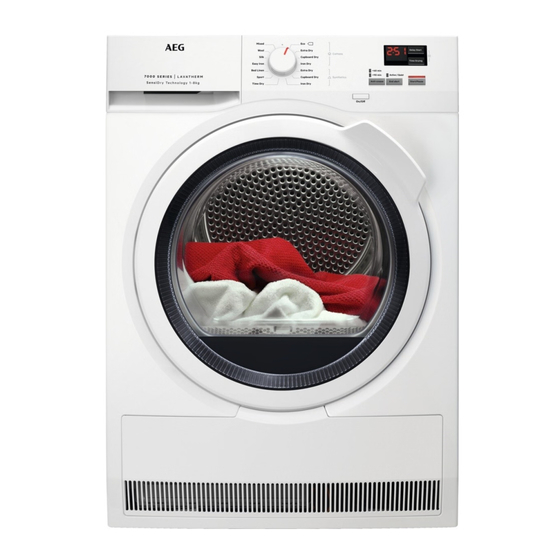
3. PRODUCT DESCRIPTION Water container Airflow slots Control panel Condenser lid Appliance door Condenser cover Filter Adjustable feet Rating plate For ease of loading laundry or ease of installation the door is reversible. (see separate leaflet). -
Page 9: Control Panel
ENGLISH 4. CONTROL PANEL Program dial On/Off button Display Programs Start/Pause button Options 4.1 Display Symbol on the display Symbol description delay start selection (30min-20h) cycle time indication drain the water container indicator: clean the filter indicator: check the condenser indicator: child lock on... -
Page 10: Program
Symbol on the display Symbol description time programme selection (10min-2h) 5. PROGRAM Program Properties / Fabric mark Load Cottons Cycle to be used to dry cotton with 8 kg "cotton cupboard" dryness level, with maximum energy saving. Extra Dry 8 kg Drying level: extra dry. - Page 11 ENGLISH Program Properties / Fabric mark Load With this programme you can use the Time Drying option and set the Time Dry 5 kg programme duration. Drying time should be adequate to the load, e.g. 2h for 5 kg of cotton. 1) The maximum weight refers to dry items.
-
Page 12: Options
Options Anti-crease Time Drying Programmes Time Dry 1) Together with the programme you can set 1 or more options. 2) See chapter OPTIONS: Time Drying on Wool programme 5.2 Consumption data Energy consump- Program Spun at / residual humidity... -
Page 13: Before First Use
ENGLISH 6.3 Time Drying 1. Set the drying program and options. 2. Touch Delay Start button again and For cottons, synthetics and mixed. Lets again. the user to set drying time from Time of delay is on the display (e.g. minimum 10 min to maximum of 2 hours if the program has to start after 12 (in 10 min steps). - Page 14 Rotating drum. At the beginning of the drying cycle (first 3-5 min) there could be a slightly higher sound level. This is due to the compressor starting up. This is normal for compressor powered appliances such as refrigerators and freezers.
-
Page 15: Daily Use
ENGLISH 8. DAILY USE 8.1 Preparing the laundry • Always set the programme suitable for the type of laundry. Very often the clothes after • Do not put light and dark colours washing cycle are kneaded together. and tangled altogether. •... - Page 16 8.3 Turning on the appliance To activate or deactivate an option touch the relevant button or a two button To turn on the appliance: combination. its symbol appears on the display or the Push the On/Off button. led above the corresponding button If the appliance is on, some indicators lights up.
-
Page 17: Hints And Tips
ENGLISH 8.7 Starting a program If the drying cycle is finished, the symbol appears on the display. If the End alert option is activated, the acoustic signal sounds intermittently for 1 minute. If you do not turn off the appliance, the anti-crease phase starts (not active with all programmes). -
Page 18: Care And Cleaning
5. Touch the Start/Pause button water reservoir is full. If the draining kit is repeatedly until you reach the installed the water container is drained desired dryness level. automatically and the indicator can be deactivated. - Page 19 ENGLISH 3. Gather lint with hand from both internal parts of the filter. 2. Pull the plastic connection out and drain the water into a basin or equivalent receptacle. Throw the lint in the dustbin. 4. If necessary, clean the filter with a vacuum cleaner.
-
Page 20: Condenser Lid
2. Open the condenser cover. 6. Close the condenser lid. 7. Turn the lever until it clicks into position. 8. Put the filter back. 10.4 Cleaning the humidity sensor CAUTION! Risk of humidity sensor damage. Do not use abrasive materials or steel wool to clean the sensor. -
Page 21: Troubleshooting
ENGLISH CAUTION! CAUTION! Do not use abrasive Do not use furniture materials or steel wool to cleaning agents or cleaning clean the drum. agents which can cause corrosion. 10.6 Cleaning the control 10.7 Cleaning the airflow slots panel and housing Use a vacuum cleaner to remove fluff Use a standard neutral soap detergent to from the airflow slots. - Page 22 Possible cause Remedy Problem The filter is not locked into posi- Put the filter in the correct posi- The loading tion. tion. door does not Laundry is trapped between the Remove trapped items and close close door and the seal.
-
Page 23: Technical Data
ENGLISH Possible cause Remedy Problem The filter is clogged. Clean the filter. The load is too large. Do not exceed the maximum load size. The laundry was not spun suffi- Spin the laundry well in the wash- Drying cycle too ciently. - Page 24 Energy efficiency class Energy consumption on the standard cotton 1,93 kWh programme with the full load. Energy consumption on the standard cotton 1,08 kWh programme with the partial load. 234,7 kWh Annual energy consumption 0,50 W Left-on mode power absorption...
-
Page 25: Accessories
ENGLISH 13. ACCESSORIES 13.1 Stacking kit Accessory name: DK11. Available from your authorised vendor (can be attached to some types of tumble dryer) For thorough draining of the condensed water into a basin, siphon, gully, etc. After installation, the water container is drained automatically. - Page 26 Model T7DBK841N PNC916098695 Rated capacity in kg Air vented or condenser tumble dryer Condenser Energy efficiency class Energy consumption in kWh per year, based on 160 drying cy- 234,7 cles of the standard cotton programme at full and partial load, and the consumption of the low-power modes.
- Page 27 ENGLISH Built in appliance Y/N The information given in the chart above is compliant with the EU Commission regulation 392/2012 implementing directive 2009/125/EC. 15. ENVIRONMENTAL CONCERNS appliances marked with the symbol Recycle materials with the symbol with the household waste. Return the Put the packaging in relevant containers product to your local recycling facility or to recycle it.
- Page 28 www.aeg.com/shop...