Table of Contents
Advertisement
Available languages
Available languages
Quick Links
Advertisement
Table of Contents

Related Manuals for Makita XDT111


Summary of Contents for Makita XDT111
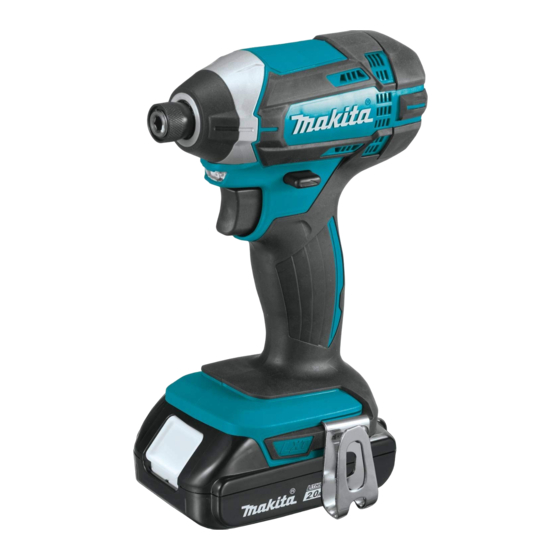
- Page 1 INSTRUCTION MANUAL MANUEL D'INSTRUCTION MANUAL DE INSTRUCCIONES Cordless Impact Driver Tournevis à Chocs sans Fil Atornillador de Impacto Inalámbrico XDT11 IMPORTANT: Read Before Using. IMPORTANT : Lire avant usage. IMPORTANTE: Lea antes de usar.
-
Page 2: Specifications
ENGLISH (Original instructions) SPECIFICATIONS Model: XDT11 Fastening capacities Machine screw 4 mm - 8 mm (5/32" - 5/16") Standard bolt 5 mm - 16 mm (3/16" - 5/8") High tensile bolt 5 mm - 12 mm (3/16" - 1/2") No load speed (RPM) 0 - 2,900 /min Impacts per minute 0 - 3,500 /min... - Page 3 Power tool use and care Cordless impact driver safety Do not force the power tool. Use the correct warnings power tool for your application. The correct power tool will do the job better and safer at the Hold power tool by insulated gripping sur- rate for which it was designed. faces, when performing an operation where Do not use the power tool if the switch does the fastener may contact hidden wiring.
-
Page 4: Battery Protection System
Avoid storing battery cartridge in a con- tainer with other metal objects such as nails, coins, etc. Do not expose battery cartridge to water or rain. A battery short can cause a large current flow, overheating, possible burns and even a breakdown. - Page 5 Low battery voltage: Switch action The remaining battery capacity is too low and the tool will not operate. In this situation, remove and recharge the battery. Indicating the remaining battery capacity Only for battery cartridges with "B" at the end of the model number 1.
-
Page 6: Installing Hook
Reversing switch action 1. Driver bit 2. Sleeve To install the driver bit, insert it into the sleeve as far as 1. Reversing switch lever it will go. CAUTION: Always check the direction of rotation before operation. CAUTION: Use the reversing switch only after the tool comes to a complete stop. -
Page 7: Operation
The hook is convenient for temporarily hanging the tool. Hold the tool firmly and place the point of the driver bit This can be installed on either side of the tool. To install in the screw head. Apply forward pressure to the tool to the hook, insert it into a groove in the tool housing on the extent that the bit will not slip off the screw and turn either side and then secure it with a screw. -
Page 8: Replacing Carbon Brushes
3. Arm Check the tool while running and electric brake operation when releasing the switch trigger. If electric brake is not working well, ask Makita Authorized or Use pliers to remove the carbon brush caps of Factory Service Centers for repair. -
Page 9: Optional Accessories
COMPLETE tool, freight prepaid, to one of Makita’s Factory or Authorized Service Centers. If inspection shows the trouble is caused by defective workmanship or material, Makita will repair (or at our option, replace) without charge. This Warranty does not apply where: •... -
Page 10: Spécifications
FRANÇAIS (Mode d’emploi original) SPÉCIFICATIONS Modèle : XDT11 Capacités de serrage Vis de mécanique 4 mm - 8 mm (5/32" - 5/16") Boulon standard 5 mm - 16 mm (3/16" - 5/8") Boulon à haute résistance 5 mm - 12 mm (3/16" - 1/2") Vitesse à... - Page 11 Évitez les démarrages accidentels. Assurez- Maintenez les outils tranchants bien aiguisés vous que l’interrupteur est en position d’arrêt et propres. Un outil tranchant dont l’entretien est avant de brancher l’outil à la prise de courant effectué correctement et dont les bords sont bien et/ou au bloc-piles, et avant de prendre ou aiguisés risquera moins de se coincer et sera plus de transporter l’outil.
-
Page 12: Description Du Fonctionnement
être extrêmement chauds et vous brûler la Ne rangez pas l’outil ou la batterie dans peau. des emplacements où la température peut Gardez les mains éloignées des pièces en atteindre ou dépasser 50 °C (122 °F). rotation. Ne jetez pas la batterie au feu même si elle est sérieusement endommagée ou complètement CONSERVEZ CES épuisée. - Page 13 Dans cette situation, libérez la gâchette et arrêtez l’activité qui entraîne une surcharge de l’outil. Ensuite, appuyez de nouveau sur la gâchette pour redémarrer. Si l’outil ne démarre pas, la batterie est en surchauffe. Dans cette situation, laissez refroidir la batterie avant d’appuyer de nouveau sur la gâchette.
- Page 14 Interrupteur Fonctionnement de l’inverseur 1. Gâchette 1. Levier inverseur ATTENTION : ATTENTION : Avant d’insérer la batterie dans Vérifiez toujours le sens de l’outil, vérifiez toujours que la gâchette fonc- rotation avant de mettre l’outil en marche. tionne bien et revient en position d’arrêt lorsque ATTENTION : N’actionnez l’inverseur qu’une libérée.
- Page 15 Utilisez uniquement l’embout-tournevis ou l’em- Installation du crochet bout-douille indiqué sur la figure. N’utilisez aucun autre embout-tournevis ou embout-douille. 1. Rainure 2. Crochet 3. Vis 1. Embout-tournevis 2. Manchon L’outil est équipé d’un crochet pratique qui permet de Pour installer l’embout-tournevis, insérez-le à fond dans le suspendre temporairement. Il s’installe d’un côté le manchon.
-
Page 16: Entretien
Lorsque la batterie est presque complètement Boulon standard déchargée, la tension tombe et le couple de ser- N•m rage diminue. (ft•lbs) M16(5/8") Embout-tournevis ou embout-douille (101) L’utilisation d’un embout-tournevis ou d’un embout-douille de mauvaise dimension entraînera (87) M14(9/16") une diminution du couple de serrage. M16(5/8") Boulon (72) -
Page 17: Accessoires En Option
Pour maintenir la SÉCURITÉ et la FIABILITÉ du pro- duit, les réparations et tout autre travail d’entretien ou de réglage doivent être effectués dans un centre de service après-vente autorisé ou une usine Makita, exclusivement avec des pièces de rechange Makita. ACCESSOIRES EN 1. -
Page 18: Politique De Garantie
Makita. S’il ressort de l’inspection que le problème est dû à un vice de fabrication ou de matériau, Makita répa- rera (ou remplacera, à son gré) l’outil gratuitement. Cette garantie ne s’applique pas dans les cas où : •... -
Page 19: Especificaciones
ESPAÑOL (Instrucciones originales) ESPECIFICACIONES Modelo: XDT11 Capacidades de apriete Tornillo de máquina 4 mm - 8 mm (5/32" - 5/16") Tornillo estándar 5 mm - 16 mm (3/16" - 5/8") Tornillo de alta resistencia 5 mm - 12 mm (3/16" - 1/2") Velocidad sin carga (rpm) 0 - 2 900 r/min Impactos por minuto... - Page 20 zapatos de seguridad antiderrapantes, casco por herramientas eléctricas con mantenimiento rígido y protección para oídos utilizado en las inadecuado. Mantenga las herramientas de corte limpias condiciones apropiadas reducirá el riesgo de lesiones. y filosas. Si recibe un mantenimiento adecuado Impida el encendido accidental. Asegúrese y tiene los bordes afilados, es probable que la de que el interruptor esté...
-
Page 21: Descripción Del Funcionamiento
extremadamente calientes y provocarle una No guarde la herramienta ni el cartucho de quemadura. batería en lugares donde la temperatura pueda Mantenga las manos alejadas de las piezas alcanzar o exceder los 50°C (122°F). giratorias. Nunca incinere el cartucho de batería incluso en el caso de que esté... - Page 22 Sobrecarga: La herramienta se está utilizando de una manera que causa que consuma una cantidad de corriente inusual- mente alta. En este caso, libere el gatillo interruptor en la herra- mienta y detenga la aplicación que causó que la herra- mienta se sobrecargara. Luego, vuelva a jalar el gatillo interruptor para reanudar el funcionamiento.
-
Page 23: Montaje
Accionamiento del interruptor de NOTA: Dependiendo de las condiciones de uso y la temperatura ambiente, la indicación podrá diferir inversión ligeramente de la capacidad real. Accionamiento del interruptor 1. Palanca del interruptor de inversión PRECAUCIÓN: 1. Gatillo interruptor Confirme siempre la dirección de rotación antes de la operación. -
Page 24: Operación
Instalación o extracción de la punta NOTA: Si la punta de destornillador no se encuentra insertada hasta el fondo en el mandril, éste no regre- de destornillador/punta de atornillar sará a su posición original y la punta de destornillador no quedará asegurada. En este caso, procure inser- tar la broca de nuevo siguiendo las instrucciones de arriba. -
Page 25: Mantenimiento
Cuando el cartucho de batería esté casi completa- Tornillo estándar mente descargado, caerá la tensión y se reducirá N•m la torsión de apriete. (ft•lbs) 16 mm(5/8") Punta de destornillador o punta de atornillar 140 N•m (101 ft•lbs) El no utilizar el tamaño correcto de punta de des- 120 N•m tornillador o punta de atornillar ocasionará... - Page 26 Verifique la herramienta en funcionamiento y la operación del freno eléctrico cuando suelte el gatillo interruptor. Si el freno eléctrico no funciona bien, pida a su centro de servicio autorizado o de fábrica Makita que se lo repare. Para mantener la SEGURIDAD y FIABILIDAD del pro- ducto, las reparaciones, y cualquier otra tarea de man- tenimiento o ajuste deberán ser realizadas en centros...
-
Page 27: Accesorios Opcionales
Makita. Si la inspección muestra que el problema ha sido a causa de un defecto de mano de obra o material, Makita hará la reparación (o a su discreción, el reemplazo) sin ningún cargo. Esta garantía no aplica cuando: •... - Page 28 Para reducir la exposición a estos productos químicos: trabaje en un área bien ventilada y póngase el equipo de seguridad indicado, tal como las máscaras contra polvo que están especialmente diseñadas para filtrar partículas microscópicas. Makita Corporation 3-11-8, Sumiyoshi-cho, 885432-947 Anjo, Aichi 446-8502 Japan...