Table of Contents
Advertisement
Quick Links
Advertisement
Table of Contents

Related Manuals for Canon 1318C002


Summary of Contents for Canon 1318C002
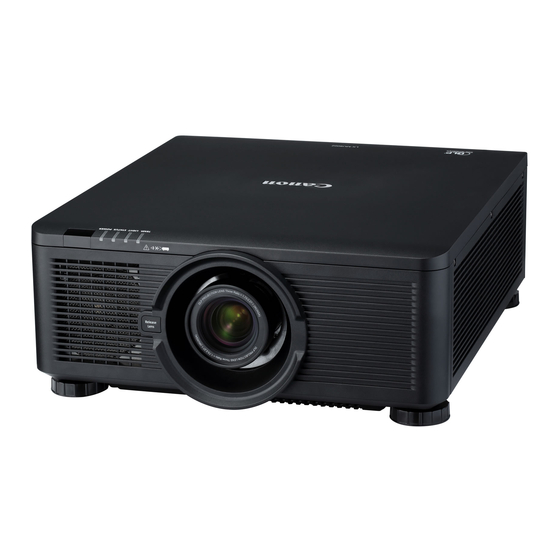
- Page 1 MULTIMEDIA PROJECTOR User’s Manual...
- Page 2 , and Crestron Connected™ are registered trademarks of Crestron Electronics, Inc. Ensure Network Security Take measures to ensure network security. Note that Canon is not liable in any way for direct or indirect loss from network security incidents, such as unauthorized access. Examples of Security Measures ■...
- Page 3 ♦ Projector Installation Notice ■ Allow at least 50 cm clearance around the exhaust vent. ■ Ensure that the intake vents do not recycle hot air from the exhaust vent. ■ When operating the projector in an enclosed space, ensure that the surrounding air temperature within the enclosure does not exceed operation temperature while the projector is running, and the air intake and exhaust vents are unobstructed.
-
Page 4: Table Of Contents
Table of Contents Safety Instructions .......................1 Getting Started ......................17 Packing Checklist ..........................17 Views of Projector Parts ........................18 Front View ..........................18 Rear View ..........................19 Bottom View ..........................19 Terminals ...........................20 Control Panel ..........................21 Power Panel ..........................22 Remote Control ..........................23 Remote Control Operating Range .....................25 Setting the Remote ID to the Projector ....................26 Clearing the Remote ID ........................26 Projector and Remote Control Buttons ....................26... - Page 5 LASER Menu .............................53 ALIGNMENT Menu ...........................54 Lens Control Menu ........................55 Lens Memory Menu ........................56 Geometry Menu ........................57 Edge Blend Menu ........................62 Possible Geometry and Edge Blend Combinations ..............65 CONTROL Menu ..........................66 Network Menu ...........................67 Control ID Menu ........................76 SERVICE Menu ..........................77 Thermal Status Menu ........................79 Maintenance and Security ...................80 Replacing the Projection Lamp ......................80...
- Page 6 Appendix ........................103 Canon LX-MU800Z / LX-MU600Z User Commands .................103 Interface and Requirements (Ver 1.0) ..................103 System Operation Commands ......................103 System Operation Command ....................103...
-
Page 7: Safety Instructions
If your projector does not seem to be operating properly, read this manual again, check operations and cable connections, and try the solutions in the “Troubleshooting” section in the user’s manual. If the problem still persists, contact the Canon Customer Support Center. CAUTION... - Page 8 Safety Precautions WARNING: ■ THIS APPARATUS MUST BE GROUNDED. TO REDUCE THE RISK OF FIRE OR ELECTRIC SHOCK, DO NOT EXPOSE THIS APPLIANCE ■ TO RAIN OR MOISTURE. ■ This projector produces intense light from the projection lens. Do not stare directly into the lens, otherwise eye damage could result.
- Page 9 Never push objects of any kind into this projector through cabinet slots as they may touch dangerous voltage points or short out parts that could result in a fire or electric shock. Never spill liquid of any kind onto the projector. Do not install the projector near the ventilation duct of air-conditioning equipment.
- Page 10 Light Module ■ A light module containing multiple laser diodes is equipped in the product as the light source. ■ These laser diodes are sealed in the light module. No maintenance or service is required for the performance of the light module. ■...
- Page 11 For more information about the recycling of this product, please contact your local city office, waste authority, approved scheme or your household waste disposal service or visit http://www.canon-europe.com/weee, or http://www.canon-europe.com/battery.
- Page 12 Voltage Selection The VOLTAGE SELECT switch must be set to match the power supply you are using: Voltage of Power Supply Used Position of VOLTAGE SELECT switch AC 100V Inlet VOLTAGE SELECT For LX-MU800Z/LX-MU600Z (U) and LX-MU800Z/LX-MU600Z (J) 200-240 V~ 100-130 V~ AC 220V (single phase) Inlet VOLTAGE SELECT...
- Page 13 Product Labels Manufacturer’s ID Label LX-MU800Z IS 13252 (Part 1)/ ZU10002-16002 IEC 60950-1 MSIP-REM-DVP-LX-MU800Z DDE300001A R-41016187 Mfg Date:YYYY.MM LX-MU600Z XXXX XXXX YB7-3383 LX-MU600Z IS 13252 (Part 1)/ ZU10002-16002 IEC 60950-1 MSIP-REM-DVP-LX-MU800Z DEE300001A R-41016187 Mfg Date:YYYY.MM Hazard Warning Symbol, Aperture Label, Certification Statement Label and Explanatory Label JIS C 6802: 2014...
- Page 14 ♦ Label Locations LX-MU800Z AUTO CENTER TRIGGER CONTROL B/Pb R/Pr COMPUTER-1 MONITOR OUT POWER INPUT ASPECT BLANK LENS COMPUTER-2 FOCUS ZOOM MENU EXIT LENS-SHIFT REMOTE HDBaseT/LAN DVI-D 3G-SDI IN 3G-SDI OUT HDMI IS 13252 (Part 1)/ IS 13252 (Part 1)/ ZU10002-16002 ZU10002-16002 MSIP-REM-DVP-LX-MU800Z...
- Page 15 LX-MU600Z AUTO CENTER TRIGGER CONTROL B/Pb R/Pr COMPUTER-1 MONITOR OUT POWER INPUT ASPECT BLANK LENS COMPUTER-2 FOCUS ZOOM REMOTE HDBaseT/LAN DVI-D 3G-SDI IN 3G-SDI OUT HDMI MENU EXIT LENS-SHIFT LX-MU600Z XXXX XXXX YB7-3383 IS 13252 (Part 1)/ ZU10002-16002 MSIP-REM-DVP-LX-MU800Z IEC 60950-1 DEE300001A R-41016187 Mfg Date:YYYY.MM...
- Page 16 Safety Symbols in this Manual This section describes the safety symbols used in this manual. Important projector safety information is identified by the following symbols. Always observe the safety information by these symbols. Denotes the risk of death or serious injury from improper handling if the Warning information is not observed.
- Page 17 If the following situations occur, turn the power off, remove the power plug from the power outlet and contact the Canon Customer Support Center. Failure to do so could cause a fire or result in an electric shock.
- Page 18 Warning Pay attention to the following points regarding the power source, power plug and handling of the connector. Failure to do so may cause a fire, electric shock or personal injury. ■ Do not use any power source with a voltage other than the voltage indicated (AC 100–240 V). ■...
- Page 19 Do not remove the cabinet from the projector or disassemble it. The interior of the projector contains high-voltage components as well as parts that are hot. If inspection, maintenance or repair is required, contact the Canon Customer Support Center. ■...
- Page 20 Caution Pay attention to the following points regarding installation and handling of the projector. ■ If the projector will not be used for a long period of time, be sure to remove the power plug from the power outlet to ensure safety. Failure to do so presents a risk of fire if dust accumulates on the plug or outlet.
- Page 21 If the projector is subjected to excessive impacts during transportation, the lens unit may be damaged. Removal and installation of the lens unit should not be performed by the user. Be sure to have the procedure performed by a qualified technician or contact the Canon Customer Support Center.
- Page 22 During projection, never put an object in front of the projector’s lens. Caution Make sure the followings when you install and handle the ceiling attachment. ■ Make sure to ask the Canon Customer Support Center if you want to install the ceiling attachment. An inappropriate installation may cause an accident.
-
Page 23: Getting Started
Getting Started Packing Checklist Check that the following items are included: Projector ENTER MENU EXIT Remote Control Power Cord (2.5M/8.2 ft) Computer Cable (1.8M/5.9 ft) (with two AA batteries) (mini D-sub 15-pin/ (LX-RC01) mini D-sub 15-pin) CD-ROM Important Information Warranty Card (This User’s manual) Anti-theft Screw for Lens Dust Cap... -
Page 24: Views Of Projector Parts
Views of Projector Parts Front View 2 3 4 7 8 9 Item Label Description Terminals Use to connect to other devices. ® Kensington Lock Secure to permanent object with a Kensington Lock system. Control Panel Use buttons to select or adjust the settings of the projector. Power Panel Insert power cord to supply electrical power or select the input voltage. -
Page 25: Rear View
Rear View Item Label Description Air Intake Vent Take in air to cool the projector. Rear IR Receiver Receives IR signal from remote control. Exhaust Vent Heat is discharged from the projector via the exhaust. Bottom View Item Label Description Adjusting Foots Adjust the levelness the projection angle. -
Page 26: Terminals
Terminals Item Label Description TRIGGER Provide 12V (+/- 1.5) output for screen operation. CONTROL Connect to the PC for system maintenance , projector maintenance and user commands. COMPUTER-2 Receives the analog PC signal (Analog PC-2). Connect BNC-type input connectors to the RGB or YPbPr/YCbCr output signal video equipment. -
Page 27: Control Panel
Control Panel Item Label Description POWER Press to turn on or off the projector. INPUT Press to select the input signal. AUTO PC Press to initiate the automatic synchronization procedure in accordance with the signal from a computer when the analog PC input is selected. -
Page 28: Power Panel
“Voltage Selection” on page 6. Improper selection of the switch could damage the projector. Please contact a qualified technician or the Canon Customer Support Center regarding any unclear points. Power Switch Turn on or off AC power of the projector. -
Page 29: Remote Control
Remote Control Remote Control Precaution ■ Handle the remote control carefully. ■ Avoid excessive heat and humidity. ■ Do not short, heat, or take apart batteries. ■ Do not throw batteries into fire. ■ Remove the battery if the remote control may not be used for a long time to prevent the damage caused by leaks. - Page 30 Item Label Description ▲ Press to select or change settings in the OSD. ◄ Press to select or change settings in the OSD. ▼ Press to select or change settings in the OSD. MENU Press to display, hide the OSD menu or return the previous OSD menu.
-
Page 31: Remote Control Operating Range
Using the Exclusive Remote (LX-RC01) with Wired To use a wired remote control with the projector. Use a cable with a ø3.5 mm stereo mini jack (not included). Remote Control 3.5mm audio cable (not included) Note: Infrared operations cannot be performed if a cable is connected to the projector or the remote control. -
Page 32: Setting The Remote Id To The Projector
Setting the Remote ID to the Projector To operate multiple projectors independently, set this ID function. ■ “Remote ID” is for a remote control. ■ “Control ID” is for a projector. See page 76. Press the ID SET button for three seconds. The LED indicator on the remote control blinks. To designate the Remote ID, press and hold the 2 digit number (01 ~ 99) each button for 1 second at least. -
Page 33: Setup And Operation
Setup and Operation Inserting the Remote Control Batteries Note: ■ Do not use the old and new batteries or the batteries of different types together. ■ Remove the battery if the remote control may not be used for a long time to prevent the damage caused by leaks. -
Page 34: Installing The Lens
Installing the Lens Remove the dust cap. Remove the new lens from its packaging. Remove the lens covers from the rear and front of the new lens. Remove them before continuing. Clean the new lens before installing. Take care when cleaning to prevent scratching the surface of the new lens. -
Page 35: Using The Anti-Theft Screw For Lens
Using the Anti-theft Screw for Lens To prevent the accidental removal of the lens, fasten the Anti- Anti-theft screw for lens theft screw for lens included with the projector to the bottom of the projector. Projector Parts and Functions Location of Laser Aperture Note: The laser aperture is located as depicted in the following illustration. -
Page 36: Interlock Switches
Interlock Switches This projector has three (top cover x 1, lens x 2) interlocking switches to protect the user from the unnecessary laser exposure. Item Description The lens alarm function automatically powers off the projector if the lens is removed or not installed correctly. -
Page 37: Precaution For Installing The Projector
Precaution for Installing the Projector The high quality display from the project is only available when the projector is correctly installed. Generally, the light source facing the screen should be reduced or eliminated as much as possible. The contrast of the image will be obviously reduced if the light directly shines on the screen, such as the beam from windows or the other lighting illumination on the image. -
Page 38: Portrait Projection (Vertical Orientation)
Portrait Projection (Vertical Orientation) The projector can be installed vertically to display computer images in portrait orientation. Notes, when installing the projector vertically. ■ Allow at least 30 cm(11.8”) clearance around the air intake vent. ■ Prepare an exclusive stand (not included). Note: Using the projector in the following situation may accelerate the deterioration of optical parts. -
Page 39: Connecting The Projector
Connecting the Projector Connecting to the PC Computer RGB to HDMI cable DVI-D cable Computer cable composite (not included) cable (not included) (not included) Projector Connecting to the AV Equipment AV Equipment RCA to BNC type composite cable HDMI cable (not included) (not included) Projector... -
Page 40: Connecting To The Control Devices
Connecting to the Control Devices Projector 3.5mm audio cable LAN cable RS-232 cable (not included) (not included) (not included) Remote Control Computer Connecting to the Screen Trigger 3.5mm trigger cable (not included) Projector Screen Projector... -
Page 41: Connecting To The External Hdbaset Transmitter
Connecting to the External HDBaseT Transmitter AV Equipment Computer Computer cable Composite cable HDMI cable (not included) (not included) HDBaseT Transmitter VGA IN YPbPr RJ45 HDMI RS-232 RJ45 Control PC RS-232 cable LAN cable LAN cable (not included) (not included) (not included) cable (not included) -
Page 42: Connecting To The Extended Monitor
Connecting to the Extended Monitor Computer Monitor RGB to composite cable Computer cable Computer cable (not included) Projector Starting and Shutting down the Projector Connect the power cord to the projector. Connect the other end to a wall outlet. (“Voltage Selection”... -
Page 43: Adjusting The Projector Level
Press the source buttons on the remote control or HDMI DISPLAY PICTURE LASER ALIGNMENT CONTROL SERVICE INPUT on the projector to select a desired input signal. Input Selection HDMI DVI-D Computer-1 Computer-2 / BNC 3G-SDI HDBaseT Press the POWER button on the projector or the OFF Power Off? button on the remote control to show the “Power Off? / Press Power again... -
Page 44: Adjusting The Focus And Zoom
Adjusting the Focus and Zoom Press FOCUS +/- on the projector or the remote control to sharpen the projected image. Press ZOOM +/- on the projector or the remote control to adjust the size of the image (ZOOM + increases image size, ZOOM - decreases image size). ENTER MENU EXIT... -
Page 45: Vertical Lens Shift
Vertical Lens Shift The lens on a desk mounted projector can move down to up from 0% to 50% (0.5V). a g e M a x . 0 . 5 a g e Vertical Shift M a x . 0 . 5 Lens Center The lens of the ceiling mounted projector can move up to down from 0% to 50% (0.5V). -
Page 46: Horizontal Lens Shift
Horizontal Lens Shift The image can be shifted horizontally to the right or left by 10% (0.1H) without moving the projector. M a x . 0 . 5 I m a 0 . 1 Lens Center 0 . 1 H ■... -
Page 47: Horizontal Lens Shift For Lx-Il01Uw (Ultra Wide Zoom Lens)
Horizontal Lens Shift for LX-IL01UW (Ultra Wide Zoom Lens) The image can be shifted horizontally to the right or left by 6.70% (0.067H) without moving the projector. M a x . 0 . 5 a g e 0 . 0 6 7 H Lens Center 0 . -
Page 48: On-Screen Display (Osd) Menu Settings
On-Screen Display (OSD) Menu Settings OSD Menu Controls The projector has an OSD that lets you make image adjustments and change various settings. Navigating the OSD You can use ▲, ▼, ◄ or ► on the remote control or the projector keypad to navigate and adjust settings. -
Page 49: Setting The Osd Language
Setting the OSD Language Set the OSD language (default: English) to your preference before continuing. Press MENU. Press ◄ or ► to navigate to CONTROL. Press ▲ or ▼ until Language is selected. Press ENTER to enter the Language menu. HDMI DISPLAY PICTURE... -
Page 50: Osd Menu Overview
OSD Menu Overview Main Menu Sub Menu Setting DISPLAY Input Selection HDMI / DVI-D / Computer-1 / Computer-2/BNC / 3G-SDI / HDBaseT Test Pattern White / Black / Red / Green / Blue / Checkerboard / CrossHatch / V Burst / H Burst / ColorBar 3D Format Off / Auto / Side by Side (Half) / Top and Bottom / Frame Sequential... - Page 51 Main Menu Sub Menu Setting ALIGNMENT Projection Mode Front Tabletop / Front Ceiling / Rear Tabletop / Rear Ceiling Lens Control Popup menu for Zoom, Focus and Shift control Lens Memory Memory 1 / Memory 2 / Memory 3 / Memory 4 / Memory 5 / Memory 6 / Memory 7 / Memory 8 Center Lens Center Lens ?
- Page 52 Main Menu Sub Menu Setting CONTROL Network Network Mode Projector Control / Service Off / On Standby Power DHCP Off / On 192.168.0.100 (Enter to edit) Subnet Mask 255.255.255.0 (Enter to edit) Gateway 0.0.0.0 (Enter to edit) 0.0.0.0 (Enter to edit) 00:18:23:2c:eb:8a (example) Auto Power Off Off / On...
- Page 53 Main Menu Sub Menu Setting SERVICE (for Model Name LX-MU600Z LX-MU600Z) Serial Number DEE300001A (example) Software Version 1 MM01-SD07-FD19 (example) Software Version 2 LD06-22-RP02-3092 (example) Control / Remote ID X / X Active Source HDMI (example) Signal Format 1920x1200 60Hz RB (example) Pixel Clock 154.00 MHz (example) H/V Refresh Rate...
-
Page 54: Display Menu
DISPLAY Menu HDMI DISPLAY PICTURE LASER ALIGNMENT CONTROL SERVICE Input Selection Test Pattern Auto Color Space Logo Background Auto PC Label Description Input Selection Press ENTER to enter the Input Selection menu. Test Pattern Press ENTER to display different test patterns for projector installation check. -
Page 55: 3D Menu
3D Menu HDMI DISPLAY PICTURE LASER ALIGNMENT CONTROL SERVICE Test Pattern 3D Format Enter DLP Link Normal 3D Swap Label Description 3D Format* Press ENTER to open the 3D Format window. Press ▲ or ▼ to select the 3D format. The options are Off, Auto, Side by Side (Half), Top and Bottom or Frame Sequential. -
Page 56: Picture Menu
PICTURE Menu HDMI DISPLAY PICTURE LASER ALIGNMENT CONTROL SERVICE Picture Mode Presentation Brightness Contrast Saturation Gamma Color Color Temperature Native White Balance Sharpness Noise Reduction VGA Setup Label Description Picture Mode (*1) Press ◄ or ► to select a picture mode. The options are Presentation, Standard and Video. -
Page 57: Color Menu
Color Menu HDMI DISPLAY PICTURE LASER ALIGNMENT CONTROL SERVICE Color Enter Saturation Gain White Gain Label Description Press ENTER to enter the Hue menu. Press ▲, ▼, ◄ or ► to adjust settings. Press ENTER to enter the Saturation menu. Press ▲, ▼, ◄ or ► to adjust Saturation settings. -
Page 58: Vga Setup Menu
VGA Setup Menu HDMI DISPLAY PICTURE LASER ALIGNMENT CONTROL SERVICE VGA Setup V Start H Start H Phase H Total Label Description V Start Press ◄ or ► to adjust V Start for the Computer-1 / Computer-2/BNC signal display. H Start Press ◄... -
Page 59: Laser Menu
LASER Menu HDMI DISPLAY PICTURE LASER ALIGNMENT CONTROL SERVICE Power Mode Normal Power Level ─ ─ ─ ─ ─ High Altitude Auto Label Description Power Mode Press ◄ or ► to select a power mode. The options are Normal, Eco or Custom. -
Page 60: Alignment Menu
ALIGNMENT Menu HDMI DISPLAY PICTURE LASER ALIGNMENT CONTROL SERVICE Projection Mode Front Table Lens Control Lens Memory Center Lens Geometry Edge Blend Label Description Projection Mode Press ◄ or ► to select a projection mode. The options are Front Tabletop, Front Ceiling, Rear Tabletop and Rear Ceiling. -
Page 61: Lens Control Menu
Lens Control Menu Switch between Lens Shift, Zoom/Focus menus by pressing ENTER button. Lens Control Zoom / Focus Zoom Shift Focus Enter to Zoom/Focus Enter to Shift Label Description Zoom Press ▲ or ▼ to adjust zooming of the lens. Focus Press ◄... -
Page 62: Lens Memory Menu
Lens Memory Menu The projector can save information about the lens position in memory. Up to eight sets of lens information (including focus, zoom, and lens shift settings) can be saved, and the lens can be restored to these positions. HDMI DISPLAY PICTURE... -
Page 63: Geometry Menu
Geometry Menu HDMI DISPLAY PICTURE LASER ALIGNMENT CONTROL SERVICE Geometry Aspect Ratio Auto Overscan Digital Alignment Keystone Rotation Pincushion / Barrel Top Left Corner Top Right Corner Bottom Left Corner Bottom Right Corner Reset Blanking Label Description Aspect Ratio Press ◄ or ► to adjust the aspect of the projected image. 5:4: The image is projected using an input signal aspect ratio of 5:4. - Page 64 Label Description Keystone Press ▲, ▼, ◄ or ► to adjust horizontal or vertical distortion brought by the projection angle. Keystone Example The projector is positioned at an angle. The resulting image is distorted. The image is corrected. Keystone Settings To correct the right side of the image The projector is positioned to the left of the screen.
- Page 65 Label Description Rotation Press ◄ or ► to rotate the image until it is good position. Pincushion / Barrel Press ENTER to enter the Pincushion / Barrel menu. Press ▲, ▼, ◄ or ► to correct the pincushion distortion. Top / Bottom Example Left / Right Example Top Left Corner Apply horizontal / vertical correction as necessary to restore the rectangular...
- Page 66 Label Description Bottom Right Corner Apply horizontal / vertical correction as necessary to restore the rectangular shape of the image. Press ENTER to enter the Bottom Right Corner menu. Press ▲, ▼, ◄ or ► to correct the distortion. Reset Press ENTER to set to the default value.
- Page 67 Digital Alignment Menu HDMI DISPLAY PICTURE LASER ALIGNMENT CONTROL SERVICE Digital Alignment Digital Zoom Digital Pan Digital Scan Reset Label Description Digital Zoom Press ◄ or ► to enlarge the projected image. Digital Pan Press ◄ or ► to move the projected image horizontally. The function is only available when the image is enlarged.
-
Page 68: Edge Blend Menu
Edge Blend Menu HDMI DISPLAY PICTURE LASER ALIGNMENT CONTROL SERVICE Edge Blend Edge Blend Align Pattern Blend Width Black Level Reset Label Description Edge Blend By combining multiple projectors, a high resolution video can be projected on an even bigger screen using the Edge Blend function. Press ◄... - Page 69 Label Description Align Pattern Make the overlaps more visible and help adjusting the physical position of the projectors in the array. Press ◄ or ► to enable or disable the align pattern function. RANGE: Determine an area of overlapped edges of images. Turn on (RIGHT) Turn on (LEFT) Magenta marker...
- Page 70 Label Description Press ENTER to enter the Black Level menu. Press ▲, ▼, ◄ or ► to Black Level adjust settings. Adjusting the Black Level when placing two projectors side by side Width of overlap Adjust [CENTER] Adjust [CENTER] Projector A’s Projector B’s image image...
-
Page 71: Possible Geometry And Edge Blend Combinations
Possible Geometry and Edge Blend Combinations Some Geometry and Edge Blend settings cannot be used in combination with others. The table below shows the possible combinations: Warping Blending White Black Level Level Keystone Rotation Warping Pincushion / Barrel 4-Corners Blanking Top/Bottom or Left/ White Level Right Only... -
Page 72: Control Menu
CONTROL Menu HDMI DISPLAY PICTURE LASER ALIGNMENT CONTROL SERVICE Network Auto Power Off Direct Power On Startup Logo Trigger Auto Search Dynamic Black Language Control ID Label Description Network Press ENTER to enter the Network menu. See “Network Menu” on page Auto Power Off Press ◄... -
Page 73: Network Menu
Network Menu HDMI DISPLAY PICTURE LASER ALIGNMENT CONTROL SERVICE Network Network Mode Projector Control Standby Power DHCP 192.168.0.100 Subnet Mask 255.255.255.0 Gateway 0.0.0.0 0.0.0.0 00:18:23:2c:eb:8a Label Description Network Mode Press ◄ or ► to select the network control. The options are Projector Control and Service. - Page 74 For simplicity and ease of operation, the projector provides diverse networking and remote management features. The LAN/RJ45 function of the projector through a network, such as remotely manage: Power On/Off, Brightness and Contrast settings. Also, projector status information, such as: Video-Source, etc. (Ethernet) The projector can be controlled by a PC (Laptop) or other external device with connecting to the projector’s LAN/RJ45 port.
- Page 75 LAN RJ45 Connect an LAN cable to the RJ45 port on the projector and the PC (Laptop). Computer Projector LAN cable (not included) Compatible browsers are as follows. Microsoft Internet Explorer 9 with Adobe Flash Player 9.0 or higher. On the PC (Laptop), select Start → Control Panel → Network and Internet. Right-click on Local Area Connection, and select Properties.
- Page 76 In the Properties window, select the Networking tab, and select Internet Protocol (TCP/IP). Click Properties. Click Use the following IP address and fill in the IP address and Subnet mask, then click OK. Press the Menu button on the projector. Select CONTROL →...
- Page 77 The projector is setup for remote management. The LAN/RJ45 function displays as follows. Based on network web-page for the input-string in tools tab, the limitation for Input-Length is in the below list (“space” and the other punctuation key included): Category Item Input-Length Crestron Control...
- Page 78 Category Item Input-Length User Password Enabled (N/A) New Password Confirm Admin Password Enabled (N/A) New Password Confirm For more information, please visit http://www.crestron.com/.
- Page 79 RS232 by Telnet Function Besides projector connected to RS232 interface with “Hyper-Terminal” communication by dedicated RS232 command control, there is alternative RS232 command control way, so called “RS232 by TELNET” for LAN/RJ45 interface. Quick Start Guide for “RS232 by TELNET” Check and get the IP address on OSD of the projector.
- Page 80 How to have TELNET enabled in Windows VISTA / 7 By default installation for Windows VISTA, “TELNET” function is not included. But end-user can have it by way of “Turn Windows features On or Off” to be enabled. Open Control Panel in Windows VISTA. Open Programs.
- Page 81 Specsheet for “RS232 by TELNET”: ■ Telnet: TCP ■ Telnet port: 7000 ■ Telnet utility: Windows “TELNET.exe” (console mode) ■ Disconnection for RS232-by-Telnet control normally: Close Windows Telnet utility directly after TELNET connection ready ■ Limitation 1 for Telnet-Control: there is only one connection for Telnet-Control in one projector Limitation 2 for Telnet-Control: there is less than 50 bytes for successive network payload for Telnet-Control application.
-
Page 82: Control Id Menu
Control ID Menu HDMI DISPLAY PICTURE LASER ALIGNMENT CONTROL SERVICE Control ID Control ID Enable Control ID Number Remote ID Number Label Description Control ID Enable* Press ◄ or ► to enable or disable control ID. Control ID Number Press ◄ or ► to set the control number for the projector. The function is only available when Control ID Enable is On. -
Page 83: Service Menu
SERVICE Menu LX-MU800Z HDMI DISPLAY PICTURE LASER ALIGNMENT CONTROL SERVICE Model Name LX-MU800Z Serial Number DDE300001A Software Version 1 MM01-SD07-FD19 Software Version 2 LD06-22-RP02-3092 Control / Remote ID X / X Active Source HDMI Signal Format 1920x1200 60Hz RB Pixel Clock 154.00 MHz H/V Refresh Rate 74.038 KHz / 59.95 Hz... - Page 84 LX-MU600Z HDMI DISPLAY PICTURE LASER ALIGNMENT CONTROL SERVICE Model Name LX-MU600Z Serial Number DEE300001A Software Version 1 MM01-SD07-FD19 Software Version 2 LD06-22-RP02-3092 Control / Remote ID X / X Active Source HDMI Signal Format 1920x1200 60Hz RB Pixel Clock 154.00 MHz H/V Refresh Rate 74.038 KHz / 59.95 Hz Laser Hours...
-
Page 85: Thermal Status Menu
Thermal Status Menu HDMI DISPLAY PICTURE LASER ALIGNMENT CONTROL SERVICE Thermal Status Inlet Temperature 25 / 25 ( C ) DMD Temperature 32 ( C ) Laser Temperature 33 / 30 ( C ) Water Pump RPM 3900 Fan 1-3 Speed 1400 / 1400 / 1400 Fan 4-6 Speed 1400 / 1200 / 1200... -
Page 86: Maintenance And Security
Replacing the Projection Lamp Do not attempt to replace the projection lamp yourself. Be sure to request this service from a qualified technician or contact the Canon Customer Support Center. Make sure to use the exclusive optional lens. There are following mentions in the zoom ring of the exclusive lens ■... - Page 87 Orient the lens so that the arrow on the label pasted on its side is facing upward and push the lens into the lens mount of the unit as far as it will go. Turn the new lens clockwise until and audible Click is heard signifying the new lens is secured and seated correctly.
-
Page 88: Cleaning The Projector
Cleaning the Projector Cleaning the projector to remove dust and grime will help ensure trouble-free operation. Warning: Be sure to turn off the power and disconnect the power plug from the wall outlet. Failure to do so, ■ an unexpected projection of light may cause injury to eyes. ■... -
Page 89: Using The Kensington ® Lock
® Using the Kensington Lock If you are concerned about security, attach the projector to a permanent object with the Kensington slot and a security cable. Note: Contact your vendor for details on purchasing a suitable Kensington security cable. -
Page 90: Ceiling Attachment Installation
Caution Make sure the followings when you install and handle the ceiling attachment. ■ Make sure to ask the Canon Customer Support Center if you want to install the ceiling attachment. An inappropriate installation may cause an accident. Parts Lineup The ceiling attachment RS-CL15 is for LX-MU800Z / LX-MU600Z. -
Page 91: Extension Pipe Rs-Cl08 / Rs-Cl09 (Optional)
Extension Pipe RS-CL08 / RS-CL09 (Optional) Use an optional extension pipe (RS-CL08 / RS-CL09) according to the ceiling height. For details, contact our local agent. RS-CL08 RS-CL09 Outer/inner pipes and outer/inner covers Outer/inner pipes and outer/inner covers M5 screw (12 mm/0.5”): 4 pcs. M5 screw (12 mm/0.5”): 4 pcs. -
Page 92: Distance From Ceiling To Lens Center (ℓ)
Distance from Ceiling to Lens Center (ℓ) RS-CL15 When RS-CL08 is used When RS-CL09 is used 26.2 cm / 0.9’ 61.2 cm / 2.0’ to 81.2 cm / 2.7’ 81.2 cm / 2.7’ to 121.2 cm / 4.0’ For more detailed information on the screen sizes and the projection distance, see “Relationship Between Image Size and Projecting Distance”... - Page 93 Turn the projector base up, and remove the two adjusting legs on front side. Install the attached M4 screws at the six screw fastening positions on the Base bracket. Caution: ■ Make sure to remove the adjusting foot before attaching the screw to the front part of the projector.
-
Page 94: Installation To A High Ceiling
Installation to a High Ceiling Use optional extension pipe RS-CL08 or RS-CL09 for high ceiling. Preparation: Remove the covers of outer and inner pipes by slightly sliding them and lift up as shown. Remove four M5 screws from the sides of the outer pipe, adjust the inner pipe length according to the projector installation height, and then secure the four M5 screws. - Page 95 Make a hole in the ceiling to install the ceiling-mount bracket and cables. Caution: ■ Mounting position varies on the projector used. Make sure that the template sheet (A) corresponding to the projector is used. ■ When determining the hole position, use the supplied template sheet (A).
- Page 96 Use the four M5 screws removed from the ceiling-mount bracket during preparation. Direction to the screen Hook the base bracket on the protrusion (A) of the joint fitting, and secure it temporarily using the four supplied M5 screws (B). Mount the terminal clamp on the other end of anti-fall wire to the joint fitting (C), and secure it at the wire- attaching position using M4 screw.
-
Page 97: Adjust The Projection Angle
Adjust the Projection Angle Turn on the projector, project an image, and then adjust the projection angle and screen slant angle. Caution: ■ After completion of adjustment, tighten the screws and check that every fitting is secured firmly. ■ Be sure to hold the projector from falling until the ceiling-mount bracket and Base bracket are secured firmly. -
Page 98: Specifications
Specifications RS-CL15 Horizontal projection angle 5° leftward or rightward Vertical projection angle 5° upward or 20° downward Screen slant angle ± 5° Outer dimension of assembly 460 x 490 x 152.6 mm (18.1 x 19.3 x 6.0 in) (excluding projection) (W x D x H) Weight (Ceiling attachment only) 6.9 kg (15.2 lbs) -
Page 99: Troubleshooting
Troubleshooting Image Problems Problem: No image appears on the screen. Check whether the projector is connected to the computer or AV equipment correctly. Check whether the power cord is connected correctly. Turn first the projector and then the computer off and then back on again. Problem: The image is blurred. -
Page 100: Specifications
Specifications Product Specifications Model name LX-MU800Z LX-MU600Z Display system 1-CHIP DLP™ Type Size / Aspect ratio 0.67”x1 / 16:10 Drive system DLP™ x 1 chip Number of pixels 2,304,000 (1920 x 1200) x 1 Zoom ratio / Focal length / 1.3x / f = 26 to 34mm / F = 1.64 to 1.86 F number Zooming / Focusing system... -
Page 101: Projector Dimensions
Model name LX-MU800Z LX-MU600Z Acoustic Noise (Normal / ECO) 40dB / 37dB Operating temperature 5°C (41°F) to 40°C (104°F), RH 10~85% Power supply AC 100-130V, 200-240V selectable Maximum power consumption 890W/845W (100V/240V) 725W/695W (100V/240V) Standby mode power consumption ECO: < 0.5W (only for Remote/Power Button) Networking: <... -
Page 102: Forholdet Mellem Image Size Or Projekteringsdistance
Relationship Between Image Size and Projecting Distance Screen Height (A) Lens Center Projector Bottom Projection Distance (B) Lens Unit LX-IL01UW LX-IL02WZ Lens Type Ultra wide zoom lens Wide zoom lens Throw Ratio 0.75 ~ 0.93 : 1 1.25 ~ 1.79 : 1 Image Size Projection Distance (B) Diagonal... - Page 103 Lens Unit LX-IL03ST LX-IL04MZ Lens Type Standard zoom lens Middle zoom lens Throw Ratio 1.73 ~ 2.27 : 1 2.22 ~ 3.67 : 1 Image Size Projection Distance (B) Diagonal Width Height (A) Wide Tele Wide Tele (inch) (inch) (inch) (inch) (inch) (inch)
-
Page 104: Lens Series
Lens Unit LX-IL07WF Lens Type Short fixed lens Throw Ratio 0.76 : 1 Image Size Projection Distance (B) Diagonal Width Height (A) (inch) (inch) (inch) (inch) 1.02 0.86 0.54 25.1 0.64 1.27 1.08 0.67 31.8 0.81 1.52 1.29 0.81 38.5 0.98 1.32 2.03... -
Page 105: Led Indicator Status
LED Indicator Status Power LED Indicator LED Display Projector Status Power is off Flashing Green Prepare to turn on projector Orange Projector cooling Standby mode Green Projector is on Status LED Indicator LED Display Projector Status No problem Flashing Red (Cycles of 1) Cover &... -
Page 106: Supported Signal Input Timing
Supported Signal Input Timing Computer Signal Resolution Freq. H Freq. V Clock BNC - BNC - HD15 - HD15- DVI-D HDMI HDMI HDBaseT Type (KHz) (Hz) (MHz) RGBHV RGBHV (EIA Timing) (EIA Timing) (EIA Timing) 640*480-60 31.47 59.93 25.175 640*480-75 37.5 31.5 640*480-85... -
Page 107: 3G-Sdi
3G-SDI Timing SDI Link Signal Standards Color Encode Sampling Bit Depth Remark Mode Structure NTSC SMPTE 259M-C 270Mbps SD YCbCr 4:2:2 128M SMPTE 259M-C 270Mbps SD YCbCr 4:2:2 128M 1035i60 SMPTE 292M 1.5Gbps HD YCbCr 4:2:2 128M 1080i59 SMPTE 292M 1.5Gbps HD YCbCr 4:2:2 128M... -
Page 108: Notes For Projection Mode
Notes for Projection Mode Referring to the following illustration, select a Projection Mode in the ALIGNMENT menu. The options are Front Tabletop, Front Ceiling, Rear Tabletop and Rear Ceiling. When the projector is installed in a tilt angle over ±10 degrees, you need to select High at the High Altitude function in the LASER menu. - Page 109 Appendix Canon LX-MU800Z / LX-MU600Z User Commands Interface and Requirements (Ver 1.0) Serial (RS-232) Interface The RS-232 Commands use only ASCII characters which can be entered using a typical terminal emulator like Windows HyperTerminal with the following setting: Bits per second: 9600 bps...
- Page 110 System response: OP BRIGHT = 127 Execute command example: Input: op auto.img [CR] System response: OP AUTO.IMG The list of valid operations commands are shown in below table. 1. DISPLAY Item Operation Commands Values Notes Input.sel 0 = HDMI Note1 1 = DVI-D (no item4 because no DP...
- Page 111 2. PICTURE Item Operation Commands Values Notes pic.mode 0 = Presentation Note2 1 = Standard 2 = Video contrast = ? + - 0 ~ 200 Note2 bright = ? + - 0 ~ 200 Note2 saturat = ? + - 0 ~ 200 Note2;...
- Page 112 Item Operation Commands Values Notes 2-9-6 blue.gain = ? + - 20 ~ 200 Note2 2-10 sharp = ? + - 0 ~ 15 Note2 2-11 = ? + - 0 ~ 3 (Noise Reduction) Note2 2-12-1 v.pos = ? + - 0 ~ 200 Note2;...
- Page 113 Item Operation Commands Values Notes 4-5-3-1 h.keystone -600 ~ 600 Note1 4-5-3-2 v.keystone -400 ~ 400 Note1 4-5-4 rotation -100 ~ 100 Note1 4-5-5-1 h.pin.barrel -150 ~ 300 Note1 4-5-5-2 v.pin.barrel -150 ~ 300 Note1 4-5-6-1 4corner.ulx -192 ~ 192 Note1 4-5-6-2 4corner.uly...
- Page 114 Item Operation Commands Values Notes 5-1-4 net.ipaddr <string> Note1 5-1-5 net.subnet <string> Note1 5-1-6 net.gateway <string> Note1 5-1-7 net.dhcp 0 = Off Note1 1 = On 5-1-8 net.dns <string> Note1 auto.powoff 0 = Off Note1 1 = On auto.powon 0 = Off Note1 1 = On startup.logo...
- Page 115 7. OTHERS Item Operation Commands Values Notes power.on (execute) power.off (execute) status 1 = warm up 2 = imaging 3 = cooling 4 = error REMARK: An input command will get back with “NA” when the input command is “Not Applicable” in some specific conditions.
- Page 116 30-2, Shimomaruko 3-chome, Ohta-ku, Tokyo 146-8501, Japan CANON U.S.A. INC. One Canon Park, Melville, New York 11747, U.S.A. For all inquires concerning this product, call toll free in the U.S. 1-800-OK-CANON CANON EUROPE LTD. 3 The Square, Stockley Park, Uxbridge, Middlesex, UB11 1ET United Kingdom CANON EUROPA N.V.