
Related Manuals for GE Monogram ZDBC2A0


Summary of Contents for GE Monogram ZDBC2A0
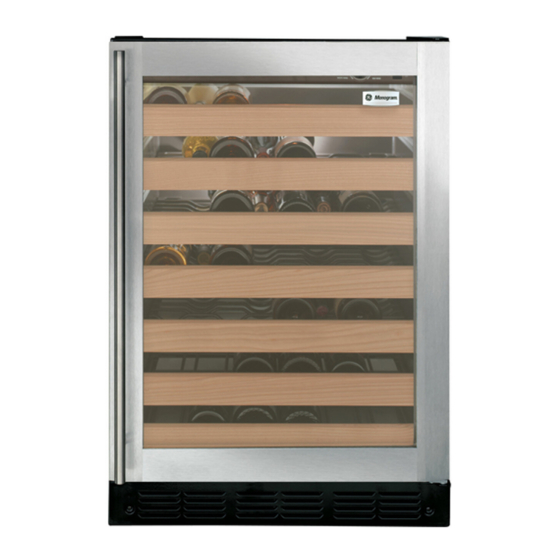
- Page 1 Design Guide with Installation Instructions Wine Chiller, Wine Reserve and Beverage Center monogram.com...
-
Page 2: Table Of Contents
Installation requires basic mechanical For Monogram Parts and Accessories, call 1.800.626.2002. skills. Proper installation is the responsibility of the installer. Product failure due to improper installation is not covered under the GE Appliance Warranty. www.monogram.com CONTENTS Design Guide Installation Instructions The Installation Space ...... -
Page 3: Design Guide
Design Guide THE INSTALLATION SPACE (cont.) THE INSTALLATION SPACE Flush Installation Dim. A Filler panel or cleat to be set back even with front of case. CABINET CABINET Front edge of product case Front face 110° These products will fit flush to 120°... -
Page 4: Side-By-Side Installations
Design Guide PRODUCT CLEARANCES SIDE-BY-SIDE INSTALLATIONS The stainless steel wine chiller, wine reserve and Increase storage capacity by installing two Monogram beverage center is factory set for a 110° door swing. beverage centers, wine chillers or wine reserves together. Models that accept custom panels have a 95° door Or, for a complete refreshment center, install any two swing. -
Page 5: Installation Instructions
Installation Instructions TOOLS REQUIRED STAINING WOOD DRAWER FRONTS • #2 Phillips screwdriver The drawer fronts are unfinished cherry wood. During • Adjustable wrench use, oil from hands may accumulate and stain the wood. PARTS SUPPLIED • The drawer fronts may be stained and sealed to match adjacent cabinetry. -
Page 6: Step 2 Reverse Door Swing
Installation Instructions STEP 2 REVERSE DOOR SWING SKIP THIS STEP IF DOOR SWING SUITS THE INSTALLATION Install 3 Hinge Parts Included: Screws • Top left case hinge Remove • Bottom left case hinge Top Hinge • Left and right side decorative hinge cover •... -
Page 7: Step 5, Slide Product Into Cutout
Installation Instructions CUSTOM FRAME PANEL MODELS STEP 3 LEVEL Model ZDWI240WII and ZDBI240WII • Use an adjustable wrench to turn the leveling legs and These models require a custom panel frame surrounding raise or lower the product. the glass. There are two options: the panel may be 29-3/4" •... - Page 8 TEMPLATE FOR NAMEPLATE LOCATION To position nameplate: • Cut template along dotted line. • Hold or tape template behind glass door so that it is visible from the front side. • Remove backing from nameplate. • Place nameplate onto front side of door, matching illustration on the template.