
Related Manuals for Samsung WA13F5S3


Summary of Contents for Samsung WA13F5S3
- Page 1 WA13F5S3 WA10F5S3 WA90F5S3 WA85F5S3 Washing Machine user manual imagine the possibilities Thank you for purchasing a Samsung product. F500-03273C-03_EN.indd 1 F500-03273C-03_EN.indd 1 2/21/2017 4:47:54 PM 2/21/2017 4:47:54 PM...
-
Page 2: Table Of Contents
contents SETTING UP YOUR WASHER Description of part How to wash automatically depends on the laundry Control Panel MANUAL FUNCTIONS Manual functions Environment INSTALLATION & MAINTENANCE Levelling Connecting the water supply hose Assembling the rat protection panel (option) How to connect the drain hose (option) Adding detergent Adding fabric softener Water supply connector fi... - Page 3 safety instructions Please note that the following precautions for safety intend to prevent unpredictable danger and damage by helping the proper use in safety. When using hot water in washing, please make sure that the water should not exceed 50°C. •...
- Page 4 safety instructions 8. CAUTION: In order to avoid a hazard due to inadvertent resetting of the thermal cut-out, this appliance must not be supplied through an external switching device, such as a timer, or connected to a circuit that is regularly switched on and off by the utility.
- Page 5 The use for business purposes qualifi es as product misuse. In this case, the product will not be covered by the standard warranty provided by Samsung and no responsibility can be attributed to Samsung for malfunctions or damages resulting from such misuse.
-
Page 6: Setting Up Your Washer
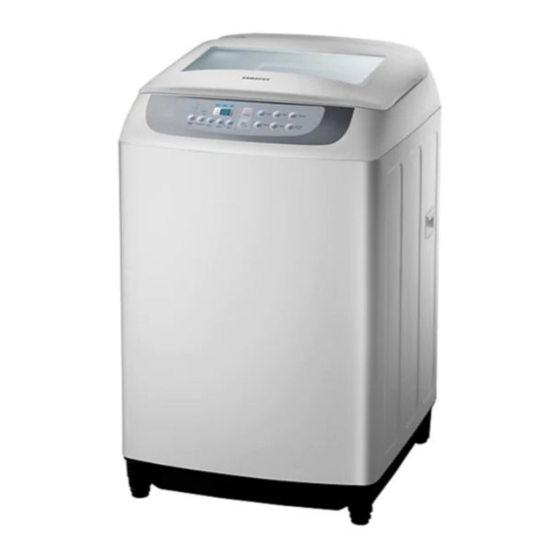
setting up your washer DESCRIPTION OF PART The User’s Manual is for common use. Make use of the User’s Manual depending upon your washing machine model. Water supply hose (Cold) Water supply hose (Hot) Be sure to keep the lid closed during washing and spinning. - Page 7 CHECKING BEFORE WASHING AND CARING FOR GARMENTS Must follow the checkpoints in order to avoid machine problems or damages on garments. • If the below problems are caused by customer’s faults, separate service fee will be charged. Checkpoints Before Starting Washing Check if the clothes are bleaching or not.
- Page 8 setting up your washer CARING FOR CLOTHES BEFORE WASHING Take out personal belongings from pockets. • Caution, Check the pockets! Hairpins and coins cause damages to clothes and washing machine. They make noise and problems to the machine. Must check the pocket. If pants zippers are open while washing, the spin basket may be damaged.
- Page 9 Curtains, fl oating garments or blue jeans shall be pressed not to fl oat on the water. • If they are floated on the water, press Start/Pause button to stop and press them to sock in the water. If the washing goes on with clothes floating on the water, it may cause damages to the clothes and the washing machine as well as unsatisfactory washing result.
- Page 10 setting up your washer HOW TO WASH AUTOMATICALLY DEPENDS ON THE LAUNDRY Before starting washing, check the following; • Connect the water supply hose to the water tap. Leave a tap open. Plug the power cord in. Make sure to lay down the drain hose. Washing for the fi...
- Page 11 CONTROL PANEL For more details, see control panel of your washing machine. Displays the remaining wash time. Digital graphic Displays the error state if a problem occurs in the washing machine so that you display can take action. The water level is automatically adjusted. However, you can select the water level Water Label manually by pressing this button.
- Page 12 setting up your washer Fuzzy Selects the best washing program automatically. If you want to wash those frequently used towels or less dirty Quick laundry time. Because washing is speedy, it is good for light or less stained laundry. Delicate Washable sweater, cardigan, delicate clothes etc.
-
Page 13: Manual Functions
manual functions Possible to select the function for each program. (Example) For a simple washing as the little dirt program : Power Select the little dirt program Wash Start/Pause Press the Power button. WASH ONLY Press the Wash button. Press the Start/Pause button. -
Page 14: Environment
installation & maintenance The User’s Manual is for common use. Make use of the User’s Manual depending upon your washing machine model. ENVIRONMENT Leave some space Maintain at least 10 cm between the washer and the wall. Place the washer on a sturdy fl at surface. If the washer is placed on an uneven or weak surface, noise or vibration occurs. - Page 15 4. Connect the water supply hose to the adaptor. Pull down the part (c) of the water supply hose. When the part (c) is released, the hose is automatically connected to the adaptor making a ‘click’ sound. 5. Connect the other end of the water supply hose to the inlet water valve at the back of the washer.
- Page 16 installation & maintenance HOW TO CONNECT THE DRAIN HOSE (OPTION) IN CASE OF PUMP-DRAINED WASHER cap-hose Take out the cap-hose and connect the Be sure to join tightly the drain hose into the outlet-hose. (option) drainoutlet on the back of the machine. Drain hose Hose guide Be sure to join tightly the drain hose into the...
-
Page 17: Adding Detergent
CAUTIONS WHEN INSERTING THE DRAIN HOSE Less than 3 m 1. Don’t exceed more than 3 m when the 2. Be careful to drain water out at the end of drain hose is used by connecting with the drain hose. other hoses. -
Page 18: Water Supply Connector Filter
installation & maintenance WATER SUPPLY CONNECTOR FILTER 1. Pull out the fi lter and wash well. 2. Pull in the fi lter and connect the hose to the inlet water valve tightly. 3. Check if there is a leakage. Note to tighten up the connector. CLEANING THE FILTER Clean the filter net often to keep the washer clean. -
Page 19: Cleaning The Detergent Compartment
CLEANING THE DETERGENT COMPARTMENT 1. Separate the detergent compartment from the washer. 2. Separate and clean the Rinse-Cap from the detergent compartment. 3. Assemble the Rinse-Cap and insert the detergent compartment into the washer. ECO TUB CLEAN REMINDER • The ( ) indicator reminds you of cleaning the tub when necessary. If you happen to see the indicator blinking after washing is complete, remove the laundry and run the Eco Tub Clean cycle. -
Page 20: Troubleshooting
troubleshooting PROBLEM CHECK Washing machine won’t work • Is the water tap opened? • Is the washer plugged in? • Is the power cut off? • Is there enough water? Water dose not drain • Is the drain hose down?(No pump) •... -
Page 21: Washing Machine Won't Work
washing machine won’t work? PROBLEM CHECK The power is cut off. Is the electric voltage normal? Is the washer plugged in? Plug in the electric cord. Water does not drain. Is the drain hose down? Put the drain hose down. Is the drain hose folded? Unfold the drain hose. -
Page 22: Washing Machine Won't Work
washing machine won’t work? PROBLEM CHECK The water leaks at the water supply Did you press the Start/Pause button after selecting the water hose connector. supply? If the Start/Pause button is not pressed, water is not supplied. Press the Start/Pause button. Is the faucet closed? ... -
Page 23: Specification
USAGE WEIGHT 41 kg 0.05~0.78 Mpa WATER PRESSURE SPIN (0.5 ~ 8.0 kg·f/cm 700 rpm SPEED WASHING TYPE Stirring Type WA13F5S3 92 ℓ MAX. MASS OF WA13F5S3 13.0 kg 65 ℓ DRY CLOTH IN kg STANDARD WATER 51 ℓ LEVEL... - Page 24 603-77137477 (Overseas contact) 1-800-10-726-7864 [ PLDT Toll Free ] PHILIPPINES 1-800-8-726-7864 [ Globe Landline and Mobile ] www.samsung.com/ph/support 02-422-2111 [ Standard Landline ] SOUTH AFRICA 0860 SAMSUNG (726 7864) www.samsung.com/support DC68-03273C-03 F500-03273C-03_EN.indd Sec7:24 F500-03273C-03_EN.indd Sec7:24 2/21/2017 4:48:07 PM 2/21/2017 4:48:07 PM...