Table of Contents
Advertisement
Quick Links
Advertisement
Table of Contents

Related Manuals for Samsung HT-F4530H


Summary of Contents for Samsung HT-F4530H
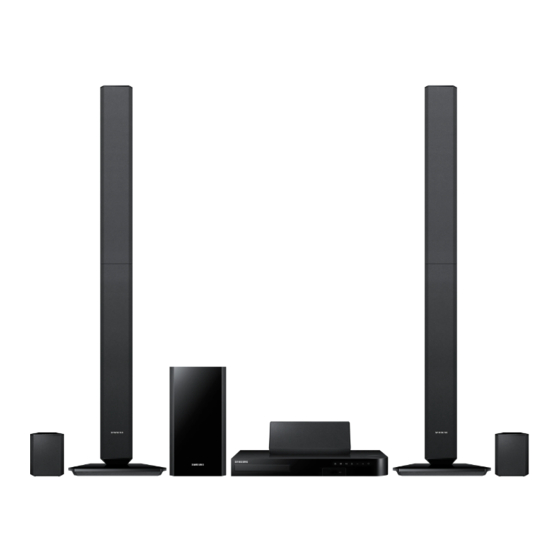
- Page 1 HT-F4500 HT-F4530H HT-F4550 5.1CH Blu-ray™ Home Entertainment System user manual imagine the possibilities Thank you for purchasing this Samsung product. To receive more complete service, please register your product at www.samsung.com/register...
-
Page 2: Safety Information
Safety Information Warning TO REDUCE THE RISK OF ELECTRIC SHOCK, DO NOT REMOVE THE COVER (OR BACK). NO USER-SERVICEABLE PARTS ARE INSIDE. REFER SERVICING TO QUALIFIED SERVICE PERSONNEL. CAUTION RISK OF ELECTRIC SHOCK DO NOT OPEN The lighting flash and Arrowhead CAUTION: TO REDUCE THE RISK OF The explanation point within the within the triangle is a warning sign... -
Page 3: Disc Storage & Management
• If the product makes an abnormal noise or produces Disc Storage & Management a burning smell or smoke, turn off the power switch immediately and disconnect the power plug from • Holding Discs the wall outlet. Then, contact the nearest customer - Fingerprints or scratches on service centre for technical assistance. -
Page 4: Using The 3D Function
Safety Information Using the 3D Function The terms HDMI and HDMI High-Definition Multimedia IMPORTANT HEALTH AND SAFETY INFORMATION FOR Interface, and the HDMI 3D PICTURES. Logo are trademarks or registered trademarks of Read and understand the following safety information HDMI Licencing LLC in the United States and other before using the 3D function. -
Page 5: Table Of Contents
Copyright MEDIA PLAY 24 Playing Files on a USB Device © 2013 Samsung Electronics Co.,Ltd. 24 Playing a Disc with User Recorded Content All rights reserved; No part or whole of this user’s manual may be reproduced or copied without the prior written 25 Playing a Commercial Video Disc permission of Samsung Electronics Co.,Ltd. -
Page 6: Getting Started
Please note that this is not a defect in the product. Samsung cannot guarantee that this product will play every disc bearing the Blu-ray Disc, DVD or CD logo because disc formats evolve, and problems and errors may occur during the creation of Blu-ray Disc, DVD, and CD software and/or the manufacture of discs. -
Page 7: Logos Of Discs The Product Can Play
Region Code Logos of Discs the product can play Both products and discs are coded by region. These regional codes must match for a disc to play. If the codes do not match, the disc will not play. The Region Number for this product is displayed on the rear panel of the product. - Page 8 Getting Started Picture File Support File Extension Type Resolution *.jpg *.jpeg JPEG 15360x8640 *.jpe *.png Video File Support File Extension Container Video Codec Audio Codec Resolution DivX 3.11/4/5/6 MP3, Dolby Digital, DTS, *.avi MP4v3 WMA, PCM H.264 BP/MP/HP VC-1 AP *.mkv DivX 5/6 MP3, Dolby Digital, DTS...
-
Page 9: Accessories
USB memory. Press the HOME button to move to the home menu, press the YELLOW (C) button, and then press the E button. • SAMSUNG is not responsible for any data file damage or data loss. Accessories Check for the supplied accessories below. -
Page 10: Front Panel
Getting Started Front Panel PLAY/PAUSE ENTER STOP OPEN/CLOSE VOLUME CONTROL FUNCTION 5V 500mA DISPLAY DISC TRAY USB HOST POWER REMOTE CONTROL SENSOR | NOTES | To upgrade the product's software through the USB Host jack, you must use a USB memory stick. When the product displays the Blu-ray menu, you cannot start the movie by pressing the 6 button on the product or the remote. -
Page 11: Remote Control
Remote Control Tour of the Remote Control Turn the product on and off. Press to select Blu-ray's mode. (BD/DVD, D. IN, AUX, etc.). FUNCTION To open and close the disc tray. VOLUME MUTE Adjust the volume. Cut off the sound temporarily. Press numeric buttons to operate options. -
Page 12: Connections
Connections This section describes various methods of connecting the product to other external components. Before moving or installing the product, be sure to turn off the power and disconnect the power cord. Connecting the Speakers Position of the product Place it on a stand or cabinet shelf, or under the TV stand. - Page 13 HT-F4530H STAND DRIVER STAND BASE STAND NUT SUBWOOFER CENTER FRONT SURROUND HT-F4550 SPEAKER CABLE SCREW (5x20): 16EA CENTRE FRONT / SURROUND STAND STAND BASE SUBWOOFER Installing the Speakers on the Tallboy Stand * HT-F4550 only - Front/Surround Speakers Stand Base Turn the Stand Base upside-down and connect it to the Stand.
- Page 14 Connections Installing the Speakers on the Half Tallboy Stand * HT-F4530H only - Front Speakers Stretch out the speaker cables as shown and arrange it through the hole of the stand base . When done, use the stand driver to tighten the stand nut as shown.
-
Page 15: Connecting To A Network Router
Connecting The Speakers Match each speaker cable bundle to the correct speaker by matching the colour coded plug on each bundle to the coloured sticker on the bottom of each speaker. To attach speaker wire to each speaker: a. Press down the red tab on the back of the speaker, insert the red wire, and then release the tab. -
Page 16: Connecting To A Tv/External Devices
Connections | NOTES | Internet access to Samsung’s software update server may not be allowed, depending on the router you use or your ISP’s policy. For more information, contact your ISP (Internet Service Provider). DSL users, please use a router to make a network connection. -
Page 17: Settings
Settings pictures to fill the 16:9 screen. The Initial Settings Procedure 4:3 Letter Box - For older, standard screen analogue TVs. Displays 4:3 pictures in full screen and 16:9 pictures in letter box format that retains • The Home menu will not appear if you do not the 16:9 aspect ratio but puts black bars above and configure the initial settings. -
Page 18: The Home Screen
E button. The Settings screen appears. page 21) If you use a HDMI cable to connect the product to Settings an Anynet+ (HDMI-CEC)-compliant Samsung TV and 1.) You have set the Anynet+ (HDMI-CEC) feature to Display 3D Settings... -
Page 19: Settings Menu Functions
RETURN ( ' ) Button : Return to the previous BD Wise is Samsung’s latest inter- menu. connectivity feature. When you connect a Samsung E (Enter) / DIRECTION Button : product and a Samsung TV • Press ▲▼◄► to move the cursor or select an... - Page 20 TV remote. To operate this function, you must connect this product to an Lets you set the Digital Output to Anynet+ Samsung TV using a HDMI match the capabilities of the AV cable. receiver you’ve connected to the Digital Output product.
-
Page 21: Networks And The Internet
Upgrade "Upgrading Software" on page 22. the E button. Contact Provides contact information for The Wired Network Settings screen appears. Samsung assistance with your product. ► Press the button on the Internet Protocol Setup Terms of View the general disclaimer regarding Service menu. -
Page 22: Upgrading Software
Follow the first four steps in the Automatic product on or off manually during the update process. procedure, but select Manual instead of Auto in Samsung Electronics takes no legal responsibility for Step 4. product malfunction caused by an unstable Internet ▼... -
Page 23: Setting Up Dlna
Click Send in the first pop-up that appears. Click connect the product to your PC via the network (See OK in the second pop-up to download and save the page 15) and install the SAMSUNG PC Share Manager firmware file to your PC. on the PC. -
Page 24: Media Play
Media Play . Press the ▲▼ buttons to select Videos, Photos or Playing Files on a USB Device Music, then press the E button. . If files appear on the screen go to Step 8 . If file You can play multimedia files located on a connected folders appear on the screen, use the ▲▼◄►... -
Page 25: Playing A Commercial Video Disc
Playing a Commercial Video Disc Using the disc menu, title menu, popup menu and title list Place a disc into the disc tray with the disc’s label • DISC MENU : During playback, press this facing up and then close the disc tray. Playback starts button to display the Disc menu. -
Page 26: Playing A Pre-Recorded Commercial Audio Disc
Media Play To play a particular track, use the ▲▼ buttons on the Select to set the desired subtitle Subtitle remote to select the track, and then press the E language. button. To view a scene from another angle. | NOTES | The Angle option displays the Angle number of angles available to view... -
Page 27: Controlling Photo Playback
Repeating Tracks Controlling Photo Playback You can set the product to repeat tracks. You can control the playback of photos located on During music playback, press the TOOLS button. DVDs, CDs, and USB storage devices. Use ◄► button to select Off, Track or One, All or Shuffle in Repeat Mode, and then press the E Using the Tools Menu button. -
Page 28: Listening To Radio
Media Play Listening to Radio Using the TV Sound Button on the Remote Control Using Buttons on the Remote Control TV SOUND Press the FUNCTION button to select FM. TV Sound Tune in to the desired station. • Preset Tuning 1 : Press the 5 button to select PRESET and then press the TUNING UP, If you have a TV that supports Anynet+ (HDMI-CEC), the DOWN button to select the preset station. -
Page 29: Network Services
Network Services Using BD-LIVE™ Using DLNA DLNA lets you access and play files located on your PC Connect the product to the network. through your home cinema. (See page 15) Follow the directions in the DLNA user's guide to setup DLNA on your PC and to tag folders and files you want to Configure the network settings. -
Page 30: Appendix
3D Settings in the Blu-ray menu. not support CEC. • Depending on the content and the position of the • If your Samsung TV has an Anynet+ logo, then it picture on your TV screen, you may see vertical black supports the Anynet+ function. - Page 31 HDMI audio Media Play • When HDMI audio is outputted to the TV speaker, it Using the TOOLS button while playing pictures is automatically down-mixed to 2 channels. • If the system is connected to a BD Wise compliant Audio Return Channel TV that has set BD Wise to On, the Picture Settings menu will not appear.
- Page 32 Appendix Digital Output Selection Bitstream Bitstream Bitstream Setup (Re-encoded (Unprocessed) (Re-encoded DTS) Dolby D) Connection HDMI supported AV receiver Up to PCM 7.1ch Dolby Digital Up to PCM 5.1ch Dolby Digital Dolby Digital Up to PCM 5.1ch Dolby Digital Plus Plus Audio Dolby TrueHD...
-
Page 33: Troubleshooting
Refer to the table below when this product does not function properly. If the problem you are experiencing is not listed below or if the instructions below do not help, turn off the product, disconnect the power cord and contact the nearest authorized dealer or Samsung Electronics Service Centre. Symptom Check/Remedy •... - Page 34 Appendix Symptom Check/Remedy Dolby Digital 5.1 CH • Is there "Dolby Digital 5.1 CH" mark on the disc? Dolby Digital 5.1 CH Surround Surround Sound is not Sound is produced only if the disc is recorded with 5.1 channel sound. produced.
- Page 35 Symptom Check/Remedy No HDMI output. • Check the connection between the TV and the HDMI jack of the product. • Check if your TV supports 480p/720p/1080i/1080p HDMI input resolution. Abnormal HDMI output • If random noise appears on the screen, it means that TV does not support HDCP screen.
-
Page 36: Specifications
3.763 • Network speeds equal to or below 10Mbps are not supported. • Samsung Electronics Co., Ltd reserves the right to change the specifications without notice. • Weight and dimensions are approximate. • Design and specifications are subject to change without prior notice. - Page 37 Contact SAMSUNG WORLD WIDE If you have any questions or comments relating to Samsung products, please contact the SAMSUNG customer care centre. Contact Centre Area Web Site ` Asia Pacific AUSTRALIA 1300 362 603 www.samsung.com/au NEW ZEALAND 0800 SAMSUNG (0800 726 786) www.samsung.com/nz...