
Related Manuals for Philips 22HFL4372D/10


Summary of Contents for Philips 22HFL4372D/10
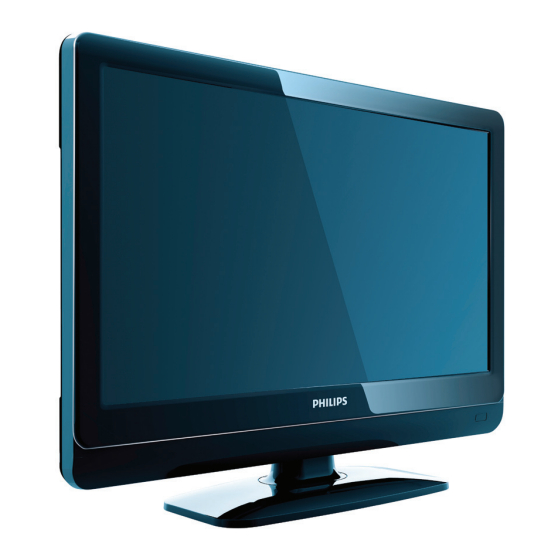
- Page 1 Register your product and get support at www.philips.com/welcome User Manual 22HFL4372D/10 26HFL4372D/10 32HFL4372D/10...
- Page 2 United Kingdom General No: 0870 900 9070 General National Rate No: 0870 911 0036 Україна 8-800-500-69-70 This information is correct at the time of press. For updated information, see www.philips.com/support. Model Serial www.philips.com/support €0.07 pro Minute €0.06 Per minuut/Par minute Местен...
-
Page 3: Table Of Contents
Professional mode options 6b Guest mode instruction 7 Connect devices Back connector Side connector Connect a computer Use a Conditional Access Module Use Philips EasyLink Use a Kensington lock 8 Product information Supported display resolutions Multimedia Tuner/Reception/Transmission Remote control Power Supported TV mounts... -
Page 4: Notice
1 Notice 2010 © Koninklijke Philips Electronics N.V. All rights reserved. Specifications are subject to change without notice. Trademarks are the property of Koninklijke Philips Electronics N.V or their respective owners. Philips reserves the right to change products at any time without being obliged to adjust earlier supplies accordingly. - Page 5 Philips plays an active role in the development of international EMF and safety standards, enabling Philips to anticipate further developments in standardisation for early integration in its products. Mains fuse (UK only) This TV is fitted with an approved moulded plug. Should it become...
-
Page 6: Important
TV. If liquids are spilt on or into the TV, disconnect the TV from the power outlet immediately. Contact Philips Consumer Care to have the TV checked before use. • Never place the TV, remote control or batteries near naked flames or other heat sources, including direct sunlight. - Page 7 • Risk of injury, fire or power cord damage! Never place the TV or any objects on the power cord. • To easily disconnect the TV power cord from the power outlet, ensure that you have full access to the power cord at all times.
-
Page 8: Tv Overview
3 TV overview This section gives you an overview of commonly used TV controls and functions. Please read section 3 to 6 to set the basic consumer menu first, then follow the instructions in section 7 to set the Professional mode menu. Side controls and indicators a ”+/- : Increases or decreases volume.In the home menu, press these... -
Page 9: Guest Remote Control
Guest remote control a B (Standby-On) • Switches the TV to standby if it is on. • Switches on the TV if it is in standby. b a EPG/TELETEXT Accesses the browse menu to select TV channel list, the Electronic Programme Guide and teletext. ALARM Lauches [Alarm time] menu. -
Page 10: Basic Tv Menus
o ”+/- (Volume +/-) Increases or decreases volume. BACK • Returns to a previous screen. • Returns to the previously viewed channel. q Colour buttons • Selects tasks or options. • When Professional mode is On, press to operate Multi remote control function. - Page 11 • [Scenea] : Switches to the Scenea wallpaper. • [Add your devices] : Adds new devices to the home menu. Note that you must add a new device to the home menu in order to access it. • [Setup] : Accesses menus that allow you to change picture, sound and other TV settings.
-
Page 12: Watch Tv
Options Option menus offer convenient settings related to what is on-screen. Press to see what options are available. To exit, press again. Watch TV Swith on/off or to standby To switch on • If the standby indicator is off, press B POWER at the side of the TV. •... - Page 13 Press a, then select [Channel list] to • use the channel list. • Press to return to the previously- viewed channel. • Enter a channel number using the Numeric buttons. To view analogue or digital channels only Filter the channel list to access analogue or digital channels only. In the channel list, press Select [Select list] >...
-
Page 14: Watch A Connected Device
• [Standard] : Adjusts sound settings to suit most environments and types of audio. • [News] : Applies sound settings ideally suited for spoken audio, such as the news. • [Movie] : Applies sound settings ideally suited for movies. • [Game] : Ideal settings for gaming. •... -
Page 15: Use More Of Your Product
4 Use more of your product Use Teletext Select a page Press a. Select [Text], then press OK. Select a page by: • Entering the page number with the Numeric buttons. Pressing ▲ or ▼ to view the next or • previous page. Pressing the Colour buttons to select a •... -
Page 16: Favourite Channels
Use digital teletext Some digital TV broadcasters offer dedicated digital text or interactive services on their digital TV channels, for example, BBC1. When in digital teletext: Press the Navigation buttons to select or • highlight items. • Use the Colour buttons to select an option, then press OK to confirm or activate. -
Page 17: Use Timers
EPG options Use the EPG options menu to set or clear reminders, change day and access other useful EPG options. Depending on the broadcast service, these options are available only for seven or eight days. When in EPG, press Press the Navigation buttons and OK to select and adjust one of the following settings: •... -
Page 18: Use The Tv Clock
Enter the child lock code with the Numeric buttons. Select an age rating, then press OK. All programmes beyond the selected age rating are blocked. Lock or unlock channels In the child lock menu, select [Channel lock]. Enter the child lock code with the Numeric buttons. -
Page 19: Access Multimedia
TV from a USB storage device. Caution • Philips is not responsible if the USB storage device is not supported nor is it responsible for damage or loss of data from the device. You can access the USB content browser using... -
Page 20: Use Scenea
• [Stop] : Stops playback. • [Repeat] : Repeats a video. • [Shuffle on] / [Shuffle off] : Enables or disables random play of videos. Listen to digital radio If digital broadcasting is available, digital radio channels are installed automatically during installation. While watching TV, press a. Select [Channel list:], then press OK. In the channel list, press Select [Select list] >... - Page 21 Visually impaired Some digital TV channels broadcast special audio adapted for people who are visually impaired. The normal audio is mixed with extra commentary. To switch on visually impaired audio (if available) While watching TV, press Select [Universal access], and press the green button to enter [Visually impaired].
-
Page 22: Set Up The Tv
5 Set up the TV Change picture and sound settings Settings assistant Use the settings assistant to guide you through the picture and sound settings. While watching TV, press Select [Setup] > [Quick picture and sound settings], then press OK. Select [Start], then press OK. Follow the on-screen instructions to choose your preferred settings. - Page 23 • [Picture format] : Changes the picture format. • [Screen edges] : Changes the picture size. • [Picture shift] : Adjusts the position of the picture. Not applicable if selected picture format is [Auto zoom] or [Wide screen]. Smart sound settings Use the [Smart sound] experience bar to access frequently-used sound settings. Press Select [Setup] >...
-
Page 24: Change Channel Settings
Change channel settings Reorder channels After installation, you may want to reorder the channel list to suit your preference. While watching TV, press a. Select [Channel list], then press OK. In the channel list, press Select [Reorder], then press OK. Select the channel to reorder, move it to the desired location, then press OK. -
Page 25: Install Channels
If you do not want this message to appear Press Select [Setup] > [Channel settings] or [Satellite settings] > [Channel installation] > [Channel update message] > [Off], then press OK. • To disable automatic updates In the [Channel installation] menu, select [Automatic channel update] > [Off]. Select audio language If the TV channel has multiple or dual sound broadcast, you can select the preferred audio language. - Page 26 Select one of the following settings: • [Antenna (DVB-T)] : Access free-to- air antenna or digital DVB-T channels. • [Cable] : Access cable or digital DVB-C channels. Press OK to confirm your choice. Press to exit. The TV switches to the selected channel list. Access DVB-S channels (for certain models only) If your satellite is connected to the SAT...
-
Page 27: Change Language Settings
Install satellite channels (For certain models only) If your satellite is connected to the SAT connector, you can receive satellite channels. While watching TV, press Select [Setup] > [Search for satellite] > [Reinstall channels]. Follow the on-screen instructions to complete the installation of satellite channels. Once complete, select [Finish], and then press OK. -
Page 28: Change Other Settings
Change other settings Energy-efficient settings While watching TV, press the green button. Select one of the following settings, then press OK: • [Energy saving] : Applies a combination of picture settings to reduce energy consumption. • [Mute screen] : Turns off the TV display. ‘Muting’ the screen saves energy if you just want to listen to audio from the TV. -
Page 29: Update Software
Shop or home mode The flexibility to change settings is limited if the TV location is set to [Shop] mode. Set the TV location to [Home] mode to access all TV settings. While watching TV, press Select [Setup] > [TV settings] > [Preferences] > [Location] > [Home] or [Shop], then press OK. Restart the TV. -
Page 30: Reinstall The Tv
TV set. The Help file (a *.upg file) is compressed into a *.zip archive. If the Help file on the Philips Support site is a later version than the file in your TV, click it to save the file to the USB flash drive. -
Page 31: A Professional Mode Instruction
6a Professional mode instruction Introduction Included in this TV is a special functional mode that allows the TV to be configured for commercial application. This feature is called Professional mode. This section has been designed to help install and operate this TV in Professional mode. -
Page 32: Professional Mode Options
Professional mode options This paragraph describes the functionality of each item in the Professional mode setup menu Enter the next layer by pressing [OK], or [>]. Return to a previous level by pressing [<]. Navigate in the current layer by pressing [^], or [v]. Layer 1 Layer 2 PBS Setup... -
Page 33: Setup Settings
Layer 1 Layer 2 Channel setup Enter TV Channel Setup Store Settings Smart Clone USB to TV TV to USB RF Download SW types Program Info Start Download Setup settings PBS Setup [PBS Setup menu language] Select menu language to be English, French, German or Italian. - Page 34 [OSD display] Set this function to show or hide screen information. [Off]: Screen information is suppressed. [On]: Normal screen information is displayed. [High security] [Off]: Professional mode setup menu can be accessed by both Guest remote control (Press [3, 1, 9, 7, 5, 3 + the Professional setup remote control ) [On]: Professional mode setup menu can only...
- Page 35 [Low power standby] The Low power standby option defines the TV to enter a specific standby mode after pressing the On/Off button on the remote control. To wake-up the TV both On/Off button on the RC or TV can be pressed: [Fast]: The TV will quickly turn on (show startup channel.
- Page 36 RC. [VSecure] VSecure is the hospitality content scrambling method used by the Philips Hospitality TVs. With its internal VSecure Authorization key a VSecure Unprotect key can be generated. If this VSecure Unprotect key is stored in the TV, the TV is able to descramble protected content.
- Page 37 [Factory default] Restore the factory picture and sound setting. Channel installation is not changed. Channel Setup The Channel Setup function depends on the state of the PBS Mode: Channel Configuration [Channel setup] Layer 1 Layer 2 Layer 3 Channel setup <Action>...
- Page 38 RF Download Instead of using USB memory device to do cloning (tbd) and firmware update, this upgrading is also possible using the RF infrastructure. This is covered by Philips Hospitality RF Download and allows a simultaneous upgrade of all installed televisions.
-
Page 39: Guest Mode Instruction
Guest mode instruction Introduction When this television is configured as a professional television, the guest is having no access to TV functionality that can influence TVs expected behavior. The guest will not have access to menus that can change the channel configuration, nor can he, as example, put the TV on a louder audio level then is permitted in the BDS Mode setting. - Page 40 [Options] Access to options for the current selection. Watch TV and press [Options] will bring up a menu to select: What’s on, Subtitles, Audio language, Dual I-II, Status [Info] Now / Next channel information [MyChoice] MyChoice activation key [ThemeTV] ThemeTV activation key [OSRC] On-Screen Remote Control...
- Page 41 page intendendly blank...
-
Page 42: Connect Devices
7 Connect devices This section describes how to connect various devices with different connectors and supplements examples provided in the Quick Start. Note • Different types of connectors may be used to connect a device to your TV, depending on availability and your needs. Back connector DIGITAL EXT 1... -
Page 43: Side Connector
f VGA Video input from a computer. Side connector a COMMON INTERFACE Slot for a Conditional Access Module (CAM). b USB Data input from USB storage devices. c HDMI (Only for TVs 26 inches and larger) Digital audio and video input from high- definition digital devices such as Blu-ray players. -
Page 44: Use A Conditional Access Module
• DVI-HDMI cable For TV of size 22 inch PC IN(AUDIO) For TV of size 26 inch and larger AUDIO IN : LEFT / RIGHT HDMI 1 / DVI • HDMI cable and HDMI-DVI adaptor For TV of size 22 inch PC IN(AUDIO) For TV of size 26 inch and larger AUDIO IN : LEFT / RIGHT HDMI 1 / DVI... -
Page 45: Use Philips Easylink
• Compliant devices must be connected to your TV via HDMI. Enable or disable EasyLink Note • Do not enable Philips EasyLink if you do not intend to use it. Press Press Navigation buttons to select [Setup] > [TV settings] > [EasyLink]. Select [On] or [Off]. -
Page 46: Product Information
8 Product information Product information is subject to change without notice. For detailed product information, go to www.philips.com/support. Supported display resolutions Computer formats • Resolution - refresh rate: • 640 x 480 - 60Hz • 800 x 600 - 60Hz • 1024 x 768 - 60Hz •... -
Page 47: Supported Tv Mounts
Supported TV mounts To mount the TV, purchase a Philips TV mount or a VESA-compatible TV mount. To prevent damage to cables and connectors, be sure to leave a clearance of at least 2.2 inches or 5.5cm from the back of the TV. -
Page 48: Troubleshooting
The standby light on the TV blinks red: • Disconnect the power cable from the power outlet. Wait until the TV cools down before reconnecting the power cable. If the blinking reoccurs, contact Philips Consumer Care. You forgot the code to unlock the TV lock feature • Enter ‘8888’. The TV menu is in the wrong language. • Change the TV menu to your preferred language. -
Page 49: Sound Issues
• Set the TV picture format to unscaled. Contact us If you cannot resolve your problem, refer to the FAQs for this product at www.philips.com/ support. If the problem remains unresolved, contact Philips Consumer Care in your country as listed in the warranty leaflet. - Page 50 Index age rating Alarm ALARM audio language Audio lip sync Batteries Blue mute Channel list PayTV channel Troubleshooting clock Computer Connect display resolutions Troubleshooting Consumer setup Digital channels CAM Display resolutions EasyLink disable Enable HDMI-CEC in one-touch play one-touch standby factory settings HDMI HDMI-CEC in Troubleshooting Hearing impaired home mode Installation Kensington lock Language Troubleshooting Lock Kensington lock Local KB lock RC lock MENU Professional mode setup menu Troubleshooting...
- Page 51 picture format picture setting picture settings POWER Technical specifications Professional mode Activate Options PBS mode Store settings Remote control Multi remote control Professional Setup Remote control RC lock Remote control usage Technical specifications Troubleshooting Rename channel Reorder channels Safety Scenea Selectable AV Shop mode Skip scrambled signals Sleep timer Smart card Smart picture Smart power Smart sound sound settings Store Technical specifications Teletext Troubleshooting TV overview Universal access Remote control Enable USB USB break-in Video formats Visually impaired Volum Wall mounts...
- Page 52 © 2009 Koninklijke Philips Electronics N.V. All rights reserved.