Table of Contents
Advertisement
Advertisement
Table of Contents

Related Manuals for Casio Adaptor


Summary of Contents for Casio Adaptor
- Page 2 Please note the following important information before using this product. Before using the optional AD-5 Adaptor to power the unit, be sure to check the AC Adaptor for any damage first. Carefully check the power cord for breakage, cuts, exposed wire and other serious damage. Never let children use an AC adaptor that is seriously damaged.
-
Page 3: Safety Precautions
Misuse of the AC adaptor creates the risk of fire and electric shock. Always make sure you observe the following precautions. Be sure to use only the AC adaptor that is specified for this product. ) means that the user... - Page 4 Take the following steps immediately. 1. Turn off power. 2. If you are using the AC adaptor for power, unplug it from the wall outlet. 3. Contact your original retailer or an authorized CASIO Service Provider.
- Page 5 CAUTION AC Adaptor Misuse of the AC adaptor creates the risk of fire and electric shock. Always make sure you observe the following precautions. Do not locate the electric cord near a stove or other sources of heat. Never pull on the cord when unplugging from the electrical outlet.
- Page 6 Safety Precautions CAUTION Heavy Objects Never place heavy object on top of the product. Doing so can make the product top heavy, causing the product to tip over or the object to fall from it, creating the risk of personal injury.
-
Page 7: Main Features
Main Features 137 tones Everything from orchestra instruments to synthesized sounds, drum sets and more. 100 rhythms A selection of rhythms that cover rock, pops, jazz and just about any other musical style imaginable. Auto Accompaniment Simply specify a chord and the keyboard automatically plays the correct rhythm, bass, and chord parts. 100 built-in tunes A simple operation cuts out the melody part of any of the 100 Song Bank tunes so you can play along on the keyboard. -
Page 8: Table Of Contents
General Guide ... E-8 About the Display ...E-10 Quick Reference ... E-11 Power Supply ... E-13 Using batteries ...E-13 Using the AC Adaptor ...E-14 Auto Power Off...E-14 Power On Alert...E-14 Settings and Memory Contents...E-15 Connections ... E-16 Phones/Output Terminal ...E-16 Sustain/Assignable jack Terminal...E-16... -
Page 9: Contents
Playing Back from Song Memory...E-39 Real-time Recording to Track 2 ...E-39 Recording Chords with Step Recording ...E-40 Step Recording Melody to Track 2 ...E-43 Track 2 Contents After Step Recording ...E-43 Editing Data While Step Recording ...E-44 Deleting the Contents of a Specific Track...E-45 Keyboard Settings ... -
Page 10: General Guide
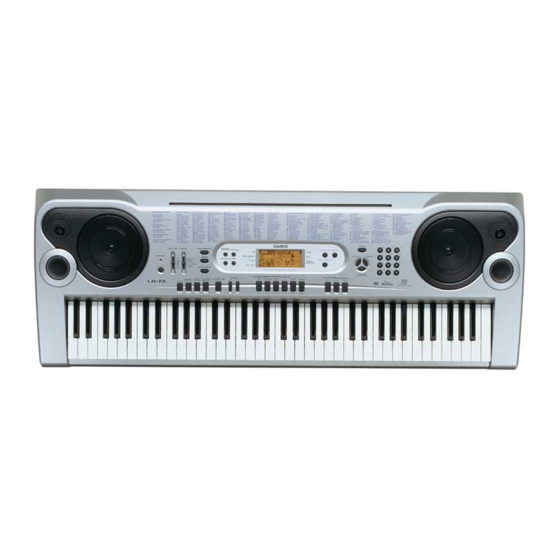
General Guide General Guide 641A-E-010A... - Page 11 * Attaching the Score Stand Insert the score stand into the slot at the keyboard as shown in the illustration. MIDI OUT terminal MIDI IN terminal SUSTAIN/ASSIGNABLE JACK terminal PHONES/OUTPUT terminal DC 9V jack Speaker Rhythm list Tone list Display Song Bank list Chord root names Percussion instrument list...
-
Page 12: About The Display
General Guide About the Display An indicator appears next to a function that is in use: GM (General MIDI Mode), SONG MEMORY (Song Memory), STEP (Step), KEY LIGHT (key light). This area shows tone number and name, rhythm number and name, and tune number and name. It also shows other information when using the song memory function and other functions. -
Page 13: Quick Reference
Quick Reference POWER indicator Number buttons STEP 2 This section provides a quick overview of keyboard operation using steps one and two of the 3-step lesson feature. To play the keyboard Press the POWER button to turn on power. This causes the power indicator to light. Set the MODE switch to NORMAL. - Page 14 Quick Reference If you selected lesson Step 2 Play the correct notes on the keyboard. Press the keyboard key that lights. Note that with tunes 70 through 99, the keyboard key light turns off as soon as you press the key. The keyboard key for the next note you will need to play flashes.
-
Page 15: Power Supply
Power Supply This keyboard can be powered by current from a standard household wall outlet (using the specified AC adaptor) or by batteries. Always make sure you turn the keyboard off whenever you are not using it. Using batteries Always make sure you turn off the keyboard before loading or replacing batteries. -
Page 16: Using The Ac Adaptor
Power Supply Using the AC Adaptor Make sure that you use only the AC adaptor specified for this keyboard. Specifled AC Adaptor: AD-5 DC 9V jack AC adaptor AD-5 AC outlet Also note the following important warnings and precautions when using the AC adaptor. -
Page 17: Settings And Memory Contents
The settings and memory data described above are retained as long as the keyboard is being supplied with electrical power. Unplugging the AC adaptor when batteries are not loaded or when loaded batteries are dead cuts off the keyboard’s electrical power supply. This causes all settings to be initialized to their factory defaults and clears all data stored in memory. -
Page 18: Connections
Connections Connections Phones/Output Terminal Before connecting headphones or other external equipment, be sure to first turn down the volume settings of the keyboard and the connected equipment. You can then adjust volume to the desired level after connections are complete. Rear Panel Connecting Headphones (Figure 1) Connecting headphones cuts off output from the keyboard’s... -
Page 19: Accessories And Options
Connections Rhythm Start/Stop Pedal In this case, the pedal performs the same functions as the START/STOP button. Accessories and Options Use only the accessories and options specified for this keyboard. Use of non-authorized items creates the danger of fire, electric shock, and personal injury. E-17 641A-E-019A... -
Page 20: Basic Operations
Basic Operations Basic Operations VOLUME METRONOME Number buttons TEMPO This section provides information on performing basic keyboard operations. Playing the Keyboard To play the keyboard Press the POWER button to turn the keyboard Set the MODE switch to NORMAL. Use the VOLUME slider to set the volume to a relatively low level. -
Page 21: Turning The Key Light System On And Off
number of notes (polyphony) available for keyboard play is reduced. Also note that some of the tones offer only 12-note polyphony. When rhythm or auto accompaniment is playing, the number of sounds simultaneously played is reduced. Digital Sampling A number of the tones that are available with this keyboard have been recorded and processed using a technique called digital sampling. - Page 22 Basic Operations While the tempo value is flashing, you can also use the number buttons or [+] and [–] to input a three-digit value. Note that you must input leading zeros, so 90 is input as 090. Pressing both the TEMPO buttons at the same time automatically returns the currently selected rhythm to its default tempo.
-
Page 23: Auto Accompaniment
Auto Accompaniment MODE Number buttons VAR/FILL-IN TEMPO This keyboard automatically plays bass and chord parts in accordance with the chords you finger. The bass and chord parts are played using sounds and tones that are automatically selected to select the rhythm you are using. All of this means that you get full, realistic accompaniments for the melody notes you play with your right hand, creating the mood of an one-person ensemble. -
Page 24: Adjusting The Tempo
This method of chord play makes it possible for anyone to easily play chords, regardless of previous musical knowledge and experience. The following describes the CASIO CHORD “Accompaniment keyboard” and “Melody keyboard”, and tells you how to play CASIO CHORDs. - Page 25 The accompaniment keyboard can be used for playing chords only. No sound will be produced if you try playing single melody notes on the accompaniment keyboard. Chord Types CASIO CHORD accompaniment lets you play four types of chords with minimal fingering. Chord Types Major chords...
- Page 26 Auto Accompaniment See the “Fingered Chord Chart” on page A-4 for details on playing chords with other roots. *1. Inverted fingerings cannot be used. The lowest note is the root. *2. The same chord can be played without pressing the 5th Except for the chords specified in note fingerings (i.e.
-
Page 27: Using An Intro Pattern
When the composite notes of a chord are separated by 6 or more notes, the lowest sound becomes the bass ( Music Example Tone: 016, Rhythm: 05, Tempo: 070 Using an Intro Pattern This keyboard lets you insert a short intro into a rhythm pattern to make startup smoother and more natural. -
Page 28: Using A Fill-In Pattern With A Variation Rhythm
Before starting, you should first select the rhythm you want to use, set the tempo, and use the MODE switch to select the chord play method you want to use (NORMAL, CASIO CHORD, FINGERED, FULL RANGE CHORD). To use synchro start Press the SYNCHRO/ENDING button to put the keyboard into synchro start standby. -
Page 29: Adjusting The Accompaniment Volume
Adjusting the Accompaniment Volume You can adjust the volume of the accompaniment parts as a value in the range of 000 (minimum) to 127. Press the ACCOMP VOLUME button. Current accompaniment volume setting Use the number buttons or the [+]/[–] buttons to change the current volume setting value. -
Page 30: Song Bank
Song Bank Song Bank SONG BANK Number buttons STOP This keyboard features a built-in Song Bank of 100 tunes that can be used for Auto Accompaniment playback. You can select a song simply to enjoy listening to it, or you can cut out its melody part and play along on the keyboard using the 3- step lesson. -
Page 31: Adjusting The Tempo
Key Lighting System Operation and Display Contents During Song Bank Play Keyboard keys light to show the keys that should be pressed to play along with Song Bank tunes as they play back. At the same time, the display shows fingerings, chord names, notes, tempo and other information. -
Page 32: Fasting Reverse
Song Bank Fasting Reverse To fast reverse While a tune is playing or paused, hold down the REW button to skip in a reverse direction at high speed. The fast reverse operation skips back one measure at a time. The measure and beat numbers on the display change while the fast reverse operation is being performed. -
Page 33: Playing All Song Bank Tunes
Specifying the tune number for the same tune that is currently selected returns the melody tone to the default setting for that tune. Playing All Song Bank Tunes in Succession To play all Song Bank tunes in succession Press the DEMO button. Song Bank tune play starts from tune number 00, and continues with each tune in numeric sequence.