Table of Contents
Advertisement
Advertisement
Table of Contents

Related Manuals for Sanyo DMP-692

Summary of Contents for Sanyo DMP-692
-
Page 2: Table Of Contents
TABLE OF CONTENTS INTRODUCTION...2 IMPORTANT SAFETY INSTRUCTIONS...3 FCC INFORMATION...5 PREPARATION FOR USE ...6 MAINTENANCE...6 BATTERY BACK-UP SYSTEM ...7 LOCATION OF CONTROLS & INDICATORS ...9 REMOTE CONTROL ...11 OPERATING INSTRUCTIONS ...12 CONNECTING EXTERNAL DEVICES...12 SETTING & BASIC OPERATION...13 RADIO OPERATION ...16 PRESETTING STATIONS IN THE TUNER MEMORY ...18 SLEEP TIMER...20 ALARM SETTING ...21... -
Page 3: Introduction
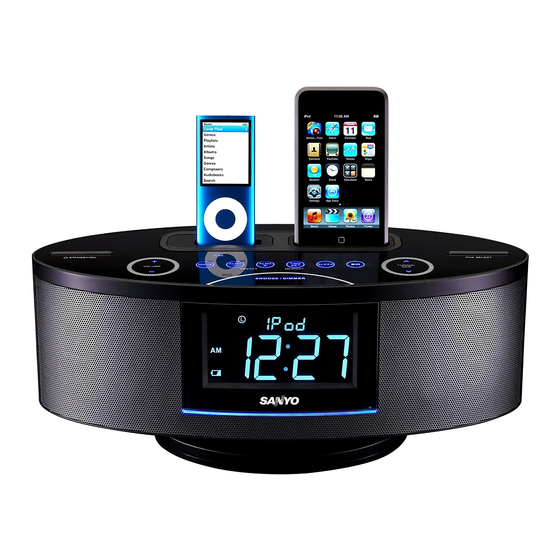
INTRODUCTION Thank-you for choosing SANYO. This digital music system comes with dual docks for playing and charging iPhone/iPod, an AM/FM stereo digital tuner with 40 presets, dual alarm clock function with wake to iPhone/iPod/radio/buzzer, jumbo backlit LCD display with six level dimmer control, two 2.5”... -
Page 4: Important Safety Instructions
IMPORTANT SAFETY INSTRUCTIONS Read these instructions. Keep these instructions. Follow all instructions. Heed all warnings. Install this unit in accordance with the manufacturer’s instructions. Only use attachments / accessories specified by the manufacturer. Use only with the cart, stand, tripod, bracket, or table specified by the manufacturer, or sold with the unit. - Page 5 IMPORTANT SAFETY INSTRUCTIONS 21.) Do not destruct the safety purpose of the polarized or grounding-type plug. A polarized plug has two blades with one wider than the other. A grounding type plug has two blades and a third grounding prong. The wide blade or the third prong is provided for your safety. If the provided plug does not fit into your outlet, consult an electrician for replacement of the obsolete outlet.
-
Page 6: Fcc Information
FCC INFORMATION NOTICE: This equipment has been tested and found to comply with the limits for a Class B digital device, pursuant to Part 15 of the FCC Rules. These limits are designed to provide reasonable protection against harmful interference in a residential installation. This equipment generates, uses, and can radiate radio frequency energy and, if not installed and used in accordance with the instructions, may cause harmful interference to radio communications. -
Page 7: Preparation For Use
Unpacking And Set Up • Remove the main unit, the AC adaptor, the 6 iPod and the external AM Loop Antenna from the carton, and remove all packing material from the main unit. We recommend that you save the carton and packing material in the event that the unit ever needs to be returned for service. -
Page 8: Battery Back-Up System
This system includes a battery back-up circuit that will maintain the time and alarm settings, and the preset tuner memories, in the event of a temporary power interruption. The battery back-up system requires one 3-Volt lithium button cell (Type CR2032 or equivalent). If the back-up battery is not installed, or the battery is exhausted, and the AC power supply is interrupted, the time, alarm, and preset memory stations will be lost. -
Page 9: Using The Ac Adaptor
Battery Precautions Follow these precautions when using a battery in this device. 1. Warning -Danger of explosion if battery is incorrectly replaced. Replace only with the same or equivalent type. 2. Use only the size and type of battery specified. 3. -
Page 10: Location Of Controls & Indicators
LOCATION OF CONTROLS & INDICATORS 17 18 19 1 . iPod Indicator 2 . Universal Dock for iPod 3 . Universal Dock for iPod/iPhone 4 . iPod/iPhone Indicator STANDYBY/ON Button 6 . VOLUME + / - Control 7 . MODE Control 8 . - Page 11 LOCATION OF CONTROLS & INDICATORS LCD DISPLAY Wake To Indicator; iPod,Radio,Buzzer. Alarm 1 / 2 Left iPod Indicator ‘On’ Indicators Daylight Savings Time TIME AM / PM Indicator Low Battery Indicator AUX/Radio Frequency/ Volume Level/ EQ/ DBBS Indicator FM/AM Indicator Time/Alarm Display Right iPod Indicator STEREO...
-
Page 12: Remote Control
PRESET / MENU DMP-692 Using The Remote Control The CR2032 lithium battery is already installed in the remote control. Pull out the small mylar insulation tab as shown in the illustration to begin using the remote control. To use the remote controller, point the remote control transmitter on the remote control toward the remote control receiver on the front panel of the main unit and press the desired button. -
Page 13: Operating Instructions
• Make sure that you have fully extended the FM antenna wire. • Be sure to connect the external AM Loop Antenna to the AM Antenna Jack on the back panel if you are planning to listen to AM radio stations (refer to page 17 for connection information) . -
Page 14: Daylight Saving / Standard Time Selection
SETTING & BASIC OPERATION Sensor-Touch Control Information All of the controls on the top panel of the main unit, with the exception of the STANDBY/ON control and the iPod SELECT control, are special ‘Sensor-Touch’ controls. There are no buttons to ‘push’. When you softly touch one of these ‘buttons’, it will flash 3 times to confirm it understood the command, and then the system will react accordingly. -
Page 15: Setting The Clock
Setting The Clock When the system is connected to the 120V 60Hz AC Outlet for the first time, “AM 12:00” will flash on the display. Important: Do not press the STANDBY/ON button to turn the system ‘On’. The clock can only be set when the system is in the Standby Mode. - Page 16 SETTING & BASIC OPERATION Volume Controls To increase or decrease the system volume, press the VOLUME button on the remote control or VOLUME + or - on the top panel. The Volume Level Indicator will appear on the display when you change the volume level. The level indicator ranges from “00”...
-
Page 17: Radio Operation
Press the STANDBY/ON button on the top panel or on the remote control to turn the system ‘On’. The initial default Mode for this system is the iPod function. The “iPod indicator will flash above the time display. Touch the MODE button on the top panel or press the MODE button on the remote control until a FM or AM frequency appears above the time display. - Page 18 Hits For Better Reception FM: The FM lead wire antenna on the back panel should be extended to its full length. You may also have to vary the direction of this antenna until you find the position that provides the best reception. AM: Insert the small black plug at the end of the AM Loop antenna wire into the AM ANT jack on the back panel as shown in the illustration.
-
Page 19: Presetting Stations In The Tuner Memory
PRESETTING STATIONS IN THE TUNER MEMORY Up to 40 stations (20 AM / 20 FM) can be stored in the tuner memory for easy recall at any time. Use either the Automatic or Manual tuning methods described on page 16 to tune to the first station to be stored in memory. - Page 20 PRESETTING STATIONS IN THE TUNER MEMORY Recalling Preset Stations Simply press the PRESET / MENU + or - buttons on the remote control or touch the PRESET / ALM1 - or PRESET / ALM2 + control on the top panel to scroll forward or backward through the preset station memories.
-
Page 21: Sleep Timer
This system includes a programmable Sleep Timer that allows you to fall asleep to between 10 and 120 minutes of music and then turns the unit to standby automatically. To operate the sleep timer: 1.) Turn the system ‘On’ and operate the TUNER function as usual. 2.) Press the SLEEP button on the remote control or the SLEEP control on the top panel. -
Page 22: Alarm Setting
NOTES: • Use the Remote Control, you can set the Alarms in STANDBY mode or operation mode. (The ALM1/ALM2 on the top panel can only be set when the system is in the standby mode.) • When setting the alarm be sure to observe the AM/PM indicators to confirm that you have set the wake-up hour correctly. - Page 23 At the selected wake-up time the system will turn on to the mode you selected. The alarm will continue for 1 hour and then shut off automatically and reset itself for the same time on the following day. Note: If you selected the wake to iPod mode but there is no iPod docked at the wake up time, the system will default to the wake to Buzzer mode automatically.
-
Page 24: Ipod/Iphone Operation
This SANYO system includes two separate docking stations so that you can dock and charge two separate iPod models, or one iPod and one iPhone model simultaneously. Since this model is ‘Works With iPhone’ certified it is not necessary to place your iPhone in the Airplane mode to avoid audio interference. -
Page 25: Choosing The Correct Adaptor
Choosing The Correct Adaptor When connecting an iPod / iPhone to this iPod Dock, pleaase ensure that the correct adaptor plate is used. FAILURE TO DO SO MAY RESULT IN DAMAGE TO THE iPod / iPhone. This iPod Dock comes with 6 removable dock adaptors. Using the correct adaptor ensures the proper fit for your iPod / iPhone and helps to reduce the stress on the connector when operating the iPod / iPhone. -
Page 26: Dock Adaptor Compatibility
3G iPhone 16GB 16GB 16GB 16GB 3GS iPhone 32GB 32GB iPhone 16GB 16GB 4G nano 16GB 16GB 120GB 120GB 160GB 160GB Dock Adaptor Compatibility... -
Page 27: Ipod/Iphone Operation Controls
iPod/iPhone OPERATION CONTROLS (Play/Pause) – Touch this area on the top panel or Press this button on the remote control to begin playback on your iPod/iPhone. Press again to Pause playback. TUNE/SKIP buttons on Main Unit – During playback press to skip forward or backward to the next or previous track. - Page 28 iPod/iPhone OPERATION CONTROLS The MENU button on the remote control works the same way as the MENU button on your iPod. Press the MENU button repeatedly to access the Main Menu of your iPod. Press the + or - buttons on the remote control to navigate Up or Down through the displayed Menu list.
-
Page 29: Troubleshooting Guide
Symptom Radio Noise or sound distorted on FM or AM broadcasts. FM: Wire aerial is not positioned correctly . Loop aerial is not positioned correctly. FM STEREO indicator FM station is mono or station does not light. signal is weak. AM or FM, no sound. -
Page 30: Technical Specification
1. General Power requirements Power consumption Dimensions of main unit Weight of main unit 2. Amplifier Power Output 3. Tuner AM Tuning range FM Tuning range 4. Speaker system Impedance 5. AUX IN Input Max voltage Impedance Specifications subject to change without notice. TECHNICAL SPECIFICATION AC Adaptor Input: AC 100-240V ~ 50/60Hz Output: DC 10V 2.4A... -
Page 31: The Unit Supports The Listed Ipods / Iphones
THE UNIT SUPPORTS THE LISTED iPods / iPhones *iPod / iPhone charge and operation only* ***iPods / iPhones shown are not included*** Made for iPod mini (4GB, 6GB only) Made for iPod with color display (4th generation) (20GB, 30GB only) Made for iPod with video (5th generation) -
Page 32: Warranty
In order to obtain warranty service, the product must be delivered to and picked up from an authorized Sanyo factory service center at the user’s expense, unless specifically stated otherwise in this warranty. The names and addresses of Authorized Sanyo Service Centers may be obtained by calling the toll-free number listed below. - Page 33 Sanyo por cuenta y gasto del usuario, a menos que específicamente se mencione lo contrario en esta garantía. Los nombres y direcciones de los Centros de Servicio Autorizados de Sanyo se pueden obtener llamando sin costo a la línea que se muestra a continuación.
- Page 34 Afin de bénéficier du service de garantie, l’appareil doit être livré et récupéré d’un Centre de service agréé de Sanyo aux frais de l’utilisateur, sauf stipulation expresse contraire de cette garantie. Les noms et adresses des Centres de service agréés de Sanyo peuvent être obtenus en appelant le numéro sans frais inscrit ci-dessous.