
Related Manuals for D-Link DPH-130S


Summary of Contents for D-Link DPH-130S
- Page 1 D-Link DPH-130S IP Phone User Manual Building Networks for People RECYCLABLE 2006/11/08 Ver. 1.00...
-
Page 2: Table Of Contents
View Call Records ............50 Change the Ring Tone............. 53 Caller ID Support............. 54 View Firmware Version............ 55 Chapter 4 Appendix Troubleshooting............... 56 FCC Statements .............. 59 Firmware Upgrade............60 Change User Name and Password......... 61 Contacting D-Link............62 Notices ................63... -
Page 3: Package Contents
Package Contents Thank you for purchasing the DPH-130S IP Phone! Before you start using this phone. Please first check the contents of the product package. If any item listed below is missing, please contact your dealer. • IP Phone (Main Body) •... -
Page 4: Safety Information
Safety Information Please adhere to the following safety instructions while you’re using this IP Phone. Failure to do so could result in damage to this phone or injuries to you. 1. Do not store or use this phone in high-humidity or hot environment, like a bathroom or kitchen. -
Page 5: Features Of This Ip Phone
1-3 Features of This IP Phone The DPH-130S IP Phone takes full advantage of the power of your data network; it uses the TCP/IP network communication protocol, which is the most commonly-used network protocol in the world at present. With an easy-to-use user interface, you do not need help from a network technician, or additional network devices to install your new DPH-130S IP Phone. -
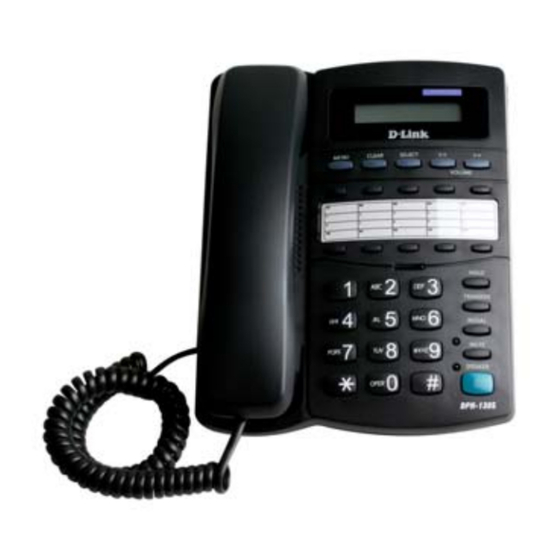
Page 6: Descriptions Of All Keys And Components
1-4 Description of All Keys and Components Front View... - Page 7 Top View Back View Side View...
- Page 8 Here is a description of all the parts and function keys of this phone in reference to the figures on the preceding pages. Item No. Description Item No. Description Handset Speed-dial Key Handset Cord Speed-dial Key LCD Display Message Indicator LED Menu Key Numeric Keypad Clear Key...
-
Page 9: Basic Setup
1-5 Basic Setup Please use the following instructions to setup your new DPH-130S IP Phone: 1. Unpack the box and determine whether anything is missing. 2. Insert the Ethernet cable into the network port labeled “LAN” on the phone, as shown below. - Page 10 4. Please insert the phone stand into the back of the phone, as shown in the picture below. (If you plan to hang the phone on a wall, please skip this step, and mount it on the wall using the wall mount hole on the back of the phone). 5.
- Page 11 6. Please connect one end of the handset cord to the handset, as shown below. 7. Please connect the other end of the handset cord to the phone, as shown below.
- Page 12 8. Please insert the A/C power adapter into a power outlet and make sure the output voltage of power outlet matches the A/C adapter specification (AC 100V to 240V, 50/60Hz). 9. Now check the LCD display on the phone. You should see a date, time and a message displayed on it as shown in the image below.
-
Page 13: Network Setup (On Lcd Screen)
Network Setup (On LCD Screen) Before you can use DPH-130S IP phone, it must be connected to your network using a valid IP address. In this section you’ll learn how to configure an IP address for this phone using various supported methods. - Page 14 3. Press the [ >> ] key repeatedly, until “ >Net NAT Setting Setting “ is displayed on the LCD, then press >Net Setting the [Select] key. 4. There are 4 options here, they are: >IP Address IP Address (Static IP), PPPoE PPPoE, DHCP, and MAC (MAC address lookup).
- Page 15 [Select] key; Next, press the [ << ] or [ >> ] key until “DHCP: Off “ is displayed, then press the [Select] key and continue on to Step 3 (below). Case B In Case B, you will see a flashing cursor on the LCD display, which means that the phone is IP Address: already in static IP mode.
- Page 16 4. Please input the gateway IP address and Gateway: press [Select] to save your changes and 192.168.0.254 █ proceed to next step. 5. Please input the DNS (Domain Name Server) Dns: IP address and press [Select] to you’re your 192.168.0.254 █...
- Page 17 3. Please input the PPPoE username Name: assigned by your internet service provider Username here. You can use the numeric keypad to enter numbers, letters, and symbols. To erase a character, press [Clear]. After the username is entered, press the [Select] key, or press [Menu] to abort.
- Page 18 Note: Password characters will be show on the LCD as you enter the new password. Take care to keep your password secret. 5. Please enter the name of your internet ISP: service provider (ISP) here. This step is ISP_NAME optional so you may press the [Select] key without entering anything.
- Page 19 MAC Address Lookup 1. If you want to check the MAC address of the DHCP Set DPH-130S, press the [ << ] or [ >> ] key >MAC until ”>MAC ” is displayed on the LCD then press the [Select] key.
-
Page 20: Network Setup (Web Interface)
2-2 Network Setup (Web Interface) You can also use a web browser on a computer to set the network parameters of the DPH-130S. Please use the following instructions to set network parameters using a web browser: Use a web browser (like... - Page 21 If you choose DHCP (Dynamic IP Address): Please click the Apply button in this page to get an IP address automatically from a DHCP server. Or click Cancel to abort. If you choose Static IP Address: Please input the IP address, subnet mask, and the IP address of a...
- Page 22 If you choose PPPoE: Please input the PPPoE username, password, retype the password, and the ISP name (optional) in the corresponding fields, and select the proper authentication type, then click the Apply button. If you are unsure what you need to put in the fields of this page, please call your ISP for...
- Page 23 Please input the address of a DNS server here(only required when Static IP address is used), then click the Apply button. Note: At minimum, the address of one DNS server is required for Static IP address users.
-
Page 24: Voip Server Setup (On Lcd Screen)
VoIP Server Setup (On LCD Screen) After the IP address is set, you also need to configure the phone with the information of a VoIP server. Configuring your phone with VoIP server information allows it to register with the VoIP service so that you can then talk with other IP phone users. Please use the following instructions to configure the VoIP server information: 1. - Page 25 Proxy Server: Set the IP address of a proxy server Note: A proxy server is required in some network environments but is not necessary in all networks. If you are not sure about this, please ask your service provider or network administrator. 1.
- Page 26 4. Input the realm (the domain name) of the Realm: proxy server here, then press the [Select] key. domainname.com This is an optional setup item. You can skip it by pressing the [Select] key without entering anything. 5. Please select the proxy’s protocol using the Protocol: [ <<...
- Page 27 Note: Most of VoIP servers use port number 5060, which is the default value of this setup item. However, you should ask your network administrator to get the correct port number. You can input “0” here, which means that the port number is provided by DNS. 4.
- Page 28 User: Setup the VoIP server’s username, password, and phone number 1. Input the VoIP username assigned to you by User Name: your service provider then press [Select]. Username 2. Input the name which represents this VoIP Display Name: service. You can input a name like “Lucy’s Lucy’s phone phone”...
-
Page 29: Voip Server Setup (Web Interface)
VoIP Server Setup (Web Interface) Just like with network settings, you may also use a web browser to configure VoIP parameters. Use a web browser (like Internet Explorer) to connect to the IP address of your IP Phone. You should be able to see a login welcome screen (at left). - Page 30 There are several setup categories in this page, for example: VoIP server address, username, and other advanced settings. Please select a setup category from the “Option” drop menu and enter all required parameters. Then click the Apply button or click the Cancel button to abort.
-
Page 31: Date / Time Setup
Date / Time Setup Your DPH-130S comes with an internal calendar and clock. The current date and time will show on the LCD display. To set the correct date and time using the LCD you must first set the NTP server to OFF using the webpage interface before setting the time and date. - Page 32 Date setting: 1. The current date will be displayed. If you want Date to set a new date, press the [Select] key or 2007-01-01 press the [Menu] key to abort. 2. You will see an underline displayed. Please Date input the date using the numeric keypad. 2007-01-01 For example, if you want to input “December 12, 2006”...
- Page 33 Note: If you are unable to adjust the time and date when you press the [Select] key (i.e. no cursor is displayed), the phone is configured to obtain time and date from an NTP server. Please refer to the instructions below to switch NTP to “OFF”. You can also set the current date and time using NTP (network time protocol) automatically.
- Page 34 Click the “System” link on the left side of the webpage then click the “System time” link. You can set the NTP parameter in this window. Choose the source for date and time – NTP or VoIP Server (Register), or switch the NTP function off by selecting “OFF”.
-
Page 35: Accepting And Making Phone Calls
Not Registered Please go to section 2-3 to setup VoIP parameters. To accept an incoming phone call: The DPH-130S message indicator will light From and you will hear the phone ring. The phone John Doe number of the caller will also be displayed if it is available. - Page 36 To make an outgoing phone call: 1. Lift the handset or press the [Speaker] key to use the speakerphone. 2. Dial the phone number of the person you are calling. The DPH-130S will try to reach the number after about 2 seconds.
-
Page 37: Advanced Functions During A Call
2-7 Advanced Functions During a Call Putting someone on Hold during a call: During a call, press the [Hold] key. The call will be suspended, to resume, press [Hold] again. When someone is on hold, the LCD display will look like the image below and the call timer will continue counting during the hold. - Page 38 Mode 2: During a phone call, press the [Transfer] key. The call will be suspended. Now dial the phone number that you want to transfer the call to and press the [#] key. You may then hang up your phone and the remote party will be connected with the phone number you dialed.
-
Page 39: Auto Call Forwarding
2-8 Auto Call Forwarding For all incoming calls, your phone allows you to forward calls to another phone number automatically using pre-defined rules. 1. Press the [Menu] key once. >Address Book Call Records 2. Press the [ >> ] key until “ > Setting “ is Call Records displayed on the LCD then press the [Select] >Setting... - Page 40 Note: Brief descriptions of the four call forwarding modes: Disable: No call forwarding. Busy: Forward when the line is busy. No Answer: Forward when no one answers calls. Always: Always forward calls under any circumstances. 6. Enter the name and number for Name receiving forwarded calls just like █...
-
Page 41: Auto Call Rejection (Dnd Function) And Ringer Mute
2-9 Auto Call Rejection (DND Function) and Ringer Mute If for any reason you do not want to be disturbed, you can activate the phone’s DND function and refuse all incoming calls. The DND function will refuse all incoming calls and the person calling will hear a busy signal. - Page 42 5. Press the [ << ] or [ >> ] key until you see Undisturbed Mode “Undisturbed Mode On” displayed then press the [Select] key. If you want to continue accepting calls but do not want to hear the ring sound, you may mute the ring sound without otherwise effecting the phone’s operation: 1.
-
Page 43: Adjust Ringer / Handset / Speakerphone Volume
2-10 Adjust Ringer / Handset / Speakerphone Volume The volume settings of the ringer sound, handset, and speakerphone are all adjustable. Change Ringer Volume: Press the [ << ] or [ >> ] key when the phone is not Ring Volume in use and you will see the ringer volume indicator Level: ████... -
Page 44: Speed-Dial Programming
Speed-Dial Programming 1. Press the [Menu] key once. >Address Book Call Records Message 2. Press the [ >> ] key until “ > FastDial “ is >FastDial displayed on the LCD then press [Select]. 3. Press [Select] to choose “Assign Number” >Assign Number 4. - Page 45 Address Book: 7. If you choose “Address Book” at step 4 Name 1 of 6 (previous page), you can look at the Mary address book listings and check them one-by-one to find the entry you want. Press the [Select] key to choose a record to assign to a speed-dial key.
-
Page 46: Address Book Management
3-2 Address Book Management You can store frequently used phone numbers and their associated names in the DPH-130S Address Book. Up to 100 simultaneous entries are allowed. 1. Press the [Menu] key once then press [Select] >Address Book when “ > Address Book “ is displayed. - Page 47 3. From View, there are 2 options: Dial (dial this >Dial address book entry) and Edit (edit this entry). Edit Press the [Select] key to make a choice or press the [Menu] key to abort. 4. If you selected “ Dial “ in the previous step, you will see a message like the one shown on Jane Doe the left and the number will be dialed.
- Page 48 Search: 1. Please input the name you want to search for Name: then press the [Search] key. John Doe █ 2. If the name you entered is found, it will show Name: on the LCD display. You may press the [ << ] John Doe or [ >>...
- Page 49 3. Please input the phone number of this Number: address book entry, then press the [Select] 1-482-1728502 █ key to return to the menu. Delete: Please press [ << ] or [ >> ] to select an Name 1 of 15 address book entry to delete, then press the John Doe [Select] key.
-
Page 50: View Call Records
View Call Records The phone maintains a list of all incoming, outgoing, and missed calls. You can view those records using the LCD. 1. Press the [Menu] key and then press the [ >> ] >Address Book key when “ > Call Records “ is displayed. Call Records Then press the [Select] key. - Page 51 Received Call: 1. There are two options available here: View >View and Delete All. Use the [ << ] or [ >> ] key to Delete All select one and then press [Select]. 2. If you selected “View” in the previous step, Mary all records will be displayed and you can use 10:45...
- Page 52 Missed Call: (The process and choices are the same as for “Received Call” as described on the previous page.) Dialed Call: (The process and choices are the same as for “Received Call” as described on the previous page.) Delete All: Press the [1] key to delete all call record entries Delete? or press [2] key to abort.
-
Page 53: Change The Ring Tone
3-4 Change the Ring Tone There are several ring tones available in the DPH-130S. 1. Press the [Menu] key. >Address Book Call Records 2. Press the [ >> ] key until “ > Setting “ is Call Records displayed on the LCD then press the [Select] >Setting... -
Page 54: Caller Id Support
3-5 Caller ID Support The DPH-130S supports caller ID display. However, you can disable this function using the following instructions: 1. Press the [Menu] key. >Address Book Call Records 2. Press the [ >> ] key until “ > Setting “ is Call Records displayed on the LCD, then press [Select]. -
Page 55: View Firmware Version
3-6 View Firmware Version If you have a problem with your DPH-130S and need customer support, the technician at help desk will need to know the firmware version of your DPH-130S. Please use the follow instructions to check the firmware version of your DPH-130S. -
Page 56: Appendix 4-1 Troubleshooting
4-1 Troubleshooting If your DPH-130S IP phone is not working properly or not responding, don’t panic! Before you contact your dealer for help, please check this troubleshooting list. You may be able to solve the problem yourself. Scenario Solution The LCD display is... - Page 57 I do not hear a dial tone Please check the cable connection between the IP phone and the handset. Please make sure that the A/C adapter is connected to both the power outlet on the wall and the phone. Replace the cable used to connect the IP phone to the handset with a new one.
- Page 58 provider and ask about the status of the service.
-
Page 59: Fcc Statements
4-2 FCC Statements NOTE: This equipment has been tested and found to comply with the limits for a Class B digital device, pursuant to Part 15 of the FCC Rules. These limits are designed to provide reasonable protection against harmful interference in a residential installation. -
Page 60: Firmware Upgrade
4-3 Firmware Upgrade All functions of the DPH-130S are controlled by the phone’s firmware. The firmware is upgradeable when new versions are available. A new version of the firmware may provide added functionality or it may correct problems with older versions. -
Page 61: Change User Name And Password
4-4 Change User Name and Password Click the “System” link on the left side of the screen then click the “System User Setting” link. Enter a new UserName, a new Password, and click Apply. -
Page 62: Contacting D-Link
Contacting D-Link Support for D-Link products is available over the internet 24 hours a day at the following web addresses: dlink.com Greece dlink.gr Canada dlink.ca Luxembourg dlink.be Europe (UK) dlink.co.uk Poland dlink.pl Germany dlink.de Hungary dlink.hu France dlink.fr Singapore dlink-intl.com Netherlands dlink.nl... -
Page 63: Notices
United States Copyright Act of 1976 and any amendments thereto. Contents are subject to change without prior notice. © Copyright 2006 by D-Link Corporation/D-Link Systems, Inc. All rights reserved. Information in this document is subject to change without notice.