Table of Contents
Advertisement
Quick Links
Advertisement
Chapters
Table of Contents

Related Manuals for Philips VTR7080


Summary of Contents for Philips VTR7080
- Page 1 使用手册 User manual User manual...
-
Page 3: Table Of Contents
目录 6 语音速记 6.1 录音 1 欢迎 6.2 速记 1.1 产品特点 6.3 录音转文本 6.4 文本编辑 2 重要须知 2.1 安全 7 资源管理 7.1 音频 7.2 照片 3 您的翻译器 7.3 录音文本 3.1 供货范围 7.4 翻译文本 3.2 概览 8 设置 4 开始使用 4.1 开 / 关机 9 应用软件... - Page 4 11.1 无法启动 11.2 翻译不出来 11.3 机器死机 12 技术参数 12.1 存储器 12.2 尺寸和重量 12.3 系统要求 12.4 录音 12.5 运行条件...
-
Page 5: 产品特点
1 欢迎 欢迎来到飞利浦世界!您能选择和购买飞利浦的产品,我们非 常高兴。您可在我们的官方网站上获得飞利浦公司的全方位技 术支持,如:使用手册、软件下载、保修信息等。 www.philips.com 1.1 产品特点 • 支持翻译功能:在线翻译和离线翻译。 • 内置高性能编解码芯片,支持无损音频播放。 • 以常见的 WAV 格式录音,支持 44.1KHz,16 位 PCM 录音。 • 支持录音文件转文本、录音速记。 • 支持 WIFI,蓝牙,4G。 • 支持文件分享功能。 • 支持扩展 SD 卡。 • 使用高速 Type-C 快速存取录音文件和数据。 • 可作为 MTP 存储设备,确保最大的兼容性。... -
Page 6: 重要须知
2 重要须知 2.1 安全 为了避免短路,切勿将产品放置在触水受潮处。 不要将产品放在加热设备附近或阳光直射的地方。 请注意,切勿挤压电缆,特别是插头处。 小心 • 特别声明:使用本产品前请仔细阅读本说明书,如因人为 操作或不可抗力因素而导致数据丢失,本公司一概不予负 责。特别提醒用户小心操作,注意将资料另外备份。 • 图像仅作参考。飞利浦保留更改颜色 / 外观 / 设计 / 参数 / 产品功能的权利, 硬件、 软件、 APP 如有更新, 恕不另行通知。... -
Page 7: 您的翻译器
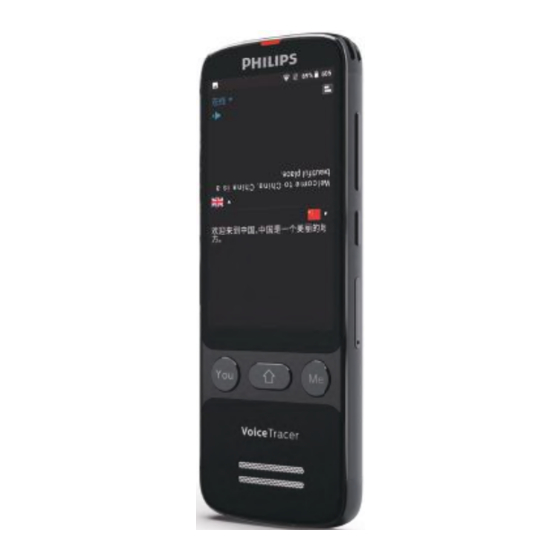
3 您的翻译器 3.2 概览 3.1 供货范围 Type-C接口 You键 工作指示灯 显示屏 Me键 Home键 喇叭 咪头 音量“-”键 音量“+”键 电源键 内存卡/SIM卡 摄像头 闪光灯... -
Page 8: 开始使用
4 开始使用 然后机器进入翻译界面 , 如下图所示。 4.1 开 / 关机 注意 • 第一次使用机器时,请对该机器充电三小时以确保机器有 电工作! 长按开关键,约 3 秒至 4 秒后开机,开机界面显示飞利浦图标, 如下图所示: 提示 • 在屏幕边上从左往右滑或者从右往左滑可以返回上一级菜 单。... -
Page 9: 翻译模式
5 翻译模式 文字翻译:适用于直接输入文字,即可翻译。 5.1 对话翻译 在主页面菜单下包含各个形式的翻译功能,参考界面如下: 先设置翻译的主语言和翻译语言,长按 YOU 键或 ME 键开始录制, 松开后生成翻译文字,并语音播报。点击“对话翻译”,可进 入如下图对话翻译界面: 翻译功能分为对话翻译、群组翻译、拍照翻译和文字翻译 4 个模块。 对话翻译:适用于交谈,对话翻译。 (1)对话翻译分为“在线翻译”和“离线翻译”,在翻译界面 群组翻译:适用于多人、多国语言群聊翻译。 可以点击左上角的 “在线” 或 “离线” 进行切换, 切换至 “离线” 拍照翻译:适用于文本、文章、路牌等拍照翻译。 状态时,翻译语言为:简体中文、英文、日语、韩语等四种,... - Page 10 若想翻译其它语言,可切换至“在线”,在线翻译语言可 5.1.1 离线翻译 达 50 种以上。 (2)长按机器 ME 键或 YOU 键可录制需要翻译的语音,松开手 在对话翻译界面,点击左上角的切换按钮,切换至离线,界面 后生成文字并开始播报翻译内容。 翻译状态会显示“离线”两字,如下图所示: (3)点击“ ”可以停止或者重复播报。 (4)点击右上角“ ”可以切换显示模式,如下图: 注意 • 机器开机无网络,默认为离线状态,第一次使用“离线” (5)点击“ ”可以快速互换语言位置。 翻译请先连接网络激活授权,方可使用。 (6)点击对话框可以停止或者重复播报。...
-
Page 11: 群组翻译
5.2 群组翻译 先设置翻译语言,创建群组,进行群组翻译。点击“群组翻译”, 可进入如下图群组翻译界面: (2)点击右上角的 “ ”进入菜单设置界面,点击“+”添 加设备 ID,如下图: (1)进入“群组翻译”页面后首先选择“我的语言”,点击“创 建群聊”就会自动创建群聊房间,点击“加入群聊”,输 入房间号就可以进入群聊界面... -
Page 12: 拍照翻译
(1)进去拍照预览界面,根据拍照的内容,先设置主语言和翻 (3)在群组翻译聊天房间,可点击编辑框输入文字,点右边的 译语言。 “发送”即可,也可以点击左边的“ ”选择语音输入。 (2)点击“ ”可以选择“关闭、自动、打开”闪光灯。 (3) 进去拍照预览界面点击 “ ” 按钮后, 界面切换到框选界面, 可以拉伸或者缩小框选边框来选择所需翻译的文字区域大 5.3 拍照翻译 小,确定就点击“完成”,等待识别。识别后可翻译对应 选择对应语言,接着对准需要翻译的内容拍照,进行翻译。点 的语言文字,点击“ ”可进行播报,触摸上半区域可以 编辑修改文本,也可切换语言将识别的文本翻译成其他国 击“拍照翻译”,可进入如下图拍照翻译预览界面: 家的语言。... -
Page 13: 文字翻译
(2)点击“ ”可以清空文字。 5.4 文字翻译 先设置翻译的主语言和翻译语言,输入需要翻译的文字,进行 翻译,点击“ ”可进行播报。点击“文字翻译”,可进入如 下图文字翻译界面: (1)触摸上半区域编辑框可输入需要翻译的文字,长按上半区 域编辑框可以对输入的文字进行“粘贴、全选、剪切、复 制、分享”,编辑完成后会自动在下半区域生成翻译文字, 点击右下角“ ”按钮可以播放翻译文本。... -
Page 14: 语音速记
6 语音速记 6.1 录音 (1)在录音界面,点击“ ”开始录音,再点击“ ”可以 语音速记模式包括录音、 速记、 录音转文本、 文本编辑 4 个模块。 暂停录音,点击“ ”可以保存录音,如下图所示: 录音:操作此功能可以录音; (2) 保存后会自动进入播放界面, 点击 “ ” 可以播放当前文件, 速记:边录音边转写文本,适用于会议纪要; 点击“ ”可以暂停播放,点击“ ”可以切换文件, 录音转文本:录好的音频文件,转写文本; 拖动进度条可以快进快退。 文本编缉:可对转写后的文本文件进行编缉处理。 (3)在录音界面点击“ ”可以进入“音频”文件列表界面, 如下图:... - Page 15 (4)在音频列表界面点击音频文件可以进入播放界面并且播放 在速记界面, 点击 “ ” 选择识别语言, 点击 “ ” 识别录制开始, 点击“ ”会弹出提示是否保存,选择“取消”会停止识别、 文件。 不保存文本并清空文本,选择“确定”会停止识别、保存文本 并清空文本,点击“<”或者左滑返回会提示是否保存,选择 6.2 速记 后会退出录音速记。 点击“速记”菜单,进入速记界面,如下图:...
-
Page 16: 录音转文本
注意 • 使用速记时,机器要连网状态下方可使用。 • 请勿在吵杂的环境下使用,避免影响识别的准确率。 • 使用速记时,确保输入的音源清晰,大声。 6.3 录音转文本 点击“录音转文本”菜单,进去音频列表界面,如下图: 图 1 转写完成后,界面会提示“转写完成”如图 2: 图 2 点击右上角的“保存”可保存当前的转写文件并且返回上一级 在此界面点击需要转文本的文件,进入转写界面,如图 1: 菜单列表界面,点左上角的“ ”会弹出提示是否保存文件,... -
Page 17: 文本编辑
选择后会直接返回上级菜单列表界面。 6.4 文本编辑 点击“文本编辑”菜单,进去语音文本列表界面,如下图: 图 3 在此界面点击需要编辑的文本,进入如图 3 界面,可编辑和播 放文件,编辑后可保存。... -
Page 18: 资源管理
7 资源管理 翻译文本:可在此菜单查看,对话翻译的文本内容。 点击进入“资源管理”,参考页面如图: 7.1 音频 (1)录音文件可以在音频模式查看,点击文件可以进行播放。 (2)长按录音文件可对文件进行“分享、修改名称、删除”。 注意 • 选择删除文件,文件会直接被删除,请确保重要文件另外 备份,不要误删。 播放界面说明: 音频:可在此菜单查看录音文件, 或对文件进行分享、 修改名称、 删除等操作; 照片:可在此菜单,查看拍照翻译图片; 录音文本:可在此菜单查看录音转写保存的文本,以及速记里 转写保存的文本;... -
Page 19: 录音文本
在此界面, 可点击图片进入预览, 长按可对当前照片进行 “分享” 、 返回/退出 当前文件数 “修改名称”、“删除”。 总文件数 录音文件名 播放进度条 当前播放时间 7.3 录音文本 上一曲 文件总时间 播放/暂停 下一曲 点击“录音文本”菜单可进去语音文本列表界面,如下图: 7.2 照片 点击“照片”菜单可进去照片列表界面,如下图: 点击文件可进去文本预览,在列表界面,长按可对当前文件进 行“分享”、“修改名称”、“删除”。... -
Page 20: 翻译文本
7.4 翻译文本 (1)点击文件可以打开文本进行查看。 (2)长按文件可以“删除该条”或者“删除全部”。... - Page 21 8 设置 点击“设置”进入设置界面: 设置界面包含 WLAN、移动网络、蓝牙、语言、键盘和输入法、 日期和时间、显示、存储设定、恢复出厂设置、关于设备等操 作选项。...
-
Page 22: 应用软件
9 应用软件 注意 • 请不要自行安装对系统要求很高的大型应用,例如游戏, 应用软件包括:计算器、浏览器、文件管理、音乐等。主应用 否则会影响本机性能。 参考界面如下:... -
Page 23: 充电方法
10 充电方法 使用 USB 数据线将本机与 PC 相连接。 请使用专用充电器充电,充电时指示灯亮,充满电,指示灯灭。 10.1 连接电脑 翻译器可作为存储设备,可使用 USB 数据线将翻译器与电脑相 连对文件进行存储、备份和移动,且无须安装软件。 提示 • 在文件移入或移出翻译机时,请不要断开翻译器与电脑的 连接,否则会损坏文件。... -
Page 24: 常见问题
11 常见问题 此处列举了常见问题的解答,可帮助解决智能翻译器出现的简 单问题。如果故障仍无法排除,请咨询经销商或访问我们的官 方网站:www.philips.com/support 11.1 无法启动 电池电量已耗尽请及时充电。 11.2 翻译不出来 检查确认网络信号是否正常。 11.3 机器死机 长按电源键 8 秒,复位即可。... - Page 25 12 技术参数 12.4 录音 PCM/44.1K/1411kbps:格式为 WAV 12.1 存储器 内置存储空间 12.5 运行条件 内置存储器类型:EMMCP 移动存储器 (PC):是 温度:5° C–45° C 存储卡:是 空气湿度:10% – 90%, 不凝结 蓝牙:是 WIFI:是 12.2 尺寸和重量 宽 × 高 × 深: 137 x 50 x 12.8 (mm) 重量 (含电池):131.66 (g) 12.3 系统要求...
- Page 26 Content 6.3 Recognize 6.4 Text editior 1 Welcome 7 Resource Management 1.1 Product features 7.1 Audio 7.2 Photo 7.3 Record text 2 Important Information 7.4 Translated text 2.1 Safety 8 Setting 3 Your Translator 3.1 What's in the box 3.2 Overview 9 Apps 4 Start Using 10 Charging Method...
- Page 27 12.3 System requirements 12.4 Recording 12.5 Running conditions...
-
Page 28: Welcome
1 Welcome Welcome to the world of Philips! We are honored by your choice and purchase of Philips’ products. You can have Philips’ comprehensive technical supports from our website, e.g. us- er’s manuals, software downloading and warranty information etc. www.philips.com 1.1 Product features... -
Page 29: Important Information
We specially recommend that users make additional copies of the files in the device. • Images are for reference only. Philips reserves the right to change the color/appearance/design/parameters/product functions without prior notice. -
Page 30: Your Translator
3 Your Translator 3.2 Overview: 3.1 What's in the box: Type-C interface You key Work indicator lamp Display Me key Home key Loudspeaker Microphone Volume “+” key Volume “-” key Memory card / SIM card Power key Camera Flashlight... -
Page 31: Start Using
• Please recharge the device for three hours before using it for the first time! Press the on-off key for about 3-4 seconds, and then the device will be switched on. The Philips icon will appear on the startup interface, as shown in the fi gure below: Reminder •... -
Page 32: Translation Mode
5 Translation Mode 5.1 Translate Firstly, select the source language and the target language, Various types of translation functions are displayed on the press YOU key or ME key while recording; after the record- main menu, and a reference interface is shown below: ing is over, the translated text will be generated and then an audio of this text will be played. - Page 33 translation languages is more than 50. 5.1.1 Off-line translation (2) Long press the ME key or YOU key to record the audio to be translated, move away the hand to generate text, On the translate interface, click the switch button in the and then start playing the translation contents.
-
Page 34: Group Translation
(1)After entering the “Group Translation” page, select “My Note Language” firstly, click “Create group” will automatically creat a group chat rooom; click “Join group” and enter the • The device has no network connection when switched room number to the group chart interface. on, and therefore it is defaulted as off-line status. -
Page 35: Camera Translation
(1) Enter the camera preview interface, and then select the (3) In the group translation chat room, the user can click the source language and target language according to the editing box to input text, and then click “Send” on the right contents. -
Page 36: Text Translation
to translate the identified text into languages of other half box to “paste, select all, cut, copy and share” the input countries. text; after the completion of editing, the translated text will be generated in the lower half area, and after clicking “ ” button at the lower right corner, the translated text can be 5.4 Text translation played. -
Page 37: Voice Shorthand
6 Voice Shorthand 6.1 Record (1) Click “ ” on the recording interface to start recording, ” on the recording interface to start recording, The voice shorthand mode includes 4 modules, i.e. Record, and then click “ ” to suspend recording; click “ ”... -
Page 38: Transcript
(4) Click the audio document on the audio list interface to On the transcribe interface, click “ ” to select and identify enter the playing interface and play the document. the language, and click “ ” to identify and conduct record- ing;... -
Page 39: Recognize
Click the document to be converted into text on this inter- Note face, thus entering the transcription interface, as shown in Figure 1: • For recording and shorthand, the device cannot be used unless it has been networked. • Please do not use the device in a noisy environment, so as to prevent the accuracy of identification from being influenced. -
Page 40: Text Editior
Click “Save” at the upper right corner to save the current Click the text to be edited on this interface, so as to enter transcription document and return to the interface of the transcription document and return to the interface of the the interface as shown in Figure 3, thus editing and playing the document;... -
Page 41: Resource Management
7 Resource Management text in this menu. 7.1 Audio Click to enter “Resource Management”, and a reference page is shown in the figure below: (1) The recording document can be viewed in the audio mode; after being clicked, the document can be displayed. (2) Long press the audio document to conduct “sharing, renaming and deleting”... -
Page 42: Photo
Description of Playing Interface: 7.2 Photo Click “Photo” menu to enter the interface of the picture list, as shown in the figure below: Return / Quit On this interface, click the picture to preview; long press it Progress bar Current play time to conduct “sharing”, “renaming”... -
Page 43: Record Text
7.3 Record text 7.4 Translated text Click the “Record text” menu to enter the interface of the voice text list, as shown in the figure below: (1) Click the document to open the text for checking. (2) Long press the document to “delete this one” or “delete Click the document to preview the text, and on the list all”. -
Page 44: Setting
8 Setting Click “Set” to enter the setting interface: The setting interface includes Wi-Fi, Mobile network, Blue- tooth, Language, Keyboard & Inputs, Date & time, Display, Storage setting, Factory data reset, About device and other relevant operation items. -
Page 45: Apps
9 Apps Note • Please do not install any large-sized application which has very high requirements for the system, such as The apps includes: computer, browser, document manage- games; otherwise, the performance of this device will be ment, music, etc., and a main application reference interface impacted. -
Page 46: Charging Method
10 Charging Method Use USB data line to connect this device with PC. Please use this dedicated charger for charging. When charging, the indictor lamp is on, and after charging is com- pleted, the indicator lamp is off. 10.1 Connecting computer The translator can be used as storage equipment, and the USB data line can be used to connect the translator and the computer for storage, backup and moving of documents, and... -
Page 47: Faqs
Here, we list the answers to FAQs to help you solve simple problems regarding this intelligent translator. If the fault still cannot be eliminated, please consult the dealer or visit our official website: www.philips.com/support. 11.1 Startup failure The battery has run out of its power, so please charge it in time. -
Page 48: Technical Parameters
12 Technical Parameters 12.4 Recording PCM/44.1K/1411kbps: format: WAV 12.1 Memory Built-in storage space 12.5 Running conditions Type of built-in memory: EMMCP Portable memory (PC): Yes Temperature: 5°C-45°C Storage card: Yes Air humidity: 10% - 90%, no condensation Bluetooth: Yes WIFI: Yes 12.2 Dimension and weight Width ×... - Page 50 VTR7080...
- Page 52 © 2020 Speech Processing Solutions GmbH. Register your product and get support at www.philips.com/welcome 版权所有文档版本 1.0, 2020/05/28...