Table of Contents
Advertisement
Quick Links
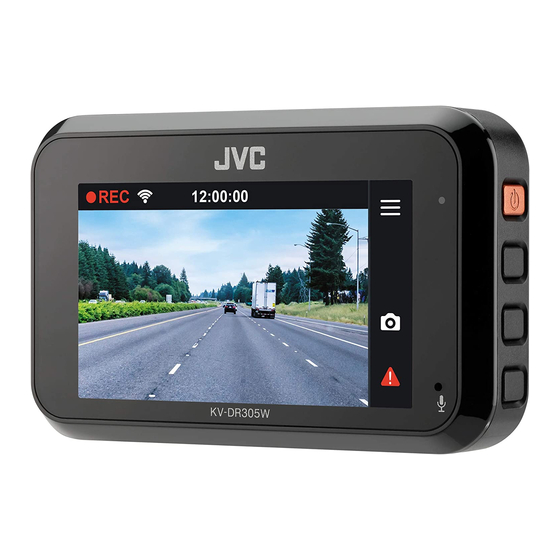
KV-DR30 W
Dashboard Camera
INSTRUCTION MANUAL
FCC WARNING
This equipment may generate or use radio frequency energy. Changes or modifications to this equipment may cause harmful
interference unless the modifications are expressly approved in the instruction manual. The user could lose the authority to operate this
equipment if an unauthorized change or modification is made.
FCC NOTE
This equipment has been tested and found to comply with the limits for a Class B digital device, pursuant to Part 15 of the FCC Rules.
These limits are designed to provide reasonable protection against harmful interference in a residential installation.
This equipment may cause harmful interference to radio communications, if it is not installed and used in accordance with the
instructions. However, there is no guarantee that interference will not occur in a particular installation. If this equipment does cause
harmful interference to radio or television reception, which can be determined by turning the equipment off and on, the user is
encouraged to try to correct the interference by one or more of the following measures:
Reorient or relocate the receiving antenna.
Increase the separation between the equipment and receiver.
Connect the equipment into an outlet on a circuit different from that to which the receiver is connected.
Consult the dealer or an experienced radio/TV technician for help.
© 2020 JVCKENWOOD Corporation
FCC COMPLIANCE NOTICE
Complies with
IMDA Standards
DB02771
Advertisement
Table of Contents

Related Manuals for JVC KV-DR305W


Summary of Contents for JVC KV-DR305W
- Page 1 KV-DR30 W Dashboard Camera INSTRUCTION MANUAL FCC WARNING This equipment may generate or use radio frequency energy. Changes or modifications to this equipment may cause harmful interference unless the modifications are expressly approved in the instruction manual. The user could lose the authority to operate this equipment if an unauthorized change or modification is made.
-
Page 2: Getting To Know Your Device
Getting to Know Your Device Mini-USB connector Reset button Device mount socket Camera lens LCD screen Speaker System indicator Power button / Function keys Microphone Memory card slot How to install 1. Make sure that your car is parked on level ground. Use a commercially available cleaning cloth to wipe off any dirt or grease from the location you are mounting the device. Follow the instructions below to securely mount your device in a vehicle. 2. Adjust the lens angle. When adjusting the angle of mounting, make sure that the cameraʼs view is parallel with the level ground and the ground/sky ratio is close to 6/4. 3. ... -
Page 3: Using A Memory Card
Using a Memory Card You must insert a memory card before you can start recording. You should use separate MicroSD cards for recording and for regular data storage. Hold the card (MicroSD) by the edges and gently insert it into the slot as shown in the illustration. To remove a card, gently push the top edge of the card inwards to release it and pull it out of the slot. Formatting a Card To format a memory card (all data will be erased), press > Format. Note: DO NOT apply pressure to the centre of the memory card. The manufacturer does not guarantee the productʼs compatibility with memory cards from all manufacturers. Before you start recording, please format the memory card to avoid malfunction caused by files not created by the device. Turn the device off before removing the memory card. Turning the Device On Complete the installation according to the instructions in the “Using your device in a vehicle” section. Once the vehicle engine is started, the device automatically turns on. The System indicator glows in green when the device is powered. Power Button Press and hold the Power button for 2 seconds to manually turn the device on and off. -
Page 4: Shutting Down The Device
Shutting down the Device Occasionally, you may need to perform a hardware reset when the device stops responding or if it appears to be “frozen” or unresponsive. To shut down the device, press and hold the Power button until the system powers off. If the system does not shut down by keeping the Power button pressed, you can force it to shut down by inserting a small rod (such as a straightened paperclip) into the Shutdown button on the device. Function Keys The device provides 4 function keys to control the corresponding icons displayed on the LCD screen. The keys' functions may vary on different screens. (Recording screen) (Menu screen) System Icons Various system icons on the status bar at the top of the screen provide the status information of your device. The display icons will vary depending on your device model and state. Recording indicator Wireless LAN status (Recording screen) Time display Microphone status... -
Page 5: Setting The Date And Time
Setting the Date and Time To make sure that the date and time of your recordings are correct, check the settings before you begin recording. 1. Press to access the Settings Menu. 2. Select S S ystem > D D ate/Time. 3. Use / press and repeat the step until all fields have been changed. 4. When done, press . Recording in Driving Mode Continuous Recording By default, the system will automatically begin continuous recording shortly after start-up. The System indicator flashes in green and amber alternately while the recording is in progress. The recording may be divided into several video clips; recoding will not stop between video clips. When your memory card fills up with continuous recordings, it will automatically record over the oldest existing files in this category. When continuous recording is in progress, you can manually stop recording by pressing ... -
Page 6: Event Recording
Event Recording By default, if an event happens such as a sudden impact, high speed driving, an aggressive turn or an accidental crash during continious recording, the G sensor will prompt the device to start recording the event. Note: You can change the sensitivity level of the G sensor by selecting > Video Recording > G-Sensor Sensitivity If you want to manually start an event recording while continuous recording is in progress, press the Event button ( ). The event recording will save moments before and moments event. When your memory card fills up with event recordings , it will record over the oldest existing files in this category The event recordings can be found in the “Event” category for file playback. -
Page 7: Camera Mode
Camera Mode The device allows you to take a photo. Do one of the following: If the recording is in progress, p r ess to take a photo. Press > Camera > . The photos can be found in the “Photo” category for file playback. Playback Mode To select a video or photo for playback: 1. Press > File Playback. 2. Select the desired type. 3. Select the desired file from the list and then press to start playback. 4. During playback, you can: While playing videos Press / to play the previous/next video; press and hold the buttons to fast rewind/forward the video. Press to return to the list. Press to display the pop-up menu to select: Play / Pause: Start or pauses the playback. Move to Event: Move the file to the “Event” category. Transfer to phone: Upload the selected video to your smartphone. -
Page 8: Getting Connected
Getting Connected JVC DVR Link The JVC DVR Link app is an integrated application that allows you to view, share and back up the videos recorded on a dashboard camera via wireless LAN. Search for "JVC DVR Link" in Apple App Store or in Google Play Store to download the app for free. Note: The JVC DVR Link app is compatible with iOS 9.0 (and above) and Android 5.0 (and above) devices. JVCKENWOOD does not guarantee the productʼs compatibility with smartphones from all manufacturers. App Store is a service mark of Apple Inc., registered in the U.S. and other countries. IOS is a trademark or registered trademark of Cisco in the U.S. and other countries and is used under license. Android and Google Play are trademarks of Google LLC. Setting up a Wireless Connection On your device, select > Wireless LAN > On to enable the wireless LAN mode. Once enabled, the wireless LAN setting screen displays the SSID and password of the device. On your smartphone, follow the steps to set up the wireless connection. -
Page 9: System Settings
You can check the wireless connection status by the icon on the device. The device is connected to the smartphone and paired with the JVC DVR Link app. The device is not connected to the smartphone. The device is connected to the smartphone but not paired with the JVC DVR Link app yet. Once connected, the event recordings will be automatically transferred to your smartphone via the JVC DVR Link app. System Settings Note: Not all setting items and options are available for all models. To customise the system settings, press File Playback Play the recorded videos and photos. Camera Press to enter Camera mode. Wireless LAN Enable or disable wireless LAN. Sound Recording Set if you want to include sounds in the recordings. Video Recording Video Clip Length: Sets the length of each video clip for a continuous recording. WDR: Enables the Wide Dynamic Range (WDR) function to improve the device's image quality under high-contrast lighting conditions. EV: Sets the exposure level to adjust the brightness of the image. Frequency: Sets the frequency for the camera to avoid problems caused by artificial light sources that are not constant. G-Sensor Sensitivity: Sets the sensitivity level of the G sensor ... -
Page 10: Using The Pc Application
Storage Allocation: The system provides 3 memory configurations to store the videos and photos. Select the proper configuration based on your usage. Restore to Defaults: Restore the system settings to the factory defaults. Version: Display the software information. Format Format a memory card. (All data will be erased.) Using the PC Application ROUTE WATCHER is a PC application for displaying video recorded with the device. System Requirements for JVC ROUTE WATCHER Installing the Software Install the software in a computer environment in which you have administrator's rights. 1 Download the installer from 2 Install according to the on-screen instructions... - Page 11 Recording preservation timing Screen size 2.7inches color TFT Continuous / Event Operating voltage Recording Mode DC 5.0V 1 / 3 / 5 min. Current Consumption Video format 480mA (Max.1A) H.264 (MP4) G-sensor Picture format JPEG (Max.1920 x 1080) Built-in Collision sensitivity Recording media 0.5G to 3G (0.5G step) microSDHC card 4GB to 32GB Class 10 or above Image sensor USB Port 1/2.7 Color CMOS sensor mini USB-B type Number of Pixel 2M Pixels (1920x1080) Angles of view Dimensions WxHxD (Main unit)
-
Page 12: Precautions And Notices
Precautions and Notices Precautions and Notices Warning! Do not operate the device while driving. Using this product does not change the requirement for a driver to take full responsibility for his or her behavior. This responsibility includes observing all traffic rules and regulations in order to avoid accidents, personal injury or property damage. For your own safety, do not operate the controls of the product while driving. A window mount is needed when using the recorder in a car. Make sure that you place the recorder in an appropriate place, so as not to obstruct the driverʼs view or deployment of airbags. Make sure that no object is blocking the camera lens and no reflective material is placed near the lens. Please keep the lens clean. If the carʼs windscreen is tinted with a coating, it may impact the recording quality. Connect the charger to a proper power source. The voltage requirements are found on the product case and/or packaging. Do not use the charger if the cord becomes damaged. Do not attempt to service the unit. There are no serviceable parts inside. Replace the unit if it is damaged or exposed to excess moisture. Caring for Your Device Taking good care of your device will ensure trouble-free operation and reduce the risk of damage. Keep your device away from excessive moisture and extreme temperatures. Avoid exposing your device to direct sunlight or strong ultraviolet light for extended periods of time. Do not place anything on top of your device or drop objects ... -
Page 13: Cleaning The Device
specifically for use on portable devices with LCD panels may be used to help protect the screen from minor scratches. Never clean your device with it powered on. Use a soft, lint- free cloth to wipe the screen and the exterior of your device. Do not use paper towels to clean the screen. Never attempt to disassemble, repair or make any modifications to your device. Disassembly, modification or any attempt at repair could cause damage to your device and even bodily injury or property damage and will void any warranty. Do not store or carry flammable liquids, gases or explosive materials in the same compartment as your device, its parts or accessories. To discourage theft, do not leave the device and accessories in plain view in an unattended vehicle. Overheating may damage the device. Cleaning the Device When the device is dirty, wipe it with a dry silicone cloth or other soft cloth. If the device is very dirty, remove the dirt with a cloth with neutral cleaner on it and then wipe off the cleaner. Wiping the device with a hard cloth or using using a volatile substance such as thinner or alcohol may cause scratches, deformation, deterioration, or other damage. When the lens is dirty, gently wipe it with a soft cloth dampened ... -
Page 14: Precautions For Use
work correctly. Refer to "How to Install" for the loosening of fixing knob, installation orientation, installation angle, and other information and then install the device correctly. Do not install the device near a digital terrestrial television antenna or an electrical component. Doing so may reduce television receiver sensitivity or cause flickering and noise. Use a commercially available cleaning cloth or the like to wipe off all dirt and grease on the mounting surface and then fix the mount base in place. If the device is re-affixed or mounted using, for example, general-purpose double-sided tape, the adhesion strength may weaken and cause the device to fall. After mounting the device, leave it for 24 hours before use to enable the mounting strength of the mount bracket to improve. Failing to do so may result in the adhesion of the mount bracket becoming weak and the device falling. Fix the cord in place with tape or the like so that it does not interfere with driving. Precautions for Use Do not block the camera lens, get dirt on it, or place a reflective object near it. When LED traffic lights are recorded, video in which they appear to be flickering or flashing may be recorded. ... - Page 15 Applicable condition of license for third party software MIT License Permission is hereby granted, free of charge, to any person obtaining a copy of this software and associated documentation files (the "Software"), to deal in the Software without restriction, including without limitation the rights to use, copy, modify, merge, publish, distribute, sublicense, and/or sell copies of the Software, and to permit persons to whom the Software is furnished to do so, subject to the following conditions: The above copyright notice and this permission notice shall be included in all copies or substantial portions of the Software. THE SOFTWARE IS PROVIDED "AS IS", WITHOUT WARRANTY OF ANY KIND, EXPRESS OR IMPLIED, INCLUDING BUT NOT LIMITED TO THE WARRANTIES OF MERCHANTABILITY, FITNESS FOR A PARTICULAR PURPOSE AND NONINFRINGEMENT. IN NO EVENT SHALL THE AUTHORS OR COPYRIGHT HOLDERS BE LIABLE FOR ANY CLAIM, DAMAGES OR OTHER LIABILITY, WHETHER IN AN ACTION OF CONTRACT, TORT OR OTHERWISE, ARISING FROM, OUT OF OR IN CONNECTION WITH THE SOFTWARE OR THE USE OR OTHER DEALINGS IN THE SOFTWARE. BSD 3-Clause "New" or "Revised" License * Redistribution and use in source and binary forms, with or without * modification, are permitted provided that the following conditions are met: * \begin{itemize} * \item Redistributions of source code must retain the above copyright notice, * this list of conditions and the following disclaimer.
- Page 16 If You Notice a Problem with the Device Reset the device. Turn off the power by pressing the reset button on the back of the device with the tip of a thin paperclip. Press the power button once again to turn the device on again. SD Cards Cards supported by this device Standard microSDHC Capacity 4 GB to 32 GB Speed class Class 10 or above File system FAT32 Precautions for Using SD cards When using a commercially available SD card, also check the instructions supplied with the SD card. Be sure to format (initialize) an SD card with the device before use. SD cards have a product lifespan, such as the number of times that writing can be performed. It is recommended to replace the SD card with a new one regularly depending on the usage conditions. When inserting and removing an SD card, confirm the orientation, do not bend it, and do not apply a strong force or impact to it. Do not directly touch the contact part with a hand or metal. The stored data may be damaged or lost due to static electricity. Be sure to back up (copy) the required files in the SD card to a ...