Cisco Firepower 1010 Hardware Installation Manual
Hide thumbs
Also See for Firepower 1010:
- Getting started manual (190 pages) ,
- Getting started (42 pages) ,
- Deployment manual (8 pages)
Table of Contents
Advertisement
Quick Links
Advertisement
Table of Contents

Related Manuals for Cisco Firepower 1010


Summary of Contents for Cisco Firepower 1010
- Page 1 Cisco Firepower 1010 Hardware Installation Guide First Published: 2019-07-24 Last Modified: 2022-03-21 Americas Headquarters Cisco Systems, Inc. 170 West Tasman Drive San Jose, CA 95134-1706 http://www.cisco.com Tel: 408 526-4000 800 553-NETS (6387) Fax: 408 527-0883...
- Page 2 Cisco and the Cisco logo are trademarks or registered trademarks of Cisco and/or its affiliates in the U.S. and other countries. To view a list of Cisco trademarks, go to this URL: https://www.cisco.com/c/en/us/about/legal/trademarks.html.
-
Page 3: Table Of Contents
Maintain Safety with Electricity Prevent ESD Damage Site Environment Site Considerations Power Supply Considerations Rack Configuration Considerations C H A P T E R 3 Mount the Chassis Unpack and Inspect the Chassis Desktop-Mount the Chassis Cisco Firepower 1010 Hardware Installation Guide... - Page 4 Connect to the Console Port with Microsoft Windows Connect to the Console Port with Mac OS X Connect to the Console Port with Linux C H A P T E R 5 Installation, Maintenance, and Upgrade Install the FIPS Opacity Shield Cisco Firepower 1010 Hardware Installation Guide...
-
Page 5: Overview
• Power Cord Specifications, on page 12 Features The Cisco Firepower 1010 security appliance is an NGFW desktop product in the Cisco Firepower family of devices with Power over Ethernet (PoE+) and L2 switch support. Note The PoE+ and L2 switch features are supported starting with Firepower Threat Defense (FTD) Version 6.5 and ASA Version 9.13. - Page 6 Rack mount (Cisco part number 800-107605-01) Airflow Side-to-side No fan Note Because the Firepower 1010 has no fan, the internal system temperature is significantly higher than the ambient temperature cited in Hardware Specifications, on page Cisco Firepower 1010 Hardware Installation Guide...
- Page 7 Power switch System power is controlled by the power cord; there is no power button. To shut down the Firepower 1010, remove the AC power supply. Power cord The chassis is powered on when you plug in the AC power supply.
- Page 8 Console Ports The Firepower 1010 has two external console ports, a standard RJ-45 port and a USB Mini B serial port. Only one console port can be active at a time. When a cable is plugged into the USB console port, the RJ-45 port becomes inactive.
-
Page 9: Package Contents
FAT-32 and mount the partition to disk1 again; however, data might be lost. Package Contents The following figure shows the package contents for the Firepower 1010. Note that the contents are subject to change and your exact contents might contain additional or fewer items. Figure 2: Firepower 1010 Package Contents... -
Page 10: Qr Code Sticker
(LTP). LTP allows anyone to connect a new Firepower 1010 to a network so that the IT department can onboard the device to CDO and configure it remotely. CDO supports Firepower Threat Defense (FTD) version 6.7 and later. -
Page 11: Serial Number Location
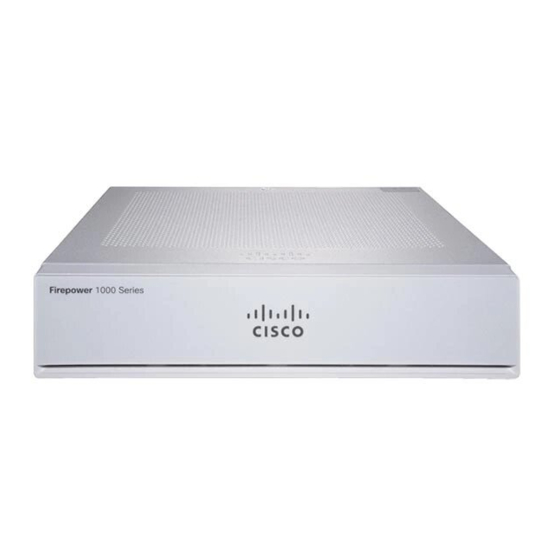
The following figure shows a sample compliance label. Figure 5: Compliance Label on the Chassis Front Panel The following figure shows the front panel of the Firepower 1010. Note that there are no connectors or LEDs on the front panel. Figure 6: Firepower 1010 Front Panel Rear Panel The following figure shows the rear panel of the Firepower 1010. -
Page 12: Status Leds
Overview Status LEDs Figure 7: Firepower 1010 Rear Panel Status LEDs Management port Lock slot Power cord socket Network data ports Console port USB Mini B port USB Type A port Reset button Rubber feet Status LEDs Facing the rear of the chassis, the LEDs are located on the top left edge (facing the front of the chassis, they are in the back right corner of the top). - Page 13 Power, Status, and Active LEDs on rear of chassis Power, Status, and Active LEDs on top of chassis The following figure shows all of the LEDs on the rear panel of the Firepower 1010 and describes their states. Figure 9: Rear Panel LEDs...
- Page 14 The LED is green always unless the chassis • Green—Link established. in a high availability pair. • Green, flashing—Link activity. • Amber—When the chassis is in a high availability pair, the LED is amber for the standby unit. Cisco Firepower 1010 Hardware Installation Guide...
-
Page 15: Hardware Specifications
Derate the maximum operating temperature 1.5° C per 1000 ft above sea level. Nonoperating: -13 to 158°F (-25 to 70°C) maximum altitude is 40,000 ft Note Because the Firepower 1010 has no fan, the internal system temperature is significantly higher than the operating temperature. Humidity... -
Page 16: Product Id Numbers
Product ID Numbers Product ID Numbers The following table lists the field-replaceable PIDs associated with the Firepower 1010. The spare components are ones that you can order and replace yourself. If any internal components fail, you must get a return material authorization (RMA) for the entire chassis. - Page 17 Figure 11: Australia (CAB-AC-C5-AUS) Plug: AUS 10S3 Cord set rating: 2.5 A, 250 V Connector: IEC 60320/C5 — Figure 12: Brazil (CAB-AC-C5-BRA) Plug: NBR 14136 Cord set rating: 2.5 A, 250 V Connector: IEC 60320/C5 — Cisco Firepower 1010 Hardware Installation Guide...
- Page 18 Figure 14: China (CAB-AC-C5-CHI) Plug: GB 2099.1 Cord set rating: 2.5 A, 250 V Connector: IEC 60320/C5 — Figure 15: Europe (CAB-AC-C5-EUR) Plug: CEE 7 VII Cord set rating: 2.5 A, 250 V Connector: IEC 60320/C5 — Cisco Firepower 1010 Hardware Installation Guide...
- Page 19 Figure 17: Italy (CAB-AC-C5-ITA) Plug: CEI 23-06/VII Cord set rating: 2.5 A, 250 V Connector: IEC 60320/C5 — Figure 18: Japan (CAB-AC-C5-JAP) Plug: JIS C8303 Cord set rating: 3 A, 125 V Connector: IEC 60320/C5 — Cisco Firepower 1010 Hardware Installation Guide...
- Page 20 Figure 20: South Africa (CAB-AC-C5-SAF) Plug: SABS 164-1 Cord set rating: 2.5 A, 250 V Connector: IEC 60320/C5 — Figure 21: Switzerland (CAB-AC-C5-SWI) Plug: SEV 1011 Cord set rating: 2.5 A, 250 V Connector: IEC 60320/C5 — Cisco Firepower 1010 Hardware Installation Guide...
- Page 21 Figure 22: Taiwan (CAB-AC-C5-TWN) Plug: CNS 10917-2 Cord set rating: 2.5 A, 125 V Connector: IEC 60320/C5 Figure 23: United Kingdom (CAB-AC-C5-UK) Plug: BS1363A/SS145 Cord set rating: 2.5 A, 250 V Connector: IEC 60320/C5 — Cisco Firepower 1010 Hardware Installation Guide...
- Page 22 Overview Power Cord Specifications Cisco Firepower 1010 Hardware Installation Guide...
-
Page 23: Installation Preparation
Use the statement number provided at the end of each warning statement to locate its translation in the translated safety warnings for this device. SAVE THESE INSTRUCTIONS Cisco Firepower 1010 Hardware Installation Guide... - Page 24 • Do not use if battery is warped or swollen. • Do not store or use battery in a temperature > 60° C. • Do not store or use battery in low air pressure environment < 69.7 kPa. Cisco Firepower 1010 Hardware Installation Guide...
- Page 25 Do not operate the system unless all cards, faceplates, front covers, and rear covers are in place. Warning Statement 1030 Equipment Installation Only trained and qualified personnel should be allowed to install, replace, or service this equipment. Cisco Firepower 1010 Hardware Installation Guide...
-
Page 26: Position The Chassis
Do not stack the chassis on top of another chassis. If you stack the units, they will overheat, which causes the units to power cycle. Whether positioning the chassis on a desktop, on a closet shelf, or mounting it on a wall, consider the following: Cisco Firepower 1010 Hardware Installation Guide... -
Page 27: Safety Recommendations
• The chassis is equipped with an AC-input power supply, which is shipped with a three-wire electrical cord with a grounding-type plug that fits into a grounding-type power outlet only. Do not circumvent this safety feature. Equipment grounding should comply with local and national electrical codes. Cisco Firepower 1010 Hardware Installation Guide... -
Page 28: Prevent Esd Damage
An open chassis allows air leaks, which may interrupt and redirect the flow of cooling air from the internal components. • Always follow ESD-prevention procedures to avoid damage to equipment. Damage from static discharge can cause immediate or intermittent equipment failure. Cisco Firepower 1010 Hardware Installation Guide... -
Page 29: Power Supply Considerations
• Baffles can help to isolate exhaust air from intake air, which also helps to draw cooling air through the chassis. The best placement of the baffles depends on the airflow patterns in the rack. Experiment with different arrangements to position the baffles effectively. Cisco Firepower 1010 Hardware Installation Guide... - Page 30 Installation Preparation Rack Configuration Considerations Cisco Firepower 1010 Hardware Installation Guide...
-
Page 31: Mount The Chassis
Check for damage and report any discrepancies or damage to your customer service representative. Have the following information ready: • Invoice number of shipper (see the packing slip) • Model and serial number of the damaged unit • Description of damage • Effect of damage on the installation Cisco Firepower 1010 Hardware Installation Guide... -
Page 32: Desktop-Mount The Chassis
(rear panel up), the holes should be 6.826 inches apart. For side to side orientation, the holes should be 5.154 inches apart. The wall-mount kit (part number 69-100647-01) contains the following items: • Wall-mount bracket (part number 700-118506-01) Cisco Firepower 1010 Hardware Installation Guide... - Page 33 Figure 26: Wall-Mount Bracket Horizontal mounting Vertical mounting Step 3 Attach the wall-mount bracket to the chassis using the three Phillips M3 x 6-mm screws. Cisco Firepower 1010 Hardware Installation Guide...
- Page 34 Pick up the chassis, align the screws in the anchors with the holes in the bottom of the wall-mount bracket, move the chassis toward the wall until the screw heads are in the wall-mount bracket, and then slide it down until it rests on the screws. Cisco Firepower 1010 Hardware Installation Guide...
-
Page 35: Rack-Mount The Chassis
• Four Phillips 10-32 x 0.75-inch screws (part number 48-0441-01); depending on your rack type, use these screws to secure the sliding-rack tray to your rack. Step 1 Install the cable guides on the rack shelf: Cisco Firepower 1010 Hardware Installation Guide... - Page 36 Place the chassis with the top facing down on a large, stable work area. Step 3 Invert the sliding rack tray and position it on the chassis. You can mount the chassis with the front or rear panel facing front. Cisco Firepower 1010 Hardware Installation Guide...
- Page 37 Tighten the three M3 x 7-mm screws to lock the chassis into place on the sliding rack tray (see the figure above). Step 6 Carefully turn the sliding rack tray right-side up. Step 7 Install the power supply in the sliding rack tray behind the chassis. Cisco Firepower 1010 Hardware Installation Guide...
- Page 38 If the rear sliding stop is not touching the power supply, loosen the two screws, slide the stop up to touch the power supply, and then retighten screws. c) Re-engage the Velcro straps and tighten them to secure the power supply. Cisco Firepower 1010 Hardware Installation Guide...
- Page 39 Use the second sliding rack tray and remaining three M3 x 7-mm screws to install a second chassis to the sliding rack tray and then onto the rack shelf (see Step 3). Cisco Firepower 1010 Hardware Installation Guide...
- Page 40 You can now attach your power supply cord and run it through the cable guides. What to do next Install the cables according to your default software configuration as described in the Cisco Firepower 1010 Getting Started Guide. Cisco Firepower 1010 Hardware Installation Guide...
-
Page 41: Connect To The Console Port
The drivers are OS-specific and not tied to the vendor of the console cable manufacturer. Step 2 Install the driver. Step 3 Connect a 5-pin USB Mini B to the console port as shown in the following figure. Cisco Firepower 1010 Hardware Installation Guide... - Page 42 Follow the instructions to complete the driver installation. Step 6 To communicate with the chassis, start a terminal emulator application. This software should be configured with the following parameters: • 9600 baud • 8 data bits Cisco Firepower 1010 Hardware Installation Guide...
-
Page 43: Connect To The Console Port With Mac Os X
/dev# ls -ltr *ACM* crw-r--r-- 1 root root 188, 0 Jan 14 18:02 ttyACM0 root@usb-suse /dev# Step 4 Connect to the USB port with the following command followed by the chassis USB port speed Example: Cisco Firepower 1010 Hardware Installation Guide... - Page 44 Connect to the Console Port Connect to the Console Port with Linux root@usb-suse /dev# screen /dev/ttyACM0 9600 Step 5 To disconnect the Linux USB console from the Terminal window, enter Ctrl-a followed by : then quit. Cisco Firepower 1010 Hardware Installation Guide...
-
Page 45: Installation, Maintenance, And Upgrade
Note Because the FIPS opacity shield covers the serial number on the chassis, the CO should copy the serial number and store it in a secure place. The serial number is needed when you call Cisco TAC. See Serial Number Location, on page 7 for the location of the serial number. - Page 46 Install the FIPS cover by holding the chassis right-side up and sliding the chassis into the FIPS cover front panel first. Figure 35: Install Chassis into FIPS Cover Step 4 Turn the chassis with the FIPS cover installed over and install the three screws. Cisco Firepower 1010 Hardware Installation Guide...
- Page 47 The figure shows the bottom of the chassis where you place three of the TELs. Allow the TELs to cure for a minimum of 12 hours. Any deviation in the placement of the TELs means the chassis is not in FIPS mode. Caution Cisco Firepower 1010 Hardware Installation Guide...
- Page 48 See the following procedures for how to place the chassis in FIPS mode: • See the "Security Certifications Compliance" chapter in the Firepower Management Center Configuration Guide, Version 6.7 for the procedure to enable FIPS mode. Cisco Firepower 1010 Hardware Installation Guide...
- Page 49 Installation, Maintenance, and Upgrade Install the FIPS Opacity Shield • See the fips enable command in the Cisco ASA Series Command Reference, A-H Commands for the ASA procedure to enable FIPS mode. What to do next See the Cisco Firepower 1010 Getting Started Guide for further configuration information.
- Page 50 Installation, Maintenance, and Upgrade Install the FIPS Opacity Shield Cisco Firepower 1010 Hardware Installation Guide...