
Related Manuals for Waterdrop WD-G3-W


Summary of Contents for Waterdrop WD-G3-W
- Page 1 Instruction Manual Read and save these instructions Reverse Osmosis Water Filtration System Model: WD-G3-W ,WD-G3-B, WD-G3-G...
- Page 3 Thanks or your purchase from Waterdrop. We value your patronage and appreciate your con dence in us. Counting you among our customers is something for which we are especially grateful. Please let us know if we can do anything else to help.
-
Page 4: Table Of Contents
Contents Installation Instructions Before Installation ..........................1 Parts List............................... 2 Product Introduction ......................... 3 Installation Tips........................... 4 Installation Steps..........................5 Step 1: Install the Feed Water Adapter...........................5 Step 2: Install the RO Faucet .................................6 Step 3: Install the Drain Saddle ..............................6 Step 4: Position the RO System Housing ..........................7 Step 5: Connect Tubing...................................7 Step 6: Connect Power Cord ................................9... -
Page 5: Installation Instructions
• Adjustable wrench, pliers Specifications To achieve the optimal performance, it is highly recommended to use the system within the operational parameters. Model WD-G3-W / WD-G3-B / WD-G3-G RO System Size (L*W*H) 18.12” *5.67”* 17.72” Feed Water Pressure 14.5-87 psi/0.1-0.6 MPa Feed Water Temperature 41-100 °F / 5-38 °C... -
Page 6: Parts List
Parts List System Housing Activated Carbon Filter Pre-sediment and Reverse Osmosis X1 Set (CB: WD-G3-N3CB) Carbon Block Filter Membrane Filter (CF: WD-G3-N1CF) (RO: WD-G3-N2RO) Smart Digital White 1/4" Feed Water White 3/8" Lock Clip RO Faucet x1 PE Tubing Adapter 3/8"-1/2” PE Tubing X60"... -
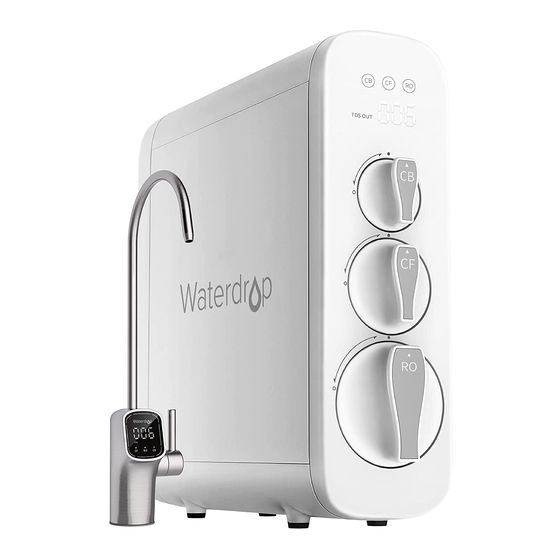
Page 7: Product Introduction
Product Introduction The brief introduction of various parts and sample connections are presented as follows. Please identify and get familiar with these parts and connection points for a smooth installation. G: “FAUCET” Connector A: Filter Life Indicators F: “POWER” Port B: Display Screen C: Activated Carbon (CB) D: Pre-sediment and... -
Page 8: Installation Tips
Installation Tips How to Use the Quick-Connect Fittings Figure 1 To connect: NOTE: There is an existing mark (Figure 1) at the end of the tubing for you to confirm if the tubing is fully inserted into the fitting. • Push the tubing into the fitting until you reach the mark on the tubing. NOTE: If the tubing is not fully inserted, no seal will be created and leakage will occur. -
Page 9: Installation Steps
6. Once you break through the surface, swirl the drill a little to apply pressure in a circle evenly. Installation Steps Prior to installation, it is highly recommended to watch the video "Waterdrop G3 RO Installation" on YouTube. NOTE: • The RO system must be connected to the COLD water supply ONLY. -
Page 10: Step 2: Install The Ro Faucet
Step 2: Install the RO Faucet (Non-Air Gap Faucet) NOTE: If your kitchen sink or countertop does not have an existing hole, you will have to drill one (1”). Refer to Page 5. 1. Insert the faucet spout into the faucet body (Figure 2. -
Page 11: Step 4: Position The Ro System Housing
Step 4: Position the RO System Housing NOTE: It is not recommended to place the housing against the cabinet, as there may be vibrations when the system works. a) The power-supply receptacle for the appliance shall be installed in a cabinet or on a wall adjacent to the undercounter space in which the appliance is to be installed. - Page 12 2. Install the “FILTERED” Water Tubing • Remove the plug from the "FILTERED" water port; • Identify the white 1/4" PE tubing that is pre-installed with RO faucet (figure 13). • Insert the other end of the tubing into the “FILTERED” water port (Figure 14), and pop the lock clip on the fitting.
-
Page 13: Step 6: Connect Power Cord
Step 6: Connect Power Cord Connect the RO faucet to the system: Insert the power cord which is attached to the RO faucet into the“FAUCET” connector (Figure 17) at the back of the housing, and tighten the nut. Connect Power Adapter: Insert the DC head of the power adapter into the "POWER" port at the back of the housing (Figure 18). -
Page 14: Step 8: Start Up The System
Step 8: Start up the System 1. Turn on the cold water supply valve. Check for leaks; 2. Insert the plug of power adapter into the socket; NOTE: If the system can't be powered on after you insert the plug of power adapter, check the power under the sink, as this mostly occurs when the power under the sink is powered off. -
Page 15: Owner's Manual
5. Confirm the flush is completed before turning off the RO faucet and ensure it’s not leaking. 6. Please fix the power adapter with the cable tie so that it does not move by impact. To avoid failure, stay away from any water sources, including pipe fittings, the bottom of the basement, and wet floors. * Please note that the reading in the figure is only used as an example, and the actual reading may vary according to different water conditions. -
Page 16: Section 2: Filter Life Reminder
Section 2: Filter Life Reminder NOTE: Filter life may vary depending on source water quality and water usage. Please replace the filter according to the reminder of the filter life indicators. 1. Filter Life Indicator on System Housing There are helpful electronic filter indicators (CF/CB/RO) on the front panel (Figure 26) that will notify you to perform a routine filter replacement by color change. -
Page 17: Section 3: Filter Replacement Guide
Display Time: • All indicators will go off after 5 minutes when the system stops making water. • Check the filter life status by touching the indicators, and the lights will go off in 30 seconds. 2. Filter Life Indicator on the RO Faucet Different light colors displayed on RO faucet indicate different filter life status. -
Page 18: Section 4: Automatic Flushing
Figure 28 Figure 29 How to Reset the Filter Life Indicator (Taking Reset of CB Filter Life Indicator as an Example): Press and hold the CB filter life indicator for 7 seconds until the system beeps. NOTE: Refer to the above method, hold down the CF or RO indicator to reset the corresponding filter. How to Flush the Filter after Replacement: NOTE: The display screen on front panel and RO faucet will show the flushing status (Figure 30) -
Page 19: Section 5: Malfunction Display
3. Recycled Fresh Water Flushing Recycled fresh water flushing function is to ensure each cup of water to be fresh and healthy. The system will automatically recycle fresh water and flush after it has dispensed water over 5 minutes. When the system is recycling fresh water and flushing, the panel displays as shown in figure 30. -
Page 20: System Maintenance
System Maintenance • If you don't use the system for more than one week, turn on the RO faucet, shut off the cold water valve, and disconnect the power. Seal the filters and store it in the refrigerator (not the freezer). You need to open the RO faucet and allow it to run for 10 minutes first before using the system again. - Page 21 • Low Water Flow at the RO Faucet a. Leak from tubing connection. Check and ensure all tubing is installed correctly and completely. b. Filter expires. Check the filter life indicators to confirm which filter needs to be replaced and replace it immediately.
-
Page 22: Limited Product Warranty
a. The reading tested by the TDS Meter is the TDS of static water in the container while the TDS reading displayed by the system is the TDS of flowing water. As a result, the TDS readings are different. b. There are errors in the TDS Meter tests. •... -
Page 23: Warranty Registration
This limited warranty shall only be valid if: 1. The feed water pressure is no less than 14.5 psi and no longer than 87 psi; 2. The feed water temperature must be no less than 41°F and no more than 100°F; 3. - Page 24 Manufacturer Technical Support Tel: 1-888-352-3558 (U.S.) Made in China V001 E-mail: service@waterdropfilter.com Qingdao Ecopure Filter Co., Ltd.