Advertisement
Quick Links
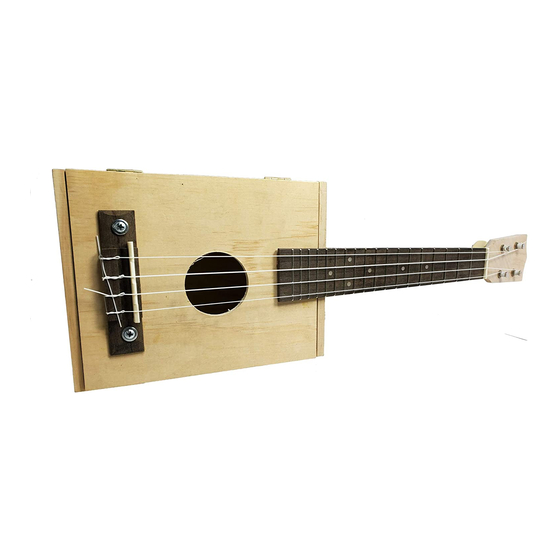
Cigar Box Ukulele
Kit Assembly
Instructions
Maybe you'd like to play a little love song for the apple of your eye, or possibly plink your way over
the island rainbow like the late, great IZ. Maybe you're looking to build your first instrument by hand.
No matter what your motivation, you too can play soft, mellow tones on your very own hand-built ci-
gar box ukulele in no time.
This guide will walk you through the assembly of the C. B. Gitty Cigar Box Ukulele kit. Using just a few basic
tools you will construct a fully playable, great-sounding and awesome-looking concert (also known as alto)
cigar box ukulele, sure to be the envy of friends and
neighbors alike. The ukulele is a very fun and easy-to-
play instrument with a unique, happy sound, and your
cigar box uke will provide many hours of musical enjoy-
ment.
Kit Inventory
Refer to the labeled photo above to identify each of the parts in your kit. Verify that everything is present and
that you are familiar with what's what.
A. Plain Wooden Craft Box
B.
Hardwood ukulele neck blank
C.
Rosewood ukulele fret board
D.
Set of nylon ukulele strings
E.
Rosewood ukulele bridge
Visit
Copyright 2015 © C. B. Gi y Cra er Supply
Product Number 36‐009‐01
View this guide in full color online:
www.CBGi y.com/CBUkeKit
Need Parts?
www.CBGi y.com/ukulele‐parts/
our full line of uke parts and hardware!
for
1
Advertisement

Related Manuals for C. B. Gitty Crafter Supply Cigar Box Ukulele Kit

Summary of Contents for C. B. Gitty Crafter Supply Cigar Box Ukulele Kit
- Page 1 This guide will walk you through the assembly of the C. B. Gitty Cigar Box Ukulele kit. Using just a few basic tools you will construct a fully playable, great-sounding and awesome-looking concert (also known as alto)
- Page 2 Bone ukulele saddle Bone ukulele nut H. (4) washer-head screws (3) drywall screws (two longer, one shorter) J. Bridge/tail bracing block (4) Ukulele tuners Tools Needed The following tools are what we recommend for completing this kit—they are the same ones we used when making this guide.
- Page 3 Step 1—Marking for the Neck Figure 1 Now it’s time to mark the box for the location of the neck. As an overview, you will want the neck to be mounted to the cigar box exactly in the center of the side you glued the neck brace The top surface of the neck should end up flush with, or slightly above (1/16”...
- Page 4 Figure 3 Figure 4 Step 3—Drilling the Neck Mounting Holes in the Neck Now, line the neck back up to the box, in position where it will be mounted, and make a mark through each the holes you just drilled onto the flat part of the neck heel. The scratch awl or a small nail is very handy for this.
- Page 5 Figure 10 shows what the ukulele-to-be should look like once you have finished test-mounting Figure 6 This mark was made with a the neck. If the neck heel extends below the bot- scratch awl through the tom of the cigar box, you can file/sand the over- holes drilled in the side of hang away.
- Page 6 board extend out over the box (which makes the instru- Figure 9 ment more versatile when being played), or you can cut off the bottom part off the fretboard so that it ends at the box edge. One benefit of the latter is that it lets you gain access to the box interior after the ukulele has been built - this can be handy if you want to install a pickup, or at least want to leave yourself the option of doing so later.
- Page 7 3—I Figure 11 S In this section we’ll cover how to install the bridge and saddle, as well as the bridge Leave about 1/8” bracing block that goes inside the box. of space below where the head‐ Step 1—Install the Bridge stock angle begins, for the nut.
- Page 8 lid, center the bridge at the appropriate distance from the top of the fret board. Making certain that it is cen- Figure 14 tered will properly align the bridge and saddle with the fret board. Through the holes you’ve drilled, mark the box lid. Use a ⅛” bit to drill holes through the lid and into the brace at the points you’ve marked, as shown in Figure 20.
- Page 9 (Figure 21). A few light taps with a small mallet or wood scrap may be required to seat it securely, but don’t overdo it or the bone or wood may break. You should not need to glue the saddle in place, since the strings will hold it down.
- Page 10 After removing the clamps from gluing the fretboard to the neck, apply a small amount of wood Figure 18 glue to the nut. Clamp it in place, as shown in Figure 24, with the flat edges butted up against the top edge of the fret board and the neck, as shown in the photo.
- Page 11 gives a very nice look. Several smaller holes in a pattern can also work nicely. Step 3—Re-attach the Neck Now re-attach the neck using the three neck- mounting screws, as shown in Part I above. Make sure everything lines up correctly and make any adjustments as necessary.
- Page 12 5—T Once your strings are installed, the construction part of this kit is complete. Congratulations, you have finished your ukulele! Now all that’s left is to get it strung up and get busy playing! Figure 25 Step 1—Get your Ukulele in Tune Figure 26 Figure 27 This ukulele is tuned to G C E A, with G being the top string (when held in playing position) and A being the...
- Page 13 But your instrument-building career doesn’t have to stop here! C. B. Gitty Crafter Supply offers a variety of musical instrument kits featuring cigar boxes and other reclaimed materials, from the simplest one-string diddley-bows to 4-string cigar box guitars.
- Page 14 Your Next Project... www.CBGi y.com/PureAndSimple Copyright 2015 © C. B. Gi y Cra er Supply...