Canon RE-350 Instruction Manual
Video visualizer
Hide thumbs
Also See for RE-350:
- Brochure & specs (4 pages) ,
- Control interface commands manual (63 pages) ,
- Pin assigments manual (1 page)
Table of Contents
Advertisement
Please read this instruction manual carefully before operation. Store
this manual in a readily accessible location for future reference.
Veuillez lire attentivement ce mode d'emploi avant d'utiliser
l'appareil. Conservez-le soigneusement pour référence.
Canon Video Visualizer
Vidéo visualiseur Canon
RE-350
INSTRUCTION MANUAL
MODE D'EMPLOI
E
F
English
Français
Advertisement
Table of Contents

Related Manuals for Canon RE-350


Summary of Contents for Canon RE-350
- Page 1 Please read this instruction manual carefully before operation. Store this manual in a readily accessible location for future reference. Veuillez lire attentivement ce mode d'emploi avant d'utiliser l'appareil. Conservez-le soigneusement pour référence. Canon Video Visualizer Vidéo visualiseur Canon RE-350 INSTRUCTION MANUAL...
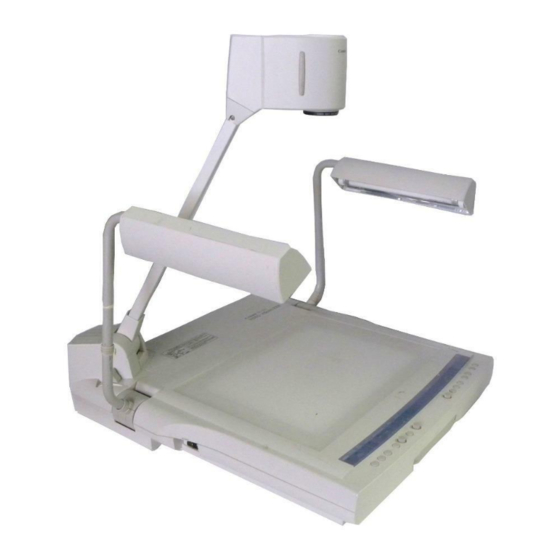
- Page 2 Thank you for purchasing the Canon Video Visualizer RE-350. The RE-350 is a user-friendly portable image input device with a built-in video camera and a 12 x zoom lens. It projects images of flat documents, three-dimensional objects, film, etc., onto a video monitor.
-
Page 3: Fcc Notice
Date of Purchase Dealer Purchased From Dealer Address Dealer Phone No. Model No. RE-350 Serial No. TO REDUCE THE RISK OF ELECTRIC SHOCK, DO NOT EXPOSE THIS PRODUCT TO RAIN OR MOISTURE. TO REDUCE THE RISK OF ELECTRIC SHOCK AND TO REDUCE ANNOYING INTERFERENCE, USE THE RECOMMENDED ACCESSORIES ONLY. -
Page 4: Important Safety Instructions
IMPORTANT SAFETY INSTRUCTIONS In these safety instructions the word “product” refers to the Canon Video Visualizer RE-350 and all its accessories. 1. Read Instructions—All the safety and operating instructions should be read before the product is operated. 2. Retain Instructions—The safety and operating instructions should be retained for future reference. - Page 5 This indicates a need for service. 19.Replacement Parts—When replacement parts are required, be sure the service technician has used replacement parts that are specified by Canon or that have the same characteristics as the original part. Unauthorized substitutions may result in fire, electric shock or other hazards.
-
Page 6: Table Of Contents
CONTENTS IMPORTANT SAFETY INSTRUCTIONS ... 3 NOMENCLATURE AND FUNCTIONS ... 6 ASSEMBLING, STORING AND CONNECTION ... 9 OPERATION ... 12 Manual Focusing ... 13 Film Projection ... 13 Readjusting the White Balance ... 14 Converting from Negative to Positive ... 14 Projecting Black-and-White Documents ... -
Page 7: Nomenclature And Functions
NOMENCLATURE AND FUNCTIONS Camera head Rear panel Arm lock release lever Press to fold/unfold the arm. Power switch (see page 12) Lens cap NOTICE お願い After turning the power OFF, wait at least 5 seconds before turning the power ON again. Turning the power ON too soon may cause a malfunction. The illumination lamps do not light up immediately after the LIGHTS button is MEMO pressed. -
Page 8: Rear Panel
Use to adjust external synchronization (see page 19). (sub carrier) Hue fine-adjustment volume MIC LEVEL PHASE (See page 19) Use this terminal when controling the RE-350 by a computer (see page 16, 20). AC outlet Should not exceed 5A. This outlet is not interlocked. AC INLET... -
Page 9: Operation Panel
Operation Panel RS232C CONTROL button/indicator Use this button to switch between online and offline to a computer. The indicator flashes when the system is set to online, and stays lit while online. INPUT SELECT button/indicator Use this button to select input equipment, when switching between pictures via the camera head and pictures via external input equipment (see page 17) -
Page 10: Assembling, Storing And Connection
ASSEMBLING, STORING AND CONNECTION Assembling Unfold and raise the pair of illumination lamps. Raise the right-hand illumination lamp first, then the left-hand illumination lamp ( → ). Press the arm lock release lever, and raise the arm until it stops. Direct the camera head towards the document table. - Page 11 注 意 CAUTION MEMO Put the supplied unit cover on the RE-350 when the unit is not in use. The unit cover has a pocket to store cords. Place the unit horizontally when storing it. If the unit is stored vertically, it may fall down and cause injury or malfunction.
- Page 12 Connection To connect the RE-350 to a monitor, use a commercially available BNC video cable. To use a video monitor with the S-VIDEO terminal, use a commercially available S-video cable. Using S-video enhances picture quality. Use the power cord included with the RE-350.
-
Page 13: Operation
Power switch Operation panel EXPOSURE The power of the RE-350 should be turned OFF when the unit is not used. MEMO Disconnect the power cord if the unit will not be used for extended periods. P O W E R... -
Page 14: Manual Focusing
(65mm) above the document table. ■ Undesirable objects for focusing Although the auto focus function of the RE-350 is very accurate, objects such as those listed below may present some difficulties. If the system cannot focus automatically, the AUTO FOCUS indicator goes off. If this happens, focus the lens manually using the NEAR button or the FAR button. -
Page 15: Readjusting The White Balance
Readjusting the White Balance Readjust the white balance after changing the illumination, or when the color tone seems unnatural. Adjustment to a desired color tone can be made manually. To readjust the white balance, complete the following steps: Put some white paper on the document table. Project the white paper to full monitor size by pressing the ZOOM buttons (WIDE button or TELE button). -
Page 16: Projecting Black-And-White Documents
To fully display on the monitor a 13" x 10" size document with clear characters, refer to the samples shown below for size and thickness. The character samples are in actual scale (equivalent to 20 point photoset letters, and when outputting from the S-VIDEO OUT). Canon Video Visualizer Vidéo Visualiseur Canon Operation panel... -
Page 17: System Construction
SYSTEM CONSTRUCTION The RE-350 has abundant video input and output terminals.The equipment shown below can be connected to these terminals. Use the specified power cord. For other cords, use commercially available cables. For details of operation, refer to the instruction manual of the equipment to be used. -
Page 18: Changing To Pictures Via External Input Equipment
Using a Microphone If you connect a microphone to the MIC IN terminal of the RE-350 and connect a monitor with speakers, sound can be output. Regardless of the selection of input equipment, sound from the microphone will be output to both R and L AUDIO OUT terminals in monaural mode. -
Page 19: Recording By Vcr
Recording by VCR When you connect a VCR to the output terminal of the RE-350, use a commercially available BNC video cable and RCA pin cable. If you connect a microphone, you can record audio together with pictures via the camera head onto a video tape. -
Page 20: Using External Synchronization
The following illustration shows an example of connecting a camera for a video conferencing system to the RE-350. The picture will not flicker when the INPUT SELECT button is pressed to change from video captured by the camera of the RE-350 to that from external input and vice versa. -
Page 21: Functions Controlled By A Computer
DATA: machine name DATA: ROM version To utilize the computer control features of the RE-350 a program developers kit is available from Canon U.S.A. The developers kit provides a guide for computer software programmers to create customized software to control camera functions. -
Page 22: Troubleshooting
TROUBLESHOOTING If the RE-350 does not function properly, check the following points before contacting your dealer. Problem No image appears on the monitor The picture cannot be focused correctly Pictures appear reddish/bluish Pictures are too bright/dark Pictures appear with flicker... -
Page 23: Specifications
• Weight and dimensions are approximate. • Errors and omissions excepted. • Specifications and design of the product are subject to change without notice. • Canon is a registered trademark of Canon Inc. " x 9- " to 1- " x "...