Advertisement
Quick Links
Advertisement

Related Manuals for Electrolux Unic Aura


Summary of Contents for Electrolux Unic Aura
- Page 1 July 2021...
- Page 2 https://www.unic-usa.com/en_US/service-center/technical-center...
- Page 3 Topics: Installation Start-up Operation Cleaning Programming...
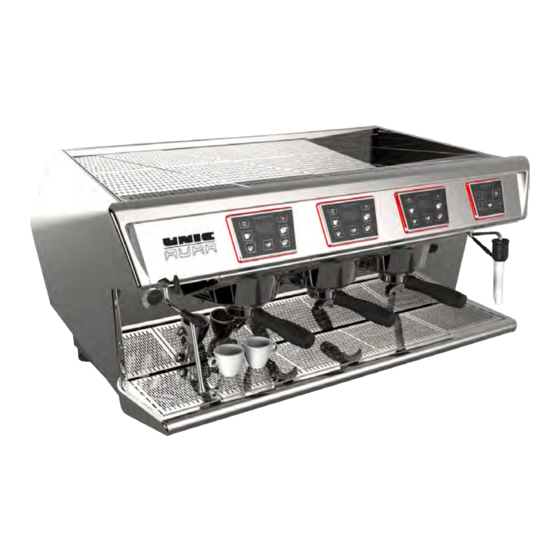
- Page 4 Aura Features Design appearance from our Stella Simple Heat Exchanger boiler from our Mira Solid State internal electronic controls Easy to Use/Program touchpads developed from Pony...
-
Page 5: Installation
Installation... - Page 6 Installation Water Power Drain Line Warranty for scale problems not valid 220Volts 30 Amps 6’ reinforced drain line unless water treatment installed shipped attached to machine Suitable cord cap must be supplied by customer L6-30 Recommended Suitable drain must be within 6’...
- Page 7 Install Legs Install Allen screw with the socket facing down. Easier to remove in the future!
-
Page 8: Water Line
Water Line Remove Right Side Attached Line with Fiber Washer... - Page 9 Start-up...
- Page 10 Flashing: FL Switch Startup Sequence: no heat 3 . 9 9 Software Version Group Assignment Fill Confirmation Ready...
- Page 11 Switch ON no heat Empty Boiler Flashing: FL...
- Page 12 Fill Boiler Boiler Filling: no heat Autofill Valve Opens Flashing: FL...
- Page 13 Fill Boiler Boiler Filling: no heat Autofill Valve Open Fills to Probe Level Flashing: FL...
- Page 14 Fill Boiler Boiler Filling: no heat Autofill Valve Open Fills to Probe Level Pump Runs during Filling Flashing: FL...
- Page 15 Fill Boiler AutoFill Valve Adjustment: Test Filling Cycle: Activate fill 3 turns out for best operation by disconnecting probe...
- Page 16 Filling Time Out Message no heat After 3 minutes without completely filling May have to cycle ON OFF to re-start: 1. Machine with empty boiler 2. Low water pressure 3. 3 group machine with large boiler...
- Page 17 Full Boiler Verification no heat Briefly Flashes FL Starting with a Full Boiler: The screen will briefly flash FL after the startup sequence to verify the Boiler is full...
-
Page 18: Start Heating
Start Heating ON Heating no heat Once the Boiler is full the power switch can be turned to the Heating position Dashes cycle during heating Dashes also cycle in switch pos 1 When the boiler is full... - Page 19 Start Heating ON Heating Elements 1 & 2 Element 3 Both on SSR 1 SSR 2 Boiler should start Steam Pressure Check for power to all 3 getting warm elements with an ammeter starts to climb...
- Page 20 False Pressure • Gauge shows pressure Open Steam Valve • Boiler cold • Air Pressure caused by rapid filling -----Trapped Air------ Shows up to 3 bar! Open Steam valve to vent air Whoosh!!!!
- Page 21 Set Pump Pressure - 9 bar 9 bar The pump creates pressure in the brewing system Adjust Pump while Activate any group 9-10 bar (130-140psi) running...
- Page 22 Set Steam Pressure Heating Elements create pressure in the steam Boiler 1.1 bar (16psi) Steam Pressure Sensor Programming: Pr5 (See Programming section)
- Page 23 Dispensing Lights Lights are on a separate switch...
-
Page 24: Operation
Operation... -
Page 25: Make A Drink
Make a Drink... - Page 26 Make a Drink...
-
Page 27: Steam Milk
Steam Milk... - Page 28 Steam Milk...
- Page 29 Steam Milk...
- Page 30 Cleaning...
-
Page 31: Automatic Cleaning Cycle
Automatic Cleaning Cycle Cleaning Button Blind Cleaning Basket (No holes) Powered Espresso The Cleaning Button starts a 4-minute Machine Cleaner automatic cycle Cleaning Brush with cleaner measuring spoon... - Page 32 Automatic Cleaning Cycle Remove coffee basket Insert Cleaning Basket Add a small amount of Lock portafilter tightly from portafilter (No holes) cleaner into the group 1 measure Start Cleaning...
- Page 33 Automatic Cleaning Cycle Press & Hold the Press the Continuous Cleaner will “back-flush” Cleaning Button Button to start into drip tray for 3 seconds Cleaning Cycles: 10 x 10 second clean cycles Rinse Cycles: 3 X 30 second rinse...
- Page 34 Automatic Cleaning Cycle...
- Page 35 Programming...
- Page 36 Program Drink Doses...
- Page 37 Program Drink Doses There are 2 steps to unlock the Programming Mode Programming Mode: Display: Pro Display: do Press the cleaning and (dose) Press & Hold the GEAR button for 3 seconds continuous buttons Press & hold the continuous button first, then the cleaning button Hold both for 3 seconds...
- Page 38 Program Drink Doses Display: do Display: PrG All drink Buttons Press Stars Press Stars a 2 time start flashing to allow drink programming...
- Page 39 Program Drink Doses Button stops flashing when programed. Button can be re-programmed to get the correct amount The last value is saved START & STOP dispensing with desired button Prepare a portafilter with coffee and lock in place Display shows milliliters through flowmeter...
- Page 40 Save Programing Press & Hold the GEAR Press & Hold the STARS button button on G1 for 3 on G1 for 3 seconds to Save and return to the seconds to exit Programming Selection “do” Programming Normal Operation Press & Hold the STARS button to exit any sub menu Press &...
- Page 41 Program: Steam / Hot Water...
- Page 42 Program Steam / Hot Water Steam/Water Group All Buttons flash in programming mode Programming Mode: 1 Press the GEAR button on any Group for 3 seconds 2 Press & Hold both the cleaning and continuous buttons for 3 seconds...
- Page 43 Program: Steam / Hot Water Steam/Water Group Start and Stop Start and Stop All Buttons flash in SteamAir Button to set Water and Steam Buttons temperature programming mode to set dispensing times Press & Hold the GEAR button on G1 for 3 seconds to Save and Exit...
- Page 44 Adjust Steam Pressure When “ON” Press Stars to enter Programming Scroll to Pressure and 1 . 1 Toggle between press Stars to enter OFF & ON if needed Adjust bar setting Press & Hold the GEAR button on with lower keys G1 for 3 seconds to Save and Exit...
- Page 45 https://www.unic-usa.com/en_US/service-center/technical-center...