Table of Contents
Advertisement
Quick Links
Table of Contents
1. Getting to Know the Cactus V6 II
1. Getting to Know the Cactus V6 II
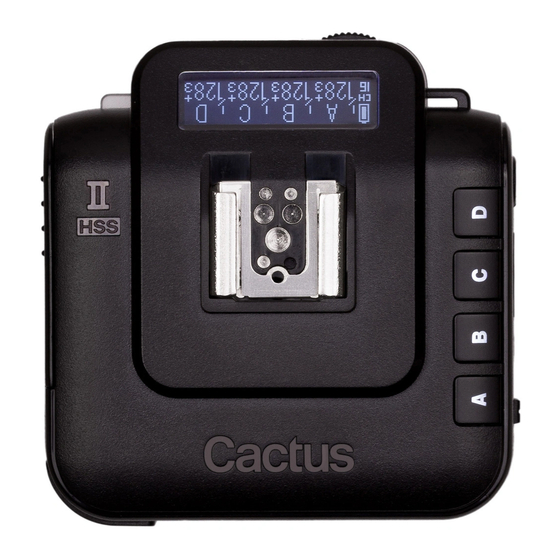
Thank you for purchasing the Cactus Wireless Flash Transceiver V6 II. Compared with
its predecessor V6, the Cactus V6 II allows you to command different brands' flashes
off camera below or above x-sync speed. The freedom to adjust shutter speed equips
you the best flexibility in controlling apertures and power levels - the possibility are
endless!
1.1 Special Features
1. Cross-brand wireless manual power control of Canon, Fujifilm, Nikon, Olympus,
Panasonic, and Pentax flashes;
Advertisement
Table of Contents

Related Manuals for Cactus V6 II


Summary of Contents for Cactus V6 II
-
Page 1: Table Of Contents
Thank you for purchasing the Cactus Wireless Flash Transceiver V6 II. Compared with its predecessor V6, the Cactus V6 II allows you to command different brands’ flashes off camera below or above x-sync speed. The freedom to adjust shutter speed equips you the best flexibility in controlling apertures and power levels –... - Page 2 HSS or FP sync, has to be enabled on the system flash in order to synchronize the flash light with the camera beyond the x-sync shutter. Cactus V6 II supports cross-brand high-speed sync in two ways: 1. Normal HSS: It supports the HSS or FP sync capabilities of the system flashes.
- Page 3 For flash models that have not been included in the profile list, the V6 II can still work with it by the auto flash profiles. Users could further calibrate the flash profiles in the Cactus Firmware Updater to produce more accurate power outputs.
-
Page 4: Cautions And Warnings
5. Do not operate the device in the presence of flammable gases or fumes. 6. Do not dissemble. 7. Do not crush and do not expose the V6 II to any shock or force such as hammering, dropping, or stepping on it. -
Page 5: Package Contents
4. Package Contents (image) V6 II Transceiver (image) Flash Stand FS-2 (image) Album & User Manual 5. Nomenclature TEST BUTTON/ SHUTTER RELEASE BUTTON MULTI-SYSTEM SHOE (FEMALE) LCD DISPLAY LANYARD LOOP X-SYNC PORT MINI USB PORT MODE SWITCH GROUP BUTTONS AF ASSIST LIGHT... -
Page 6: Lcd Panel
TRIPOD MOUNT MULTI-SYSTEM SHOE (MALE) HOT SHOE LOCK LEVER SELECTION DIAL OK BUTTON MENU BUTTON LED STATUS INDICATOR BATTERY DOOR 6. LCD Panel 6.1 TX Mode BATTERY INDICATOR GROUP CHANNEL POWER LEVEL POWER LEVEL INCREMENT 6.2 RX Mode... -
Page 7: Compatibility
RELAY MODE INDICATOR SLAVE MODE INDICATOR 7. Compatibility The Cactus V6 II is both a wireless flash trigger and wireless remote control. While it triggers both portable flashes and studio strobe lights, it also supports remote control features with selected flash models. -
Page 8: Ttl Pass-Through
(2) equipped with the same features with their system flashes. The V6 II supports HSS adaptation To use the V6 II as a wireless shutter release, specific shutter cables are required. For the list of optional accessories, see Section 19. - Page 9 The V6 II transceiver comes with a multi-system shoe that supports TTL pass- through. While the V6 II does not command slave flashes to fire TTL exposures wirelessly, it is designed to pass TTL signal from camera to flash via the transmitter (TX) and vice versa.
-
Page 10: Getting Started
9.2 Attaching to and Detaching from the Camera To mount the V6 II on a camera’s hot shoe mount: 1. Turn the lock lever of the V6 II to the left to unlock the multi-system shoe (male). 2. Slide the V6 II into the camera’s hot shoe. - Page 11 The selection dial has a built-in push-in button that serves as a quick OK button. You may configure how the dial works to suit your working habit. (see Sections 17.1 - 17.3). Major functions of the V6 II listed below are easily accessible by the buttons and dial. Group Control (see Section 9.6) Function Mode Select a group (e.g., group...
- Page 12 (e.g., group Hold then Adjust power level of the Main screen Master flash Quick power Main screen adjustment Zoom (Cactus) mode Main screen (needs configuration in menu beforehand) Navigating the Menu (see Section 9.7) Function Mode Enter the menu TX/RX...
- Page 13 9.6 Setting and Selecting the Group (image) The group function in the V6 II can assign RXs into Group A, B, C, or D, and allows you to choose which group(s) to f ire from the TX unit. 1. All V6 II transceivers must be set to the same channel.
- Page 14 The V6 RX units that have been set to the off group(s) will not f ire. 6. The V6 II will memorize the group selection in both TX and RX when it is switched off. Next time you switch on the V6 it will start up with the saved setting.
- Page 15 OLYMPUS (M43) PENTAX OTHERS √ √ FLASH PROFILE CANON FUJIFILM NIKON PENTAX OLYMPUS (M43) OTHERS CUSTOM* √ GROUP SEQUENCE A-B-C-D AB-CD √ HIGH SPEED MODE DISABLE HSS NORMAL HSS POWER SYNC √ LEARN HSS START SKIP √ √ SUB-MENU LCD BACKLIGHT SLEEP DIAL DIRECTION SWAP CONTROL...
-
Page 16: Camera System: Auto Detect And Learning
To fully utilize the advanced features of the V6 II transceivers, it is necessary to configure the correct camera system profile to the V6 II TX. On the LCD screen, the different camera systems will be represented by the icons below:... - Page 17 1. Attach your camera to the V6 II (see Section 9.2) and turn on your camera. 2. If you would like to command a master flash, attach your flash to the V6 II and turn on your flash.
-
Page 18: Flash Profile: Auto Detect And Customization
If you would like the V6 II to detect the camera system for you, choose <AUTO>. The option will display the camera system detected last time in the brackets (e.g., <AUTO(CANON)>). - Page 19 The V6 II is capable of auto detecting the flash system of the attached flash. 1. Attach your flash to the V6 II and turn on the flash. 2. Switch on the V6 II to the RX mode (for slave flashes) or TX mode (for master flash).
- Page 20 4. Turn the selection dial until the LCD shows your flash model (e.g., <580EX*>). Press 5. Connect the flash unit to the V6 II. Switch your flash to TTL mode and your flash will be ready for remote control. The chosen flash profile will be applied until you choose another flash profile.
-
Page 21: Flash Triggering
Apart from flash triggering, the V6 II can also command the manual power of your flash. On each RX, choose the appropriate flash profile for each flash to be connected. The V6 II TX will then be able to command the flash to f ire from 1/128 to... - Page 22 To remotely control the power of your flash units: 1. Connect the flash units to the V6 II. 2. Switch on the flash units in TTL mode. Then switch on the V6 II in RX mode. 3. Choose the correct flash profile for each V6 II.
- Page 23 By turning the dial left or right one “click,” the power level of the chosen groups will increase or decrease by one step. The EV step in the V6 II factory setting is 1/3 EV. The EV step can be configured to 1/2, 1/3, or 1/10 in the <EV STEP> menu (see Section 12.3).
- Page 24 12.2 13.0 When setting up the absolute power mode, the V6 II TX will collect the flash profiles being selected by the RX units in the same channel and rescale them to the unified light intensity scale. The following example shows how the model-specific relative power scales are translated into the absolute power scale.
- Page 25 (SETUP)> and press to confirm. 3. The V6 II TX will then collect the flash profiles from the V6 II RX units and set up the absolute power level scheme. Once the set up is finished, the LCD display will return to the main screen again and show the absolute light intensity of the four groups.
-
Page 26: High Speed Synchronization
1EV step changes. 13.4 Lo Power At the Lo Power level, the relative power output of a flash triggered by the V6 II is roughly equal to 1/256. The difference between 1/128 and 1/256 power outputs may be hardly detected by flash meter, but the extremely short firing duration helps freeze faster-than-lightning moments and is ideal for high-speed photography. - Page 27 To command the flash units to fire the HSS flash when your camera shutter speed exceeds the x-sync speed: 1. Configure the V6 II TX and the V6 II RX to the correct camera and flash systems (see Section 10 and 11).
-
Page 28: Camera Shutter Release
14.3 Power Sync As an alternative to the normal HSS, the Power Sync of the V6 II syncs with the full power flash of the remote flashes. Power Sync yields a much higher exposure than the normal HSS flash. - Page 29 1. Connect the V6 II RX to your camera using an appropriate shutter release cable. 2. Set both the V6 II TX and RX to the same channel. On the V6 II TX, activate the group assigned to the V6 II RX.
-
Page 30: Advanced Operations
3. Mount one of the V6 II RXs onto the camera’s hot shoe, and also connect the V6 II RX to the camera’s shutter release port with an appropriate shutter release cable (optional). Connect the other V6 II RXs to the flash units. - Page 31 4. The status screen of V6 TX and main screen of the V6 II RX will show the status of the delay timer (see Section 6.2).
-
Page 32: Personalizing The V6
17. Personalizing the V6 II You may configure a number of personalized options in the SUB-MENU of the V6 II to suit your needs. Press and turn the selection dial to <SUB-MENU>, then press . - Page 33 Zoom (Cactus) Mode <ZOOM (CACTUS)>: controlling the zoom level of the Cactus RF60 (see Section 16.1.1). This can be conf igured in <SWAP CONTROL>. 17.4 LCD Options The LCD screen of the V6 II can be configured in the following ways:...
-
Page 34: Working With Cactus Gear
V6 to the sleep mode after a specified period. In <SLEEP>, choose from <OFF>, <15 MINS> or <60 MINS>. To wake up the V6 II from the sleep mode, press any button or turn the selection dial once. Local triggering via a hot shoe or x-sync port also awakens the V6. - Page 35 For example, assign a RF60x to group A, a Canon 580EX II (with a V6 II RX) to group B, and a Nikon SB-900 (with another V6 II RX) to group C. The V6 II TX will be able to trigger them all, set their power levels in either relative or absolute power mode and adjust their zoom angles.
-
Page 36: Led Signal Guide
18.2 V6, V5 and LV5 The Cactus V6 II transceiver can work in pairs with the Cactus V6, V5 or LV5 for wireless triggering without group control. They all share the same 2.4GHz, 16- channel platform. -
Page 37: Optional Accessories
To check the firmware version of the V6 II, press and hold , then switch on the V6 II in TX or RX mode at the same time. The LCD display will show the firmware version installed in the unit. Release the buttons, the LCD display will return to the main screen after 3 seconds. -
Page 38: Troubleshooting
7. Lanyard CL-1 22. Troubleshooting Before reading this section, ensure that the Cactus V6 II transceiver have been set up correctly (following the instruction in Section 8-14 of this manual). If the problem persists after conducting the troubleshooting steps, contact your seller directly for further assistance. - Page 39 Poor hot shoe condition - Adjust tightness of hot RX: No shoe contact - Clean the hot shoe contacts of the V6 II with a clean cloth TX: No 1. Background radio - Set both transceivers to RX: Yes (GREEN)
- Page 40 (Red every 3 seconds) 5. Flash Not Triggered/Shutter Not Released LED Blinks? Possible Causes Solution TX: No 1. Poor battery contact or Replace batteries on TX and RX: No insufficient battery on retry 2. Poor hot shoe condition - Adjust tightness of hot shoe contact - Clean the hot shoe contacts of the V6 with a...
-
Page 41: Notices
V6 with a clean cloth 2. Flash used is not Check that the flash used is compatible with the V6 compatible with the V6 II (see Section 7.1) 3. Poor cable connection - Check the cable connection - Change the cable 4. - Page 42 R&TTE Directive (1999/5/EC). (image) This product, Cactus Wireless Flash Transceiver V6 II, is in conformity with the provisions of EU Council Directive: 1999/5/EC. (image) The crossed-out wheeled bin means that within the European Union the product must be disposed separately at the end of the product cycle.
-
Page 43: Warranty
Cactus brand Wireless Flash Transceiver purchased with this limited warranty. Your Cactus Wireless Flash Transceiver or other contents, when delivered to you in new condition in its original container, is warranted against defects in materials or... - Page 44 ADVISED OF THE POSSIBILITY OF SUCH DAMAGES. IN NO EVENT SHALL RECOVERY OF ANY KIND AGAINST HARVEST ONE LIMITED GREATER IN AMOUNT THAN THE PURCHASE PRICE OF THE CACTUS WIRELESS FLASH TRANSCEIVER SOLD BY HARVEST ONE LIMITED OR ITS AUTHORIZED DEALERS AND CAUSING THE ALLEGED DAMAGE.
- Page 45 TUEN MUN, HONG KONG PLEASE CONTACT YOUR LOCAL DEALER FOR CUSTOMER SERVICE. © HARVEST ONE LTD. 2016...