Advertisement
Quick Links
Advertisement

Related Manuals for G-Tools G-kit wing


Summary of Contents for G-Tools G-kit wing
- Page 1 Instruction manual G-kit® wing Version: February ‘16...
- Page 2 Content: 1. Important information READ FIRST! pag. 3 2. Specifications pag. 4 3. Detailed specifications pag. 5 4. Content boxes pag. 7 5. Assembly instructions pag. 9 6. Installation Azerwing® pag.19 7. Setttings G-Kit pag.23 8. Settings Azerwing® pag.24 9. Settings ventilator pag.
- Page 3 Our products are not meant to encourage anyone to break the law. G-tools and our dealers cannot and will not be held responsible for anyone who does. G-tools advise their customers to check the national laws of their country before ordering any products.
- Page 4 2 . General specifications: Dimensions (h x b x d): G-kit 400 wing 191 x 118 x 78 cm. G-kit 600 wing 191 x 154 x 78 cm. G-kit 800 wing 191 x 174 x 88 cm. G-kit 1200 wing 191 x 174 x 118 cm.
- Page 5 3. Detailled specifications: Timer box: The switchbox consists of the following components: Relay 40A Timer Davin 2 x socket for lights 3 x socket for fans, irrigation pumps,etc All components are CE approved Azerwing: We only use the original Azerwing Vegagreen® reflector.
- Page 6 Ventilation: The installed extractor fan is an in-line fan of Prima Klima. It is the most silent in its class. 2 Types of in-line fans are used. -GT 2-speed 225m3-360m3 (G-Kit 400/600 Wing) -PK 125 EC-TC 680 m3 with build-in speed controller (G-Kit 800/1200 Wing)
- Page 7 4a. Content boxes G-kit 1200 Wing: ® Box 1- Top and bottom plate roof plate with fan and filter bottom plate with profiles, connectors and wheels 1 x plate 168,5 x 34,8 cm high for bottom part 2 x door x x 34.8 cm high for bottom part 2 x long plate 168,5 x 22,8 cm high for top part 4 x aluminium profile 165,5 long with connectors 2 x aluminium profile 110 long...
- Page 8 4b. Content boxes G-kit 400/600/800 Wing: ® Box 1- Upper part and bottom plate upper part with lighting and ventilation bottom panel (with profiles and corner pieces) 1 x long back panel 34,8 cm high for bottom part 2 x door x x 34.8 cm high for bottom part 4 x air inlet (8 x for 800 Wing) 2 x aluminium profile with corner pieces box with adjust-a-wing reflector and chain and spreader.
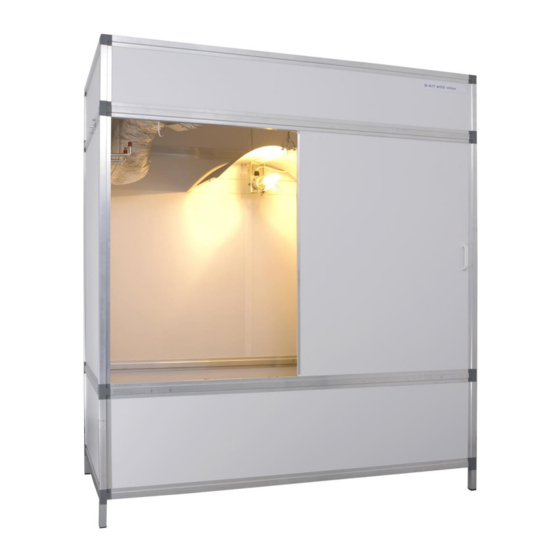
- Page 9 5a. Installation instruction G-kit: NOTE: Pictures may differ in detail. Pictured below is the set up of a G-Kit 600 Wing. a. Open the box and check if all components arrived in good order. Take out the large components: 2 long panels with vents ...
- Page 10 azerwing reflector light bulb c. Position the bottom part and make sure it is leveled Push the 4 short poles (32cm) on the corner pieces. d. Take away all the protection foil from the panels!
- Page 11 c. Place the side panels with the holes for the air inlets (400, 600 and 800Wing have holes in back panel). d. Placet he air inlets. Each air inlet consists of 2 parts.
- Page 12 -Push part 1 inwards through the hole in the backpanel. -Push part 2 on part 1 and twist & lock. e. Place the back panel and the doors with the supplied wheater tape to seal of the doors lighttight. Take the 2 long profiles with the corner pieces and the 2 side profiles and make a ring.
- Page 13 g. Position the ring on top of panels of the bottom part push them tight. The bottom part is ready. h. Position the 4 long poles, 110cm.
- Page 14 Take the 2 back panels and put them together using the white H (connecting) profile. Position the side- and back panels between the poles.The G- Kit 1200 Wing has side panels consisting of two parts. (picture above is fitted with the optional irrigation system)
- Page 15 k. Take the doors and add the handles. Watch out: the door with the white plastic foam is the back door. This insulation tape is to make sure no light comes through the doors.
- Page 16 5b. Installation instruction G-kit 1200 Wing: For transport reasons the top part of the G-Kit 1200 Wing is packed in three separate boxes Take the roof panel with the fans and filters from the box and put it flat on the floor.
- Page 17 Attach the side panel with the timer box and ballasts to the roof panel using the plastic corner pieces. Attach the opposite side-panel using the connectors. Fix the front and back panels between the profiles. Fix the two aluminium profiles (165cm) with the connectors.
- Page 18 5c.Installation instructions Azerwing® In the 1200 Wing the Azerwing reflector still has to be installed. 400, 600 and 800 Wing models have the Azerwing pre installed.
- Page 19 Take de Azerwing® out of the box and check the content. Install the Azerwing reflector according to the supplied manual. c. Connect the fittings of the Azerwing to the cables of the two Lucilux ballasts. Don’t forget to ground them.
- Page 20 With the screws on the stays of the Wing the reflector can be adjusted from wide to deep beam. d. Take the heavy hangers and hook it between the wing and the upper part of the cabinet. When everything is installed properly the upper part can be placed on top of the poles.
- Page 21 (picture shows the G-kit 400 Wing) e. After you put the upper part on top of the poles wit with tighten it to be able to install the doors. Position both doors. The right door (with the white tape) is the one which is sliding in the second profile behind the front door.
- Page 22 Setting the timer Put the timer on Set the time by turning the▲ at current time. The green pins in the outer ring mean: Positioned outside – ON Positioned inside – OFF Set the timer for lights ON by pushing the pins outwards...
- Page 23 7. Settings Azerwing®: First 2 weeks: Use the reflector as a “deep beamer” by shortening the stays with The screws. The wing now reflects a narrow beam and the reflector can be hung high above the canopy. After the 2nd week: Widen the reflector with the screws on the stays.
- Page 24 8.Fan settings (800/1200 Wing): a. Set the desired temperature with the left button. b. Set the minimum ventilator speed with the right button ( in % of the maximum speed : 100% = 680m3/hour) c. Under the right button is a potentiometer with which you can manualy further fine tune the running speed of the fan.
- Page 25 9 Maintenance: The G-kit takes little maintenance during normal operation. a. It is advised to change the bulb every year because of the reduction of light output. b. Replace the filter after 1 year. The active carbon looses its functionality after 1 year. In a very humid environment the filter can break down faster.
- Page 26 There's a one year warranty on all electrical equipment except for the light-bulb and filter. New parts shall be send to you after the broken parts have been received at the distribution center. Contact: For all your questions visit our website www.g-tools.nl or send an e- mail to: info@g-tools.nl...