Table of Contents
Advertisement
Advertisement
Table of Contents

Related Manuals for Dali SOUND HUB


Summary of Contents for Dali SOUND HUB
- Page 1 DALI SOUND HUB MANUAL HDMI module • NPM BluOS module...
-
Page 2: Table Of Contents
Connecting Audio Sources 7.1 Installation 4.1 Bluetooth Audio 7.2 Network Connection 4.2 Wired Audio 7.3 Using Your NPM equipped SOUND HUB 4.3 Connecting Network Audio Streams 7.4 NPM Reset to Defaults Using Your SOUND HUB Installing and Using the SOUND HUB 5.1 Standby... - Page 3 Introduction Thank you for choosing the DALI SOUND HUB. DALI is Following this introduction the manual covers unpacking, installation, setup, renowned throughout the world for continually striving connections and use, and also includes sections that describe installation to enhance the experience of music while simultaneously and use of the optional BluOS NPM and HDMI modules.
-
Page 4: Sound Hub Overview
TV to wireless speaker connections, the SOUND HUB is fitted with audio devices such as a DALI SOUND HUB. If your TV offers mono subwoofer and stereo preamplifier outputs. both ARC and eARC connection or settings options, always use the eARC option to connect your DALI SOUND HUB. -
Page 5: D 1: Sound Hub Rear Panel
Module 1 PLUG-IN MODULE PLUG-IN MODULE PRE OUT SUB OUT RCA IN AUX IN COAXIAL OPTICAL IN OPTICAL IN POWER USB POWER/ 2.8A SERVICE Pre Out Sub Out Power In USB Power D 1: SOUND HUB Rear Panel Out /Service... -
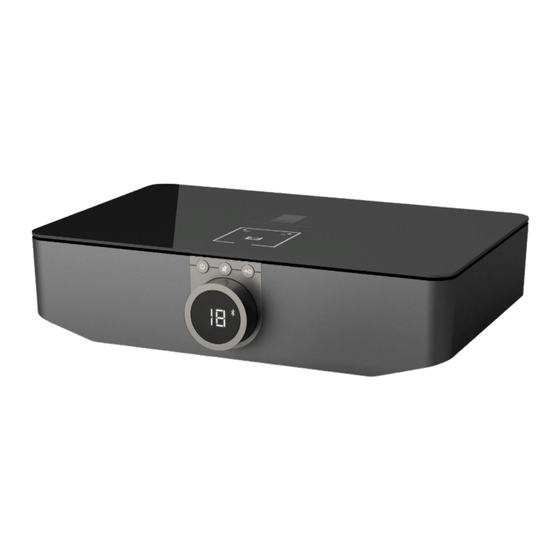
Page 6: D 2: Sound Hub Front Panel
SOUND HUB Overview D 2: SOUND HUB Front Panel Standby Mute Source Select Volume Control Module 1 Optical In (TV) Optical In Coaxial In AUX In RCA In Bluetooth Module 2... -
Page 7: D 3: Remote Control
SOUND HUB Overview D 3: Remote Control Standby Mute Source Select Bluetooth RCA In AUX In Coaxial In Optical In Module 2 Optical In (TV) Module 1 Volume Down Volume Up... - Page 8 WIRELESS SUBWOOFER RECEIVER SOUND HUB Overview D 4: Setups The DALI SOUND HUB can be used with the DALI speakers illustrated below and the DALI Wireless Subwoofer Receiver WSR. OBERON C CALLISTO C RUBICON C OBERON ON-WALL C OBERON 1 C OBERON 7 C CALLISTO 2 C CALLISTO 6 C...
-
Page 9: Unpacking
2. Unpacking DALI SOUND HUB The contents of the DALI SOUND HUB pack is illustrated in Diagram D 5 / page 9 and listed below. × 1 1: SOUND HUB 2: Power supply with international mains socket adaptors 3: Bluetooth remote control and batteries ×... -
Page 10: Installation And Setup
If you intend to fit either or both of the SOUND HUB modules you should do so before the SOUND HUB is in its final position. Refer to Section 7 / page 38... -
Page 11: Getting Started And Switching On
Install batteries in the SOUND HUB remote control. Diagram D 6 / page 11 illustrates battery installation. • With the location of your SOUND HUB selected and any modules fitted, plug the power supply cable into the rear panel POWER socket illustrated in Diagram D 1 / page 5 and then plug the power supply into an appropriate mains power socket. -
Page 12: Connecting Speakers
WSR Wireless Subwoofer Receiver. Always use the LFE input on the subwoofer when connecting the SOUND HUB or the DALI WSR. If the subwoofer has no LFE input, connect to its standard line input and either switch its low-pass... - Page 13 Now channel matrix indicators flashing slowly. If press the SOUND HUB rear panel LINK & To establish the connections between the the SOUND HUB is equipped with an HDMI...
-
Page 14: D 7: Connecting Speakers
Press the LINK & CONNECT button on Press the LINK & CONNECT button on the SOUND HUB. the LEFT speaker. the RIGHT speaker. The SOUND HUB must be switched ON. 5-10 5-10 sec. sec. Press the LINK & CONNECT button on Press the LINK &... -
Page 15: D 8: Multi-Channel Home Theatre System
Installation and Setup 3.3 Connecting Speakers D 8: Multi-Channel Home Theatre System The SOUND HUB must be switched ON. Repeat procedure for each speaker. Press the LINK & CONNECT Press the LINK & CONNECT Press the LINK & CONNECT button on the SOUND HUB. -
Page 16: Connecting An External Power Amplifier
Installation and Setup 3.4 Connecting an External Power Amplifier Your SOUND HUB provides a stereo pair of preamplifier output RCA Phono sockets intended for the connection of a separate audio power amplifier. The preamplifier outputs mirror the SOUND HUB stereo left and right wireless speaker channels. -
Page 17: Connecting Audio Sources
The SOUND HUB Bluetooth input supports SBC, AAC, AptX and AptX HD formats. 4.1 Bluetooth Audio If you wish to stream audio to your SOUND HUB and NOTE: speakers from a Bluetooth device such as a mobile phone, Bluetooth pairing is only possible when the SOUND tablet or laptop, the device and the SOUND HUB must be HUB Bluetooth input is selected. - Page 18 The default SOUND HUB Bluetooth name is Bluetooth device is connected. “DALI SOUND HUB”. Alternative names from You can disconnect currently “DALI SOUND HUB 1” to “DALI SOUND HUB 9” connected Bluetooth device(s) can be selected. from your SOUND HUB or •...
-
Page 19: Wired Audio
USB devices. If your SOUND HUB is equipped with a If your SOUND HUB is fitted with an HDMI module, this module provides an DALI NPM module, you can connect USB audio input for HDMI ARC or eARC equipped TVs. -
Page 20: Connecting Network Audio Streams
Connecting Audio Sources 4.3 Connecting Network Audio Streams If your SOUND HUB is fitted with an NPM module it will be able to connect to a home WiFi or Ethernet network and play audio from a wide range of music streaming services, network music libraries and internet radio stations. -
Page 21: Using Your Sound Hub
With you SOUND HUB installation Standby button complete and speakers connected, you can begin to enjoy some music. Your SOUND HUB has a low energy consumption Standby Mode that can be SOUND HUB control functions can engaged or disengaged pressing either the... -
Page 22: Volume
DALI CALLISTO C wireless speaker models also offer top panel touchpad volume control. NOTE: If a Bluetooth or network audio source (with an NPM module installed) is playing, you may also be able to control SOUND HUB volume from a source device or app. -
Page 23: Mute
Using Your SOUND HUB 5.3 Mute Mute button Mute button To silence your SOUND HUB, press either the front panel or remote control mute ( ) button. To restore the audio, press either mute button again. -
Page 24: Source Selection
Using Your SOUND HUB 5.4 Source Selection NOTE: Depending on whether SOUND HUB Auto Signal Sensing is To select a SOUND HUB audio source, press either engaged, sources may select automatically when they become the SOUND HUB front panel or remote control source active. -
Page 25: Auto Signal Sensing
5.5 Auto Signal Sensing Auto Signal Sensing can be disengaged if desired, leaving only manual source selection available. Any SOUND HUB input except AUX IN will select automatically • With your SOUND HUB switched on, press and hold the when a signal is present, unless an alternative input is already front panel Source Selection button and turn the Volume playing. -
Page 26: Display And Indicator Illumination
Using Your SOUND HUB 5.6 Display and Indicator Illumination Standby button The brightness of your SOUND HUB front panel display and the volume level display on connected CALLISTO C or RUBICON C speakers can be adjusted. With your SOUND HUB switched on, press and hold the front panel Standby... -
Page 27: Speaker Balance Adjustment
The aim of Speaker Balance Adjustment is to relative volume of the selected speaker. The have all the speakers playing at approximately SOUND HUB volume display will show the the same volume at the listening position. Up adjustment. to ±9dB of adjustment for each channel is available. - Page 28 This is especially if no action is taken for two minutes. likely with the multi-channel systems made possible by the SOUND HUB HDMI module.
-
Page 29: Speaker Distance Adjustment
This is especially significant in multi-channel systems. The SOUND HUB will automatically calculate any appropriate relative time delays using the measured distance from the listening position to the speakers. This is described in the following section. - Page 30 Using Your SOUND HUB 5.8 Speaker Distance Adjustment • With your SOUND HUB switched on, simultaneously press and hold the front SOUND panel Standby and Source Select buttons . When you hear an audio prompt from the first speaker, release the Standby and Source Select buttons.
- Page 31 Using Your SOUND HUB 5.8 Speaker Distance Adjustment • Press the front panel Source Select NOTE: NOTE: button to move to the next speaker, The default order of Speaker Your SOUND HUB will or press the Mute button to return...
-
Page 32: Trouble-Shooting And Maintaining Your Sound Hub
6.1 Cleaning Use a soft dry cloth to dust the SOUND HUB case. We do not recommend the use of any cleaning fluids or sprays, but if you wish to use furniture polish, apply it to a cloth rather than... -
Page 33: Wireless Connection Channel Options
Trouble-Shooting and Maintaining Your SOUND HUB 6.2 Wireless Connection Channel Options Your SOUND HUB will by default automatically select To configure your SOUND HUB the least congested radio frequency channel for wireless to use a fixed wireless broadcast speaker connections. However, in homes and environments... - Page 34 Press the LINK & CONNECT button return the SOUND HUB to normal operation. • You should operate your SOUND HUB with a newly selected fixed wireless channel for some time to see if performance improves before trying another wireless channel option.
-
Page 35: Reset To Defaults
Switch off the SOUND HUB . connect your SOUND HUB • Switch on the SOUND HUB by pressing the Standby button while simultaneously to different speakers or to pressing and holding the Mute and Source Select buttons . -
Page 36: Firmware Update
Updated firmware may improve performance and reliability or introduce PLUG-IN MODULE new features. Firmware updates will be made available for download from the DALI website. To install a firmware update follow the steps below. • Download the firmware file from the DALI website (see link below). -
Page 37: Disposal
Trouble-Shooting and Maintaining Your SOUND HUB 6.5 Disposal If you want to dispose of this product, do not mix it with general household waste. There is a separate collection system for used electronic products in accordance with legislation that requires proper treatment, recovery and recycling. -
Page 38: Installing And Using The Sound Hub Npm Bluos Module
7. Installing and Using the SOUND HUB NPM BluOS Module SOUND HUB NPM BluOS Module... -
Page 39: Installation
Installing and Using the SOUND HUB NPM BluOS Module The NPM modules employ the BluOS streaming platform to enable the SOUND HUB to connect to a home WiFi or Ethernet network and play audio from a wide range of music streaming services, network music libraries, internet radio stations and USB storage. - Page 40 Installing and Using the SOUND HUB NPM BluOS Module 7.1 Installation • Disconnect the SOUND HUB from its power supply. • Use a Torx 10 screwdriver to remove the two screws and the cover from an unused SOUND HUB rear panel module slot.
-
Page 41: Network Connection
Installing and Using the SOUND HUB NPM BluOS Module 7.2 Network Connection NPM modules require a connection to your home D 9: NPM-2i module rear panel network and the internet. The home network connection can be either wired via an Ethernet cable connected to your home router, or wireless via your home WiFi network. - Page 42 • With the BluOS Controller app launched and the SOUND installed the NPM module in your SOUND HUB, and either HUB switched on follow the app procedure to install a new inserted its WiFi Dongle or made a wired connection to BluOS device.
-
Page 43: T 2: Led Blink Codes
Installing and Using the SOUND HUB NPM BluOS Module 7.2 Network Connection During and after the network connection process, LED Blink Code Description the “Status” LED located on the NPM rear panel will illuminate to indicate different setup states. These... -
Page 44: Using Your Npm Equipped Sound Hub
Depending on which SOUND HUB slot the NPM module is installed in, a stations. You will also be able to use technologies such as “Slot 1” (icon) or “Slot 2” (icon) will illuminate on the SOUND HUB display Apple Airplay 2 (NPM-2i only), Spotify Connect and Tidal to indicate that the NPM module is the selected source. -
Page 45: Npm Reset To Defaults
Installing and Using the SOUND HUB NPM BluOS Module 7.4 NPM Reset to Defaults If you wish to connect your NPM equipped SOUND HUB to an alternative WiFi network it will require resetting to its defaults. To reset your NPM follow the steps below. -
Page 46: Installing And Using The Sound Hub Hdmi Module
8. Installing and Using the SOUND HUB HDMI Module SOUND HUB HDMI Module... -
Page 47: D 10: Hdmi Module Rear Panel
Installing and Using the SOUND HUB HDMI Module The SOUND HUB HDMI module provides an input for HDMI D 10: HDMI module rear panel ARC and eARC equipped TVs and incorporates Dolby Digital and DTS decoding to enable broadcast to multi-channel speaker systems. -
Page 48: Installation
Installing and Using the SOUND HUB HDMI Module 8.1 Installation To install the HDMI module in your SOUND HUB, follow the steps below. • Disconnect the SOUND HUB from its power supply. • Use a Torx 10 screwdriver to remove the two screws and the cover from an unused SOUND HUB rear panel module slot. - Page 49 Installing and Using the SOUND HUB HDMI Module 8.1 Installation NOTE: If an HDMI module is to be removed, • Use an HDMI cable to connect the SOUND HUB power supply must the SOUND HUB HDMI module first be disconnected. The SOUND...
-
Page 50: Configuring Your Hdmi Equipped Sound Hub
Installing and Using the SOUND HUB HDMI Module 8.2 Configuring Your HDMI Equipped SOUND HUB NOTE: If you have not yet connected D 11: HDMI module speakers to your SOUND HUB, please do so as described in Section 3.3 / page 12. - Page 51 Distance Adjustment (see Section 5.8 / connected speakers. The SOUND HUB will intelligently decide on page 29), two further HDMI module options the appropriate signal routed to each speaker. that are particularly relevant for multi-channel systems can be configured by switches on the HDMI module.
-
Page 52: D 12: Hdmi Module Switches
ProLogic II. Release the Mute button when the required option is selected. Remember remain silent. to re-set the SOUND HUB to ProLogic II when ProLogic I is no longer required. We recommend that the “Upmix HDMI To All Speakers” switch is set to YES... - Page 53 UPMIX HDMI TO ALL SPEAKERS ADAPTIVE WIRELESS SAMPLE RATE CONVENIENCE If the Adaptive Wireless Sample Rate switch is set to CONVENIENCE, audio from any source will be broadcast by the SOUND HUB to all connected wireless speakers at 16bit/48kHz digital resolution. If the eARC...
-
Page 54: Using Your Hdmi Equipped Sound Hub
TV and that multiple individual audio channels are and route it to the appropriate speaker channels. If the being delivered to the SOUND HUB. Due to variations in TV SOUND HUB HDMI upmix function is engaged, material decoding performance however we recommend that Dolby encoded for fewer speakers than are available will be and DTS decoding is best handled by the SOUND HUB. - Page 55 Installing and Using the SOUND HUB HDMI Module 8.3 Using Your HDMI Equipped SOUND HUB The input encoding format received by the HDMI module will be shown as either PCM, Dolby or DTS, as illustrated below. Dolby The post-processing of the HDMI module depends on the input encoding format. Dolby will be post- processed by the Dolby ProLogic I or Dolby ProLogic IIx codec, depending on user selection, while DTS and PCM will be post-processed by the DTS Neo:6 Cinema codec.
-
Page 56: T 3: Valid Multi-Channel Speaker Arrangements
Installing and Using the SOUND HUB HDMI Module 8.3 Using Your HDMI Equipped SOUND HUB T 3: Valid Multi-Channel Speaker Arrangements NOTE: Left Right Right Left Rear Right Rear Format Centre Left Surround Front Front Surround Surround Surround Depending on the number of... - Page 57 Installing and Using the SOUND HUB HDMI Module 8.3 Using Your HDMI Equipped SOUND HUB NOTE: NOTE: When playing DTS 7.x and PCM 7.x material The SOUND HUB allows ten speakers on a 6.0 or 6.1 speaker system, the same in total to be connected wirelessly.
-
Page 58: Technical Specifications
9. Technical Specifications DALI SOUND HUB NPM-2i HDMI Input Connections 2 × Optical (TosLink), Coax (S/ General Supported Audio Formats Linear PCM (up to 7.1ch/24 bit/192 kHz) PDIF), RCA (Analogue stereo), 3.5 Dolby TrueHD (up to 7.1ch) Operating System BluOS mm Stereo (mini-jack), 2 ×... -
Page 59: Diagrams / Tables
10. Diagrams / Tables Diagrams Tables D 1: SOUND HUB Rear Panel T 1 : Speaker channel assignments D 2: SOUND HUB Front Panel T 2: LED Blink Codes D 3: Remote Control T 3: Valid Multi-Channel Speaker Arrangements D 4: Setups...