Table of Contents
Advertisement
Quick Links
Advertisement
Table of Contents

Related Manuals for Sanyo A5514SA


Summary of Contents for Sanyo A5514SA
- Page 1 A5514SA Operating Instructions...
-
Page 2: Table Of Contents
Contents Infrared Data About Infrared Data Communication … …………………41 Using Infrared Data Communication … …………………42 Communication Before Use Pair Function Register a Pair Partner ……………………………………43 Call a Pair Partner ……………………………………………44 Smart Mode About Smart Mode …………………………………………45 Using the Phone in Smart Mode … ………………………47 Character Input About Character Input … ……………………………………53 Entering Text …………………………………………………54 Telephone Making a Call …………………………………………………11 Answering a Call ……………………………………………11 Dialed / Received ……………………………………………12 Adjusting the Volume of the Other Party s Voice …12 Adjusting the Ringer Volume ……………………………13 Changing the Ring Tone … …………………………………14 Silent Mode ……………………………………………………15 Recording Messages When Unable to Answer a Call ... -
Page 3: Before Use
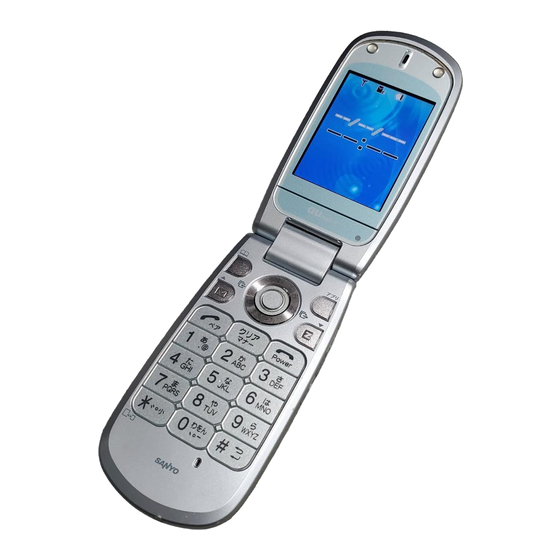
Before Use qClose-up Swich wFlat-type Earphone Jack eExternal Connection Terminal Names of Each Part rMain Display tScroll Key yAddress Book Key uMail Key iCall / Pair Key oDial Keys !0 E arpiece (Receiver) !1 L ight Sensor !2 C enter Key !3 A pplication Key !4 E Zweb Key !5 C lear / Manner Key !6 P ower / End Key !7 M icrophone !8 I nternal Antenna !9 H ands Free / Flashlight Key @0 M emo Key @1 I nfrared Port @2 F lash... - Page 4 Charge Indicator Light will be flashing red. When charg- ¡Displays the Main Menu Scroll Key is indicated as in screen ing has finished, the light will go out. the diagram below; ¡Selects the highlighted Down Left Right item ●Charging Using the AC Adapter Connect the AC Adapter connector to the A5514SA Application Key phone external jack and plug it into the power socket. ¡Starts EZ Applications ® (BREW ) When the phone is charging, the Charge Indicator Light Address Book Key will be flashing red. When charging has finished, the ¡Displays the Address Book light will go out.
- Page 5 Making a Selection / Go Back Setting the E-mail and EZweb Default Settings When you wish to select an item, use the key to posi- In order to use E-mail and EZweb, you must first subscribe. If you did not subscribe when you purchased the phone, please visit tion the cursor, then press the key. If there is a number an au Shop or au Customer Center . beside the item, pressing the corresponding key on the Also, before you use E-mail or EZweb, please reset the phone. Re- Dial Keys will also select this item. setting the phone automatically selects an E-mail address. To To go back by one screen, press the key. If is dis- 戻る change the email address to one of your choice, please refer to played at the bottom of the screen, pressing the corre- [Changing Your E-mail Address] on page 9. sponding button will also take you back one screen. From the Standby screen, press one of Switching the Screen Display to English , or . From the Standby screen, press . Press [OK]. Resetting the phone allows automatic selection of an email address. Using , choose [機能] and press [選択]. Press [OK]. After the reset is completed, the menu screen will be displayed. Using , choose [画面表示] and Confirming Your Phone Number and E-mail Address press [選択]. From the Standby screen, press . Using , choose [Set Language] and press [選択]. Using , choose [Settings] and press [Select]. Using , choose [English] and ...
- Page 6 Using , choose [Profile] and Enter your P.I.N. number and press [Select]. press [Complete], then using , Your own telephone number and E-mail address will select and press [OK]. 送信 be displayed. ●Your P.I.N. number is a 4-digit number you entered on the application at the time of purchase. ●If you enter the incorrect P.I.N. number 3 times in ●From the standby screen, pressing , then will also display these. one day, you will not be able to continue with these changes until the next day. Changing Your E-mail Address Using , select [承諾する] and press [OK}. E-Mail Address Domain △△△ @ ezweb.ne.jp This part can be changed. Using , place the cursor into the edit box and enter your E-mail address. Finish by pressing [Complete]. From the Standby screen, press . Using , select and press [OK]. 送信 ●If the E-mail address you have entered is already Using , choose [E−Meil Settings] and being used by someone else, please enter an press [Select]. alternative. Using , select and OK press [OK]. Using , choose [Other Settings] and The email address is now changed. press [Select]. ●Please note that once you have changed your email address, it is not possible Using , choose [Eメールアドレスの変更] and to change it back to the previous address.
-
Page 7: Answering A Call
Telephone Dialed/Received Calling Someone You Have Previously Called (Dialed) Making a Call From the Standby screen, press . From the Standby screen, use the Dial Keys The Outgoing Call History list will be displayed. ‒ to enter a telephone number. ●When making a call to a landline telephone number, start with the area code first. Using , select the number you would like to call again, press . Press . The number you selected will be dialed. When you want to end the call, press . Calling Someone Who Has Previously Called You (Received) From the Standby screen, press . The Incoming Call History List will be displayed. ● ● Caller I.D. Transmission Options After entering the telephone number, press [Dial], then using , Using , select the number you choose the transmission method and would like to call back, and press . press [Select]. The number you selected will be dialed. ●The options displayed will be: Dial : Call is made in accordance with current caller ID settings. 184+Number→Dial : Caller Identification is not transmitted. ●Incoming and Outgoing Call History will display 20 of the most recent 186+Number→Dial : Caller Identification is transmitted. numbers each. -
Page 8: Adjusting The Ringer Volume
Adjusting the Ringer Volume Using , adjust the volume and press [Select]. From the Standby screen, press . Press [Complete]. Using , choose [Settings] and press [Select]. Changing the Ring Tone <Example> Setting the ring tone to [Original] Using , choose [Sound/Vibration] and Follow the instructions on P.13. press [Select]. After step 4, using choose [Sound] and press [Select]. Using , choose [Incoming Call] and Using , choose [Original] and press [Select]. The current settings for the Standard Ring press [Select]. will be displayed. A list of ring tones will be displayed. Using , choose [Volume] and ●By pressing [Confirm], the selected ring tone will be selected. press [Select]. The volume can be adjusted at 5 levels. Using , choose a ring tone and : Increase Volume press [Select]. : Decrease Volume ●By pressing [Confirm] , the volume level will be set. ●By setting it to S(OFF), the ringer will be silent. [Complete] を押す ●Using , the ringer can also be set to Step Down/Step Up Step Down ... -
Page 9: Silent Mode
Playing a Saved Message Silent Mode When a message has been recorded on the In-Phone By setting the phone to Silent Mode, you will be alerted Ans Machn, an alert on the Standby screen will advise to any incoming calls by a vibration. When you are not you. able to take the call, the caller can record a message. ●Setting Silent Mode to ON Using , choose (Mesgs) and press . The recorded message playback screen will be From the Standby screen, displayed. press for more than one second. -
Page 10: Using The Telephone Overseas
Calling Japan from Overseas Using the Telephone Overseas With the help of the International Roaming feature, the Enter the number you wish to call and A5514SA may be used overseas. press [Submenu]. Setting the Roaming Area From the Standby screen, press . Using , choose [Inti. Call:toJapan] and press [Select], then . Using , choose [Global Functions] and press [Select]. ●At the time of purchase, this phone will have been set up with the latest area information (PRL: Roaming Area Information). However, this information changes many times a year and so it is highly recommended that before traveling overseas, you get the latest roaming information. Using , choose [Roam. Area Setup] and ●When calling from Japan to an overseas phone set up with a Global Passport, please dial the number as per normal. press [Select]. ●Please subscribe to EZweb and initialize your phone for use with EZweb while in Japan. Using , choose the Area (Country) and press [Select]. - Page 11 Address book Using , choose the type of telephone number and press [Select]. Adding an Entry to the Address Book The icon that corresponds to your choice will appear. Often-called phone numbers, names, E-mail addresses, etc. can be stored for easy access. If you do not wish to enter an E-mail address, ● proceed to Step 10. <Example> Adding a name, telephone number and E-mail address to the Address Book. Using , Choose (EMailAdd1) and From the Standby screen, press [Select]. press for more than one second. The Address Book edit screen will be displayed. Enter the E-mail address and Using , choose (Name) and press [Complete]. press [Select]. Using , choose the type of E-mail address and press [Select]. Enter the name and press [Complete] . The icon that corresponds to your choice will appear. ●When entering a Japanese name, the reading will automatically appear. Press [Complete]. A pop-up screen with the memory location number will appear. Using , choose (Phone No.1) and ...
-
Page 12: Calling A Number From The Address Book
Calling a Number from the Address Book Using , choose [Edit] and press [Select]. The Address Book edit screen will appear. From the Standby screen, press . The Address Book list will be displayed. Edit the data and press [Complete]. Yes :Overwrite existing data with new data. Using , choose the person you wish to call No :Do not save new data ‒ existing data remains. and press . ●If there are multiple numbers saved under one Using , choose [Yes] and press [Select]. entry, select the one you wish to dial using . The Address Book entry will be saved. press . Editing an Entry in the Address Book From the Standby screen, press . The Address Book list will be displayed. Using , choose the entry you wish to modify and press [Select]. The detailed information saved under that entry will appear. Press [Submenu]. -
Page 13: Creating And Sending E-Mail
Mail Using , choose the person to whom you wish to send the E-mail and press [Select] , About E-mail then [Select] again. In order to use E-mail, you must first subscribe to EZweb. If you did ●If there are multiple addresses saved under one not subscribe when you purchased the phone, please visit an au entry, select the one you wish to send to using Shop or au Customer Center . Also, before you use E-mail or and select 1-3. EZweb, please reset the phone. For information about resetting your phone, please refer to Setting the E-mail and EZweb Default Settings on P.8. Press [Finish]. E-mail is a service that allows the sending and receiving of messages be- tween compatible cell phones and personal computers, using the Internet. Messages containing up to 5000 double-width characters may be sent and received. Digital photographs and movies can also be sent and received. ※ E-mail messages can be sent to a maximum of 5 recipients at a time. Press [Complete]. ※ A maximum of 1000 E-mails can be sent per day (one recipient = 1 E-mail). The recipient will have been entered. Creating and Sending E-mail Using , choose and press [Edit]. From the Standby screen, press . The Subject input screen will be displayed. The E-mail menu will be displayed. Enter the Subject line and press [Complete]. Using , choose [Create New] and The Subject will have been entered. press [Select]. The Create Mail screen will be displayed. -
Page 14: Reading Received E-Mail
Reading E-mail from the Inbox Press [Send]. The Select Send Method screen will be displayed. From the Standby screen, press , ●The display contents will be the following; choose the [Inbox] using and Send Message will be sent as it is. press [Select]. Photo Mail To send photos or movies to cell phones The Inbox Folder list will be displayed. of other service providers. My Pictograph Send pictographs to au cell phones. Using , choose [メインフォルダ] and Easy Pictograph Transform pictographs into other service provider format and send. press [Select]. The Received Email list will be displayed. Using , choose [Send] and press [Select]. Using , choose the E-mail you wish to read The E-mail will be sent. and press [Display]. ●Once the E-mail has been sent, it will be saved in The selected E-mail will be displayed. the Outbox. Reading Received E-mail ● ● To View Attached Photos or Movies When E-mail is received, an alert on the Standby screen will Using , choose the attachment at advise you. the end of the body. Using , choose (E−Mail) and press . Press [Play]. -
Page 15: About C-Mail
About C-mail Using , choose [メインフォルダ] and press [Select]. To use C-mail, customers in the Tokyo and Chubu regions are not required to subscribe. Customers outside of the Tokyo or Chubu The Received E-mail list will be displayed. areas are required to purchase an application for C-mail. If you did not subscribe when you purchased the phone, please visit an au Shop or au Customer Center . Using , choose the E-mail you would like to C-mail is a message service for use between au C-mail compatible reply to and press [Display]. cell phones. A maximum of 50 double-width or 100 single-width character messages may be sent and received. The selected E-mail will be displayed. Creating and Sending C-mail Press [Reply] The new message input screen will be displayed. From the Standby screen, The recipient will be automatically entered and press for more than one second. subject and body will have been copied from the original message. The C-mail menu will be displayed. Using , choose and press [Edit]. The body input screen will be displayed. Using , choose [Create New] and press [Select]. The Create Mail screen will be displayed. Enter the message text and Using , choose and press [Edit]. press [Complete]. The Recipient input method option screen will appear. The message will have been entered. Press [Send]. The Send-method screen will be displayed. Using , choose [Go To Address Book] and ... -
Page 16: Reading Received C-Mail
Reading Received C-mail Using , choose the person to whom you wish to send the C-mail and press [Select] . When C-mail is received, an alert on the Standby screen will advise you. ●If there is only one phone number listed under the Using , choose (C−Mail) and press . name, proceed to step 7. ●If there are multiple numbers listed under the name, The Inbox will be displayed. use to select 1-3. ●When multiple new C-mails have arrived, the most recent will be displayed. By pressing the - Press [Select] . buttons, you can move up and down through the list of C-mails. ●By pressing [Reply], a reply message can be sent. Using , choose and press [Edit]. Reading C-mail from the Inbox The Body input screen will be displayed. From the Standby screen, press for more than one second. The C-mail menu will be displayed. Enter the message and press [Complete]. The message will have been entered. Using , choose [Inbox] and press [Select]. The Received C-mail list will be displayed. Press [Send] . The C-mail will be sent. Using , choose the C-mail you wish to ●Once the C-mail has been sent, it will be saved in the Out box. -
Page 17: Recording A Movie
Camera Using , choose [Photo Folder] and press [Select]. Taking a Photo The Photo Data folder will be displayed. Select Camera and Take a Photo ●All photo data is stored in the [All Photo] folder. From the Standby screen press and Using , choose the folder in which the using , choose [Camera] and photo you wish to view is stored and press [Select] . press [Select]. A list of photo data will be displayed. Photo/Movie option screen will be displayed. Using , choose the photo you wish to view Using , choose [Photo] and press [Select]. and press [Play]. The photo you have selected will be displayed. ●By pressing , you can change to Movie mode. ●By pressing the - buttons, you can move up and down through the list of photos. Press [Shoot]. You will hear a shutter noise and the photo you Recording a Movie have taken will be displayed on the screen. Select Movie and Record a Movie ●By pressing , you can delete the photo just taken. After step 1 on P. 31, use to choose [Movie] Press [Save]. and press [Select]. The photo will be saved. ●By pressing , you can change to Photo mode. View Photos Press [Rec.]. -
Page 18: Send A Photo Or Movie By E-Mail
Send a Photo or Movie by E-mail Press [Save]. The recorded movie will be saved. <Example> Sending to an au cell phone or a personal computer. After following the Photo instructions (P. 31 steps 1 ‒ 3) or the movie View Movies instructions (P. 32 steps 1 ‒ 2), press [ E−mail Follow step 1 on P. 32 then The new E-mail screen will be displayed with the photo or movie attached. press [Submenu]. Following the instructions for [Creating and Sending E-Mail] Using , choose [Movie Folder] and (P. 23 steps 3 ‒ 11), input the recipient, the subject and the body. press [Select]. The Movie Data Folder list will be displayed. Press [Send]. ●All movie data is stored in the [All Movie] folder. The Select Send Method screen will be displayed. Using , choose the folder that contains the movie you wish to view is stored and Using , choose [Send] and press [Select]. press [Select] . The E-mail will be sent. A list of movie data will be displayed. Using , choose a movie and press [Play]. The movie you selected will begin to play. ●By pressing the - buttons, you can move up and down through the list of movies. -
Page 19: Connecting To Information Sites
EZweb (Internet) Download and Setup CHAKU-UTA You can download CHAKU-UTA from Information Sites and set them About EZweb as your phone s ring tone. You can also download pictures and set them as your background or standby screen. In order to use EZweb, you must first subscribe to EZweb. If you <Example> The method for downloading depends on each site. did not subscribe when you purchased the phone, please visit an We are presenting one example ‒ depending on circumstances, it may differ. au Shop or au Customer Center . Also, before you use E-mail or EZweb, please reset the phone. For information about resetting From the standby screen press , and your phone, please refer to Setting the E-mail and EZweb Default Settings on P.8. using choose [Top Menu] and EZweb is a service, which allows you to use your cell phone to press [Select]. enjoy the Internet. From information sites, you can download ring The EZweb top menu will be displayed. tones and get the latest news. ※Some information sites incur access fees additional to the Using , choose [カテゴリで探す] and standard communication charges. press [OK]. Connecting to Information Sites Display the Top Menu Using , choose [着うた・着ムービー] and press [OK]. From the standby screen, press and using choose [Top Menu] and press [Select]. Using , choose a category and The EZweb Top Menu will be displayed. press [OK]. -
Page 20: Registering Frequently Accessed Sites
Using , choose [New Bookmark] and Press [Enter] A screen asking what to save it as, will be displayed. press [OK]. The site title, URL and folder name will be displayed. ●Some sites are not able to be saved to Favorite Site. Using choose [Sound Setup] and press [Select]. The type you have chosen will be displayed. Press [Registe]. This site will be saved in your Favorite Site. Using choose [Incoming Call] and press [Select]. The downloaded data will be saved as your Incoming Tone. ●Some sites will require you to pay a subscription fee and submit an EZweb Accessing Sites Saved in Favorites Site password. This EZweb password will be the 4 digit number you received when you first registered for EZweb pay services. Please be sure to remember this password. From the Standby screen, press . The EZweb menu will be displayed. Registering Frequently Accessed Sites Registering as a Favorite Site Using , choose [Favorite Site] and By registering the URL of frequently accessed information sites in press [Select]. your Favorite Site, you will be able to access these sites quickly All the sites you have saved as a Favorite Site will and easily. be displayed in a list. Using , choose the site to which you Go to the site that you would like to save. would like to connect and press [Select]. You will be connected to the site you have chosen. Press [BrsrMnu]. The browser menu will be displayed. - Page 21 EZnavi ● ● Find the Route Home (requires a subscription to EZweb) Using the GPS information saved under Home , you can find your way home. Using EZnaviwalk From the Standby screen press , then EZnaviwalk is a service where a map is displayed on the screen of use to choose [EZnavi] and your mobile cell phone, and you are directed along a route by verbal instructions and vibrations. press [Select]. ●Register My Home Using , choose [EZnaviwalk] and <Example> Register your current position as home . press [Select]. From the Standby screen press , then using choose [EZnavi] and press [Select]. Using , choose [Return Home] and press [Select]. Using , choose [EZnaviwalk] and A confirmation screen will be displayed. press [Select]. Using , choose [Yes] and press [Select]. A possible route will be displayed. Using , choose [My Spot] and press [Select]. The My Spot screen will be displayed. Using , choose [ルート案内開始] and press . Using , choose [My Home] and Navigation will begin. press [Save]. A screen asking for method of saving will be displayed.
- Page 22 Infrared Data Communication Using Infrared Data Communication Receiving Data About Infrared Data Communication <Example> Receive profile data. Infrared Data Communication is a feature by which au c e l l p h o n e s u s e i n f r a r e d l i g h t t o f a c i l i t a t e d a t a From the Standby screen press and ...
- Page 23 Pair Function Calling a Pair Partner Register a Pair Partner From the Standby screen, press . The Pair menu will be displayed. The Pair function allows you to register someone as your pair partner and makes calling that person or s e n d i n g t h a t p e r s o n a n e - m a i l , a s w e l l a s o t h e r functions. a one-step process.
- Page 24 Smart Mode ●Deactivating Smart Mode From the Standby screen, press . About Smart Mode The Smart menu will be displayed. Smart Mode allows you to select a few often used applications including telephone, address book, camera, m a i l , E Z w e b , e t c . a n d l i m i t t h e p h o n e t o t h e s e Using , choose [Settings] and ...
-
Page 25: Using The Phone In Smart Mode
Using the Phone in Smart Mode Using , choose [Manual Input] and press [Select]. Adding to the Address Book In Smart Mode, you can save the name, reading, telephone number and e-mail address. Enter the telephone number and press [Complete]. From the Standby screen, press . The e-mail address input method option screen The Smart menu will be displayed. will be displayed. ●If the telephone number is a standard landline, remember to include the area code. ●If you do not wish to enter an E-mail address, press [Next] to Using , choose [Phone] and proceed to step 10. press [Select]. Using , choose [Manual Input] and press [Select]. Using , choose [Address Book] and press [Select]. The Address Book list will be displayed. Enter the E-mail address and press [Complete]. Press [New]. The Address Book Save screen will be displayed. ●By pressing [Select], you can edit the entries. Enter the name and press [Complete]. Press [Complete]. The data will be saved into the Address Book. ● W h e n y o u e n t e r t h e n a m e , t h e r e a d i n g w i l l automatically be inserted. - Page 26 Creating and Sending E-mail Enter the Subject and press [Complete]. The Body input screen will be displayed. From the Standby screen, press . ● T h e S u b j e c t m a y b e u p t o 5 0 d o u b l e - w i d t h The Smart menu will be displayed.
- Page 27 Take Photos/Record Movies ●Recording a Movie After step 2 on P. 51, using , ● ● Taking Photos choose [Movie] and press [Select]. From the Standby screen, press . The view from the camera will be displayed. The Smart menu will be displayed. ●By pressing , you can change between the photo and movie modes. ●By pressing [Mode], you can change the size of the photograph from Standard Small to Standard Using , choose [Camera] and Medium to High-Quality Large to Video Large size. press [Select]. The photo/movie option screen will be displayed. Press [Rec.]. You will hear a recording-start tone and the recording will begin. While recording, you can Using , choose [Photo] and press [Select]. press [Stop] or wait until the recording runs The view from the camera will be displayed. out of time. When the recording has finished, you will hear a recording-end tone and the movie as it finished recording will be left displayed on the screen. ●By pressing , you can change between photo and movie mode. ●Pressing [Cancel] or will stop the recording. ●By pressing [Mode], you can change the size of ●After recording has finished, pressing will delete the movie. the photograph from QQVGA to QVGA to SXGA ●Pressing ...
-
Page 28: Entering Text
Character Input Changing the Input Mode Pressing in the text input screen will display the input mode list. About Character Input To change input modes; When adding to the Address Book, creating mail, etc. requires the ●Using , choose the input mode and press [Select]. input of text. Kanji, Hiragana, Katakana, Alphabet, Numerals, ●Press [Switch] , choose the input mode and press [Select]. Symbols, Pictographs and Phrases can all be entered. ●Press the Dial Key relating to the desired input mode on the input mode list. Character Assigned to Each Key ※Dependent on each feature/function, the types of characters which can Each key represents a number of characters. By pressing the key be input will differ. repeatedly, you can cycle through until the character you are Entering Text looking for is displayed. Input Entering Kana/Kanji Hiragana/Kanji Katakana English Numerals Mode (double-width) (double/Single width) (double/Single width) (double/Single width) <Example> In the Address Book entry screen, enter the name 岡垣 あいうえ おぁ ぃぅ ぇぉ 1 アイ ウエ オァ ィ ゥェ ォ 1 .@... - Page 29 Input Pictographs/Face Symbols/Symbols Input of English Characters <Example> Input a Pictograph. <Example> In the Address Book entry screen, enter the name tottori . On the text input screen, press . On the text input screen; The input mode list will be displayed. …… 「t」 Press once … 「o」 Press 3 times …… 「t」 Press once (Cursor to the right) Using , choose and press [Select]. …… 「t」 Press once The pictograph list will be displayed. … 「o」 Press 3 times … 「r」 Press 3 times ●When you want to enter the same ●By pressing , you can cycle through the character twice, you should move the Pictograph categories. … 「i」 Press 3 times cursor to the right after completing ●By pressing , you can change between the first character.
- Page 30 As stated above, variations in SAR values If this equipment does cause harmful interference to radio or television between different model phones do not mean variations in safety. SAR reception, which can the interference by one or more of the following values at or below the federal standard of 1.6 W/kg are considered safe measures: for use by the public. -Reorient or relocate the receiving antenna. The highest reported SAR values A5514SA are: -Increase the separation between the equipment and receiver. CDMA modes(Part 22)- Head: 0.359 W/kg; Body-worn: 0.528 W/kg -Connect the equipment into an outlet on a circuit different from that to which the receiver is connected. FCC Radio Frequency Emission -Consult the dealer or an experienced radio/TV technician for help. This phone meets the FCC Radio Frequency Emission Guidelines. FCC ID number: NRNA5514SA. More information on the phone's SAR can be Cautions found from the following FCC website: http://www.fcc.gov/oet/fccid.