Table of Contents
Advertisement
Quick Links
Advertisement
Table of Contents

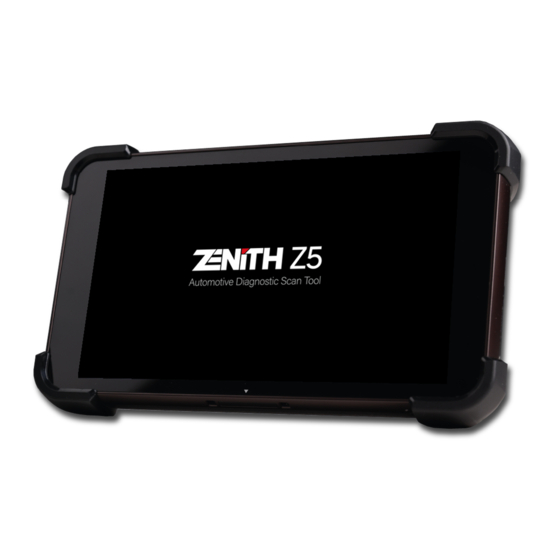
Summary of Contents for Zenith Z5
- Page 1 USER MANUAL [여기에 입력] VER.1.00...
- Page 2 1.1 End User License Agreement 1.2 Copyright Notice and Disclaimer 1.3 Safety Warnings and Cautions 1.4 Safety Warnings and Cautions Chapter 2. Getting started with Zenith Z5 2.1. Specification 2.2. Parts and Components 2.3. Details of Base Unit 2.4. Battery Installation 2.5.
- Page 3 10.1 Data Record 10.2 Data Reloading 10.3 Data Backup 10.4 Data Printing Chapter 11. Report 11.1 Diagnostic Report Function 11.2 Creating a report 11.3 Additional Functions Chapter 12. Appendix A.1. Z5 Limited Warranty A.2. Discard of used equipment A.3. Safety Regulatory...
- Page 4 ⚫ End User License Agreement A person who wishes to purchase and use Zenith Z5 (hereinafter referred to as "end user"), agrees to the following clauses and upon completion of the product registration, end user agrees to the agreement and authorizes its validity.
- Page 5 User Manual ver.1.03 5. The period of warranty service and free software update subscription are not suspended even when functional restriction to the Z5 is enforced, and the expiry dates will remain the same. 6. End user shall be liable for all expenses such as transportation, labor costs, customs, and any additional fees that may arise in the process of reactivating the product or lifting the restrictions imposed to the product.
- Page 6 EZDS Co., Ltd. reserves the right to change or modify Z5 for technical and non- technical product enhancement without notice. This may include scan tool graphic displays, vehicle coverage, supported functions and operating procedures.
- Page 7 ⚫ Keep Z5 within the specified storage temperature when not in use (See the spec sheet) ⚫ Place the Z5 at a secured location and keep clearance with any moving part of the vehicle or hazardous environment when using Z5 with the vehicle.
- Page 8 User Manual ver.1.03 Storage: ⚫ Put Z5 base unit on a secure place and avoid unstable, inclined, or slippery place. Be careful not to drop the Z5 base unit. ⚫ Avoid humidity and dusts when storing and using Z5 in order to prevent electric shock or fire.
- Page 9 Cautions and Warnings ⚫ When disposing Z5, do not dump it among the daily wastes. In many countries, it either shall be approved by local authorities or recollected by the local distributor. Disposal by burning or burying it underground without authorization is not generally ⚫...
- Page 10 CAN (High speed, Low speed, Single), ISO-9141, ISO-9141-CARB, KWP-2000, SAE-J1708, SAE-J1587, J1850(PWM/VPW), Melco Pull-Down ** Half (16GB) of Z5’s internal memory (32GB) is allocated for Z5 diagnostic software and future updates. Therefore, the actual available memory size may be less than the capacity displayed in the...
- Page 11 User Manual ver.1.03 2.2. Parts and Components Basic Supplies Description Part Parts Number Q’ty EZ5MU001 ZENITH Main Body EZ5CB001 DLC Main Cable EZ5CB002 AC/DC Adapter EZ5BA001 Battery Pack EZ5AC001 Hand Strap EZ5AC002 Stylus Pen Coiled String...
- Page 12 User Manual ver.1.03 EZ5AC003 Stylus Pen EZ5AC004 Tempered Glass Protector EZ5BX001 Packing Box Optional Supplies EZ5BX005 Carrying Case EZ0CB003 Battery to DC Cable...
- Page 13 User Manual ver.1.03 Optional OBD Adapters EZ0CB004 TOYOTA 17+1P SQUARE EZ0CB005 TOYOTA 17P ROUND EZ0CB006 HONDA/ACCURA 3P EZ0CB007 MAZDA 17P EZ0CB008 SUBARU 9P MITSUBISHI/HYUNDAI EZ0CB009 12P+16P EZ0CB010 KIA 20P A Type...
- Page 14 User Manual ver.1.03 EZ0CB011 KIA 20P B Type EZ0CB014 SSANGYONG 20P EZ0CB013 NISSAN 14P EZ0CB015 DAEWOO 12P EZ0CB016 SSANGYONG 14P EZ0CB022 J1939 9P + J1708 6P EZ0CB021 UNIVERSAL 4P...
- Page 15 User Manual ver.1.03 EZ0CB019 BMW 20P EZ0CB020 AUDI/VW 4P HYUNDAI KIA EZ0CB025 COMMERCIAL 16P EZ0CB026 HYUNDAI CNG BUS EZ0CB023 ISUZU 20P-10P-3P EZ0CB024 HINO 12P-5P...
- Page 16 User Manual ver.1.03 2.3. Details of Base Unit Z5 Base Unit...
- Page 17 User Manual ver.1.03 Description Long press on the button: Z5 Power On/Off Power button Short press on the button: Z5 Sleep/Wake Volume control button Controls volume on media or alarm Terminal for connection of the DLC cable for DLC connection terminal...
- Page 18 User Manual ver.1.03 2.4. Battery Installation A brand new Z5 will be delivered with its rechargeable battery detached. To power on and properly charge the Z5, install the provided rechargeable battery and connect the AC/DC adapter. Follow the steps described in this section to properly install the rechargeable battery to the Z5.
- Page 19 User Manual ver.1.03 Place the battery with its barcode facing upward and insert it with its gold contact aligned with the Z5. Reinstall the battery cover.
- Page 20 User Manual ver.1.03 ⚫ Basic Buttons for Android system A. Power Button You can turn on/off the power of Z5 by using the power button placed at the top of the main module. ◼ Power on To turn on the device, press and hold the Power button for a few seconds.
- Page 21 Android operating system that is exclusively customized for itself. Never try to use Zenith Z5 for playing 3rd party contents or attempt to alter or modify the operating system’s settings and security features, which may cause serious consequences...
- Page 22 User Manual ver.1.03 B. Home Button Returns to Home screen. If the Z5 program is shut down, Zenith software can be selected and executed again by selecting the Zenith icon. C. App Running button Displays the applications that are running in the background or recently executed.
- Page 23 User Manual ver.1.03 E. Setting Button Enables hardware configuration and preference setting for operating F. Screen Capture Button This enables an instant screen capture while operating Z5. You have option to edit or print the captured screenshot.
- Page 24 User Manual ver.1.03 ⚫ Quick Setting menu A quick setting menu appears when you touch the top of the screen. Touching the top area will extend drop-down menu and a quick setting menu appears like below. You can quickly change the basic Android configuration setting such as WiFi, Bluetooth, Do Not Disturb, Flashlight, Auto-rotation, Battery Saver, Airplane Mode, Cast without having to select the “Setting”...
- Page 25 1. Extend the Z5 main cable to the vehicle side diagnostic socket. Attach the paring OBD non-standard connector if necessary. 2. Turn the ignition key to ACC or ON position, and power is supplied to Z5. The power is supplied through the diagnostic socket even when the IG key is turned OFF.
- Page 26 User Manual ver.1.03 2.7. Rechargeable Battery Z5 is fitted with the Li-ion rechargeable battery pack as the basic supply, and it enables the device to run normally when the external power supply is lost. ⚫ Vehicle Battery Voltage Indication However, the device is not designed to be run on battery without external power supply for an extended time and drawing power from the car through the diagnostic adapter is always recommended for diagnostic communication stability.
- Page 27 User Manual ver.1.03 ⚫ Rechargeable Battery Replacement A rechargeable battery is an expendable supply of which performance deteriorates over the repeated recharging cycles, and the replacement of the battery is recommended when the lowered charging performance is experienced or any distortion such as swelling is witnessed.
- Page 28 2 main screws. Do not apply excessive force when fastening the screws. ⚫ Connecting to the Vehicle Extend the DLC main cable connected to the Z5 to the vehicle side DLC socket. Different types of non-standard diagnostic adapter may be used for the pre-OBD2 models or the commercial vehicles.
- Page 29 If your Z5 is not registered under your account at EZDS website, Z5 will operate in Demo mode and it will allow you to choose the carline for 30 attempts only. Remaining attempts will be displayed in the popup message as shown below.
- Page 30 User Manual ver.1.03 3-2. Device Registration Step 1. Membership Enrollment at EZDS.com Visit EZDS website and create user account. A. Go to www.zenithdiag.com and press the Join button to join the membership. B. Read the Terms of service carefully and if you agree, click the check box and fill in the blanks.
- Page 31 User Manual ver.1.03 C. Press the [Confirm] button and [OK] button. D. Your account is created. Verification email will be sent to your email address. Please follow the next verification procedure.
- Page 32 User Manual ver.1.03 Step 2. E-Mail Verification A. The email address that you enter when joining the membership is very important because it is the only channel for bi-directional communication between the customer and the supplier, therefore it needs to be verified to make sure that it is valid and working email.
- Page 33 C. Verification process is completed! Step 3. Z5 Device Registration Device Registration is a process of matching a Z5 serial number with individual website member. When registration is completed, the Z5 will be combined with a specific website member ID on EZDS’s database and the device will be finally activated for using full functionality of the device.
- Page 34 User Manual ver.1.03 C. Go to your Z5 and hit [Update] menu from the main screen. Press [Registration] button. ⚫...
- Page 35 User Manual ver.1.03 ⚫ Copy the Serial number and the Security code written on the popup screen. D. Go back to the registration page and enter the Serial number and the Security code. Make sure to enter correctly as the security code is case sensitive. When you are ready, hit the [Save] button.
- Page 36 User Manual ver.1.03...
- Page 37 The main menu as shown below appears when Z5 is turned on or when Zenith Application is selected among the applications list. ⚫ Main menu The main menu of Zenith Z5 is consisted of 4 sections (header, major functions ,convenient functions, bottom menu).
- Page 38 User Manual ver.1.03 Double tab on the [Header] area in the top of the screen with a finger or tab on the area and swipe down, then the details of the system notifications are displayed. Tab on the top of the pop-up notifications with a finger, then a system configuration menu appears where you can check and make quick and simple changes to the basic system settings.
- Page 39 User Manual ver.1.03 ⚫ Major At the time of publishing this user manual, Z5 main function menu includes following 2 selections: Diagnosis, Service function. Each of these main functions are explained more in detail in the separate chapters in this manual hereinafter.
- Page 40 Settings, Utility, Gallery. The details of these convenience functions are explained in the following chapters. Title Description Calls the Z5’s various utility programs such as “Vehicle Communication Line Check”, “Unit Converter”, “Calculator”, “Special Function Calculator”, etc. Opens the Settings menu where software version...
- Page 41 User Manual ver.1.03 Turns Z5 into a J2534 Pass-thru device Retrieves the previously saved Pre and Post Repair Diagnostic Report that can be added to Z5 memory while performing Diagnosis function. Allows user to send or delete saved log data...
- Page 42 User’s manual, OBD-2 DTC Library, Maintenance tip, Sound Recorder, Calculator, Camera features are available in the Utility menu. ⚫ User’s Manual Z5’s complete user’s manual and quick manual is available in PDF format. ⚫ OBD-II DTC library Enables search of OBD-II generic fault codes for code definition.
- Page 43 Enables voice recording through the Z5 embedded microphone. Button Description shape Starts sound recording from standby mode. Exits and saves sound being recorded. Displays the list of recorded files. ⚫ Camera This enables taking the photographs using the embedded camera of Z5...
- Page 44 User Manual ver.1.03 4.3 Settings In the [SETTINGS] menu, you can check the Software Version and Open Source License, choose the Language of the Z5 software, and change the settings in measurement unit, and display mode. ⚫ Software version Check the serial number (security code), firmware & software version, operating system version, and each carline’s diagnostic software version installed in Z5.
- Page 45 ⚫ Self test (Software Self test) In case the Z5 fails in performing the diagnostic functions properly, Software self- test verifies software integrity to make sure that there are no corrupted data in Z5 diagnostic applications. ➢ Quick: Checks the Z5 main program...
- Page 46 Type in your personal and workshop information and it will be used when printing the Pre-Post diagnostic report and other forms. Be advised that User Info is stored and used within the Z5 device only, and no personal information is transferred to the server.
- Page 47 User Manual ver.1.03 ⚫ Display User can change the theme of the Z5 software and change the location of the side buttons. A. Display Mode Z5 offers 3 different display modes: Default, Dark, and Light. ⚫ Default Mode...
- Page 48 User Manual ver.1.03 ⚫ Dark Mode ⚫ Light Mode B. Side Button Location Location of the side buttons can be changed per user preference. ⚫ Side Button - Right...
- Page 49 User Manual ver.1.03 ⚫ Side Button - Left...
- Page 50 Z5 is programmed to lock down its system immediately for self-protection. In case the Z5 is locked down for this reason, no unlock code input is possible and the only way to unlock the device is returning the device to the EZDS in Korea for inspection.
- Page 51 Wi-Fi or Ethernet LAN cable periodically. If Z5 fails to log on to the EZDS server for a certain period, a warning message pops up to remind that the device needs to connect the device to internet for validation.
- Page 52 User Manual ver.1.03...
- Page 53 To start diagnosis, select “Diagnosis” icon from the Z5 main menu. Carline Selection ⚫ In the [Diagnosis] menu, each carline software will be displayed as shown below. For easy and quick navigation of the software, Z5 offers 5 sorting features at both end of the bottom menu.
- Page 54 User Manual ver.1.03 ⚫ Search [Search] feature allows sorting the carline software according to the first letter. After selecting the first letter, the software can be sorted further using features in the [Region] tab. ⚫ Region [Region] feature sorts the carline software according to its region such as ‘All Region’, ‘Asian’, ‘Australia’, ‘European’, ‘USA’, and ‘Other’.
- Page 55 User Manual ver.1.03 ⚫ My Menu [My Menu] allows user to add or delete carline software to separate menu. This is ideal for user to add most frequently used software in My Menu for quick navigation. To add the software, press ‘+’ button, select desired software and hit ‘Apply’ button. To delete the software, deselect the software and hit ‘Apply’...
- Page 56 User Manual ver.1.03 ⚫ Automatic selection & Manual selection Zenith Z5 offers options to select the vehicle model either automatically or manually. [Automatic selection] detects the vehicle information including the VIN number, model year, model name, engine type, and other necessary information whereas [Manual selection] lets the user to select the vehicle information manually.
- Page 57 Select any Japanese brand “Toyota”, “Nissan”, “Honda”, “Mitsubishi”, “Mazda”, “Daihatsu” and “Suzuki” from the car maker selection menu, then it is followed by the Z5’s unique Japanese car menu structure as shown below. Japan Domestic Z5 is offering the model names and the detailed model selection procedure for the cars sold in Japanese domestic market or secondhand vehicles imported from Japan with unique model names and variants.
- Page 58 User Manual ver.1.03 When [International] is selected, a simple Diagnostic Connector Type selection follows and then you can select the control system or conduct System Search without having to follow multiple steps of model name, model code, type or model year selections. It is so simple but it does not mean that the diagnostic results are also simplified.
- Page 59 “All Systems Check” procedure, where Z5 tries to establish communication with all possible systems fitted in the car one after one, and then provides the summarized report of the diagnostic result on the screen.
- Page 60 DTC. In both cases, Z5 is unable to show the number of DTCs in the System Search report, not because of its fault but because the system is designed in that way.
- Page 61 Select [STOP] to abort System Search function. This option is activated only when System Search is running. ★LIST Select [★LIST], and the Z5 shows the details of the special functions available with the detected systems in the right half of the screen. ⚫ SHOW DTC...
- Page 62 User Manual ver.1.03 ⚫ REPORT [REPORT] option appears when [SHOW DTC] is selected. Select this option in order to use the System Search result for the creating Pre & Post Repair Report. Please refer [Chapter 10. Diagnostic Report] for more details about the Pre & Post Repair Report function.
- Page 63 DTC Analysis functions. ⚫ DTC Reading Select [DTC Analysis] then Z5 checks the DTCs set in the selected control system and shows the list of the DTCs.
- Page 64 User Manual ver.1.03 ⚫ Present / History / Pending DTC In general, Diagnostic Trouble Codes are categorized into 3 types according to the status of the code. Present DTC An actual DTC currently affecting the control system’s error or failure and needs further diagnosis for repair and erasure.
- Page 65 User Manual ver.1.03 ⚫ Freeze Frame Data To aid the mechanic’s better understanding on what had happened to the vehicle’s control system before and after the DTC was set, live Data parameters are recorded when the critical diagnostic trouble code was detected and logged to the control unit’s memory.
- Page 66 ⚫ Manual DTC Reading Reading and erasing the codes from the old vehicles of 1980’s and early 1990’s using Z5 or any other diagnostic tools may not be possible as the old control systems do not support bi-directional communication. Only manual reading and erasing are possible for those vehicles, so please follow the instructions that are provided on the Z5 screen.
- Page 67 User Manual ver.1.03 ⚫ Mode (just for Toyota and Daihatsu) [MODE] button is activated only when reading the DTCs from Toyota or Daihatsu models. Unlike the other automakers, Toyota and Daihatsu have an additional option for DTC reading function, and it is switching the diagnostic mode to Check Mode or Normal Mode.
- Page 68 User Manual ver.1.03 5.5 Data Analysis Also called Live Data, Data List, Data Stream or Current Data by the automakers, it is one of the basic diagnostic functions that shows the sensor input value readings and the actuator status of a control system to monitor the control system’s operation of both input and output sides.
- Page 69 User Manual ver.1.03 ➢ Full Screen Select [Full Screen] button on the left to switch the data display to a full page “Detail” mode, where up to 11 parameters are listed with more space to accommodate the longer parameter names. Select [Split Screen] button to return to the mode that shows up to 24 parameters in the split screen.
- Page 70 User Manual ver.1.03 ➢ Function Select “Function” button to add, remove or reset min/max information. MINMAX DISPLAY Removes the Min & Max value columns from the data list. Results in wider parameter name column. RESET MINMAX Resets the Min & Max values TC TERMINAL ON / OFF the Old engine type ( only applies for Toyota )
- Page 71 User Manual ver.1.03 ⚫ Graph Mode Text based data parameters are switched to the dynamic graphs when the [GRAPH] button on the left is selected. [GRAPH] option is not available when the data list is displayed in Normal Mode with split screen. ➢...
- Page 72 User Manual ver.1.03 ⚫ Selected Items / All Items ➢ Too many parameters Late model vehicles provide the more parameters, sometimes hundreds of them are listed for a single system. Parameters are scattered here and there in the data list, and the increased parameters makes it more difficult to check and monitor the related parameters efficiently moving page to page for finding the desired parameters one after another.
- Page 73 User Manual ver.1.03 ➢ All Items Select [ALL ITEMS] to return to the full list mode. ➢ Searching To search specific item(s), simply hit the magnifying icon located next to the Item number at the top of the list. To observe desired items separately, hit the checkbox in front of each item and press [Select Item] button.
- Page 74 User Manual ver.1.03...
- Page 75 User Manual ver.1.03 ⚫ Custom Graph Mode Custom mode runs when [ Overlap ] is selected. In custom mode you have freedom to move the graph of each parameter horizontally and resize the vertical scale of each graph individually. Capability to customize the scale and the position of each graph offers more intuitive approach to make efficient analysis of the parameters.
- Page 76 User Manual ver.1.03 <Custom mode graphs resized and overlapped in the center of the screen> ⚫ Data Recording ➢ Record Data Options Select [Snapshot] button to start saving a screen capture of one frame containing all parameters. Select [Record] to save consecutive multiple frames containing all parameters. Selecting [Save Selected Parameters Record] button will allow the users to save the consecutive multiple frames of selected parameters that are being recorded internally since selection.
- Page 77 User Manual ver.1.03 ➢ SINGLE RECORD Just like a snap shot, only a single frame at the time of touching the button is sampled and recorded. Check the record saving path and file name, modify, if necessary, then select [OK] to save the record to a file.
- Page 78 Select “Close” to stop recording the data and select “OK” to end, then the data is saved as the Flight Record Data in the Z5 internal memory. ➢ SELECTED ITEMS RECORD This option is available only when data list or graphs are being displayed in [SELECT ITEM] mode that shows just the data readings of the selected parameters.
- Page 79 User Manual ver.1.03 ⚫ Recorded Data Replay Recorded data can be reviewed and replayed by selecting “Record” function from the Z5 main screen, or “Record Review” from the diagnostic function’s menu.
- Page 80 User Manual ver.1.03 5.6 Actuation Test This is a function that runs or stops the active parts on the output side of the control module such as injector, fans and valves, and examines the operation of the active parts and the related circuits.
- Page 81 User Manual ver.1.03 ⚫ Actuator Run / Stop control Please note that the options for Run / Stop control of the actuators are offered differently according to the type of the active part and its attribute, i.e. Switches: ON/OFF, Volume control: Increase / Decrease, Function: Execute / Unexecuted. Please check the buttons on the right of the screen to comprehend how the test function runs and how to stop it before starting the actuation test.
- Page 82 User Manual ver.1.03 5.7 Record Review Reviews the recorded data and the function works the same as selecting the [Record] from the Z5 main menu. Please refer to [Chapter 9. Record & Gallery] in this manual for further details.
- Page 83 User Manual ver.1.03 5.8 Special Function While DTC Analysis, Data Analysis, Actuation Test and System Identification functions are considered basic diagnostic functions, there are more advanced functions that are needed for the completion of the service and maintenance for the late model vehicles such as adaptive value reset, immobilizer registration, control module coding, sensor calibration, as well as various test functions are collectively called [Special Function].
- Page 84 User Manual ver.1.03 Select one of the injectors to code and select [OK]. Type in the injector code for the selected one using the keypad on the screen. Select OK when done. Check if the code has been inputted correctly, then select OK to code the injector.
- Page 85 User Manual ver.1.03 Function Completed message is displayed when the code value is entered without error. Select [OK] to end the Special Function.
- Page 86 User Manual ver.1.03 Notice Different functions supported The list of the Special Functions available for the selected vehicle is predefined by the car manufacturers, therefore please mind that different special functions are supported according to the brands and models. Test Conditions An unfulfilled condition such as slightly misaligned steering wheel, engine not fully warmed up or released parking brake may lead to the failure of the function, so please make sure to observe the test conditions and get the vehicle ready as...
- Page 87 User Manual ver.1.03 5.9 ECU Information Display ECU Part Number and other information needed for identifying the control unit is provided as one of the basic diagnostic functions Select ECU Information Display from the diagnostic function menu. Then the ECU information of the selected system is displayed.
- Page 88 User Manual ver.1.03 Chapter 6. OBD-II Mode (Service) OBD-II Function OBD-II function is used for diagnosis of OBD-II or EOBD complaint vehicle’s emission- related powertrain control system and inter-system network that support the industrial standard protocols. Please extend the main DLC cable to the vehicle side diagnostic socket and select [OBD-II].
- Page 89 - Service 01 is supported by Z5 in 2 functions, 01. Readiness Test and 02. Current Data. You can check the readiness of on-board diagnostic system by selecting [01.
- Page 90 User Manual ver.1.03 - Service 08 is supported when [05. Test or Component Control] is selected. - Service 09 is available under [06. Vehicle Information] menu, and PID 08 of Service 09 that is reading “In-use performance tracking of spark ignition vehicles” data is supported under [07.
- Page 91 User Manual ver.1.03 Current Data in Text Mode Current Data in Graph Mode When a function is selected from the OBD-II menu, the result may come up with “NOT SUPPORTED” reading, and it means the selected function is not supported by the vehicle.
- Page 92 User Manual ver.1.03 OBD-II / EOBD Diagnostic Trouble Codes OBD-II Service 02, 03, 04 and 07 that are used for reading ‘freeze frame data’, ‘pending’ and ‘current’ DTCs and erasing them from the control system memory are collectively supported under [03. Diagnostic Trouble Code] menu. OBD-II DTC Reading OBD-II DTC Erasing Please refer to the generic OBD-II related standard documents for use of the other...
- Page 93 User Manual ver.1.03 Chapter 7. Service function 7.1 Procedure of Service function Service function offers shortcut to the most frequently used special function in workshop such as ADAS, Brake Pad Replacement, Engine Oil Reset, Brake Air Bleeding, Battery Reset, and Steering Angle Sensor Calibration* *The list of service function will grow in the future.
- Page 94 User Manual ver.1.03 C. Select the carline you wish to diagnose. (If Automatic selection is not available, vehicle model, year and engine type have to be selected manually.) Once the vehicle is detected automatically, confirm the vehicle information and press [OK] button.
- Page 95 D. After communication is successful, required service function will be highlighted. (If there is a tutorial video available for the specific function in EZDS official Youtube channel, play icon will be displayed in front of the function. By hitting the icon, Z5 will open the browser to play the Youtube video)
- Page 96 Select [REMOTE SUPPORT] button in the Z5 main screen. Your device’s ID will be displayed next to “Your ID”. Enter this code in another device’s TeamViewer application. Once the ID is entered, popup screen will be displayed in your Z5 as shown below. Pressing ‘Allow’ button will establish connection between the devices.
- Page 97 User Manual ver.1.03 File Transfer ⚫ User can transfer files from Z5 to a connected device. Hit ‘File Transfer’ and select the file in Zenith Z5 folder. Then hit the ‘Receive’ button to proceed transfer.
- Page 98 G. Connect a DLC cable to the vehicle and start diagnosis. Zenith Z5 serves as the “passthru” device only in this mode and the data files required for reprogramming must be downloaded from the car manufacturer’s service website at user’s...
- Page 99 Select [Software Update] from the main menu to go to the software update list. If Z5 is properly registered and activated, the software list will be displayed like below and you can scroll up and down to navigate the list.
- Page 100 “Request for Extension” button. When the request is submitted, the download server automatically relays the provided contact Information to the authorized local distributor in the Z5’s designated country / region so that they can take care of the request.
- Page 101 You can save your ID to avoid inconvenience of entering the email address every time by selecting the [Remember ID] checkbox, however, for protection of private information, Z5 is not allowed to save the password in the device, therefore you are required to enter the password each time.
- Page 102 User Manual ver.1.03 E. External Power supply If the log-in ID and password are correctly entered, a message pops-up to remind to use of the external power while downloading and updating software. It is always recommended to use stable external power source such as AC power from the wall outlet through the AC/DC adapter.
- Page 103 User Manual ver.1.03 F. Software Downloading When you select [OK] then software download begins. It takes more time as the more automakers are selected and the time required for downloading varies considerably according to the internet download speed.
- Page 104 In case any diagnostic function fails or does not work properly as intended, you can log the data transmission between Z5 and the vehicle control unit by 1) starting Data Log mode, 2) repeating the same function until it finally fails like experienced previously, 3) stopping Data Log mode.
- Page 105 When [Log Data] is selected, you can select either [LOG START] or [LOG STORAGE] from the pop-up menu. LOG START Start Data Logging. When Z5 is logging data, this menu will change to [LOG STOP] LOG STORAGE Go to the Log Data Storage where you can select a log data and send it to the...
- Page 106 B. Repeat the function When the Log Data Mode has started, the tape recorder sign in the top left corner of the screen indicates that the data transmission between Z5 and the vehicle control system is being logged. Please repeat the same function until you encounter the same symptom or...
- Page 107 Select the [LOG DATA] button again in order to stop data logging and it will be followed by a pop-up menu with a single entry [LOG STOP]. Select [LOG STOP] and the captured log data is stored in the Z5 internal memory.
- Page 108 User Manual ver.1.03 Chapter 10. Record & Gallery 10.1 Data Record ⚫ Screen Capture saving Screen capture function is used for saving screen capture images, live data and graphs in memory and reloading them later for review and analysis. Any time you need to capture the current screen display, just touch the [Screen Capture] button on the bottom right corner of the screen, which is a part of basic Android system function.
- Page 109 [OK] to save the file. The screen capture is saved as an image file in the pre-defined folder of Z5 memory. ⚫ Saved File Format Screen captures are saved as image files of PNG format while live data readings are saved as spreadsheet files of GTR format.
- Page 110 10.2 Data Reloading ⚫ Save Data Path When you select [Record] from the Z5 main menu or [Record] from the diagnostic functions menu of each automaker software, folder structure of the Z5 internal data storage is displayed on the screen as below.
- Page 111 User Manual ver.1.03 ⚫ Image File Select a PNG file among the saved file list Then the Gallery application runs to open and show the selected PNG file on the screen. You can print or share the file by selecting the additional function buttons in the top right corner of the screen.
- Page 112 User Manual ver.1.03 ⚫ Current Frame Indication When replaying forward and reverse, the horizontal location of the current frame is indicated on the map that appears on the left right corner of the screen for quick reference. ⚫ Graph Mode Basic operation of Flight Recording function in Graph mode works the same as Data Analysis function except that it is not live, but you are reloading the data saved in the past.
- Page 113 User Manual ver.1.03 ⚫ Graph Horizontal Scale Control You can change the horizontal scale of the graphs or number. Graph scale can be controlled by selecting the pixel per frame (1px -> 5px -> 15px). The more pixels per frame, the bigger the graphs, and vice versa. Horizontally Smallest scale when 5 pixels represent 1 frame of data readings.
- Page 114 User Manual ver.1.03 ⚫ Number of Graphs Control You can change the number of graphs displayed on the screen at a time. Number of graphs that appear on the screen can be selected among 1, 2, 3 or 4 line(s). <1 Graph>...
- Page 115 User Manual ver.1.03 <4 Graphs> ⚫ Cursor Cursors are available when replaying the recorded data in graph mode. Touch the red dot and drag it to change the horizontal position of Cursor A, and do the same on a blue dot for Cursor B. Then the time difference between Cursor A and B is indicated on the left of the screen.
- Page 116 User Manual ver.1.03 Select [TEXT] among the graph control buttons in Graph mode, then the display mode changes to Text mode, but initially the data readings will be displayed in the form of spreadsheet. ➢ Spreadsheet format In spreadsheet format, the parameter names are listed horizontally, and the data readings are stacked down vertically frame by frame.
- Page 117 User Manual ver.1.03 ➢ PRINT Print the spreadsheet using the printers connected to Z5 or into the PDF files. You can select SPECIFY SAMPLE PRINT or ALL SAMPLE PRINT. Select [SPECIFY SAMPLE PRINT] if you want to print a single sample (frame) of data readings or a part of entire recorded data.
- Page 118 User Manual ver.1.03 10.3 Data Backup You can transfer the image and data files saved in Z5’s internal storage to an external storage device by selecting [BACKUP] from the menu on the left of the Flight Recoding function menu. ⚫ External Storage Device A micro SD Card can be inserted to Z5 directly, or you can use external storage device through the USB port.
- Page 119 User Manual ver.1.03 If you happen to remove the external storage device before transferring the files or select [BACKUP] when the external storage device has not been recognized by Z5 properly, an error message will come up and file transfer will fail.
- Page 120 * Only print drivers authorized by EZDS can be installed in the Z5. Other applications are not allowed to download due to possible reduction in performance or error in the software. If any suspicious attempt to download unauthorized applications in the Z5, warranty may be void.
- Page 121 User Manual ver.1.03 C. After successful login to your Google account, search for the driver of the printer you wish to connect. Download the driver. After successful installation, printer icon will be appeared in the main screen. Run the printer App.
- Page 122 User Manual ver.1.03 F. Allow the printer App. to access photos, media, and files in the device. Then connect the printer. G. From the printer, press OK when it asks to connect with the device (Z5).
- Page 123 If you select option icon at the top right corner, drop down menu will appear and you will see print option as shown below. Select [Print] to begin printing the image. If your wireless printer is properly connected to Z5, you will see the printer’s name displayed at left top corner as shown below.
- Page 124 User Manual ver.1.03 If you slide down the top bar or select pointing down arrow button, you can edit print setting such as paper size, color, and orientation. Selecting print icon as shown below will print the image with desired setting. ⚫...
- Page 125 User Manual ver.1.03 Under ‘Recorded Data’ and ‘Internal Storage’ folder located in left side of the screen, you will find specific make folder that is created whenever you captured an image or recorded data during diagnosis. Data recorded during [Data Analysis] is saved as ‘GTR’ format. Select the file and select [OPEN] to view the data.
- Page 126 User Manual ver.1.03 Select [PRINT] to proceed to the next step and you can choose printing option as shown below. Select [ALL Sample Print] to print all the pages or select [SPECIFY SAMPLE PRINT] to enter the range of sample to be printed. Then slide down the top bar or select pointing down arrow button, you can edit print setting such as paper size, color, and orientation.
- Page 127 Diagnostic Report Function 11.1 Not only can you save the reports as a PDF file in Z5’s memory, also, with the help of Bluetooth and Wi-Fi technology, you can print or send them to desired E-mail address. Selecting [Diagnostic Report] in main screen, as shown above, allows you to view the...
- Page 128 ⚫ Pre-repair Scan In order to create a diagnostic report, you must start from selecting [DIAGNOSIS] from Z5 main menu to perform [System Search] on the vehicle. Please refer to [5.2 System Search & 5.3 DTC Analysis] of [Chapter 5. Diagnosis - General] in this manual for more details.
- Page 129 You can edit each entry if necessary. ➢ Date Automatically loaded from the system clock ➢ Customer information You need to enter manually if necessary. ➢ VIN Auto Read Select Auto Read button if you want to let Z5 read the VIN from the vehicle automatically.
- Page 130 A new report is created when you select [SAVE] button on the left. You can add the result of the current diagnostic session to the report as [Pre-repair Scan Result] by selecting [ADD] button. Once [Add] button is selected, Z5 will ask for confirmation.
- Page 131 User Manual ver.1.03 It will be noticeable that the status of the Pre-repair Scan Result is changed from “Not Saved” to data and time when the Result was saved. Also [ADD] button has been changed to [Overwrite]. If you want to delete the previously saved Pre-repair Scan Result and replace it with a new result, you can do so by repeating the System Search as explained above and selecting [Overwrite] button.
- Page 132 Z5 memory. Navigate the folders in the Z5 memory to find the image file, and selecting checkbox next to the image and pressing [OK] button will attach image to the report.
- Page 133 User Manual ver.1.03 When comment and attachment are ready, pressing [OK] button will complete the task. Added date and time will be displayed below Comment/Attachment title as shown below.
- Page 134 User Manual ver.1.03 11.3 Additional Functions Selecting upper arrow, as shown above in the red box, or touching any space in the slot will display additional functions such as [Edit Header info], [Print], [E-Mail], and [Save as PDF]. You can freely edit header information in the report, print, send as an email or save the report as PDF format.
- Page 135 With connection to the printer, you can print the diagnostic report by selecting [PRINT] among the additional functions. Please refer to [7.4. Data Printing] for more information about printer set up and installation of printer drivers to Z5 . Once [PRINT] button is selected, a pop-up menu where you can select desirable items that will be included in the printed report.
- Page 136 User Manual ver.1.03 ➢ Add Page Break If checked, Z5 will print the separate report for each of the selected item and put the header information at the head of each report. If not checked, all the selected items will be printed without break as a single report and the header information is printed in the first page only.
- Page 137 User Manual ver.1.03 Preview: Post-repair Scan Report Preview: comment Preview: Attachment...
- Page 138 User Manual ver.1.03 ⚫ Email With connection to the internet, you can send the report as an E-mail to the entered address. Once [E-Mail] button is selected, you can select desirable items in the report by selecting the checkbox next to the items. If [Add Page Break] is checked, the report will be saved separately for each item with identical header information on top of the report.
- Page 139 User Manual ver.1.03 ⚫ Save as PDF You can save the report as PDF file in the memory. Select [Save as PDF] button as shown below: Once [Save as PDF] button is selected, in the same manner as for report printing, you can select desirable items in the report by selecting the checkbox next to the items.
- Page 140 Warranty service is provided by the local distributor in the country where the product was originally shipped to. In a situation when the Z5 base unit needs to be returned to Korea for warranty service, EZDS will cover the freight cost for return trip of the Z5 base unit for repair service.
- Page 141 EZDS. YOU ARE REQUIRED TO REGISTER Z5 AND USER INFORMATION TO ZENITH WEBSITE WHEN THE PRODUCT IS DELIEVERED TO YOU WITHOUT DELAY. EZDS HOLDS THE RIGHT TO REFUSE PROVISION OF ANY SERVICE FOR THE PRODUCT THAT HAS NOT BEEN REGISTERED.
- Page 142 User Manual ver.1.03 A.2. Discard of used equipment According to the European Union’s WEEE directive, this symbol means that products sold into EU countries must dispose electrical device and/ or its battery separately from household waste. Disposing of the device separately will help conserve resources and energy and contribute to human health and environment protection.
- Page 143 User Manual ver.1.03 FCC compliance information This device complies with Part 15 of the FCC’s Rules. Operation is subject to the following two Conditions: • This device may not cause harmful interference, and • This device must accept any interference received, including interference that may cause undesirable operation.
- Page 144 User Manual ver.1.03 Most compliance for this requirement is stated from the specification of the frequency generation portion of the device and not necessarily through additional testing. Manufacturer Head Office: A-1405 Hyundai Intel. Ind. Center, 11 Beopwon-ro 11-gil, Songpa-gu, Trade name: EZDS Co., Ltd Trademark:...