Table of Contents
Advertisement
Advertisement
Table of Contents

Related Manuals for Samsung SMARTCAM SNH-V6431BN

Summary of Contents for Samsung SMARTCAM SNH-V6431BN
- Page 1 SAMSUNG SMARTCAM User Manual SNH-V6431BN 0678...
- Page 2 This device complies with Industry Canada licence-exempt RSS standard(s). Operation is subject to the following two conditions: (1) this device may not cause interference, and (2) this device must accept any interference, including interference that may cause Samsung SmartCam undesired operation of the device. User Manual Operational Description The operational description shall fulfil the requirements of Rule Part 2.1033(b)(4).
- Page 3 Instructions & Warranty • When using the product for children’s care, be careful to keep the product out of children’s reach. The manufacturer is not responsible for any loss or radio/TV interference caused by • The product partially contains component which might cause respiration difficulty. unauthorized modification of the product.
-
Page 4: Table Of Contents
Contents GettinG Started appendix Features ……………………………………………………… 5 Specifications ………………………………………………… 26 What’s Included ……………………………………………… 6 Troubleshooting ……………………………………………… 29 Part names and functions …………………………………… 7 inStallation & network ConneCtion Installation …………………………………………………… 9 Network Connection and Settings …………………………… 11 MonitorinG Registration …………………………………………………… 12 Live Video ……………………………………………………... -
Page 5: Getting Started
Features • dedicated wi-Fi product - The camera is registered through the Wi-Fi connection. • easy to install - The Wi-Fi Direct button allows easy connection to a wireless router. - Simply visit the home page (www.samsungsmartcam.com) and download and install the program without a separate installer program. -
Page 6: What's Included
What’s Included Check for components when opening the product package. Camera Power adapter and cable Warranty Card GPL Lisence Tapping screw Plastic anchor Keep the packing container. You will need the serial number later to register the camera. 6 · English... -
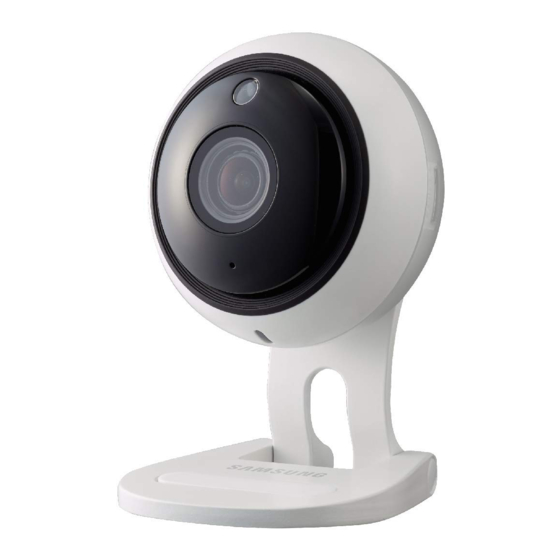
Page 7: Part Names And Functions
Part names and functions luminance Sensor Bracket knob Detects light levels where the camera is placed. Connect the camera and bracket. Night vision mode changes according to detection result. wi-Fi direct button Wi-Fi is used for wireless communication between Camera lens camera and smartphone. - Page 8 power Supply ❖ led status LED indicator shows operational status with colors. Plug-in the camera power adapter to the wall outlet and connect the camera as Refer to table below for detailed meaning of the LED indicator. shown. Color Status Make sure to use the provided power adaptor.
-
Page 9: Installation
Installation precautions Install the camera in a location with a good Wi-Fi signal and no interference. & Keep it away from humidity such as around the humidifier. nStallation Keep it away from direct sunlight, strong light or dust; install it in a place with clear view. -
Page 10: Adjusting The Camera Angle
when installing on a concrete wall Insert a screw in each of the 2 holes in the wall, and tighten the screws using a Phillips screwdriver. Fix the bracket on the wall using screws and anchors. First, mark the wall on which the Connect the adapter plug to the power camera is to be installed as shown in the terminal of the camera. -
Page 11: Network Connection And Settings
Connection using the wi-Fi direct function Network Connection and Settings What is Wi-Fi Direct? precautions Using Wi-Fi Direct, you can easily connect your camera to a router without a cable. When the power is connected, the power status LED lights up in red and • The wireless network access may fail, depending on the communications starts blinking when boot-up is complete. -
Page 12: Registration
Registration The initial settings for SNH-V6431BN can only be done through smartphones. For detailed information on camera registration, please refer to the mobile manual. pC oS requirement Windows onitorinG Windows 7/8 or higher is supported Mac OSX or higher is supported Starting SmartCam registration event alarm... - Page 13 ❖ plug in installation Click <install> to begin the installation. You can only see the camera image after installing a plug-in. If you login or click <Starting SmartCam> in a PC where the plug in is not installed, the installation message window will pop up. When you install the plug in, the web browser will be terminated and you need to launch it again.
- Page 14 For Mac Enter MAC PC password and click <install Software>. Click <Continue>. Installation has completed. Click <install>. 14 · English...
- Page 15 Enter the requested information, and click <Sign Up>. if the camera is already registered According to the network connection and setting, click <next> when the camera LED turns into green. • ID : Using alphabetical characters and numbers, make a combination using 8 to 14 letters.
- Page 16 After adding the camera, click <Yes> in the wireless network setup pop-up Serial number can be found the label on the side of the packaging or on the rear of the window. product. The computer and the camera has to be on the same network router to auto detect the cameras.
-
Page 17: Live Video
Monitoring options Live Video Select a camera from the camera list at the upper left hand of the screen. The gray icon indicates the camera is inactive so you cannot monitor it right now. Enter the camera password and click <ok>. Check on <Remember>... - Page 18 Item Description Item Description Hide/unhide detailed If Night Vision is set <ON>, it will automatically switch to black Click on the [ ] icon to unhide or hide detailed setting menu. menu and white mode in the dark condition and then the IR lamp will Night Vision automatically operate.
-
Page 19: Setup
Item Description Setup Serial number You can confirm the serial number. Click the <Modify>, you can change the Camera password. Basic info Camera password Enter the current camera password, and type a new Camera password. Camera Name Click the <Modify>, you can change the camera name. You can check the current version and the latest version of your Firmware Version camera S/W. - Page 20 ❖ Firmware update network If the currently used S/W is not of the latest version, update it. If you are using the latest version, then the firmware will not be activated. <Wireless Network> Click <Firmware>. Click the < > icon to update the firmware. When the firmware update is finished, the camera will reboot.
- Page 21 time Item Description You will see a list of APs (Access Point) available. Select a desired one AP (Access Point) list from the list of APs (Access Point). You can access the network by entering the password set for the AP (Access Point) wireless router.
- Page 22 The time will synchronize with the NTP(Network Time Protocol) server automatically. Sd card For this, Internet connection is required. You need to set the timezone correctly to obtain the exact time setting. The time displayed without Internet connection may not be accurate. When an event occurs, it is saved in an SD card.
-
Page 23: Event Alarm
Turn off the camera power or set it to <Off> before removing the micro SD card. If you Event Alarm fail to do this, the data in the micro SD camera may be damaged. Please note that the content of a micro SD card used for other purposes may be deleted when it is mounted in the camera. -
Page 24: Playback
Item Description Playback Downloads a manually recorded video/motion/audio event saved on the SD card to the PC. You can play a video saved on the SD card and download it to the PC. Downloading is only available when the computer and the camera are connected to the same network router. -
Page 25: Information
Support Information My account You can download the Smart Cam mobile app and its user manual. If you want to change the member information, click on <Account>. Select the item (password, or email address) and enter your information. -
Page 26: Specifications
Specifications Specifications Item Description Video ppendix Imaging Device 1/3" CMOS Effective Pixels 1944(H) x 1092(V) Low Light Performance Color : 0.3 Lux, B/W : 0 Lux with IR Lens Angular Field of View(D / V / H) 130° / 63° / 113° Specifications Focus Control Fixed Focus... - Page 27 Item Description Item Description Motion detection Supported Supported OS - PC : Windows 7, 8 or higher, MAC OS X or higher Webviewer/App viewer Audio detection Supported - Mobile : iOS 8 or higher, Android Jelly Bean or higher (Not all Android phones are compatible) Motion Detection, Audio Detection, Motion Zone Selection (police Alarm trigger...
- Page 28 product appearance unit: mm (inch) 42.5 Ø69 28 · English...
-
Page 29: Troubleshooting
Problem Action Troubleshooting The video from the - The video from the camera can be delayed according to a network delay. camera is temporarily Please check if the camera is installed in a place of proper wireless Internet lost. communications. If you encounter a problem with your system, see the table below to solve the problem as quickly and easily as possible. - Page 30 Hanwha Techwin cares for the environment at all product manufacturing stages, and is taking measures to provide customers with more environmentally friendly products. The Eco mark represents Hanwha Techwin's devotion to creating environmentally friendly products, and indicates that the product satisfies the EU RoHS Directive. Correct Disposal of This Product (Waste Electrical &...
- Page 31 Head Office 6, Pangyo-ro 319 beon-gil, Bundang-gu, Seongnam-si, Gyeonggi-do, 463-400 Rep. of KOREA Tel : +82.70.7147.8753 Fax : +82.31.8018.3740 www.hanwha-security.com Hanwha Techwin America 500 Frank W. Burr Blvd. Suite 43 Teaneck, NJ 07666 Tel +1.877.349.3149 Hanwha Techwin Europe Heriot House, Heriot Road, Chertsey, Surrey, KT16 9DT, United Kingdom Tel#1 00800.801.08022 Tel#2 +31.77.326.1580...