Philips BDP2500 Service Manual
Hide thumbs
Also See for BDP2500:
- User manual (49 pages) ,
- Specifications (3 pages) ,
- User manual (48 pages)
Advertisement
Quick Links
Blu-ray Disc Player
©
Copyright 2009 Philips Consumer Electronics B.V. Eindhoven, The Netherlands
All rights reserved. No part of this publication may be reproduced, stored in a retrieval system or
transmitted, in any form or by any means, electronic, mechanical, photocopying, or otherwise without
the prior permission of Philips.
Published by SL 0945 BU AVM
Version 1.3
TABLE OF CONTENTS
Technical Specifi cations ....................................................... 1-2
Safety Instruction, Warning & Notes ..................................... 1-3
QSG & DFU Instruction ........................................................... 2
Mechanical and Dismantling Instructions ................................ 3
Software Version & Upgrades, Region Code Change ............. 4
Trouble Shooting Chart ........................................................... 5
Set Wiring Diagram ................................................................. 6
Electrical Diagrams and PCB layouts ...................................... 7
Set Mechanical Exploded view & Parts List ............................ 8
Revision List ............................................................................ 9
Printed in The Netherlands
Subject to modification
BDP2500
/12/05/98/51
Page
CLASS 1
LASER PRODUCT
©
3141 785 34433
Advertisement

Related Manuals for Philips BDP2500


Summary of Contents for Philips BDP2500
- Page 1 LASER PRODUCT © Copyright 2009 Philips Consumer Electronics B.V. Eindhoven, The Netherlands All rights reserved. No part of this publication may be reproduced, stored in a retrieval system or transmitted, in any form or by any means, electronic, mechanical, photocopying, or otherwise without the prior permission of Philips.
- Page 2 Specifications Note Video Audio Main unit ; /98 110~240V ~AC, ~50~60Hz; /51 220~230V ~AC, ~50Hz Accessories supplied User manual...
- Page 3 Safety instruction, Warning & Notes Safety instruction 1. General safety 2.Laser safety Safety regulations require that during a repair: This unit employs a laser. Only qualified service personnel . Connect the unit to the mains via an isolation transformer. may remove the cover, or attempt to service this device .
- Page 4 Warning 1.General 2. Laser . All ICs and many other semiconductors are susceptible to . The use of optical instruments with this product, will electrostatic discharges (ESD). Careless handing during increase eye hazard. . Only qualified service personnel may remove the cover repair can reduce life drastically.
- Page 5 - lead free BGA-ICs will be delivered in so-called respected by the workshop during a repair: ‘dry-packaging’ (sealed pack including a silica gel Use only lead-free solder alloy Philips SAC305 with pack) to protect the IC against moisture. After order code 0622 149 00106. If lead-free solder-paste is...
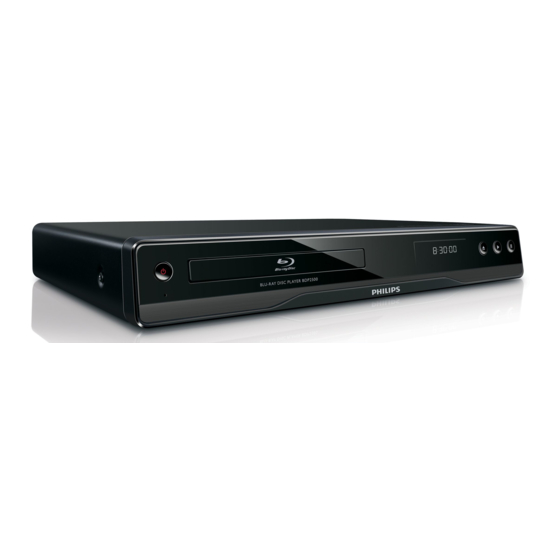
- Page 6 Product overview Main unit Disc compartment IR sensor Point the remote control at the IR sensor. Display panel Open or close the disc compartment. Start or resume play. Pause play. Front panel display Description LOADING UNSUPP The disc is not supported. HDMI ERR FASTFWD FASTBWD...
- Page 7 Remote control BONUSVIEW TOP MENU Access the home menu. DISC MENU / POP-UP MENU Navigate through the menus. BACK Return to a previous display menu. SUBTITLE Select a subtitle language on a disc. AUDIO Select an audio language or channel on a disc. Alphanumeric buttons Select an item to play.
- Page 8 Mechanical and Dismantling Instructions Dismantling Instruction Detailed information please refer to the model set. The following guidelines show how to dismantle the player. Step1: Remove 5 screws around the Top Cover, and then remove the Top Cover (Figure 1). Figure 1 Step2: If it is necessary to dismantle Loader or Front Panel, the Front door should be removed first.
- Page 9 Mechanical and Dismantling Instructions Detailed information please refer to the model set. Dismantling Instruction Step3: If the tray can’t open in normal way, you can make it through the instruction as below (Figure 3). Note: Make sure to operate gently otherwise the guider would be damaged. Figure 3 Step4: Dismantling Front Panel, disconnect the connectors (J306, CN502), need release 3 snaps of Front Panel and 2 snaps of bottom cabinet, and cut off 2 twist tie then gently pull the Panel out from the set.
- Page 10 Mechanical and Dismantling Instructions Dismantling Instruction Detailed information please refer to the model set. Step5: Dismantling Loader, disconnect the 2 connector (J317, J320) aiming in the below figure, and remove 4 screws that connects the loader and the bottom cabinet. (Figure 5) Figure 5 Step6: Dismantling Main Board, first disconnect the connector ( ), and then remove 4 screws.
- Page 11 5) Follow the instructions on the TV screen to confirm update operation. Remark: * Once software update is complete, this player automatically turns to 1. There is only 12/05 at present ,if PHILIPS add others regions, standby. we will provide the method change DVD region.
- Page 12 Trouble shooting chart No display on VFD, and buttons do Not work No display on VFD, and buttons do Not work Check every supply voltage on main board is Refer to Power supply board part Normal Check5V,+12V,-12V Fix the connection JP1 on front board voltage on the power and CN504 on power board and front board...
- Page 13 Trouble shooting chart No audio output No audio output Check whether the audio signal Check the U915 power supply is right from the U915.9,10,11,12 Replace the U915 Check whether the audio Check U916 power supply signal is right from the (U916.4=-12V and U916.8=12V) U916.7 and U916.1 Replace the U916...
- Page 14 Trouble shooting chart Remote control does Not work Remote control does Not work Check whether the remote Replace the battery for remote controller’s battery controller exhausted or Not. Check the IR1 power supply is OK,IR1.3 is Check the VCC net No front board about 5V Check the IR output of Check the VCC of U2...
- Page 15 Trouble shooting chart Can’t read disc or can’t open the disk door Can’t read disc or can’t open the disk door Check whether Check the connection of the 4PIN cable DVD loader running is from J326 on the main Board. Normal Check SATA cable from Fix the connection the SATA cable...
- Page 16 Trouble shooting chart No VFD display No VFD display Check whether the voltage Fix the connection power board +5V,+12V on the front board CN502 & front board JP1 is Normal work or Not. Check whether Check DC5V to AC 24V switch circuit voltage between F1&VFD F2 is AC24V...
- Page 17 BDP2500 Wiring Diagram Ethernet Component L-R-CVBS-COAX HDMI DC in DC/DC 3.3V DC/DC 1.2V CLOCK SATA DDR2-0H MTK8520 ASA LOADER NAND FLASH DDR2-0L serial flash +12V DC/DC 1.8V +12V P.11 ResetBtn POW_SW switch board LED-2 front board LED-...
- Page 18 Front Board Electric Diagram: +12V MCU CIRCUIT 100K MXOUT MXIN VFD1 VFD-54 +5VSTANBY 8MHz +5VSTANBY 27pF 27pF 3DG3904M 3DG3904M RESET Circuit 0.1uF 3.3uF/50V +5VSTANBY 3DG3904M 3CG3906M R17 0 IR_IN M_IR 4.7K PA3/PFD PA4/TMR 3.3uF/50V -24V PA5/INT BZX79C6V2 3DG3904M PC ON POWEK LED- POW_SW...
- Page 19 Switch Board Electric Diagram: 4PIN/2.0mm POW_SW LED1 TAC020 47pF 47pF LED03R SWITCH BOARD...
- Page 20 Power Board Electric Diagram: U504 KA278R12 +12V CY504 C501 102/400Vac 103/1KV D505 D507 R511 RL207 RL207 R512 D503 CE503 R516 SR3100 1000uF/16V 100k CE504 CE501 1000uF/16V 100uF/400V R517 C511 D506 D508 470k 4.7UF RL207 RL207 FB501 D501 2.2uH FR107 R538 T501 EF25 +12V...
- Page 21 Main Board Electric Diagram: Power CTP1 5V_USB PWR1 +5VIN 1.1V CON8P-2.54 CTP2 +5VIN CTP3 CB992 FB/0805 CTP4 0.1uF CE567 220uF/10V CTP5 1.1V_LX 1.1V_FB FB555 FB/0805 1.1V Power Circuit 10uH/LQH66SSN2R2M03 CTP6 CTP7 D519 CE594 CE595 CB940 + CE8 CB939 CB1001 0SR360 22uF/10V 22uF/10V 0.1uF...
- Page 22 Main Board Electric Diagram: DDR PART ACH 1.8V 1.8V U101 U102 U107A A_DQ0 A_RA0 A_DQ16 A_RA0 A_DQ4 A_RA1 A_DQ22 A_RA1 A_DQ0 CB198 A_DQ7 A_RA2 A_DQ21 A_RA2 VCC18IO ADQ0 0.1uF A_DQ1 0.1uF A_DQ2 A_RA3 A_DQ19 A_RA3 VCC18IO ADQ1 A_DQ2 A_DQ3 A_RA4 A_DQ20 A_RA4 VCC18IO...
- Page 23 U107B Main Board Electric Diagram: DDR PART BCH U103 U104 B_DQ0 B_RA0 B_DQ18 B_RA0 1.8V B_DQ0 B_DQ4 B_RA1 B_DQ20 B_RA1 BDQ0 B_DQ1 B_DQ2 B_RA2 B_DQ23 B_RA2 BDQ1 B_DQ2 B_DQ1 B_RA3 B_DQ19 B_RA3 AA25 BDQ2 B_DQ3 B_DQ6 B_RA4 B_DQ17 B_RA4 BDQ3 B_DQ4 CB129 CB154...
- Page 24 Main Board Electric Diagram: AV OUTPUT FB200 FB/0603 AVDD33_APLL 3.3VA C201 U107C R243 Differential Signal ! 4.7uF CB202 R242 No Through Hole ! 0603-C 0.1uF R1235 100 ohm - Impedance D201 AVDD33_APLL AOMCLK_R TX2+ F_TX2+ AVDD33_APLL AOMCLK AOBCK_R L855 TDK ACM2012H-900-2P/0 AVSS33_APLL AOBCK FB201...
- Page 25 Main Board Electric Diagram: FLASH R288 U107E R287 1.2VA 3.3V 3.3V CB311 SFCS SFCS U907 SFCK AVDD12_STX1 FB301 FB/0603 R1172 SFCK AVDD12_STX1 0.1uF SF DI AVDD12_SRX1 FB302 FB/0603 R304 SFCS SFDI AVDD12_SRX1 SFDO SF DI HOLD# RESET# SFDO HOLD RESET# (1,4,9) TP1026 SFCS2 CB301...
- Page 26 Main Board Electric Diagram: PART 4 U107D 1.1V ETMDIO VCCK ETMDIO ETMDIO D516 ETMDC VCCK ETMDC ETMDC ETTXEN USBP0 USBP0 1:GND ETTXEN VCCK ETTXEN 2:D+ ETTXER USBP0 ETTXER VCCK ETTXER ETTXCLK USBM0 USBM0 USBM0 ETTXCLK (9) VCCK ETTXCLK ETTXD0 USB_5V 3:D- VCCK ETTXD0...
- Page 27 7-10 7-10 Main Board Electric Diagram: VIDEO OUTPUT & SPDIF OUTPUT Low Impedance ow Impedance circuit with Real Line CB500 L871 R501 100R 0.1uF FB500R COAXOUT Hight Impedance Hight Impedance circuit with Broken Line ASPDIF R500 C501 VCC_CVBS 100pF 100R FB581 FB/0805 VCC_6363 COAXOUT OUTOUT...
- Page 28 7-11 7-11 Main Board Electric Diagram: AUDIO OUTPUT AK4385 U914 +5VIN R1358 100R 78L05 L859 100uH AOMCLK +12V AOMCLK AOBCK AOBCK AOLRCK AOLRCK R1359 100R CE603 C611 C625 + CE604 Q213 220uF/10V 0.1uF 4.7uF 10uF/50V AOSDATA0 AOSDATA0 9012 AOSDATA1 AOSDATA1 AOSDATA2 AOSDATA2 AOSDATA3...
- Page 29 7-12 7-12 Main Board Electric Diagram: LAN 8700 L3V3IO LAN3V3 FB578 3.3V FB579 L3V3IO LAN3V3 FB/0603 FB/0603 CE591 220uF/10v CE590 CB975 L3V3IO 220uF/10v 0.1uF CB976 CB977 CB978 CB979 CB980 0.1uF 0.1uF 0.1uF 0.1uF 0.1uF R1294 L3V3IO 0805-R LAN3V3 R1296 PWFBOUT1 VDD_CORE R1299 NC/0R...
- Page 30 7-13 7-13 Front Board PCB-layout (Top and Bottom side):...
- Page 31 7-14 7-14 Power Board Electric Diagram: Switch Board Electric Diagram:...
- Page 32 7-15 7-15 Main Board Print-layout (Top side):...
- Page 33 7-16 7-16 Main Board Print-layout (Bottom side):...
- Page 34 Exploded view for BDP2500/12/51: It's a general mechanical exploded view for BDP2500/12/51, and pls refer to the model set for detailed information. Assy1 includes components: 2.3.4.6.7...
- Page 35 Exloded view for BDP2500/05: It's a general mechanical exploded view for BDP2500/05, and pls refer to the model set for detailed information. Assy1 includes components: 2.3.4.6.7...
- Page 36 Exploded view for BDP2500/98: It's a general mechanical exploded view for BDP2500/98, pls refer to the model set for detailed information. Assy1 includes components:2.3.4.6.7...
- Page 37 BDP2500/12/05/51 SERVICE PARTS 12NC No. Description Q'ty 996510029506 ASSY-SW BD 996510029504 ASSY-PW BD 996510029508 BOTTOM CABINET 996510029502 ASSY-MAIN BD 996510029515 BACK PANEL 996510029501 POWER CORD (For /12/51) 996510029559 POWER CORD (For /05) 996510029503 TOP COVER 996510025832 ASA BOARD P021-C 996510029507...
- Page 38 BDP2500/98 SERVICE PARTLIST ELECTRICAL PARTLIST ASSY-PW BD COMPONENT PARTLIST 12NC No. Description Q'ty 12NC NO. Description Q'ty 996510029502 ASSY-MAIN BD 996510013568 D501 DIODE FR107 996510029506 ASSY-SW BD D502 996510013568 DIODE FR107 996510029504 ASSY-PW BD D503 996500025702 DIODE SR3100 996510029505 ASSY-FE BD...
- Page 39 REVISION LIST Version 1.0 * Initial release for BDP2500/12/05 Version 1.1 * Correction: 19 996510025832 BLU-RAY DISC MODULE (was ASA BOARD P021-C) Version 1.2 * Adding BDP2500/98 Version 1.3 * Adding BDP2500/51...