Panasonic PT-FW430E Operating Instructions Manual
Hide thumbs
Also See for PT-FW430E:
- Operating instructions manual (46 pages) ,
- Specifications (6 pages)
Table of Contents
Advertisement
Quick Links
Thank you for purchasing a Panasonic Projector.
Before operating this product, please read the instructions carefully and save this manual
J
for future use.
For information on using the product via a network, refer to "Operating Instructions – Network
Operations".
W0411KT0 -PS
Operating Instructions
LCD Projector
ON (G)
LAMP
TEMP
FILTER
STANDBY (R)
Projector Operations
PT-FW430E
Model No.
PT-FX400E
LENS SHIFT
SHIFT LOCK
FOCUS
ZOOM
Commercial Use
ENGLISH
TQBJ0387
Advertisement
Table of Contents

Related Manuals for Panasonic PT-FW430E


Summary of Contents for Panasonic PT-FW430E
- Page 1 SHIFT LOCK FOCUS ZOOM Thank you for purchasing a Panasonic Projector. Before operating this product, please read the instructions carefully and save this manual for future use. For information on using the product via a network, refer to “Operating Instructions – Network Operations”.
-
Page 2: Read This First
Read this first! Read this first! WARNING: THIS APPARATUS MUST BE EARTHED. WARNING: To prevent damage which may result in fire or shock hazard, do not expose this appliance to rain or moisture. Machine Noise Information Ordinance 3. GSGV, January 18, 1991: The sound pressure level at the operator position is equal or less than 70 dB (A) according to ISO 7779. - Page 3 Read this first! WARNING: POWER „ The wall outlet or the circuit breaker shall be installed near the equipment and shall be easily accessible when problems occur. If the following problems occur, cut off the power supply immediately. Continued use of the projector in these conditions will result in fire or electric shock. If foreign objects or water get inside the projector, cut off the power supply.
- Page 4 If liquid enters inside of the projector, consult your dealer. Particular attention must be paid to children. Use the ceiling mount bracket specified by Panasonic. Defects in the ceiling mount bracket will result in falling accidents. Attach the supplied safety cable to the ceiling mount bracket to prevent the projector from falling down.
- Page 5 Read this first! WARNING: ACCESSORIES „ Do not use or handle the batteries improperly, and refer to the following. Failure to observe this will cause burns, batteries to leak, overheat, explode or catch fire. Do not use unspecified batteries. Do not disassemble dry cell batteries. Do not heat the batteries or place them into water or fire.
- Page 6 Read this first! CAUTION: ON USE/INSTALLATION „ Do not put your weight on this projector. You could fall or the projector could break, and injury will result. Be especially careful not to let young children stand or sit on the projector. Do not place the projector in extremely hot locations.
- Page 7 Easy setup and Quick steps improved serviceability For details, see the corresponding pages. The 2x zoom lens and the lens shift 1. Set up your projector. allow more flexible setup of the Æ page 19) projector. Improved color reproducibility and fine display 2.
-
Page 8: Table Of Contents
Contents Be sure to read “Read this first!”. ( pages 2 to 6) Powering up the projector ........27 Important Information Making adjustment and selection......27 Read this first! ........... 2 Powering off the projector ........28 Precautions for Use......... 10 Direct power off function ........28 Cautions when transporting .........10 Projecting .......... - Page 9 Serial terminal ............75 STATUS ...............54 Other terminals ............78 PROJECTOR ID ..........54 Two window display combination list (PT-FW430E Only) ........80 INITIAL START UP ..........54 List of compatible signals ........81 PROJECTION METHOD ........55 Restoring the MENU LOCK PASSWORD to HIGH ALTITUDE MODE ........55 default............82...
-
Page 10: Precautions For Use
Precautions for Use Cautions when transporting When transporting the projector, hold it securely by its bottom and avoid excessive vibration and impacts. Doing so may damage the internal parts and result in malfunctions. Do not transport the projector with the adjustable feet extended. Doing so may damage the adjustable feet. Cautions when installing Do not set up the projector outdoors. -
Page 11: Security
Make your password as difficult to guess as possible. Change your password periodically. Panasonic or its affiliate company never inquires a password directly to a customer. Do not tell your password in case you receive such an inquiry. The connecting network must be secured by firewall or others. -
Page 12: Cautions On Use
ERAL PUBLIC LICENSE respectively. As for the terms and conditions, please refer to the software licence of the supplied CD-ROM. If you wish to ask any questions as to the software, please contact (sav.pj.gpl.pavc@ml.jp.panasonic.com) by email. Pursuant to at the directive 2004/108/EC, article 9(2) -
Page 13: Accessories
Precautions for Use Accessories Make sure the following accessories are provided with your projector. Numbers in the brackets ( ) show the number of accessories. Wireless remote control unit (x1) Power cord (x1) CD-ROM (x1) Batteries (AA/R6 type) (x2) (N2QAYB000669) (TXFSX01RTPZ) (TXFQB02VKP7) (for remote control unit) -
Page 14: Start-Up Display
RETURN (between 1400 m (4593 ft)and SELECT 2700 m (8858 ft) above sea level) ENTER (screen for PT-FW430E) Press <ENTER> to complete the setting. Note If you press [RETURN] in the [INITIAL SETTING] menu, you can go back to the [LANGUAGE] menu. -
Page 15: About Your Projector
About Your Projector Remote control (8) <ID SET> Button (15) Specifies the ID of the remote control, when operating a system with multiple projector units. page 18) Æ (9) <ID ALL> Button Makes the remote control operate any projector, when operating a system with multiple projector units. -
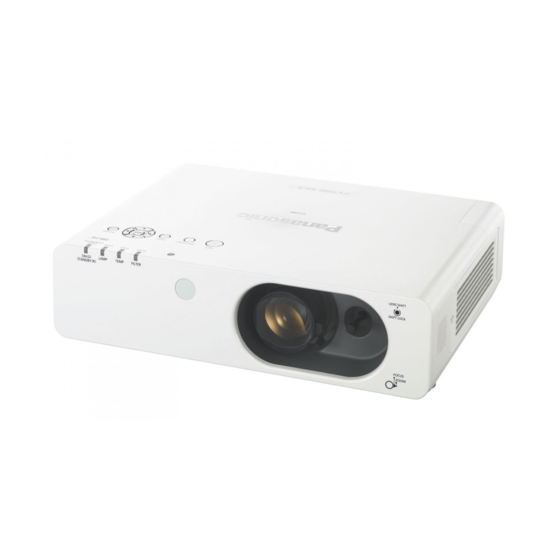
Page 16: Projector Body
About Your Projector Projector body (3) (4)(5)(6) (14) (15) (1) (2) (16) ■ Bottom view (19) (11) (13) (17) (18) (13) (12) (10) (20) (1) Power indicator (STANDBY(R) / ON(G)) (16) Air exhaust port Indicates the power supply status (17) AC IN terminal (2) CONTROL PANEL ( page 17) Æ... -
Page 17: Control Panel
About Your Projector CONTROL PANEL (1) Power < > button Turns power on/off when the main power switch on the rear of the projector is [ON]. (2) <INPUT SELECT> button Selects the input signal. ( page 30) Æ (3) <MENU> button Displays the MENU screen. -
Page 18: Using Remote Control
Using Remote control Using Remote control Installing and removing batteries Open the cover Install batteries and close the cover (Insert the – side first.) Remove the batteries in the reverse order of installation. Setting Remote control ID numbers When you use the system with multiple projectors, you can operate all the projectors simultaneously or each projector individually using single remote control, if unique ID number is assigned to each projector. -
Page 19: Setting Up
Setting up Projection method You can use the projector with any of the following 4 projection methods. To set the desired method in the projector. Mounting on the ceiling and Setting on a desk/floor and projecting forward projecting from rear (Using translucent screen) Menu Method... -
Page 20: Screen Size And Throw Distance
Attention Before installing, please read “Precautions for Use” ( Æ pages 10 to 13) Projection distance for PT-FW430E (All measurements below are approximate and may differ slightly from the actual measurements.) Projection size For 4:3 aspect ratio For 16:9 aspect ratio... - Page 21 Setting up Projection distance for PT-FX400E (All measurements below are approximate and may differ slightly from the actual measurements.) Projection size For 4:3 aspect ratio For 16:9 aspect ratio Minimum distance Maximum distance Minimum distance Maximum distance Screen diagonal (SD) (LW) (LT) (LW)
-
Page 22: Adjusting Front Adjustable Feet
Horizontal shift In accordance with the position of the screen and the projector, shift the lens shift lever right or left. PT-FW430E : Up to about 24 % of the projection PT-FX400E : Up to about 27 % of the projection... - Page 23 Setting up Vertical shift In accordance with the position of the screen and the projector, shift the lens shift lever up or down. Direction C Screen Shifting the lever to the direction D Direction D Shifting the lever to the direction C PT-FW430 E: Up to about 51 % of the projection PT-FX400 E:...
- Page 24 ON (G) LAMP TEMP FILTER STANDBY (R) Screen Lens center Shift range of the screen, when the projector position is fixed ●PT-FW430E (16:10) ●PT-FX400E Shift range Shift range Screen without lens shift Screen without lens shift Screen without lens shift FILTER...
-
Page 25: Connections
Connections Before connecting to the projector Read carefully the instruction manual for the device to be connected. Turn off the power switch of the devices before connecting cables. If any connection cable is not supplied with the device, or if no optional cable is available for connection of the device, prepare a necessary system connection cable to suit the device. -
Page 26: Powering On/Off
Powering ON/OFF Connecting the power cord Be sure to Insert the attached power cord securely to its base to prevent it from coming off. Before connecting the power cord, confirm that the MAIN POWER switch is in the “ ” (OFF) position. Installation Removal Insert the plug securely until its right... -
Page 27: Powering Up The Projector
Powering ON/OFF Powering up the projector Connect the power plug to the outlet. Making adjustment and (AC100 V-240 V 50 Hz-60 Hz) selection Press the [ON] side of the <MAIN POWER> switch to turn on the power. It is recommended that the images are projected After a while, the <Power indicator>... -
Page 28: Powering Off The Projector
Powering ON/OFF Powering off the projector 1) 2) 1) 2) Press the POWER ( ) button. Direct power off function The “POWER OFF” confirmation screen appears. Pressing any button other than the POWER Even if you turn the <MAIN POWER> switch [OFF] ) button or leaving the projector idle for during projection or just after the lamp turns off, the 10 seconds will clear the “POWER OFF”... -
Page 29: Projecting
Projecting Æ Check the connections of the peripheral devices and connection of the power cord ( page 26) and switch on the Æ power ( page 27) to start the projector. Select the image and adjust the state of the image. Screw [Lens shift lever] clockwise to Selecting the image lock [Lens shift lever]. -
Page 30: Basic Operations Using The Remote Control
Basic operations using the remote control Using the FREEZE function You can freeze the projected image and stop the sound temporarily, regardless of the playing condition of the connected device. button Press <FREEZE> button on the remote control. The image freezes and the sound is muted. Press <FREEZE>... -
Page 31: Adjusting The Display Position Automatically
Basic operations using the remote control Adjusting the display position Using the function buttons automatically Three function buttons (<FUNC 1> to <FUNC 3>) on the remote control can be assigned to any frequent This function allows you to automatically adjust operations. -
Page 32: Controlling The Volume Of The Speaker
Basic operations using the remote control Controlling the volume of the speaker You can control the volume of the projector’s speaker or audio output. button Press <VOLUME> (+/-) button on the remote control. + button increases the volume - button decreases the volume - ENGLISH... -
Page 33: Menu Navigation
Menu Navigation For some items with a setting screen and a bar Navigating through the menu scale, the MENU display disappears and only the selected item (individual setting screen) will Operating procedure appear as shown in the diagram below. Press the <MENU> button. KEYSTONE The [MAIN MENU] screen appears. -
Page 34: Main Menu
CLOCK PHASE OVER SCAN ASPECT NORMAL * FRAME LOCK *1 : PT-FW430E only Appears only when [H FIT] is selected for the [ASPECT] of the network input. *2 : Depends on signal input. Note Sub-menu items and factory default values differ depending on the selected input terminal. - Page 35 Menu Navigation LANGUAGE [ SECURITY [ Æ Details ( page 46) Sub-menu item Default Page DISPLAY OPTION[ PASSWORD PASSWORD CHANGE Factory DISPLAY SETTING Sub-menu item Page default TEXT CHANGE ON-SCREEN DISPLAY MENU LOCK DVI-I IN MENU LOCK PASSWORD HDMI IN CONTROL DEVICE SETUP CLOSED CAPTION SETTING...
-
Page 36: Picture Menu
PICTURE menu CONTRAST Select [PICTURE] from the Main Menu (see “Navigating through the menu” on page 33), You can adjust the contrast of the colors. then select the item from the sub-menu. After selecting the item, press ◄► to set. Press ▲▼... -
Page 37: Color
PICTURE menu COLOR COLOR TEMPERATURE You can adjust the color saturation of the projected Please switch if the white areas of the image are image. bluish or reddish. Press ▲▼ to select [COLOR]. Press ▲▼ to select [COLOR TEMPERATURE]. Press ◄► or the <ENTER> button. Press ◄►... -
Page 38: Advanced Menu
PICTURE menu ADVANCED MENU DAYLIGHT VIEW This corrects images so that they appear vivid when Press ▲▼ to select the [ADVANCED projected under bright lighting. MENU]. Press ▲▼ to select [DAYLIGHT VIEW]. Press the <ENTER> button. Press ◄► or the <ENTER> button. The [ADVANCED MENU] screen appears. -
Page 39: Noise Reduction
PICTURE menu NOISE REDUCTION RGB/YP [Only for S-VIDEO and VIDEO signal input] [Only for RGB/YP signals input] This can be used to adjust pictures if they contain Set this function to [AUTO] for normal operation. interference as a result of poor quality of the input When [AUTO] does not provide a normal picture, signal. -
Page 40: Position Menu
[This adjustment is available only when the Lens shift may also result in keystone distortion. “ASPECT” of the PT-FW430E is set to “H FIT”] The result of correction may affect the aspect ratio and the size of the projected image. -
Page 41: Dot Clock
POSITION menu DOT CLOCK CLOCK PHASE [Available only for RGB (still image) signal input] Use this when the screen flickers or halos are Use this function to adjust and minimize the effect observed around contours. of interference caused by projection of patterns Press ▲▼... -
Page 42: Aspect
When wide signals * other than WXGA768, Press ◄► to change the setting. WIDE720, 1125 (1080)/50p, and 1125 (1080)/60p are detected, PT-FW430E [When 16:10 is selected]: The aspect ratio switches from WIDE NORMAL. The aspect ratio switches based on the input signals [When 16:9 is selected]: The aspect ratio switches and the screen format setting (16:10 or 16:9). - Page 43 POSITION menu WIDE FULL When standard * signals are input, the image is The image is projected using all the panel (screen) projected in the 16:9 aspect ratio. pixels. The input signals are converted to the When 15:9, 16:9 or 16:10 signals are input, the aspect ratio of the panel (screen).
- Page 44 POSITION menu PT-FX400E H-FIT When standard signals * are input, the aspect ratio is kept fixed. The image is projected using AUTO NORMAL WIDE all the panel pixels horizontally, and the vertical edges of the image are cropped. REAL H-FIT Input signal: SXGA S 4:3 FULL...
-
Page 45: Frame Lock
POSITION menu REAL FRAME LOCK The image is projected without size adjustment, [Only for RGB/DVI (analog) and HDMI signals keeping the resolution of the input signals. input] Settable when the input signals are smaller than Settable for specific computer signals. the number of the pixels of the projector’s LCD Set when the movie is distorted. -
Page 46: Language
LANGUAGE Select [LANGUAGE] from the Main Menu (see “Navigating through the menu” on page 33), then select the item from the sub-menu. After selecting the item, press ◄► to set. Remote Control Control Panel Changing the display language This lets you switch the on-screen display language. PICTURE POSITION LANGUAGE... -
Page 47: Display Option Menu
33), then select the item from the sub-menu. the computer for switching the image output. After selecting the item, press ◄► to set. Key command to Manufacturers switch the image Remote Control Control Panel Panasonic SAMSUNG acer SHARP TOSHIBA lenovo ON-SCREEN DISPLAY SONY You can set the on screen display. -
Page 48: Dvi-I In
DISPLAY OPTION menu DVI SIGNAL LEVEL DVI-I IN Each press of the button switches the settings as Change this setting if the image is not displayed shown below. properly while signals from an external device are 0-255 : PC 16-235 input to the DVI-I terminal of the projector. -
Page 49: Closed Caption Setting
DISPLAY OPTION menu CLOSED CAPTION SETTING SCREEN SETTING [Only for NTSC, 525i (480i) input] [PT-FW430E only] Set the closed caption display as follows. When the projection image aspect ratio is changed, the projector makes corrections to ensure the optimal Press ▲▼ to select [CLOSED images for the set screen size. -
Page 50: Startup Logo
S P A C E 1 2 3 4 5 6 7 8 9 0 DEFAULT The Panasonic logo is projected ! “ # $ % & ‘ * + / = ? LOGO _ ` | ~ ( ) <... -
Page 51: Signal Search
The entire projection area appears BLUE blue. The entire projection area appears BLACK black. DEFAULT The Panasonic logo is projected. LOGO The logo transferred by “Logo USER LOGO Transfer Software * ” is projected. *1 : “Logo Transfer Software” is included on the supplied CD-ROM. -
Page 52: Other Functions
You can pause the projection and mute the sound for the PT-FX400E, temporarily, regardless of the playing status of the and two ways for the connected device. PT-FW430E.) Still image Movie Pressing the <RETURN> button cancels the function. AV MUTE... - Page 53 DISPLAY OPTION menu DIGITAL ZOOM SIDE BY SIDE [PT-FW430E only] Two different input signals can be simultaneously projected. Pressing the <RETURN> button cancels the DIGITAL ZOOM function. You can enlarge the center area. You can also change the location of the area to be...
-
Page 54: Projector Setup Menu
PROJECTOR SETUP menu PROJECTOR ID Select [PROJECTOR SETUP] from the Main Menu (see “Navigating through the menu” on The projector has an ID number setting function that page 33), then select the item from the sub- helps the user to control two or more projectors either menu. -
Page 55: Projection Method
PROJECTOR SETUP menu Note PROJECTION METHOD Make sure to set this to [OFF] when you use the projector at elevations lower than 1400 m (4593 ft) above A projection scheme can be chosen depending on sea level. Set this to [ON] when you use the projector the installation of the projector. -
Page 56: Schedule
LAMP POWER NORMAL LAMP POWER • *1 : PT-FW430E only Press ▲▼ to select [STORE] and press the <ENTER> button. Note If you try to register a setting that would cause the lamp to flash for a short time, an error message will be displayed on the screen. -
Page 57: Eco Management
PROJECTOR SETUP menu Note ECO MANAGEMENT In following cases, [LAMP POWER] does not drop automatically. Can optimize lamp power and reduce the power • When [LAMP POWER] is [ECO]. consumption according to the application. Immediately after the lamp is turned on or immediately •... -
Page 58: Emulate
PROJECTOR SETUP menu EMULATE FUNCTION BUTTON When using the control commands for one of our Three function buttons (<FUNC 1> to <FUNC 3>) on projectors that you have previously purchased to the remote control can be assigned to any frequent control this projector using a computer via its serial operations. -
Page 59: Audio Setting
PROJECTOR SETUP menu POWER BUTTON BEEP AUDIO SETTING You can turn on and off the beep sound produced by Set details of Audio functions. the POWER button. Each press of the button switches the settings as Press ▲▼ to select [AUDIO SETTING]. shown below. -
Page 60: Date And Time
PROJECTOR SETUP menu Adjusting the date and time DATE AND TIME automatically This lets you set the time zone and the current date Press ▲▼ to select [DATE AND TIME]. and time for the projector’s internal clock. Press the <ENTER> button. Setting the TIME ZONE The [DATE AND TIME] screen will be displayed. -
Page 61: Test Pattern
PROJECTOR SETUP menu TEST PATTERN INITIALIZE ALL The test patterns do not reflect position, size and Use the steps below to return all adjusted “MENU” other adjustments. Be sure to display the input signal items to their factory defaults. before making any test pattern settings. When you perform this function, the projector enters standby mode to initialize. -
Page 62: Security Menu
SECURITY menu PASSWORD CHANGE Select [SECURITY] from the Main Menu (see “Navigating through the menu” on page 33), The password can be changed. then select the item from the sub-menu. When you operate the projector for the first time. Press ▲▼ to select [PASSWORD Factory default password: CHANGE]. -
Page 63: Display Setting
SECURITY menu DISPLAY SETTING MENU LOCK You can display the security message (text and Display the Menu and enable Menu operation by image) on the projected image. pressing <MENU> button. Press ▲▼ to select [DISPLAY Press ▲▼ to select [MENU LOCK]. SETTING]. -
Page 64: Control Device Setup
SECURITY menu CONTROL DEVICE SETUP You can enable/disable the button operations of the Control panel of the main unit and remote cotrol. Press ▲▼ to select [CONTROL DEVICE SETUP]. Press the <ENTER> button. The [CONTROL DEVICE SETUP] screen will be displayed. Press ▲▼... -
Page 65: Network
NETWORK NETWORK MULTI-LIVE Select [NETWORK] from the Main Menu (see “Navigating through the menu” on page 33), Used when connecting to a computer using then select the item from the sub-menu. Wireless Manager ME5.5. After selecting the item, press ▲▼◄► to set. STATUS Shows the network status of the projector. -
Page 66: Temp, Lamp And Filter Indicators
TEMP, LAMP and FILTER Indicators TEMP, LAMP and FILTER Indicators Managing the indicated problems If a problem should occur inside the projector, the TEMP, LAMP and/or FILTER indicators will inform you. Manage the indicated problems as follow. CAUTION Before you take a remedial measure, follow the procedure of switching the power off indicated in “Powering off the projector”. - Page 67 TEMP, LAMP and FILTER Indicators TEMP indicator Lights in red while projecting. ([REFER TO THE “TEMP indicator” SECTION IN THE Indicator OPERATION MANUAL] appears on the screen.) Blinking in red when the power is off. (Projection stops automatically.) Status The internal or external temperature is abnormally high. Is the ventilating Is the temperature of Check...
-
Page 68: Replacement
Replacement Before replacing the unit When you perform maintenance or replacement of the parts, make sure to turn off the power and disconnect Æ the power plug from the wall outlet. ( pages 26, 28) Æ Be sure to observe the procedure “Powering off the projector” ( page 28) when performing power supply operation. -
Page 69: Replacing The Unit
Replacement Drying the air filter unit Attention • Leave the filters to dry in a well- After cleaning the air filter unit, make sure that it is ventilated location that is not exposed sufficiently dry before reinstalling it to the projector. to excessive dust. - Page 70 Replacement Lamp unit The lamp unit is a consumable component. You can check the total usage time using STATUS in the PROJECTOR SETUP menu on page 54. It is recommended to ask an authorized engineer to replace the lamp unit. Contact your dealer. Consult your dealer to purchase a replacement lamp unit (ET-LAF100A, dealt as a service component).
- Page 71 Replacement Replacing the Lamp unit CAUTION: When the projector is mounted on a ceiling, do not work with your face close to the projector. Attach the lamp unit and the lamp cover securely. When you experience difficulty in installing the lamp, remove it and try again. If you use force to install the lamp, the connector may be damaged.
-
Page 72: Cautions On Wireless Module Installation
Cautions on Wireless Module Installation Cautions on Wireless Module Installation The optional Wireless Module (part number ET-WM200E) is required to use wireless LAN functions. Before installing the wireless module to the projector, remove the protective sticker and cap from the wireless module. Procedure Use a Phillips screwdriver to loosen the Wireless Module cover screw until it... -
Page 73: Troubleshooting
Troubleshooting Please check following points. For details, see the corresponding pages. Reference Problem Cause page The power cord may not be connected. — The <MAIN POWER> switch is turned off. No electric supply is at the wall outlet. — Power does not turn The circuit breakers have tripped. - Page 74 Troubleshooting Reference Problem Cause page [TV SYSTEM] and [RGB / YP ] may not have been set correctly. The picture does not There may be a problem with the VCR or other signal source. — display correctly. A signal which is not compatible with the projector is being input. The cable may be longer than the optional cable.
-
Page 75: Technical Information
Technical Information Serial terminal The serial connector which is on the connector panel of the projector conforms to the RS-232C interface specification, so that the projector can be controlled by a personal computer which is connected to this connector. Connection Connecting terminals on projector Computer... - Page 76 Technical Information Basic format Transmission from the computer begins with STX, then the ID, command, parameter, and ETX are sent in this order. Add parameters according to the details of control. (2 bytes) 2 ID Semicolon characters (1 byte) Colon (1 byte) (2 bytes) Start...
- Page 77 Technical Information Cable specifications [When connected to a computer] Computer (DTE Projector specifications) Control commands When controlling the projector from a computer, the following commands are available: [Projector control command] Command Control contents Remarks In stand-by mode, all commends other than [PON] are invalid. Power [ON] During lamp ON operation, the [PON] command is not accepted.
-
Page 78: Other Terminals
Technical Information Other terminals Pin assignments and signal names of <S-VIDEO IN> terminal Pin No. Signal names Outside view GND (luminance signal) GND (color signal) Luminance signal Color signal Pin assignments and signal names of <RGB2 IN> terminal Pin No. Signal names Outside view G/G SYNC/Y... - Page 79 Technical Information Pin assignments and signal names of <DVI-I IN> terminal Pin No. Signal names Pin No. Signal names Outside view T.M.D.S data 2 - Hot plug detection T.M.D.S data 2+ T.M.D.S data 0- T.M.D.S data 2/4 shield T.M.D.S data 0+ —...
-
Page 80: Two Window Display Combination List (Pt-Fw430E Only)
Technical Information Two window display combination list (PT-FW430E Only) RGB1 RGB2 DVI-D HDMI Subwindow VIDEO VIDEO Moving Moving NETWORK input input image system image system Main window input input input input system system RGB input RGB1 input RGB input RGB2... -
Page 81: List Of Compatible Signals
Technical Information List of compatible signals The following table specifies the types of signals compatible with the projectors. Format : V = VIDEO, S = S-VIDEO, D = DVI, C = COMPUTER, Y = YP , H = HDMI Scanning Picture Display Dot clock... -
Page 82: Restoring The Menu Lock Password To Default
Signals are converted by the image processing circuit. Note The number of display dots is 1280 x 800 for the PT-FW430E and 1024 x 768 for the PT-FX400E. A signal with a different resolution will be projected after converting the resolution to match the projector display. -
Page 83: Specifications
Light output * 3500 lm (ANSI) 4000 lm (ANSI) Horizontal 15.6 kHz to 91.1 kHz, Vertical 24 Hz to 85.1 Hz PIAS (Panasonic Intelligent Auto Scanning) system for RGB signal Dot clock frequency: 162 MHz or less [525i(480i)] Horizontal 15.75 kHz, Vertical 60 Hz [525p(480p)] Horizontal 31.5 kHz, Vertical 60 Hz... - Page 84 Specifications Model No. PT-FW430E PT-FX400E 1 (D-sub 15 pin female) [RGB signal] 0.7 V [p-p] 75 Ω (When G-SYNC: 1.0 [p-p] 75 Ω COMPUTER IN HD/SYNC TTL high impedance, automatic positive/negative polarity compatible VD TTL high impedance, automatic positive/negative polarity compatible signal] Y: 1.0 V [p-p] including synchronization signal, P...
-
Page 85: Dimentions
Ceiling mount bracket safeguards Specifications Dimentions <Unit : mm> (2 1/8") 430 (16 7/8") Actual dimension may differ by product. ½ Ceiling mount bracket safeguards Installation work of the ceiling mount bracket should only be carried by a qualified technician. Even if it is during guaranteed period, the manufacturer is not responsible for any hazard or damage caused by using a ceiling mount bracket which is not purchased from an authorized distributors, or environmental conditions. -
Page 86: Index
Index Replacing the unit ......69 Resetting to the factory Accessories ........13 ID numbers .......18, 54 ADVANCED MENU ......38 INDEX WINDOW ......52 default ........31, 33 RGB/YP ........39 Air filter ........68, 69 INITIALIZE ........61 ASPECT .........42 INITIALIZE ALL .......61 AUDIO SETTING ......59 INITIAL SETTING ......14 SCHEDULE ........56 AUTO POWER SAVE .....57... - Page 87 Information for Users on Collection and Disposal of Old Equipment and used Batteries These symbols on the products, packaging, and/or accompanying documents mean that used electrical and electronic products and batteries should not be mixed with general household waste. For proper treatment, recovery and recycling of old products and used batteries, please take them to applicable collection points, in accordance with your national legislation and the Directives 2002/96/EC and 2006/66/EC.