
Related Manuals for AEG Perfekt Glide-24-1


Summary of Contents for AEG Perfekt Glide-24-1
- Page 1 Perfekt Glide-24-1 Perfekt Glide-30-1 Perfekt Glide-36-1 Built-in Range Hood Instru Manual Thank you for the purchase of this product. Please read the manual carefully before op g the appliance. V1.1 Version Number:V20191127 Cod:0103088729-00.01...
- Page 2 Contents l a t t a l g Ven Dire on l a t t a l Cabinet Prep on for Hood Support 10-14 Prepar on for Duct Conne on l a t t a l c i f P a g e...
- Page 3 In work and electrical wiring must be done by o When replacing an exis ge hood with your new AEG Perfekt Glide range hood, turn OFF the electrical power to the exis ng unit before removal o Unplug the unit before cleaning or servicing...
- Page 4 WARNING to reduce risk of cooktop grease fire: temperatures off temperatures high flame foods element dish cloths P a g e...
- Page 5 CAUTION! Important observe all governing codes and ordinances. to exhaust hazardous or explosive materials and vapors To reduce the risk of fire, use only metal duct work To avoid damage to the motor o r other components, keep To reduce risk of fire and exhaust air, be sure to duct air outside.
- Page 6 CAUTION! CAUTION! should in use or other fu ls (no t applicable to appliances that only discharge the air back into the room); There is a risk of fire if the cleaning is not carried out Do not flambé under the range hood; CAUTION: Accessible parts may become hot when used with cooking appliances.
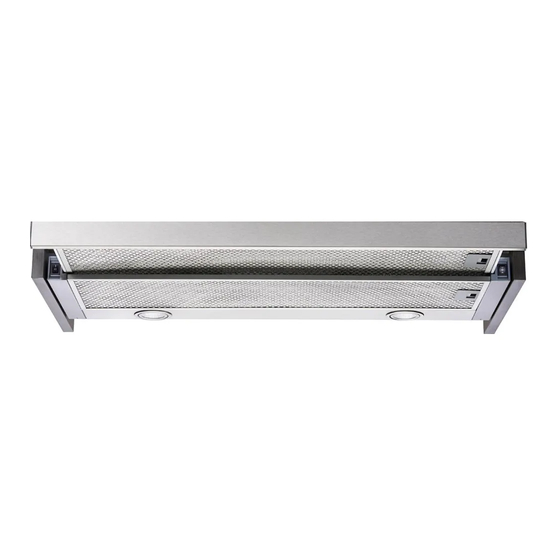
- Page 7 Features This appliance is manufactured from top quality materials, and o s superb streamlined e ects With high on power and low noise, it is designed to remove cooking fumes from your kitchen quietly and c vely Installa on Note: this procedure will require 2 people for easier in General Prepara on Remove range hood from packaging and lay upside down on table covered with cardboard or paper to prevent...
- Page 9 Perfekt Glide-24-1 Perfekt Glide-30-1 Perfekt Glide-36-1 P a g e...
- Page 10 Perfekt Glide-24-1 ” (640mm) ” (606mm) ” (78.5mm) (443mm) ” (205mm) ” ” (190mm) ” (60cm) Perfekt Glide-30-1 ” (800mm) ” (766mm) ” (603mm) (78.5mm) ” ” (285mm) ” (190mm) (76cm) ” Perfekt Glide-36-1 ” (940mm) ” (906mm) ” (743mm) (355mm) ”...
- Page 11 Cabinet Prepara on for Hood Support The range hood should be mounted at a minimum distance ” of 24 from an electric or indu on cooktop, and a minimum distance of 30” above a gas cooktop for safety and optimum performance.
- Page 12 Then asten the wood strips with wood screws about 3” in rom each end. NOTE: slightly more than the recessed dimension. The 2. Measure and mark the electrical wiring opening in also mark and measure the duct opening in the wall or cabinet.
- Page 13 Perfekt Glide-24-1 RECOMMENDED CABINET MINIMUM CLEARANCE 24” 609mm 24”-30” (600mm-762mm) ons are subject to change without no P a g e V1.3...
- Page 14 Perfekt Glide-30-1 RECOMMENDED CABINET MINIMUM CLEARANCE 24”-30” (600mm-762mm) P a g e V1.3...
- Page 15 Perfekt Glide-36-1 RECOMMENDED CABINET MINIMUM CLEARANCE 24”-30” (600mm-762mm) P a g e V1.3...
- Page 16 Hood Installa on Connect the ductwork on the hood, using duct tape to make Power cord Your new range hood will operate at the highest efficiency the number of elbows and the length of the duct are kept to WARNING: TO REDUCE THE RISK OF FIRE, USE ONLY METAL DUCTWORK AND DUCT CONNECTION DEVICE.
- Page 17 When , the hood will turn on. of the hood. Perfekt Glide-24-1 110-120V~ 122W 2 x 1W 120W 6” Perfekt Glide-30-1 110-120V~ 122W 2 x 1W 120W 6” Perfekt Glide-36-1 110-120V~ 122W 2 x 1W 120W 6” P a g e...
- Page 18 For highest efficiency, the filter should be removed and cleaned once a month. Soak the filter in hot water with a mild soap or detergent. Rinse thoroughly and repeat if necessary. The filter is also dishwasher safe. Heavy grease buildup may not be cleaned easily, therefore the filter may need to be replaced in certain cases.
- Page 19 Trouble Sh If any problems occur, please detach the plug from the electrical outlet and contact Euro-Parts or an authorized servicer in order to avoid an accident. Fan does not turn on (but light turn on). This is probab ly due to either a def ve fan switch or a burned out fan motor.
- Page 20 Light does not turn on (but fan turns on). This could be because the bulb has burned out. Try replacing the light bulb. If the light s ll does not work, either the light switch or the lamp-holder socket could be defec ve. Both can be replaced without having to remove the range from the wall or cabinet.
-
Page 21: Warranty
Warranty All AEG Appliances are backed by a comprehensive 2-year part and labour warranty. Informa on on service and parts available from Euro-Parts at 1-800-678-8352 AEG Appliances are imported and distributed in North America by Euro-Line Appliances Inc. For more informa on visit www.euro-line-appliances.com...