AEG MCC4061E User Manual
Hide thumbs
Also See for MCC4061E:
- User manual (252 pages) ,
- User manual (136 pages) ,
- User manual (20 pages)
Table of Contents
Advertisement
Available languages
Available languages
Quick Links
Advertisement
Table of Contents

Related Manuals for AEG MCC4061E


Summary of Contents for AEG MCC4061E
- Page 1 TINS-B108URR0 1. English_Layout 1 25/02/2015 11:29 Page 1 User Manual User Manual MCC4061E MCC4061E فيووركيم نرف دليل المستخدم TINS-B108URR0 1_Arabic (1)-2.pdf 1 16/04/2015 12:14:22...
-
Page 2: Table Of Contents
12. ENVIRONMENT CONCERNS..........39 FOR PERFECT RESULTS Thank you for choosing this AEG product. We have created it to give you impeccable performance for many years, with innovative technologies that help make life simpler –... -
Page 3: Safety Information
ENGLISH 1. SAFETy INFORMATION IMPORTANT! IMPORTANT SAFETY INSTRUCTIONS: READ CAREFULLY AND KEEP FOR FUTURE REFERENCE. If food being heated begins to smoke, DO NOT OPEN THE DOOR. Turn off and unplug the oven and wait until the food has stopped smoking. Opening the door while food is smoking may cause a fire. - Page 4 Do not attempt to replace the oven lamp yourself or allow anyone who is not authorised by AEG to do so. If the oven lamp fails, please consult your dealer or call an authorised AEG service agent.
- Page 5 ENGLISH Do not cook eggs in their shells and whole hard boiled eggs should not be heated in microwave ovens since they may explode even after microwave cooking has ended. To cook or reheat eggs which have not been scrambled or mixed, pierce the yolks and the whites, or the eggs may explode.
- Page 6 This appliance can be used by children aged from 8 years and above and persons with reduced physical, sensory or mental capabilities or lack of experience and knowledge if they have been given supervision or instruction concerning use of the appliance in a safe way and understand the hazards involved.
- Page 7 Always stand back from oven immediately and call an authorised the oven door when opening to avoid AEG service agent. Do not immerse the burns from escaping steam and heat. power supply cord or plug in water or Slice stuffed baked foods after heating any other liquid.
- Page 8 To prevent the turntable from breaking: • Before cleaning the turntable with water, leave the turntable to cool. • Do not put hot foods or hot utensils on a cold turntable. • Do not put cold foods or cold utensils on a hot turntable.
-
Page 9: Product Description
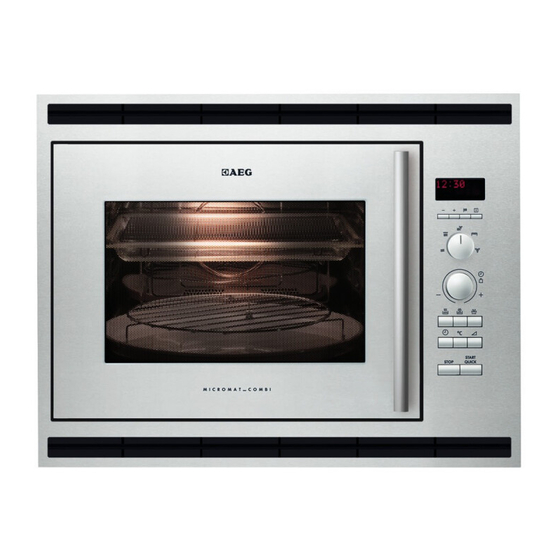
ENGLISH 2. PRODUCT DESCRIPTION 2.1 Microwave Oven Fixing points (4 points) Grill heating element Convection heating element Oven lamp Control panel Shelf runners Waveguide cover Oven cavity Coupling Door seals and sealing surfaces Door opening handle Air-vent openings Outer cabinet Power supply cord support clip Power cord TINS-B108URR0 1_Arabic (1)-2.pdf 9 16/04/2015 12:14:22... - Page 10 The rotary direction may change each time you start the oven. This does not affect cooking performance. When you order accessories, please mention two details: part name and model name to your dealer or AEG service agent. TINS-B108URR0 1_Arabic (1)-2.pdf 10 16/04/2015 12:14:22...
-
Page 11: Control Panel
ENGLISH 3. CONTROL PANEL Digital display indicators Cooking indicator Start indicator Grill indicator Convection indicator Microwave indicator Information indicator Operation buttons Information button Language button Cooking mode knob Microwave cooking Microwave cooking with grill Microwave cooking with convection Grill Convection Timer/Weight knob Auto defrost button Auto cook from frozen button Power level button... -
Page 12: Before First Use
4. BEFORE FIRST USE 4.1 Before first use 4.3 Using the stop button 1. Plug in the oven. Use the STOP button to: 2. Open the door. 1. Erase a mistake during The oven display will show “SELECT programming. LANGUAGE” in 6 languages. -
Page 13: Operation
ENGLISH 5. OPERATION 5.1 Suitable cookware Cookware Microwave Convection Grill Combination Ovenproof glass and ceramic dishes (without any metal parts, e.g. Pyrex ®, oven-to-tableware, glass tray) Non ovenproof glass and porcelain (e.g. table crockery) Glass ceramic and vitroceramic made of fire/frost-proof material, (e.g. Arcoflam ®) Ovenproof earthware Plastic heat-resistant up to 200 ˚C... - Page 14 5.2 Microwave cooking advice Microwave cooking advice Composition Foods high in fat or sugar (e.g. Christmas pudding, mince pies) require less heating time. Care should be taken as overheating can lead to fire. Size For even cooking make all the pieces the same size.
- Page 15 ENGLISH Your oven can be programmed for up to Cooking time Increasing unit 90 minutes. The input unit of cooking 0-5 minutes 10 seconds time varies from 10 seconds to five 5-10 minutes 30 seconds minutes. It depends on the total length of 10-30 minutes 1 minute the cooking time as shown in the table.
- Page 16 5.4 Reduced power level Cooking mode Standard time Microwave 900 W 20 min. Grill 15 min. Dual 1 Micro - 40 min. Dual 2 Micro - 15 min. (900 W microwave power) Grill - 15 min. Dual 2 Micro - 40 min.
- Page 17 ENGLISH 5.6 Add 30 seconds The START/QUICK button allows you to operate the two following functions: Direct Start You can cook on your desired cooking mode for 30 seconds without entering the cooking time. Example: To cook for 30 seconds on 900 W microwave power.
- Page 18 5.7 Plus and minus The PLUS and MINUS function enables you to decrease or increase the cooking time when using the automatic programmes. Example: To cook 0.2 kg French fried potatoes using AUTO COOK FROM FROZEN with the MINUS button.
- Page 19 ENGLISH Changing the cooking time while the oven is operating During the manual cooking process, the You can only use this function for cooking time can be decreased or manual cooking. increased in 1 minute steps each time the MINUS and PLUS buttons are pressed.
- Page 20 5.10 Heating without food IMPORTANT! The high or the low WARNING! rack is recommended for grilling. The oven cavity, door, outer You may detect smoke or a burning cabinet, turntable, racks and dishes smell when using the grill for the first...
- Page 21 ENGLISH 5.12 Convection cooking Your oven can be used as a facility and 10 pre-set oven conventional oven using the convection temperatures. Example 1: To pre-heat to 180 °C and cook for 20 minutes at 180 °C. 1. Rotate the COOKING MODE knob to the CONVECTION setting.
- Page 22 6. Press the START/QUICK button. 7. Check the display. When the oven is pre-heating, the hold at the pre-heated turntable should be in the oven. temperature for 30 minutes. After 30 minutes the display may show After pre-heating, if you want to or ‘NOW COOLING’.
- Page 23 ENGLISH 4. Press the START/QUICK button. 5. Check the display. IMPORTANT! To change the WARNING! convection temperature, press the The oven cavity, door, outer CONVECTION button until the cabinet, turntable, racks and dishes desired temperature appears on will become very hot, always use the display.
- Page 24 Example: To cook for 20 minutes on DUAL 1 using 90 W microwave power and 200 °C convection. 1. Rotate the COOKING MODE knob to the MICROWAVE COOKING WITH CONVECTION setting. 2. Enter the time by rotating the TIMER/WEIGHT knob clockwise/anti- clockwise until 20.00 is displayed.
- Page 25 ENGLISH 5.14 Automatic operation WARNING! AUTOMATIC OPERATION automatically works out the correct For AUTO COOK and AUTO cooking mode and cooking time. You COOK FROM FROZEN: The oven cavity, door, outer cabinet, can choose from 5 AUTO COOK menus, 4 AUTO COOK FROM FROZEN turntable, racks and dishes will menus and 7 AUTO DEFROST menus.
-
Page 26: Programme Charts
6. PROGRAMME CHARTS Auto cook chart Weight (Increasing Menu No. Procedure Unit)/Utensils AC-1 0.1-0.3 kg (100 g) • Place in a big bowl and add boiling water. Rice Big bowl and lid • Cover with lid. • Place the dish in the centre of the turntable. - Page 27 ENGLISH POTATOES ONION 6.2 Auto cook from frozen chart Weight (Increasing JACKET Menu No. Procedure POTATOES Unit)/Utensils ACF-1 Cook 0.3-1.0 kg (100 g) • Transfer meal to suitable microwave-proof Frozen ready meals Bowl and lid dish. (stirrable) • Cover with lid. •...
- Page 28 & CHOPS POTATOES ONION www.aeg.com 6.3 Auto defrost chart JACKET POTATOES Weight (Increasing Menu No. Procedure Unit)/Utensils AD-1 Defrost 0.2-1.0 kg (100 g) • Place food in a flan dish in the centre of the Steak, chops Flan dish turntable.
- Page 29 ONION & CHOPS ONION ENGLISH Weight (Increasing Menu No. Procedure Unit)/Utensils AD-6 Defrost 0.1-1.4 kg (100 g) • Remove all packaging from the cake. Cake Plate • Place directly on the turntable or on a plate in the middle of the turntable. •...
- Page 30 6.4 Recipes for auto cook Gugelhupf Baked broccoli, potato and mushroom gratin 1 tsp butter or margarine to grease 400 g potatoes, peeled the dish 400 g broccoli florets 170 g butter or margarine 6 tbsp water 140 g...
- Page 31 ENGLISH 6.5 Cooking charts Baking using the glass tray with the convection function Menu Time Mode Position Quiche Pre-heat 200 ˚C Cook base for 15’00, directly in glass tray, 1) 20’00 200 ˚C lower position, rotate after 1) 2) 12’00 200 ˚C Banana loaf Pre-heat...
-
Page 32: Recipes
7. RECIPES Recipes for glass tray with the convection function Baked cheescake Banana loaf Base: 120 g butter 170 g caster sugar 100 g butter 1 tsp coffee essence 4 tsp brown sugar ripe bananas 200 g plain flour 225 g flour... - Page 33 ENGLISH Pre-heat the oven. Red onion quiche 1. Roll out the pastry and line the 500 g shortcrust pastry square dish. 45 g butter 2. Prick the pastry all over with a fork. 3. Line the pastry with baking paper. 300 g red onion, sliced 4.
-
Page 34: Care And Cleaning
8. CARE AND CLEANING Oven interior CAUTION! CAUTION: DO NOT USE For cleaning, wipe any splatters or spills COMMERCIAL OVEN CLEANERS, with a soft damp cloth or sponge after STEAM CLEANERS, ABRASIVE, HARSH each use while the oven is still warm. For... -
Page 35: Troubleshooting
• Call an authorised AEG service agent. The interior light is not • Call your local AEG service agent. The interior light bulb can be working? exchanged only by a trained AEG service agent. The food is taking longer •... -
Page 36: Installation
10. INSTALLATION The microwave can be fitted in position A, B or C: Chimney Chimney Cable clip Niche size between Cable clip Position Chimney cupboard & ceiling 560 x 550 x 450 560 x 500 x 450 560 x 550 x 460... - Page 37 ENGLISH 10.2 Connecting the appliance to the power supply • Connect the appliance to a single phase 230 V-240 V/50 Hz alternating current via a correctly installed earth socket. • If the appliance is to be operated in a non-European country, the supply voltage, current type and frequency of the appliance indicated on the rating plate must correspond with...
- Page 38 In the user manual and on our web site, www.aeg.co.uk you will find some useful in- formation on how to deal with minor faults and how to take care of your product. When contacting us for Service please ensure that you have your purchase receipt and the following information available: Model No..............
-
Page 39: Technical Information
1400 W Microwave Frequency 2450 MHz (Group 2/Class B) Outside Dimensions: MCC4061E 592 mm (W) x 462 mm (H) x 537 mm (D) Cavity Dimensions 375 mm (W) x 272 mm (H) x 395 mm (D) Oven Capacity 40 litres Turntable ø... - Page 40 المحتويات 41 ....................1 . معلومات السالمة 47 ....................2 . وصف المنتج 49 ....................3 . لوحة التحكم 50 ..................4 . قبل االستخدام ألول مرة 51 ......................5 . التشغيل 64 ....................6 . جدول البرامج 70 ....................... 7 . الوصفات...
- Page 41 ARABIC 1 . معلومات السالمة مهم! تعليمات السالمة المهمة يرجى قراءتها بعناية .ً واالحتفاظ بها للرجوع إليها مستقب ال إذا بدأ دخان يتصاعد من الطعام الذي يتم تسخينه، ال تفتحي باب الفرن. أوقفي تشغيل الفرن وانزعي القابس من مأخذ التيار ،الكهربائي...
- Page 42 ب ) المفصالت ومزاليج السالمة للباب : تأكدي من أنها ليست .مكسورة أو مفكوكة ج ) موانع التسرب في الباب واألسطح المانعة للتسرب : تأكدي أنها .ليست تالفة .د ) داخل تجويف الفرن أو على الباب : تأكدي من عدم وجود ا ن ْ ب ِعاج...
- Page 43 ARABIC ال تقومي بطهي البيض دون تقشيره، ويحظر تسخين البيض المسلوق غير منزوع القشرة الصلبة في فرن الميكروويڤ حيث .إنه من الممكن أن ينفجر حتى بعد انتهاء الطهي بالميكروويڤ لطهي أو إعادة تسخين البيض الذي لم يتم خفقه أو خلطه قومي بثقب...
- Page 44 ويمكن أن يستخدم هذا الجهاز َ األطفال ُ من سن 8 سنوات فما بعدها واألشخاص ُ ذوو القدرات البدنية أو الحسية أو العقلية الضعيفة أو الذين تنقصهم الخبرة والمعرفة إذا تم ذلك تحت إشراف خاص أو إرشادات تتعلق باستخدام الجهاز استخدام ا ً آمن ا ً ومع فهم المخاطر...
- Page 45 ARABIC ال تتكئي أو تتأرجحي على باب الفرن. وال تعبثي المعتمد. ال تغمسي سلك ثم اتصلي بوكيل خدمة بالفرن أو تستخدميه كلعبة. وينبغي تعليم األطفال كافة أو قابس وحدة توصيل التيار الكهربائي في الماء أو تعليمات السالمة المهمة : استخدام مقابض األوعية أي...
- Page 46 ووضع المشواة الحمل الحراري CONVECTION ووضع الطهي األوتوماتيكي المزدوجة DUAL GRILL ووضع الطهي األوتوماتيكي من AUTO COOK حالة التجمد AUTO COOK FROM FROZEN حتى ال تنصهر. وذلك ألن األوعية البالستيكية ينبغي أال تستخدم أثناء األوضاع المذكورة ما لم تحدد الشركة...
- Page 47 ARABIC 2. وصف المنتج 1.2 فرن ميكروويڤ ) نقاط التثبيت ( 4 نقاط عنصر تسخين المشواة عنصر تسخين الحمل الحراري مصباح الفرن لوحة التحكم عجالت انزالق األرفف غطاء موجه الموجات تجويف الفرن المقرن موانع التسرب في الباب واألسطح المانعة للتسرب مقبض...
- Page 48 2.2 الملحقات : افحصي الفرن لتتأكدي من توافر الملحقات التالية القرص الد و ّار دعامة القرص الد و ّار الحامل العلوي الحامل السفلي حامل الصينية الزجاجية الصينية الزجاجية • ضعي دعامة القرص الدوار في المقرن في وسط أرضية الفرن، وتأكدي من وضعه بحيث يكون...
- Page 49 ARABIC 3. لوحة التحكم مؤشرات الشاشة الرقمية مؤشر الطهي مؤشر بدء التشغيل مؤشر المشواة مؤشر الحمل الحراري مؤشر الميكروويف مؤشر المعلومات أزرار التشغيل زر المعلومات زر اللغة مقبض وضع الطهي الطهي في الميكروويڤ الطهي في الميكروويڤ بالمشواة الطهي في الميكروويڤ بالحمل الحراري...
- Page 50 4 . قبل االستخدام ألول مرة 3.4 استخدام زر إيقاف التشغيل 1.4 قبل االستخدام ألول مرة STOP : لألغراض التالية STOP استخدمي زر إيقاف التشغيل .1) ضعي قابس الفرن في مأخذ التيار الكهربي .1) لكي تمسحي الخطأ أثناء البرمجة...
- Page 51 ARABIC 5 . التشغيل 1.5 أدوات الطهي المناسبة مشترك المشواة الحمل الحراري الميكروويڤ أدوات الطهي أطباق الزجاج والخزف المقاومة لحرارة الفرن ( دون وأدوات أي أجزاء معدنية مثاللبايركس Pyrex ® ) المائدة المخصصة للفرن والصينية الزجاجية الزجاج...
- Page 52 2.5 نصائح الطهي في الميكروويڤ نصائح الطهي في الميكروويڤ األطعمة عالية الدهن أو السكر ( مثل بودنج الكريسماس، فطائر اللحم المفروم ) تتطلب وقت تسخين التركيب .أقل. ينبغي توخي الحرص والحذر حيث إن التسخين الزائد قد يؤدي إلى نشوب الحريق...
- Page 53 ARABIC يمكن برمجة فرن الميكروويڤ حتى 09 دقيقة. وتتنوع وحدة الزيادة وقت الطهي وحدة إدخال وقت الطهي من 01 ثواني إلى خمس 01 ثوان 0-5 دقائق دقائق. وهي تعتمد على إجمالي طول وقت الطهي 03 ثانية 5-01 دقائق .المبين في الجدول 1 دقيقة...
- Page 54 4.5 مستوى الطاقة المخفض الوقت القياسي وضع الطهي 02 دقيقة الميكروويڤ 009 واط 51 دقيقة المشواة 04 دقيقة الميكروويڤ 1 المشواة المزدوجة 51 دقيقة الميكروويڤ 2 المشواة المزدوجة ) ( 009 واط من طاقة الميكروويڤ 51 دقيقة المشواة 04 دقيقة...
- Page 55 ARABIC 6.5 إضافة 03 ثانية يسمح لك START/QUICK إن زر بدء التشغيل : بتشغيل الوظيفتين التاليتين بدء التشغيل المباشر يمكنك الطهي على وضع الطهي المرغوب لمدة .03 ثانية دون إدخال وقت الطهي مثال : للطهي لمدة 03 ثانية على طاقة ميكروويڤ : 009 واط...
- Page 56 ) - ( 7.5 اإلضافة ( + ) والتقليل تمكنك وظيفة اإلضافة ( + ) والتقليل ( - ) من زيادة أو .تقليل وقت الطهي عند استخدام البرامج األوتوماتيكية مثال : لطهي 2.0 كج من البطاطس المقلية الفرنسية باستخدام وضع الطهي األوتوماتيكي من حالة التجمد...
- Page 57 ARABIC تغيير وقت الطهي أثناء تشغيل الفرن يمكنك فقط استخدام هذه الوظيفة للطهي أثناء استمرار الطهي اليدوي، يمكن تقليل وقت الطهي .األوتوماتيكي أو زيادته في خطوات مدتها دقيقة واحدة في كل مرة . ) + ( يتم فيها الضغط على زر التقليل ( - ) والزيادة 8.5 للتحقق...
- Page 58 01.5 التسخين دون طعام في الفرن !مهم يوصى باستخدام الحامل المرتفع أو !تحذير الحامل المنخفض للشواء. ويمكنك أن تكتشفي سوف يصبح تجويف الفرن والكابينة الخارجية الدخان أو رائحة االحتراق عند استخدام المشواة والقرص الدوار والحوامل واألطباق ساخنة للمرة األولى، وهذا أمر معتاد وال يدل على...
- Page 59 ARABIC 21.5 الطهي بالحمل الحراري يمكن أن ي ُستخدم فرنك كفرن حمل حراري باستخدام ميزة الحمل الحراري و01 مستويات درجة حرارة .مسبقة الضبط درجة حرارة الفرن اضغطي على زر الحمل درجة حرارة الفرن اضغطي على زر الحمل ) ( °م ) ( °م...
- Page 60 START/ 6) اضغطي على زر بدء التشغيل .QUICK .7) افحصي الشاشة 30 على درجة حرارة التسخين المسبق لمدة عند تسخين الفرن على درجة حرارة مسبقة دقيقة. وبعد 03 دقيقة، يمكن أن تعرض الشاشة ً الضبط، ينبغي أن يكون الطبق الدوار موجود ا...
- Page 61 ARABIC .START/QUICK 4) اضغطي على زر بدء التشغيل .5) افحصي الشاشة !تحذير !مهم لتغيير درجة حرارة الحمل الحراري، اضغط على زر الحمل الحراري سوف يصبح تجويف الفرن والكابينة الخارجية حتى تظهر درجة الحرارة CONVECTION والقرص الدوار والحوامل واألطباق ساخنة .المرغوبة على الشاشة للغاية،...
- Page 62 مثال : للطهي لمدة 02 دقيقة على وضع المشواة المزدوجة 1 باستخدام طاقة ميكروويڤ قدرها 09 واط °200 وحمل حراري قدره COOKING 1) أديري مقبض وضع الطهي MICROWAVE إلى إعداد الميكروويڤ MODE .CONVECTION مع إعداد الحمل الحراري /2) أدخلي الوقت عن طريق تدوير مقبض المؤقت...
- Page 63 ARABIC 41.5 التشغيل األوتوماتيكي !تحذير يعمل التشغيل األوتوماتيكي على تحديد وضع الستخدام وضع الطهي األوتوماتيكي AUTO الطهي ووقت الطهي الصحيحين أوتوماتيكي ا ً. يمكنك ووضع الطهي األوتوماتيكي من حالة COOK االختيار من بين 5 قوائم طهي أوتوماتيكي و 4 قوائم التجمد...
- Page 64 6. جدول البرامج 1.6 جدول الطهي األوتوماتيكي / ) الوزن ( وحدة الزيادة اإلجراء رقم القائمة األواني ) 1.0 - 3.0 كج ( 001 جرام .• ضعيه في سلطانية كبيرة وأضيفي المياه المغلية .• قومي بتغطيته بالغطاء للوعاء وغطاءه...
- Page 65 ARABIC 2.6 جدول الطهي األوتوماتيكي من حالة التجمد / ) الوزن ( وحدة الزيادة اإلجراء رقم القائمة األواني ) 3.0 - 1 كجم ( 001 جرام .• انقلي الوجبة إلى طبق مناسب ال ينفذ إليه الميكروويڤ 1 طهي -ACF .• قومي بتغطيته بالغطاء السلطانية...
- Page 66 3.6 جدول اإلذابة األوتوماتيكية للثلج / ) الوزن ( وحدة الزيادة اإلجراء رقم القائمة األواني ) 2.0 - 0.1 كج ( 001 جم .• ضعي الطعام في طبق فالن في وسط القرص الدوار 1 إذابة الثلج طبق فالن قطع وشرائح اللحم...
- Page 67 ARABIC / ) الوزن ( وحدة الزيادة اإلجراء رقم القائمة األواني ) 1.0 - 0.1 كج ( 001 جم 7 إذابة الثلج • وزعي الطعام في طبق فالن في وسط القرص الدوار. بالنسبة .لوزن 0.1 كج، وزعيه بشكل مباشر على القرص الدوار طبق...
- Page 68 4.6 وصفات للطهي األوتوماتيكي الكيك الرخامي البروكولي المخبوز والبطاطس وغراتان المشروم زبد أو سمن صناعي لدهن الطبق 1 ملعقة صغيرة بطاطس مقشرة 004 جم زبد أو سمن صناعي 071 جم زهيرات البروكولي 004 جم ماء 6 ملعقة كبيرة سكر ناعم...
- Page 69 ARABIC 5.6 جداول الطهي الخ َ بز باستخدام الصينية الزجاجية مع وظيفة الحمل الحراري الوضع الوضع الوقت القائمة قومي بطهي المكونات األساسية لمدة 00:51 دقيقة مباشرة 002° م تسخين مسبق البرمجة فطيرة كيش في الصينية الزجاجية، في الوضع المنخفض، وأديريها 002°...
- Page 70 7. وصفات الطهي 1.7 وصفات باستخدام الصينية الزجاجية مع وظيفة الحمل الحراري كيك الجبن المخبوز كيك الموز : المكونات األساسية زبد 021 جم زبد 001 جم سكر ناعم 071 جم سكر بني 4 مالعق صغيرة مستخلص قهوة 1 ملعقة صغيرة...
- Page 71 ARABIC .قومي بالتسخين المسبق للفرن فطيرة الكيش بالبصل األحمر .1) ابرمي المعجنات وصفي الطبق المربع معجنات بسيطة 005 جم .2) اثقبي المعجنات في كل مكان فيها بالشوكة زبد 54 جم .3) صفي المعجنات مع ورق الخ َ بز بصل أحمر شرائح 003 جم...
- Page 72 8 . العناية بالجهاز وتنظيفه تأكدي من عدم نفاذ الصابون المعتدل أو الماء إلى !تنبيه الفتحات الصغيرة في حوائط الفرن حتى ال يتسبب تحذير : ال تستخدمي أية منظفات تجارية للفرن .ذلك في تلف للفرن أو منظفات بخار أو مواد كاشطة أو منظفات قوية...
- Page 73 .• أنه ال يوجد أي شيء في التجويف الواقع أسفل القرص الد و ّار الميكروويڤ ال ينطفئ؟ .• اعزلي الجهاز عن صندوق المصهرات • اتصلي بوكيل معتمد لخدمة .AEG الضوء الداخلي ال يعمل؟ المحلي لديك. يمكن استبدال مصباح الضوء • اتصلي بوكيل خدمة...
- Page 74 01 . التركيب ) يمكن تركيب الفرن في الوضع ( أ ) أو ( ب :) أو ( ج المسافة مدخنة مدخنة التجويف المقاس بين الدوالب مدخنة الوضع العرض العمق االرتفاع مشبك كابل مشبك كابل والسقف أ ب 450 × 550 × 560 أ...
- Page 75 ARABIC 2.01 توصيل الجهاز بوحدة توصيل التيار الكهربي ،• إذا توجب تشغيل الجهاز في دولة غير أوروبية ) ( أ ينبغي أن يتماشى جهد توصيل الكهرباء ونوع التيار وتردد الجهاز المبين على لوحة التصنيف مع مواصفات توصيل التيار الكهربي لديك. ويمكن االطالع...
- Page 76 !مهم أخضر وأصفر مصهر 31 أمبير األسالك في دليل التوصيالت الرئيسية ملونة : حسب الكود التالي أرضي األخضر واألصفر متعادل األزرق متصل بالتيار البني إذا ركبت ِ القابس الخاص بك، فإن ألوان األسالك الموجودة في دليل مأخذ القدرة الرئيسي لجهازك من...
- Page 77 (Group 2/Class B) : األبعاد الخارجية عرض 295 مم × ارتفاع 264 مم × عمق 735 مم MCC4061E 592 mm (W) x 462 mm (H) x 537 mm (D) عرض 573 مم × ارتفاع 272 مم × عمق 593 مم...
- Page 80 TINS-B108URR0 1_Arabic (1)-2.pdf 78 16/04/2015 12:14:24...