Table of Contents
Advertisement
Quick Links
Advertisement
Table of Contents

Related Manuals for AEG IAE64851FB


Summary of Contents for AEG IAE64851FB
- Page 1 IAE64851FB User Manual USER MANUAL...
-
Page 2: Table Of Contents
AEG manufacturer’s warranty provided with your product. Products must be used, installed and operated in accordance with this manual. You may not be able to claim on the AEG manufacturer’s warranty in the event that your product fault is due to failure to adhere to this manual. -
Page 3: Safety Information
ENGLISH Environmental information Subject to change without notice. SAFETY INFORMATION Before the installation and use of the appliance, carefully read the supplied instructions. The manufacturer is not responsible for any injuries or damage that are the result of incorrect installation or usage. - Page 4 1.2 General Safety WARNING: The appliance and its accessible parts • become hot during use. Care should be taken to avoid touching heating elements. WARNING: Unattended cooking on a hob with fat or • oil can be dangerous and may result in fire.
-
Page 5: Conditions Of Use
ENGLISH the manufacturer of the appliance in the instructions for use as suitable or hob guards incorporated in the appliance. The use of inappropriate guards can cause accidents. 2. CONDITIONS OF USE This appliance is intended to be used in •... - Page 6 • Make sure the mains cable or plug (if • Do not rely on the pan detector. applicable) does not touch the hot • Do not put cutlery or saucepan lids on appliance or hot cookware, when you the cooking zones. They can become connect the appliance to the near hot.
-
Page 7: Installation
ENGLISH 3.5 Service glass ceramic. Always lift these objects up when you have to move • To repair the appliance contact the them on the cooking surface. Authorised Service Centre. • This appliance is for cooking • Use original spare parts only. purposes only. -
Page 8: Product Description
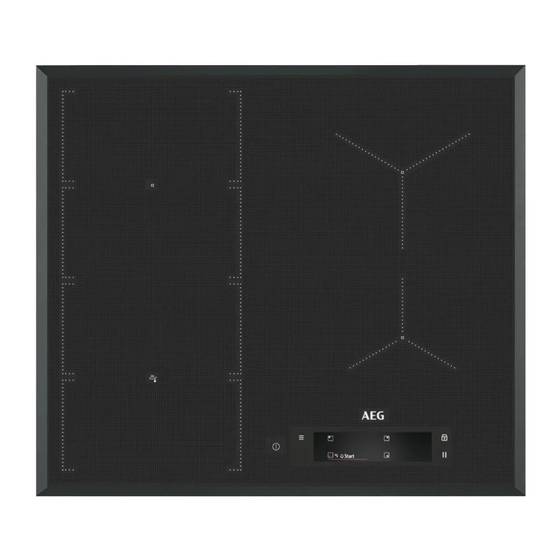
How to install your AEG Induction Hob - Worktop installation min. min. min. 5. PRODUCT DESCRIPTION 5.1 Cooking surface layout... -
Page 9: Quick Guide
ENGLISH Symbol Comment ON / OFF To activate and deactivate the hob. Menu To open and close the Menu. Zone selection To open the slider for the selected zone. Zone indicator To show for which zone the slider is active. To set the timer functions. - Page 10 Symbols useful for display navigation activate the function. • Select a zone first to activate the timer To activate / deactivate the options. functions. To close the pop-up window. Symbols useful for display navigation To cancel a setting.
-
Page 11: Before First Use
ENGLISH description appears. Follow the tips to To leave the Menu touch or the right easily navigate through the Menu. side of the display, outside of the pop-up window. To navigate through the Menu If you are at the bottom of the Menu use or . - Page 12 The slider for the active cooking zone 1. Touch the desired zone symbol first. appears on the display and is active for 8 2. Touch or slide your finger to the seconds. right to activate the function for the 3.
- Page 13 ENGLISH 8.7 Timer You can also choose to cancel your selection. Count Down Timer When the time comes to an end, a signal +STOP sounds and blinks. Touch to stop Use this function to specify how long a the signal. cooking zone should operate during a single cooking session.
- Page 14 8.12 Key Tones / Buzzer Lock Volume You can lock the control panel while the hob operates. It prevents an accidental You can choose the type of sound your change of the heat setting. hob emits or turn the sounds off entirely.
- Page 15 ENGLISH • You can set the timer function. an infrared signal communicator. The When the pot reaches the speed of the fan is defined automatically intended temperature you can on the basis of the mode setting and the activate the timer. temperature of the hottest pot on the •...
-
Page 16: Flexible Induction Cooking Area
Changing the modes When you finish cooking and deactivate the hob, the hood fan may still operate If you are not satisfied with the noise for a certain period of time. After that level / fan speed, you can switch time the system deactivates the fan between modes manually. - Page 17 ENGLISH heat setting for each zone separately. Correct cookware position: Correct cookware position: To use this mode you have to place the cookware on the four connected To use this mode you have to place the sections. If you use cookware smaller cookware on the three connected sections.
-
Page 18: Hints And Tips
If you place the cookware at the 3. Place the pot on the cooking zone front you get the highest heat setting with the desired heat setting. (i.e. 9). To decrease it, move the Place the cookware in the centre of... - Page 19 ENGLISH 10.2 Correct pans for Pan Fry • crack noise: cookware is made of different materials (a sandwich function construction). • whistle sound: you use a cooking Use only pans with flat bottom. To check zone with a high power level and the if the pan is correct: cookware is made of different 1.
- Page 20 Heat setting Use to: Time Hints (min) 1 - 2 Hollandaise sauce, melt: but- 5 - 25 Mix from time to time. ter, chocolate, gelatine. 1 - 2 Solidify: fluffy omelettes, 10 - 40 Cook with a lid on.
-
Page 21: Care And Cleaning
To find the full range of cooker hoods Other remotely controlled which work with this function refer to our appliances may block the consumer website. The AEG cooker signal. Do not use any such hoods that work with this function must appliances near to the hob have the symbol while Hob²Hood is on. - Page 22 Problem Possible cause Remedy The fuse is blown. Make sure that the fuse is the cause of the malfunction. If the fuse is blown again and again, contact a quali- fied electrician. You do not set the heat set- Activate the hob again and ting for 60 seconds.
- Page 23 ENGLISH Problem Possible cause Remedy There is no sound when you The sounds are deactivated. Activate the sounds. Refer to touch the panel sensor "Daily use". fields. Wrong language is set. You changed the language Reset all functions to the fac- by mistake.
-
Page 24: Technical Data
Make sure, you operated the hob correctly. If not the 13. TECHNICAL DATA 13.1 Rating plate Model IAE64851FB PNC 949 597 568 00 Typ 62 B4A 05 CA 220 - 240 V / 400 V 2N 50 - 60 Hz Induction 7.35 kW... -
Page 25: Energy Efficiency
14. ENERGY EFFICIENCY 14.1 Product information according to EU 66/2014 valid for EU market only Model identification IAE64851FB Type of hob Built-In Hob Number of cooking zones Number of cooking areas Heating technology Induction... -
Page 26: Warranty
This document sets out the terms and Appliance not having purchased conditions of the product warranties the Appliance for re-sale, and for AEG Appliances. It is an important ‘your’ has a corresponding document. Please keep it with your meaning. proof of purchase documents in a safe 2. - Page 27 ENGLISH replacement. Electrolux or its ASC used for purposes other than may use refurbished parts to repair those for which the Appliance your Appliance. You agree that any was intended, including replaced Appliances or parts where the Appliance has become the property of Electrolux. been used for any non- 5.
- Page 28 Electrolux to meet its obligations under this warranty. Important Notice Before calling for service, please ensure that the steps listed in clause 8 above have been followed. SERVICE AUSTRALIA aeg.com/au FOR SERVICE...
- Page 32 www.aeg.com/au...