Table of Contents
Advertisement
Quick Links
COMPACT DISC PLAYER
PD-30AE
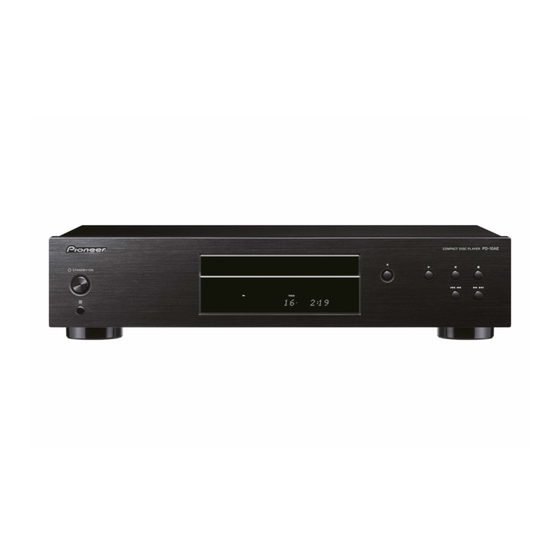
PD-10AE
Instruction Manual
Thank you for purchasing Pioneer product. Please read this
manual carefully before making any connections or using
this product. By following these instructions, you'll get the
best audio performance and the most listening pleasure
from your Pioneer product. Keep this manual for future
reference.
Getting Started
............................En-
2
13
15
16
21
24
26
27
E
n
Advertisement
Table of Contents

Related Manuals for Pioneer PD-10AE


Summary of Contents for Pioneer PD-10AE
-
Page 1: Table Of Contents
Setting for MP3 ......En- Troubleshooting ...... En- Thank you for purchasing Pioneer product. Please read this manual carefully before making any connections or using this product. By following these instructions, you’ll get the Specifications best audio performance and the most listening pleasure ...... - Page 2 WARNING: WARNING AVIS RISK OF ELECTRIC SHOCK RISQUE DE CHOC ELECTRIQUE TO REDUCE THE RISK OF FIRE OR DO NOT OPEN NE PAS OUVRIR ELECTRIC SHOCK, DO NOT EXPOSE THIS The lightning flash with arrowhead symbol, within APPARATUS TO RAIN OR MOISTURE. an equilateral triangle, is intended to alert the user to the presence of uninsulated “dangerous CAUTION:...
-
Page 3: Precautions
Precautions 1. Recording Copyright—Unless it’s for personal 9. Installing this Unit use only, recording copyrighted material is illegal • Install this unit in a well-ventilated location. without the permission of the copyright holder. • Ensure that there’s adequate ventilation all around this unit, especially if it’s installed in an 2. - Page 4 • Reorient or relocate the receiving antenna. • Increase the separation between the equipment Manufacturer: EU Representative’s: and receiver. Onkyo & Pioneer Pioneer Europe NV • Connect the equipment into an outlet on a circuit Corporation Haven 1087, different from that to which the receiver is con-...
-
Page 5: Supplied Accessories
Supplied Accessories Features Make sure you have the following accessories • 24bit 192KHz D/A converter • MP3 playback • 25-track memory playback • SR compatible remote control (PD-30AE only) • Auto standby • Coaxial and optical digital audio output (PD- 30AE only) •... - Page 6 Aiming the Remote Controller......11 Disc Notes............12 Connecting the CD Player ....... 13 Audio Connections.......... 13 Using centralized control with other Pioneer components (PD-30AE only) ......14 Connecting the Power Cord......14 Basic Operation..........15 Turning On CD Player ........15 Setting Auto Standby (ASb)......
-
Page 7: Getting To Know The Cd Player
PD-10AE 7. Remote control sensor (11) STANDBY/ON button (15) Í Receives control signals from the remote Press to turn on or standby the PD-10AE. controller. 2. Disc tray (16) The CD is loaded here. 8. Display (8) See next page. -
Page 8: Display
Getting to Know the CD Player-Continued Display indicators REPEAT lights up when repeat playback is indicator lights up for playback. selected for all tracks. indicator lights up while playback is REPEAT 1 lights up when repeat playback is paused. selected for one track. 2. -
Page 9: Rear Panel
2. CONTROL IN/OUT jacks (14) 4. AC IN (14) By connecting Pioneer brand components with The supplied power cord is connected. control jacks, you can centralize control of the devices using the remote controller of this unit. -
Page 10: Remote Controller
Getting to Know the CD Player-Continued Remote Controller The page numbers in parentheses show where you can find the main explanation for each item. 4. RANDOM button (21) Select the Random playback mode. 5. Play [ ] button (16 – 19, 21, 22) Press to start playback. -
Page 11: Installing The Batteries
Getting to Know the CD Player-Continued Installing the Batteries Aiming the Remote Controller When you operate the remote controller, point it at the To open the battery compartment, press the CD Player’s remote control sensor, as shown below. small hollow and slide open the cover. Remote control sensor Insert two batteries (R03/AAA) into the Notes:... -
Page 12: Disc Notes
(HFS) cannot be played. • Up to 99 folders (including the root folder), and up If the disc is dirty, the PD-30AE/PD-10AE will have to 499 files (including root) and files can be rec- a hard time reading signals, and the audio quality ognized and played. -
Page 13: Connections
Connecting the CD Player Audio Connections • Before making any connections, read the manu- • To prevent interference, keep audio cables away als supplied with your other components. from power cords and speaker cables. • Don’t connect the power cord until you’ve com- Optical/Coaxial Digital Jack (PD-30AE pleted and double-checked all connections. -
Page 14: Using Centralized Control With Other Pioneer Components (Pd-30Ae Only)
Connecting the CD Player-Continued Using centralized control with other Pioneer components (PD-30AE only) By connecting Pioneer brand components with Note: control jacks with monaural miniplug cables (with- • When connecting the CONTROL IN/OUT jacks, out resistors), you can centralize control of the supplied analog audio cables must also be used devices using the remote controller of this unit. -
Page 15: Basic Operation
Basic Operation Note: Turning On CD Player If playback is paused, the power will remain on even after 30 minutes have elapsed; the Auto STANDBY/ON STANDBY/ON Standby function will not operate. Changing the Display Brightness Press the remote controller’s [DIMMER] button repeatedly to select the following options: Normal... -
Page 16: Disc Playback
Disc Playback Disc tray ENTER Selecting Tracks Press the Open/Close [ ] button to open < To return to the beginning of the track that’s currently play- the disc tray. ing or paused, press the Previous [ ] button. -
Page 17: Using The Remote Controller
Disc Playback-Continued Using the Remote Controller [DISPLAY] Press repeatedly to display CD information Press to pause playback See below for details. Press to start playback Press to fast-forward or fast- reverse Press to select tracks During playback or while playback is •... -
Page 18: Selecting Files (Mp3 Cds)
Disc Playback-Continued Selecting Files (MP3 CDs) Selecting Files in Navigation Mode For MP3 CDs, files (MP3 files) may be organized in a In Navigation mode, you can select files by navigating hierarchy, with folders containing files and subfolders, as through the folder hierarchy. This mode can only be used shown below. -
Page 19: Selecting Files In All Folder Mode
Disc Playback-Continued To select another folder, press the [;] button again Press the [ENTER] or [ ] button. (front panel: [∫]), and then use the [:]/[9] Playback will start with the specified file or buttons to select it (front panel: [:22]/ folder and continue until all of the files on the [119]). -
Page 20: Displaying Mp3 Information
Disc Playback-Continued When there is no ID3 tag, “ARTIST-NO DATA” appears. To select the previous folder, press the Previous [] button. To select the next folder, press the Next [] button. Album name: Name of the album (if ID3 tag is present). Press the [ENTER] button to display the file When there is no ID3 tag, “ALBUM-NO DATA”... -
Page 21: Various Playback Modes
Various Playback Modes You can select the following playback modes: Memory Playback (For Audio CDs) • Random playback In memory playback, you can create a playlist of up • Memory playback to 25 files. • Repeat playback Random Playback With random playback, all of the files on the disc DISPLAY are played in random order. -
Page 22: Memory Playback (For Mp3 Cds)
Various Playback Modes-Continued ∫To Cancel Memory Playback Use the Previous and Next [ ] buttons • Stop playback, then press the [MEMORY] button to to select the first file you want to add to the change the playback mode. The MEMORY indica- playlist, and then press [ENTER] button. -
Page 23: Repeat Playback
Various Playback Modes-Continued Repeat Playback Use the [ ] buttons to continue selecting other items for memory playback. In repeat playback, you can play an entire CD To move up a level, press the [ ] button. ... -
Page 24: Setting For Mp3
Setting for MP3 ∫ FOLDER NAME (Scroll/Not) Setting MP3 Preferences This preference determines whether the folder The MP3 preferences let you change the way MP3 name scrolls across the display when an MP3 file information is displayed and the way MP3 CDs folder is selected. - Page 25 Setting for MP3 -Continued File/folder name Disable Enable 01 Pops 01 Pops Pops 10-Rock 10-Rock Rock 16_Jazz 16_Jazz Jazz 21st Century 21st Century 21st Century 05-07-20 Album 05-07-20 Album Album ∫ STOP KEY (All Folder/Navigation/Disable) This preference determines how the Stop [ ] button ∫...
-
Page 26: Troubleshooting
SETUP Can’t access the SETUP menu. • If any track has been selected even when the PD-30AE/PD-10AE is stopped, you must place it into the full stop state by pressing the [ ] button before you can view all the SETUP menus. -
Page 27: Specifications
30AE/PD-10AE is not subjected to direct sunshine or inverter-type fluorescent lights. Relocate if neces- sary. • If the PD-30AE/PD-10AE is installed in a cabinet with colored glass doors, the remote controller may not work reliably when the doors are closed. Open the doors, or use a cabinet without colored glass. - Page 28 (Europe) © 2016 Onkyo & Pioneer Corporation. All rights reserved. © 2016 Onkyo & Pioneer Corporation. Tous droits de reproduction et de traduction réservés. F1807-1 “Pioneer” is a trademark of Pioneer Corporation, and is used under license. SN 29402408A...