Acer ICONIA User Manual
Hide thumbs
Also See for ICONIA:
- User manual (110 pages) ,
- Quick manual (32 pages) ,
- Product and safety information (18 pages)
Table of Contents
Advertisement
Advertisement
Table of Contents

Related Manuals for Acer ICONIA


Summary of Contents for Acer ICONIA
-
Page 1: User Guide
User Guide... - Page 2 © 2011 All Rights Reserved Acer ICONIA TAB User Guide Model: A500 First issue: 03/2011 Acer ICONIA TAB Model number: __________________________________ Serial number: ___________________________________ Date of purchase: ________________________________ Place of purchase: ________________________________...
-
Page 3: Table Of Contents
Table of Contents End User License Agreement Getting to know your tablet Features and functions ......... . . 7 Product registration . - Page 4 Acer content folders Playing music and video Multimedia playback ......... . . 35 Media server .
-
Page 5: End User License Agreement
Sublicense or otherwise make the Software available to third parties, except that you may, after prior written notification to Acer, transfer the Software as a whole to a third party so long as you do not retain any copies of the Software and such third party accepts the terms of this Agreement. - Page 6 Privacy policy During registration you will be asked to submit some information to Acer. Please refer to Acer’s privacy policy at http:// www.acer.com or your local Acer website. Music recognition technology and related data are provided by Gracenote Gracenote logo and logotype, and the "Powered by Gracenote"...
-
Page 7: Features And Functions
To register your Acer product, please visit mobile.acer.com. Click Product Registration and follow the simple instructions. You can also register directly from your tablet by tapping the Acer Registration icon. After we receive your product registration, you will be sent a confirmation email with important data that you should keep in a safe place. -
Page 8: Unpacking Your Tablet
Your new tablet comes packed in a protective box. Carefully unpack the box and remove the contents. If any of the following items is missing or damaged, contact your dealer immediately: • Acer ICONIA TAB • Quick Guide • USB cable •... -
Page 9: Back View
Back view Item LED flash 5 MP camera Speakers view Item Micro HDMI (Type D) connector 3.5 mm headphone jack Power button Getting to know your tablet Description Lights to illuminate images. A 5-megapixel camera for taking high- resolution images. Emits stereo audio Description Connects to an HDMI cable with a Type D... -
Page 10: Bottom View
Bottom view Item Reset button USB connector (Host) Micro USB connector (Slave) DC-in jack Left and right views Item Docking port Volume control key Screen rotation lock switch 1 2 3 Description Insert a small thin object (such as a paperclip) to reset power to the tablet. -
Page 11: Charging Your Tablet
Item Card slot cover Charging your tablet For first-time use, you need to charge your tablet for four hours. After that you can recharge the battery as needed. Connect the DC-in jack to your tablet and plug the AC adapter into any AC outlet. -
Page 12: Using Your Tablet
Turning on for the first time To turn on your tablet, press and hold the power button for two seconds. You will then be asked some questions before you can use your tablet. To start, tap to select your language, then tap Start. Follow the rest of the instructions as they are displayed. -
Page 13: Locking Your Tablet
If you will not use your tablet for a while, briefly press the power button to lock access. This saves power and ensures your tablet does not unintentionally use any services. Your tablet will lock automatically if it is not used after a while. To change the delay, tap Apps >... -
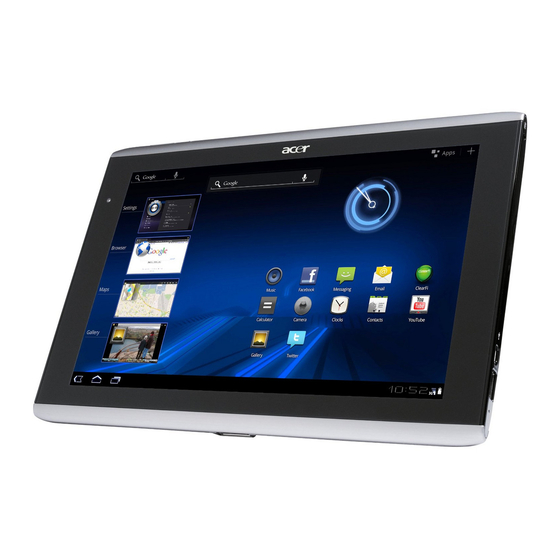
Page 14: The Home Screen
Tap and hold: Tap and hold an item to see a list of actions available for that item. On the pop-up menu that appears, tap the action you want to perform. Scroll: To scroll up or down the screen, simply drag your finger up or down the screen in the direction that you want to scroll. - Page 15 Back Tap this icon to go to the previous page, or to go up one level in a menu. This icon may be replaced with the (such as if the keyboard or list of recent applications is shown). Home Tap this icon to go directly to the Home screen. Recent Tap this icon to see recently opened applications.
-
Page 16: Status And Notification Area
The application menu The application menu displays applications installed on your tablet. Two categories are available All and My apps. All displays all applications that are installed on your tablet; My apps displays applications that you have installed from the Android Market. Note: All images are for reference only. -
Page 17: Status And Notification Icons
Tap the status icons to view more status information and a summary of events. Tap the status area again to view more controls. While viewing a notification, tap the summary to see more information, if available. Some event summaries include controls, such as media controls if music is playing. Status and notification icons Connection and batterystatus icons Note: Network connection icons are blue if you have an active Google... - Page 18 Notification icons Icon Description Alarm is set New Gmail message New Google Talk message Upcoming event Song is playing SD card or USB storage is full Tablet is connected to PC via Application update available System update available Virtual private network (VPN) status Icon Description...
-
Page 19: Personalizing The Home Screen
Personalizing the Home screen You may personalize your Home screen by adding or removing application shortcuts or widgets, and by changing the wallpaper. Adding or removing shortcuts or widgets To add shortcuts or widgets open the Add to Home screen: tap the plus sign next to Apps in the top-right corner of the Home screen. -
Page 20: The Onscreen Keyboard
Adding shortcuts from the Application menu You can add shortcuts to the Home screen directly from the application menu. Open the Application menu then tap and hold an icon until an image of the Home screens appears. Drag the icon to a Home screen to create a shortcut. The onscreen keyboard When you tap a text box to enter text, an onscreen keyboard will appear. -
Page 21: Xt9 Text Input
settings. These settings include Auto-correction and keyboard sounds and vibration. Predictive text or auto correction The Android keyboard can provide predictive text input. As you tap the letters of a word, a selection of words are displayed that continue the sequence of letters tapped, or are a close match allowing for errors. -
Page 22: Editing Text
listing the text input methods available on your tablet. Tap the settings icon next to the XT9 Text Input entry. Function Description Languages and Set the languages that will be available. settings If you have selected more than one keyboard language, tap the globe in the text prediction bar to cycle through the languages. - Page 23 The selected text is highlighted, with a tab at each end of the selection. 2. Drag either tab to expand or reduce the amount of selected text, or tap Select all. 3. To cut or copy the text, tap the Cut or Copy button. Editing text...
-
Page 24: Connecting Devices To Your Tablet
Take care when removing the card, the slot is spring-loaded. Connecting to a PC as a USB storage device Download and install the latest USB driver on your computer before connecting your tablet to the computer. Visit www.acer.com/worldwide/support/ download.htm for the latest driver. -
Page 25: Connecting A Usb Device To Your Tablet
This allows you to transfer your personal data to, or from, your PC, using your PC’s file explorer. Plug the micro USB connector to your tablet, and plug the other end of the USB cable into a USB port on your PC. After a short delay, your tablet's internal memory will be visible as an external drive in your PC’s file explorer. -
Page 26: Connecting To A Television With Hdmi
Note: Please check for updates to the tablet's software that may add support for additional Bluetooth devices. Visit www.acer.com/support. Connecting to a television with HDMI Connect a micro HDMI (Type D) cable to your tablet then plug the other end of the HDMI cable into a TV or monitor with an HDMI port. -
Page 27: Going Online
Managing Wi-Fi Connections If you did not connect to a Wi-Fi network when you first started your tablet, or want to connect to a new network, tap Apps > Settings > Wireless & networks to manage your connection settings. Alternatively, tap the Wi-Fi status icon in the bottom-right corner of the screen. -
Page 28: Setting Up Gmail (Google Mail)
You may open multiple tabs. When a page is open, press the small tab with a plus sign. Simply tap one of the tabs across the top of the screen to switch pages. Pinch to zoom in or out of pages. Tap and hold an item on a page to open a contextual menu. -
Page 29: Setting Up The Email Application
Your tablet provides a variety of preinstalled applications. Many of these require some form of Internet access. These applications may include: • Acer Sync: Sync your data between your tablet, your computer and the Google servers. • SocialJogger: View updates to your social networks in one location. -
Page 30: Acer Socialjogger
From the application menu, tap Acer SocialJogger to launch the program. Select Sign in to enter your account information. When you are finished press Start. - Page 31 You can browse the market by category or tap the search icon to search for a specific application. Once you have selected an application, tap the DOWNLOAD button to download and install the application. You will be told which services (contact information, wireless access, GPS, etc.) the application requires access in order to function correctly.
-
Page 32: Google Talk
Using downloaded applications Once you’ve downloaded and installed an application, you may find it in the My apps or All sections of the Application menu. Certain applications also provide widgets, or only provide a widget (with no application icon). Widgets can be found in the Widget section when personalizing your Home screen. -
Page 33: Acer Content Folders
Acer content folders Your tablet includes content folders that allow you to easily organize and access your favorite applications. Choose one of the four categories on the Home screen or application menu: eReading, Games, Multimedia or Social. Tap the shortcut to open a screen containing applications from that category. - Page 34 Selecting a content folder The folder shortcuts on the home screen or Application menu give you direct access to any of the four categories. If you have opened a category, you can easily change category by swiping the screen to the left or right. Adding You can add applications to any content folder.
-
Page 35: Playing Music And Video
Your tablet comes supplied with a variety of programs that you can use to enjoy multimedia content. Acer clear.fi With Acer clear.fi, you can browse and stream remote multimedia content from connected devices on your tablet. Note: You must be connected to a wireless network. - Page 36 Tap and hold a photo thumbnail, then tap and hold any of the connected device showing an arrow. Select Play or Save. To upload a photo to Facebook, or Flickr via Acer Photo Uploader, or to paired devices using Bluetooth, tap and hold a photo thumbnail, then tap Share.
- Page 37 Note: The Acer clear.fi video player only plays MP4 files. Please check for updates to the tablet's software which may add support for other types of video. See “Updating your tablet’s operating system” on page 54. To send video files, for example, to paired devices using Bluetooth or to YouTube, tap and hold a photo thumbnail, then tap Share.
-
Page 38: Media Server
nemoPlayer Open nemoPlayer from the application menu to play media you have stored on your tablet. nemoPlayer enables you to listen to music, view video clips and pictures in all the formats supported by your tablet. See “Multimedia” on page 58. Media server Your tablet can act as a digital media server using UPnP technology. -
Page 39: Managing Contacts
Your tablet features an address book that allows you to save contacts to the internal memory or your Google account. Tap Contacts from the application menu to view your contacts. If you don’t have any contacts stored on your tablet, you can sync with your Google account contacts, import contacts from a contact data file (vCard or csv) or add a new contact. -
Page 40: Editing A Contact
You may now edit the new contact entry. Editing a contact If you have opened an new or existing contact you can enter information about the contact: Simply tap on a box and type the appropriate information. Click on the arrow next to the name entry to see options, such as adding a name prefix or phonetic name. -
Page 41: Starred Contacts
Tap on an entry (such as an email address) to open the application linked to that type of entry. For example, tap an email address to open the Gmail application. To add or change information, tap the pencil icon. Tap Done to save changes, or Cancel to discard them. Starred contacts You may quickly access your favorite contacts by adding a contact, then tap the star next to the contact’s name. -
Page 42: Using The Camera
Your tablet features two cameras: a 5-megapixel digital camera and flash mounted on the rear and a 2-megapixel digital camera mounted on the front. This section will take you through all the steps in taking photos and videos with your tablet. Note: It is recommended that you insert a microSD card into the microSD slot before using the camera. -
Page 43: Taking A Photo
Icon Description Zoom out You may only zoom out after you have zoomed in. Zoom in Crop and enlarge the center of the screen. When using zoom, the image on the screen does not represent the quality of the final image. Take photo After taking a photo, tap the thumbnail in the bottom-left corner to view the photo in the Gallery. -
Page 44: Shooting A Video
3. Zoom in or out as needed. Note: When using zoom, the image on the screen does not represent the quality of the final image. 4. Tap the camera icon to take the photo. After taking a photo, tap the thumbnail in the bottom-left corner to view the photo in the Gallery. -
Page 45: Supported Formats
Note: Zoom is only available in certain resolutions. Supported formats Type Formats Image JPEG Video H.264BP Audio AAC-LC Viewing photos and videos After you have taken your photo or video, it is automatically saved; normally to internal memory. After taking a photo or video, you can view it in the Gallery by tapping the thumbnail in the bottom-left corner of the screen. -
Page 46: Reading An Ebook
Your tablet provides several ways to read an eBook. Open the eReading library to see the applications that have been pre-installed. LumiRead The LumiRead application allows you to purchase, store and read books on your tablet. Tap the LumiRead shortcut in the Application menu, or eReading library, to open the LumiRead application. -
Page 47: Opening A Book
Normally All books are displayed, but you can select a tag. If a tag has been selected, only books with that tag will be displayed. Available tags are: All, Favorites, Fiction, Romance, Fantasy, Crime, Historical, Horror, Business, Life, Outdoor, Science. Tap the Settings icon and select Tags to edit or create new tags. - Page 48 Icon Item Shopping cart Open the Bookstore page, where you can choose Search Sort by Display Settings Shopping Tap the shopping cart and select your region to see a featured bookstore. On the right, additional bookstores are listed, tap the plus sign add links to your favorite sites.
- Page 49 2. Tap the Settings button. 3. Tap Register Adobe ID. 4. Tap Create an Adobe Account. 5. Enter the information requested to create login information for your account. Note: The email adress you enter will be your Adobe ID. Make sure you remember your password.
-
Page 50: Advanced Settings
Access Settings from the Application menu. Tap Apps, then Settings. Sound Adjust the volume of your tablet using the volume buttons on the side of the tablet. Alternatively, you can adjust your tablet sound settings by tapping Apps > Settings > Sound. Item Description Vibrate... -
Page 51: Putting Your Tablet In Airplane Mode
You can enter Airplane mode (also known as flight mode) to turn off network and Bluetooth functions and use your tablet during a flight. Check with your airline to make sure this is permitted onboard. Switch your tablet off during takeoff and landing as it may interfere with aircraft electronic systems. -
Page 52: Connecting To A Pc
To connect to a device, tap the device in the list of available devices. You may be asked to enter a PIN on both devices to establish the connection. Note: Only A2DP stereo headsets (without microphone) are supported. Please check for updates to the tablet's software which may add support for additional Bluetooth devices. -
Page 53: Setting The Date And Time
Internet accounts. Acer Sync Acer Sync allows you to easily synchronize your contacts, calendar, photos and videos between your tablet, PC and corresponding Google services. You must install the Acer Sync program on your computer; download and install Acer Sync and Acer PIM for the PC from the mobile.acer.com website. -
Page 54: Updating Your Tablet's Operating System
Closing an application To close an active application, go to Settings > Applications > Manage applications. Tap the Running tab, then tap the program you wish to close. Select Force stop to close the program. Uninstalling an application You can remove programs installed on your tablet to free up extra storage memory. - Page 55 Open Settings from the application menu, then tap Privacy > Factory data reset; click Reset tablet and then Erase everything to format your tablet. If your tablet still does not respond, refer to “FAQ and troubleshooting” on page 56. Resetting your tablet...
-
Page 56: Appendix
FAQ and troubleshooting This section lists frequently asked questions that may arise during the use of your tablet, and gives easy answers and solutions to these questions. Aspect Question Audio Why is there no sound coming from the device? Multimedia files Why can’t I view my picture files? Why can’t I view my... -
Page 57: Other Sources Of Help
It is also normal for the tablet to heat up during long periods of use, such as watching a video or playing a game. All Acer tablets are factory tested before release. Refer to: www.acer.com mobile.acer.com... -
Page 58: Specifications
Performance ® ™ • NVIDIA Tegra 250 dual-core Cortex-A9, 1 GHz • Ultra-low power GeForce • System memory: • 1 GB of RAM • 16 or 32 GB of flash memory ™ • Google Android operating system Display • 10.1” WXGA TFT-LCD capacitive multi-touch screen •... - Page 59 • 5-megapixel rear camera with flash (auto focus) Expansion • microSD memory card slot (up to 32 GB) Battery • Rechargeable high density Li-polymer batteries: 3260 mAh x 2 (24.1 Wh) Note: Length of battery operation will depend on power consumption which is based on system resource use.
-
Page 60: Safety
Prevention of hearing loss Caution: Permanent hearing loss may occur if earphones or headphones are used at high volume for prolonged periods of time. This device have been tested to comply with the Sound Pressure Level requirement laid down in the applicable EN 50332-1 and/or EN 50332-2 standards. -
Page 61: Medical Devices
Medical devices Operation of any radio transmitting equipment, including wireless phones, may interfere with the functionality of inadequately protected medical devices. Consult a physician or the manufacturer of the medical device to determine if they are adequately shielded from external RF energy or if you have any questions. -
Page 62: Emergency Calls
points such as near gas pumps at service stations. Observe restrictions on the use of radio equipment in fuel depots, storage, and distribution areas; chemical plants; or where blasting operations are in progress. Areas with a potentially explosive atmospheres are often, but not always, clearly marked. They include below deck on boats, chemical transfer or storage facilities, vehicles using liquefied petroleum gas (such as propane or butane), and areas where the air contains chemicals or particles such as grain, dust or metal powders. -
Page 63: Battery Information
When normal use and standby times are noticeably shorter than normal, contact your reseller. Use only Acer approved batteries, and recharge your battery only with Acer approved chargers designated for this device. - Page 64 °C and 25 °C (59 °F and 77 °F). A device with a hot or cold battery may not work temporarily, even when the battery is fully charged. Battery performance is particularly limited in temperatures well below freezing. Do not dispose of battery or devices with embedded batteries in a fire as they may explode.
- Page 65 • Device enabled with GPS or AGPS technology transmit location-based information. This location-based information may be shared with third parties, including your wireless service provider, application providers, and other third parties providing service. Emergency calls • When you make an emergency call, the cellular network may activate the AGPS technology in your mobile device to tell the emergency responders your approximate location.
-
Page 66: Disposal And Recycling Information
Use of connectors and ports Never force a connector into a port. Check for obstructions on the port. If the connector and port don’t join with reasonable ease, they probably don’t match. Make sure that the connector matches the port and that you have positioned the connector correctly in relation to the port. -
Page 67: Rohs Compliance
To minimize pollution and ensure utmost protection of the global environment, please recycle. For more information on the Waste from Electrical and Electronics Equipment (WEEE) regulations, visit www.acer-group.com/ public/Sustainability/sustainability01.htm RoHS compliance This product is in compliance with Directive 2002/95/EC of the European... - Page 68 Note: Channels 10 through 13 inclusive operate in the band 2446.6 MHz to 2483.5 MHz. There are few possibilities for outdoor use: On private property or on the private property of public persons, use is subject to a preliminary authorization procedure by the Ministry of Defense, with maximum authorized power of 100 mW in the 2446.5 - 2483.5 MHz band.
-
Page 69: Fcc Regulations
FCC regulations This mobile device complies with part 15 of the FCC Rules. Operation is subject to the following two conditions: (1) This device may not cause harmful interference, and (2) this device must accept any interference received, including interference that may cause undesired operation. This mobile device has been tested and found to comply with the limits for a Class B digital device, pursuant to Part 15 of the FCC Rules. - Page 70 NCC 警語 經型式認證合格之低功率射頻電機,非經許可,公司、商號或使用者均不得擅自變更 頻率、加大功率或變更原設計之特性及功能。 低功率射頻電機之使用不得影響飛航安全及干擾合法通信;經發現有干擾現象時,應 立即停用,並改善至無干擾時方得繼續使用。 前項合法通信,指依電信法規定作業之無線電通信。 低功率射頻電機須忍受合法通信或工業、科學及醫療用電波輻射性電機設備之干擾。 * 減少電磁波影響,請妥善使用。(* 僅限電話手機機種 ) Lithium-ion / Li-polymer battery warning ATTENZIONE! Rischio di esplosione della batteria se sostituita in modo errato. Sostituire la batteria con un una di tipo uguale o equivalente consigliata dalla fabbrica.
- Page 71 RF exposure information (SAR) This device meets the government's requirements for exposure to radio waves. This device is designed and manufactured not to exceed the emission limits for exposure to radio frequency (RF) energy set by the Federal Communications Commission of the U.S. Government. The exposure standard for wireless devices employs a unit of measurement known as the Specific Absorption Rate, or SAR.
- Page 72 Before radio devices can be put in circulation, their agreement with European laws or limits must be confirmed; only then may the CE symbol be applied. The unit of measurement for the European Council's recommended limit for mobile devices is the "Specific Absorption Rate" (SAR). This SAR limit is 2.0 W/ kg, averaged over 10 g of body tissue.
-
Page 73: Declaration Of Conformity
Declaration of Conformity We, Acer Incorporated, of 8F., No. 88, Sec. 1, Xintai 5th Rd., Xizhi Dist, New Taipei City, 22181, Taiwan Declare under sole responsibility that the product: To which this declaration relates, is in conformity with the following standards and/or other normative documents: •...