Table of Contents
Advertisement
Quick Links
Advertisement
Table of Contents

Related Manuals for Acer beTouch E130


Summary of Contents for Acer beTouch E130
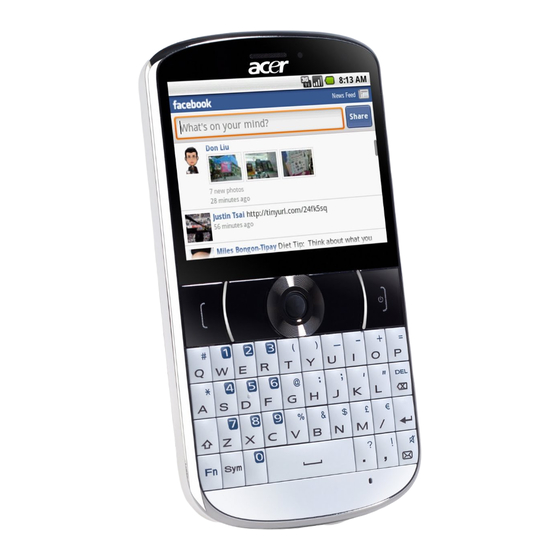
- Page 1 Acer beTouch E130 User Guide...
- Page 2 © 2010 All Rights Reserved Acer beTouch E130 Smartphone User Guide Original issue: 06/2010 Acer beTouch E130 Smartphone Model number: __________________________________ Serial number: ___________________________________ Date of purchase: ________________________________ Place of purchase: ________________________________...
-
Page 3: End User Licence Agreement
Sublicense or otherwise make the Software available to third parties, except that you may, after prior written notification to Acer, transfer the Software as a whole to a third party so long as you do not retain any copies of the Software and such third party accepts the terms of this Agreement. - Page 4 Furthermore, you may not use the Third Party Software in any manner that could interfere with any other party's use and enjoyment of the Third Party Services, or the services and products of Acer's licensors' or suppliers' third party licensors.
-
Page 5: Table Of Contents
Acer Settings ........ - Page 6 GPS tracker ..........34 FM radio .
-
Page 7: Features And Functions
To register your Acer product, please visit http://mobile.acer.com. Click Product Registration and follow the simple instructions. You can also register directly from your smartphone by tapping the Acer Registration icon. After we receive your product registration, you will be sent a confirmation email with important data that you should keep in a safe place. -
Page 8: Unpacking Your Smartphone
Your new smartphone comes packed in a protective box. Carefully unpack the box and remove the contents. If any of the following items is missing or damaged, contact your dealer immediately: • Acer beTouch E130 Smartphone • Battery • Quick Guide •... -
Page 9: Led Indicators
Item Call button Menu button Keyboard Microphone Search button End button / Power button Back button Trackball LED indicator Camera Handsfree speaker Volume up / down button Micro USB connector LED indicators Item Steady Slow flashing Flashes twice rapidly Flashes rapidly Flashes every 10 seconds Getting to know your smartphone... -
Page 10: Installing Or Removing The Battery
Your smartphone uses a replaceable battery to provide power. It is packed separately from your smartphone and needs to be inserted and charged before you can use the smartphone. Installing the battery Insert your fingernail into the cutout between the battery cover and the phone. Unclip the cover and lift off the battery cover. -
Page 11: Installing A Sim And Microsd Card
To take full advantage of your smartphone’s telephony capabilities, you must install a SIM card. The SIM card holder is located at the bottom of the battery bay. Additionally, you may wish to increase your smartphone’s storage by inserting a microSD Card into the slot provided. -
Page 12: Using Your Smartphone
Turning on for the first time To turn on your smartphone for the first time, press and hold the power button until the screen turns on. You will then be asked to configure some settings before you can use your smartphone. Follow the onscreen instructions to complete setup. -
Page 13: The Qwerty Keyboard
Item Caps Mail Enter key Delete key The Home screen After rebooting, your smartphone will display the Home screen. This screen gives you quick, icon-based access to many of the frequently used features of your smartphone. The first time you start your smartphone, you will see some icons on the screen. - Page 14 Multitasking You can have multiple applications open at the same time. To open a new application, press the Home button to return to the Home screen, then start the new application. To view your active applications, press and hold the Home button. Then tap an icon to go to the application.
-
Page 15: Personalizing The Home Screen
Icon Description Missed call. New/unread SMS. New/unread MMS. New/unread email. HSDPA connected: Downloading data. 3G connected: You may make a call. Connected to a 2G network: You may make a call. Airplane mode: Wireless connectivity disconnected. Please disable airplane mode before trying to make a call. Incoming call or active call. - Page 16 Tap Widgets to open a list of small applications that you can add to your Home screen. Widgets are handy applications that you can add to your Home screen to display various information. You can also add folders to your Home screen. There are some pre-defined folders available or you can add a New folder.
-
Page 17: Managing Contacts
Managing your contacts Your smartphone features an address book that allows you to save contacts to either the internal memory or onto your SIM card. Tap Contacts from the Home screen or the Contacts tab from the Dialer to view your contacts. -
Page 18: Making Calls
This chapter shows you how to make phone calls, and the various options available to you during your call. Before making a call Check that the phone function is on before you make a call. You can confirm the phone status from the icon on the right-hand side of the Notification area. Icon Description Connected: You may make a call. -
Page 19: The Voice Call Screen
Making a call to one of your contacts 1. Tap the Contacts tab in the dialer or Contacts from the Home screen to view your contacts. 2. Tap a contact. A dialog will open, asking if you want to Call the contact or send the contact an SMS. -
Page 20: Conference Calls
Saving a dialed number to contacts You can save a number you have dialed to your contacts for future use. 1. Select the number from the Call log tab, and tap Add to contacts. 2. Tap Create new contact and select how to complete the action. Please refer to “Adding a contact“... -
Page 21: Creating A New Message
This chapter shows you how to set up and use the SMS and MMS functions of your smartphone. All SMS and MMS messages are accessed via Messaging. Messaging automatically arranges received and sent messages into threads. To access Messaging tap Messaging on the Home screen. Creating a new message You can use your phone to compose SMS or MMS messages. -
Page 22: Replying To A Message
When a new text message arrives a message icon appears in the Notification area and the message icon on the top of the phone lights up. Tap Messaging on the Home screen to view the message list or expand the Notification area to see a summary of the message. - Page 23 Receiving MMS messages When a new MMS message arrives, a message icon appears at the top of the screen and a notification message is displayed. 1. Open Messaging to view a summary of the message. 2. Tap Download to download the message content. Note: Downloads can take a long time, depending on your connection quality.
-
Page 24: Going Online
Browsing the Internet In order to browse the Internet with your smartphone, you must be connected to a data or wireless network. Using the browser Tap Browser on the Home screen to start browsing. To open a new website, tap the address box at the top of the page. -
Page 25: Setting Up Email
Your smartphone enables you to access your email. Most popular ISPs can be set up in two steps. Tap the Applications tab and then Email to start setting up your email access. If necessary, enter your email address and tap Manual setup to enter the parameters manually. - Page 26 Important: Some applications may require payment before you can download them. You will need to have a Google Checkout account in order to pay for these applications. Uninstalling downloaded applications Once you’ve downloaded and installed an application, you may uninstall the application by tapping Settings from the Applications tab.
-
Page 27: Using The Camera
Your smartphone features a 3-megapixel digital camera mounted on the rear. This section will take you through all the steps in taking photos and videos with your smartphone. Note: You need to have a microSD Card inserted into the microSD Card slot before using the camera. -
Page 28: Taking A Photo
Camera settings menu Tap the Menu button to open the Camera settings menu. • Store location picture • Jpeg quality • Prompt after capture • Grid • Enable shutter sound • Antibanding • Resolution • White balance / lighting • Select effect •... -
Page 29: Advanced Settings
Each connection icon will be highlighted when turned on. Acer Settings Acer Settings is a convenient all-in-one place for you to adjust commonly-used settings on your phone. Open the Applications tab and tap Acer Settings. From this screen you can turn Bluetooth on or off or... -
Page 30: Adjusting Connection Settings
Phone network settings Tap Mobile networks to adust your network settings. You can turn data connection on or off when roaming, restrict the connection to 2G networks only, specify a network operator and define access point names. Please refer to “Selecting a network“... -
Page 31: Phone Settings
Selecting a network Your phone wil automatically detect your carrier/network settings when you insert a new SIM card. However, you may prefer to manually select a network. This may be a good idea when roaming. Tip: When you are traveling, manually selecting a network may help to reduce your roaming charges. -
Page 32: Urfooz
urFooz is your portable profile that lives where you live. • Fooz Creator lets you create a Fooz avatar, which is your virtual look-a-like. • Fooz World lets you edit and manage your Fooz avatar(s), create new avatars and share them on Facebook, MySpace, blogs and more. -
Page 33: Connecting To A Pc
Sharing your Fooz card and avatar urFooz lets you share your Fooz card with friends by posting it to your social networks, blogs, and websites; or emailing it to friends. In Fooz World, select Share it. Select Post to post your Fooz card to Facebook or other social networks, or select Email to email your Fooz card to a friend. -
Page 34: Gps Tracker
• Day • Week • Month • New event • Today • More Tap More > Settings to view additional options: • Hide declined events • Set alerts & notifications • Select ringtone • Vibrate • Set default reminder Adding a new event To add a new event, tap Menu and tap New event. -
Page 35: Multimedia Playback
station. To turn the radio off, return to the radio application and tap Menu and Turn off. Other functions are available through the Menu such as: • Mute • Set frequency • Scan • Save • More (Speaker on, RDS, Station list, Send station info) Multimedia playback Your smartphone comes supplied with a variety of programs that you can use... - Page 36 Browsing Spinlets gallery You can sort or search your media content by albums or genres. Browsing albums Once Spinlets is opened, you will see a display of featured albums. Browse this display by sliding your finger horizontally (left or right), and select an album by tapping it.
-
Page 37: Adjusting The Volume
Sharing your Spinlets You can share your favorite Spinlets in two ways. To post the Spinlet you are currently viewing to your social networks, blogs, or other websites, tap Share It at the top right corner of the Spinlet. Select Post it and tap the icon of the social network site or blog you want to post the widget to. -
Page 38: Resetting Your Smartphone
Managing applications Warning! Make sure you trust the source of any program you install. If you are not sure of the source, do not install a program. Installing programs from unknown sources increases your risk of virus attacks and theft of personal and private data. You can remove programs installed on your smartphone to free up extra storage memory. -
Page 39: Accessories And Tips
Connect your smartphone to a PC via USB, and do the following steps: 1. Install Acer PC Suite on your PC or notebook. 2. After the installation is complete, click Start > All Programs > Acer > Acer PC Suite > Acer PC Suite to launch the application. -
Page 40: Inserting A Microsd Card
Note: If the connection fails, restart and reconnect your smartphone to your PC, and then repeat the installation. Note: Updates are available at the Acer website. Visit http://mobile.acer.com. Creating a new access point When you need to add another GPRS/3G/EDGE connection on your phone, obtain the access point name and settings (including username and password if required) from your wireless service provider. -
Page 41: Appendix
It is also normal for the phone to heat up during long periods of use, such as watching a video or a long phone conversation. All Acer phones are factory tested before release. Refer to: www.acer.com/ http://mobile.acer.com... -
Page 42: Aux Adb
1. Set up the network configuration for the USB Ethernet device: • IP address: 192.168.239.5 • Subnet mask: 255:255:255:0 2. Add ADBHOST to the PC environment variable. • Variable name: ADBHOST • Variable value: 192.168.239.4 3. Connect the smartphone via USB to the PC. Execute the following commands before running adb. -
Page 43: Replacing The Battery Pack
When the talk and standby times are noticeably shorter than normal, buy a new battery. Use only Acer approved batteries, and recharge your battery only with Acer approved chargers designated for this device. -
Page 44: Medical Devices
your device when its use is prohibited or when it may cause interference or danger. Use the device only in its normal operating positions. Do not cover the antenna with metal and you should position the device at the above-stated distance from your body. To successfully transmit data files or messages, this device requires a good quality connection to the network. -
Page 45: Emergency Calls
To minimize pollution and ensure utmost protection of the global environment, please recycle. For more information on the Waste from Electrical and Electronics Equipment (WEEE) regulations, visit www.acer-group.com/public/Sustainability/sustainability01.htm Mercury advisory For projectors or electronic products containing an LCD/CRT monitor or display: Lamp(s) inside this product contain mercury and must be recycled or disposed of according to local, state or federal laws. - Page 46 3. DO be careful not to drop your smartphone or subject it to any strong impact. Do not place your smartphone in your back pocket. 4. DO NOT expose your smartphone to extreme temperatures. For example, do not leave your smartphone on the dashboard of a car on a hot day or when temperatures are below freezing point.
-
Page 47: Specifications
Performance • ST Ericsson PNX6715, 416 MHz • System memory: • 256 MB of SDRAM • 512 MB of Flash ROM • Google Android operating system Display • 2.6” TFT-LCD resistive touchscreen • 320 x 240 resolution • 65K colors support Multimedia •... - Page 48 • Built-in GPS • Supports AGPS Battery • High density, rechargeable 1500 mAh Lithium-Ion battery (replaceable) Note: Length of battery operation will depend on power consumption which is based on system resource use. For example, constantly using the backlight or using power- demanding applications will shorten battery life between charges.
-
Page 49: Regulatory Information
Compliant with Russian regulatory certification RoHS compliance This product is in compliance with Directive 2002/95/EC of the European Parliament and of the Council of 27 January 2003, on the restriction of the use of certain hazardous substances in electrical and electronic equipment (RoHS) and its amendments. LCD pixel statement The LCD unit is produced with high-precision manufacturing techniques. -
Page 50: List Of National Codes
• 100 mW for frequencies between 2446.5 MHz and 2483.5 MHz Note: Channels 10 through 13 inclusive operate in the band 2446.6 MHz to 2483.5 MHz. There are few possibilities for outdoor use: On private property or on the private property of public persons, use is subject to a preliminary authorization procedure by the Ministry of Defense, with maximum authorized power of 100 mW in the 2446.5 - 2483.5 MHz band. -
Page 51: Fcc Regulations
FCC regulations This mobile phone complies with part 15 of the FCC Rules. Operation is subject to the following two conditions: (1) This device may not cause harmful interference, and (2) this device must accept any interference received, including interference that may cause undesired operation. - Page 52 Important: Body-worn measurements differ among phone models, depending upon available enhancements and FCC requirements. While there may be differences between the SAR levels of various phones and at various positions, they all meet the government requirements. The FCC has granted an Equipment Authorization for this model phone with all reported SAR levels evaluated as in compliance with the FCC RF exposure guidelines.
-
Page 53: Important Note
your hearing aid. Hearing devices may also be measured for immunity to this type of interference. Your hearing device manufacturer or hearing health professional may help you find results for your hearing device. The more immune your hearing aid is, the less likely you are to experience interference noise from wireless devices. - Page 54 telephones is the "Specific Absorption Rate" (SAR). This SAR limit is 2.0 W/kg, averaged over 10 g of body tissue. It meets the requirements of the International Commission on Non-Ionizing Radiation Protection (ICNIRP) and was included in the European Standard EN 50360 for mobile radio devices.
-
Page 55: Declaration Of Conformity
We, Acer Incorporated, of 8F., No. 88, Sec. 1, Hsin Tai Wu Rd. Hsichih Taipei Hsien 221, Taiwan Declare under sole responsibility that the product: Model: E130 Description: Smart HandHeld To which this declaration relates, is in conformity with the following standards and/ or other normative documents: zEN 301 511 V9.0.2... - Page 56 battery charging ... 10 information ... 48 Bluetooth connections ... 31 headset ... 39 call history ... 18 calls answering ... 19 ending ... 19 onscreen options ... 19 rejecting ... 19 camera icons and indicators ... 27 information ... 47 shooting a video ...