Table of Contents
Advertisement
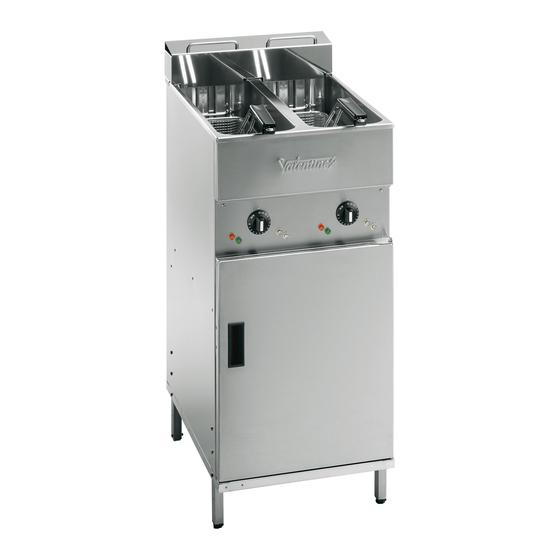
Operating Instructions
for deep fat fryers
Applicable to models: SERIES 2000
V200 (T)
V250 (T)
V400 (T)
Your model:
Please give the information
below when ordering or requesting
repairs.
Spares: see page 11
Your service centre:
confirms that the above-mentioned products conform to the following standards:
Machine safety:
EMC:
Ecublens, 15 January 1998
The responsible officer from Valentine Fabrique SA
Name: M. F. Wenger
Board of Directors
Date of creation: 15.01.98 by W/mm
Fabrique SA Doc. N°
V2200 (T)
V2525 (T)
V600
Declaration of conformity
Valentine Fabrique SA
6, Avenue d'Epenex
CH - 1024 ECUBLENS
Tél.: +41 21 637 37 40
Internet: www.valentine.ch
EN 60335-2-37:95+A1:96: Par. 11, 13 and 19
EN 55014:93 and EN 55014-2:97
EN 61000-3-2:95 and EN 61000-3-3:95
Date of modification: 03.09.03 by fd
A2000E
Fax: +41 21 637 37 41
Mail: info@valentine.ch
The EEC representative:
Name: M. A. Holliday
Director of Valentine Equipment LTD
Reading RG1 8JS (GB)
File:
Page No.: 1
Advertisement
Table of Contents

Related Manuals for Valentine 2000 Series


Summary of Contents for Valentine 2000 Series
- Page 1 EN 60335-2-37:95+A1:96: Par. 11, 13 and 19 EMC: EN 55014:93 and EN 55014-2:97 EN 61000-3-2:95 and EN 61000-3-3:95 Ecublens, 15 January 1998 The responsible officer from Valentine Fabrique SA The EEC representative: Name: M. F. Wenger Name: M. A. Holliday Board of Directors...
-
Page 2: Table Of Contents
5.6 Circuit diagram _____________________________________________________________ 12 Warning: The information given in these operating instructions may be amended at any time. Valentine Fabrique SA accepts no liability for errors in these instructions and any consequent damage. File: Date of creation: 15.01.98 by W/mm Date of modification: 03.09.03 by fd... -
Page 3: Important Information
Dear Customer, Congratulations on purchasing a Valentine fryer, a product of the best quality well known in Europe for 50 years. The following operating instructions are based on and international regulations, as well as on the new product liability. 1. Important information 1.1 Warning... -
Page 4: Technical Data
2. Technical data Model: V200 50-60 5x1.5 19-23 IP X4 20x58x85 V200T 50-60 5x1.5 26-32 IP X4 20x58x85 14.4 50-60 5x2.5 IP X4 40x58x85 V2200 2x 7-9 38-46 V2200T 50-60 2x 7-9 52-64 IP X4 40x58x85 50-60 5x1.5 IP X4 25x58x85 V250 8-10... -
Page 5: Cleaning
Fig. 1: Fryer against wall Fig. 2: Fryer free-standing Fig. 3: Fryer against wall, with socket IP X2 (next to cooking range) with swichbox IP X5 N.B.: The V200 and V250 fryers, which are only 200 and 250 mm wide respectively, must be secured on the sides (risk of tipping over). - Page 6 Fig. 5 Detail control panels - 1 Oil pan - 2 Oil pans Above the door Behind the door Heating element may be folded up : L = working position N = draining M = cleaning 1 Lid mounted in door 19 Red lamp = safety thermostat off 2 Door handle (door open) 20 Basket...
-
Page 7: Instructions For Use
4. Instructions for use 4.1 Pouring in oil Grip lid [1] (Fig. 5, page 6) by handle [3] and ◊ Whilst working, the folded lid is supported inside the door. place inside the door [21] (hinge at the top) Pour peanut oil into the fryer basin as far as ◊... -
Page 8: Oil Care
Close oil cock, pour in fresh oil up to the “ MAX ” fully down above the drain position. level [24] Exclusive advantages of your Valentine fryer: When the green cook light comes on, immerse Higher power due to dialogue ⇒... -
Page 9: Repairs
5. Repairs 5.1 Simple faults Fault Possible cause Remedy The fryer is no longer heating. No lamp lights up ∗ No power ◊ Check fuses, plugs and socket The red lamp lights up ∗ Safety thermostat has ◊ Press reset button (see 5.3) switched off The fryer is not heating ∗... -
Page 10: Security Thermostat
5.3 Safety thermostat Every heating element is fitted with a breakage-proof temperature limiter. The reset button is located behind the door on the upper edge of the control panel. (Fig 5, no. 16, page 6). The red signal lamp [19] to the right of the reset button lights up as soon as the temperature limiter switches off. The safety thermostat ∗... -
Page 11: Spare Parts
5.5 Spare parts Only use original spare parts. When ordering spare parts indicate not only the unit no. but also the article no. given in the table. Fryer type Type Unit number Voltage, current and power U, I, P This information is given on page no. 1 Your fryer: Name H3, H4,...