Table of Contents
Advertisement
Available languages
Available languages
Quick Links
MULTIPLE PRODUCT CODES (LEAVE BLANK IF N/A)
SAFETY INFORMATION
WARNING
!
FIRE OR EXPLOSION HAZARD
If the information in these instructions are
not followed exactly, a fi re or explosion may
result causing property damage, personal
injury, or loss of life.
- Do not store or use gasoline or other
fl ammable vapors and liquids in the vicinity of
this or any other appliance.
INSTALLER:
Leave this manual with the appliance
CONSUMER:
Retain this manual for future reference
Wolf Steel Ltd., 24 Napoleon Rd., Barrie, ON, L4M 0G8 Canada / 103 Miller Drive, Crittenden, Kentucky, USA, 41030
Phone (705)721-1212 • Fax (705)720-9081 • www.napoleonfi replaces.com • hearth@napoleonproducts.com
$10.00
INSTALLATION AND
ADD MANUAL TITLE
OPERATION MANUAL
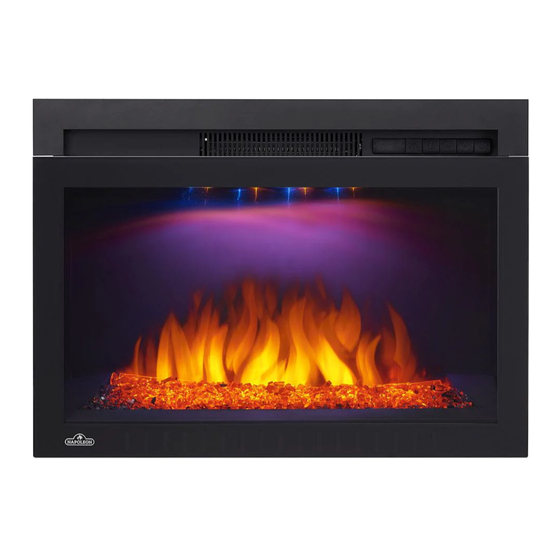
24" ELECTRIC FIREPLACE WITH TRIM KIT
CERTIFIED TO THE CANADIAN AND AMERICAN NATIONAL STANDARDS:
CSA /
INTERTEK
LOGO
ENGLISH
SPANISH PG. 25
PRODUCT NAME™
NEFP24HT-HD
ADD PRODUCT CODE
(IF MULTIPLE, _____ ILLUSTRATED)
ADD PRODUCT IMAGE
FOR INDOOR USE ONLY
CSA 2.22 NO. 46 / UL 1278
W415-1755 / 05.03.17
2021
1278
Advertisement
Chapters
Table of Contents

Related Manuals for Napoleon NEFP24HT-HD


Summary of Contents for Napoleon NEFP24HT-HD
- Page 1 Retain this manual for future reference CSA / INTERTEK LOGO Wolf Steel Ltd., 24 Napoleon Rd., Barrie, ON, L4M 0G8 Canada / 103 Miller Drive, Crittenden, Kentucky, USA, 41030 Phone (705)721-1212 • Fax (705)720-9081 • www.napoleonfi replaces.com • hearth@napoleonproducts.com W415-1755 / 05.03.17 $10.00...
- Page 2 safety information WARNING • If equipped with a heater, this appliance can be hot when operated and can cause severe burns if contacted. • Do not operate appliance before reading and understanding operating instructions. Failure to operate appliance according to operating instructions could cause fi re or injury. •...
- Page 3 safety information WARNING • To prevent a possible fi re, do not block air intakes or exhaust in any manner. Do not use on soft surfaces, like a carpet, where openings may become blocked. • Always plug appliances directly into a wall outlet/receptacle. Never use an extension cord or relocatable power tap (outlet/power strip).
-
Page 4: Table Of Contents
table of contents dimensions general information listing approvals general instructions rating plate information label location hardware list locating appliance unpacking and testing the appliance grounding the appliance installation minimum clearance to combustibles minimum mantel clearances trim kit installation hard wiring installation framing 4.5.1 installing the appliance into existing fireplace 4.5.2 installing the appliance into the wall... -
Page 5: Dimensions
dimensions 1.0 dimensions W415-1755 / 05.03.17... -
Page 6: General Information
POR WOLF STEEL LTD. MADE IN CHINA FABRIQUÉ EN CHINE HECHO EN CHINA WOLF STEEL LTD. SERIAL NUMBER / NO. DE SÉRIE / 24 NAPOLEON ROAD, NEFB NÚM. DE SERIE W385-4488 BARRIE, ON, L4M 0G8 CANADA note: The rating plate must remain with the appliance at all times. It must not be removed. -
Page 7: Label Location
general information label location "DO NOT COVER" LABEL (W385-2210) ATTENTION LABEL (W385-2201) "HOT SURFACE" LABEL (W385-2017) WARNING LABEL (W385-2200) FRONT HARD WIRING LABEL (W385-2202) RATING PLATE WITH SERIAL NUMBER NEFB24H (W385-4488) CAUTION LABEL (W385-2199) WARNING LABEL (W385-2211) SIDE WIRE DIAGRAM LABEL REAR (W385-2203) hardware list... -
Page 8: Locating Appliance
3.0 locating appliance locating appliance WARNING • Due to high temperatures, this electric appliance should be located out of traffic. Keep combustible materials such as furniture, pillows, bedding, papers, clothes and curtains at least 36” (91.4cm) from the front of the appliance. -
Page 9: Installation
installation 4.0 installation WARNING • Risk of fi re! The power cord must not be pinched against a sharp edge. Secure cord to avoid tripping or snagging to reduce the risk of fi re, electric shock, or personal injury. Do not run cord under carpeting. Do not cover cord with throw rugs, runners, or similar items. -
Page 10: Minimum Mantel Clearances
installation minimum mantel clearances WARNING • When using paint or lacquer to finish the mantel, the paint or lacquer must be heat resistant to prevent discolouration. TOP OF TRIM KIT 23 3/8” (59.4cm) 29 3/8” (74.6cm) BOTTOM OF APPLIANCE trim kit installation 2. - Page 11 installation 3. Secure top trim. 4. Insert the 4 brackets into the slots on the side trim pieces. See above for a rear view of bracket installed. note: If the bottom trim pieces are desired, continue with installation instructions below. 5.
-
Page 12: Hard Wiring Installation
installation hard wiring installation WARNING • Turn off the appliance completely and let cool before servicing. Only a qualifi ed service person should service and repair this electric appliance. HARD WIRING CONNECTION If it is necessary to hard wire this appliance, a qualified electrician must remove the cord connection and wire the appliance directly to the household wiring. -
Page 13: Framing
STEP 1: LIFT installation ÉTAPES 1: SOULEVER framing 4.5.1 installing the appliance into existing fireplace note: APPLIANCE This appliance is equipped with nylon pads located on the bottom 4 corners. To prevent damaging the base APPAREIL of the mantel or wood floor, carefully lift the appliance into the mantel or fireplace opening while avoiding STEP 2: INSERT contact with the front edge of the mantel base or wood floor. -
Page 14: Installing The Appliance Into The Wall
(73.6c (58.4cm) 41” installation (104.1cm) 4.5.2 installing the appliance into the wall Prepare rough in framing following the recommended dimensions, see Figure 1. Select a location that is not prone to moisture and is located at 36” (91.4cm) away from combustible materials as curtain drapes, furniture, bedding, paper, etc. -
Page 15: Finishing
5.0 finishing finishing WARNING • Power supply service must be completed prior to finishing to avoid reconstruction. • Heat vents and air openings cannot be covered in any circumstances. glass door removal / installation WARNING • Facing and/or finishing material must not interfere with air flow through air openings, louvres openings, operation of louvres or doors or access for service. -
Page 16: Wiring Diagram
wiring diagram 6.0 wiring diagram WARNING • Turn off the appliance completely and let cool before servicing. Only a qualified service person should service and repair this electric appliance. DECORATION / DÉCORATION / DECORACIÓN FLAME / DISPLAY CN3 / FLAMME / AFFICHAGE / VISOR CN3 LLAMA... -
Page 17: Operation
7.0 operation operation Once the appliance has been plugged into a grounded electrical outlet or hard wired to a dedicated 120V power supply, it is ready to operate. ATTENTION: Ensure the house circuit breakers for the power supply are turned on. When initially connecting the appliance into a power source, the appliance will perform an LED check. -
Page 18: Operating By Remote Control
operation operating by remote control WARNING • To avoid danger of suffocation, keep the packaging bag away from babies and children. Do not use in cribs, bed, carriages or play pens. This bag is not a toy. Knot before throwing away. note: When operating the remote control, it must be directed towards the front center of the appliance. -
Page 19: Replacements
replacements 8.0 replacements WARNING • Failure to position the parts in accordance with this manual or failure to use only parts specifi cally approved with this appliance may result in property damage or personal injury. Contact your dealer for questions concerning prices and policies on replacement parts. Normally, all parts can be ordered through your Authorized dealer / distributor. -
Page 20: Overview
replacements overview note: Care must be taken when removing and disposing of any broken glass or damaged components. Be sure to vacuum up any broken glass from inside the appliance before operation. W415-1755 / 05.03.17... -
Page 21: Troubleshooting
troubleshooting troubleshooting WARNING • Turn off the appliance completely and let cool before servicing. Only a qualifi ed service person should service and repair this electric appliance. sympton problem test solution Dim or no fl ame Flame brightness not selected. See “operation”... -
Page 22: Warranty
Notwithstanding any provisions contained in the Limited Warranty, Napoleon responsibility under this warranty is defi ned as above, and it shall not in any event extend to any incidental, consequential, or indirect damages. -
Page 23: Notes
11.0 notes warranty 29.1 W415-1755 / 05.03.17... - Page 24 Fireplace Inserts • Charcoal Grills • Gas Fireplaces • Waterfalls • Wood Stoves Heating & Cooling • Electric Fireplaces • Outdoor Fireplaces • Gas Grills 24 Napoleon Road, Barrie, Ontario, Canada L4M 0G8 214 Bayview Drive, Barrie, Ontario, Canada L4N 4Y8...
- Page 25 Conserve este manual para consultarlo en el futuro. CSA / INTERTEK LOGO Wolf Steel Ltd., 24 Napoleon Rd., Barrie, ON, L4M 0G8 Canada / 103 Miller Drive, Crittenden, Kentucky, USA, 41030 Teléfono (705)721-1212 • Fax (705)720-9081 • www.napoleonfoyers.com • hearth@napoleonproducts.com W415-1755 / 05.03.17 $10.00...
- Page 26 información de seguridad ADVERTENCIA • Si cuenta con un calefactor, este artefacto puede estar caliente al operarlo y puede causar quemaduras graves al tocarlo. • No opere el artefacto antes de leer y comprender las instrucciones de operación. Si no opera el artefacto de acuerdo con las instrucciones de operación, podrían producirse lesiones o un incendio.
- Page 27 • No inserte ni permita que objetos extraños ingresen en las aberturas de ventilación o salida ya que esto puede causar un choque eléctrico o incendio, o dañar el artefacto. información de seguridad ADVERTENCIA • Para evitar un posible incendio, no bloquee las entradas o salidas de aire de ninguna manera. No lo use sobre superfi cies blandas, como un tapete, donde las aberturas puedan quedar bloqueadas.
- Page 28 indíce dimensiones información general lista de aprobaciones instrucciones generales información de la placa de calificación ubicación de la etiqueta lista de componentes ubicación artefacto descempacary probar el artefacto puesta a tierra del artefacto instalación separación mínima de los materiales combustibles separaciones mínimas de la repisa instalación del kit de molduras instalación del cableado eléctrico...
-
Page 29: 1.0 Dimensiones
dimensions 1.0 dimensiones W415-1755 / 05.03.17... -
Page 30: Información General
POR WOLF STEEL LTD. MADE IN CHINA FABRIQUÉ EN CHINE HECHO EN CHINA WOLF STEEL LTD. SERIAL NUMBER / NO. DE SÉRIE / 24 NAPOLEON ROAD, NEFB NÚM. DE SERIE W385-4488 BARRIE, ON, L4M 0G8 CANADA nota: La placa de calificación debe quedar con el artefacto en todo momento. No se la debe retirar. -
Page 31: Ubicación De La Etiqueta
información general ubicación de la etiqueta ETIQUETA "NO CUBRIR" (W385-2210) ETIQUETA DE ATENCIÓN (W385-2201) ETIQUETA "SUPERFICIE CALIENTE" ETIQUETA DE (W385-2017) ADVERTENCIA (W385-2200) FRENTE ETIQUETA DE CABLEADO ELÉCTRICO (W385-2202) PLACA DE CALIFICACIÓN CON NÚMERO DE SERIE NEFB24H-HD (W385-4488) ETIQUETA DE PRECAUCIÓN (W385-2199) ETIQUETA DE ADVERTENCIA... -
Page 32: Ubicación Artefacto
3.0 ubicación artefacto locating appliance ADVERTENCIA • Debido a las altas temperaturas que alcanza, este artefacto eléctrico debe ubicarse fuera de la zona de tráfico. Mantenga los materiales combustibles, como muebles, almohadas, ropa de cama, papeles, prendas y cortinas, a al menos 36” del frente del artefacto. •... -
Page 33: Instalación
instalación 4.0 instalación ADVERTENCIA • ¡Riesgo de incendio! El cable eléctrico no debe estar apretado contra un borde fi loso. Asegure el cable para evitar tropezar o engancharse con él, para reducir el riesgo de incendio, choque eléctrico o lesiones personales. -
Page 34: Separaciones Mínimas De La Repisa
instalación separaciones mínimas de la repisa ADVERTENCIA • Al usar pintura o barniz para dar la terminación a una repisa, la pintura o el barniz deben ser resistentes al calor para evitar la decoloración. TECHO O REPISA PARTE SUPERIOR DEL KIT TOP OF TRIM KIT DE MOLDURAS 23 3/8”... - Page 35 instalación 3. Asegure la moldura superior. 4. Inserte las 4 ménsulas en las ranuras en las piezas de la molduras laterales. Arriba se muestra una vista trasera de la ménsula instalada. nota: Si se desean las piezas de la moldura inferior, siga con las instrucciones de instalación a continuación. 5.
-
Page 36: Instalación Del Cableado Eléctrico
instalación instalación del cableado eléctrico ADVERTENCIA • Apague totalmente el artefacto y déjelo enfriar antes de hacerle cualquier servicio. Solo una persona de servicio califi cada debe dar servicio y reparar este artefacto eléctrico. CONEXIÓN DEL CABLEADO ELÉCTRICO Si es necesario hacer el cableado eléctrico de este artefacto, un electricista calificado debe retirar la conexión del cable y conectar el artefacto directamente al cableado de la vivienda. -
Page 37: Tirantería
STEP 1: LIFT instalación ÉTAPES 1: SOULEVER tirantería 4.5.1 instalación del artefacto en una chimenea existente nota: APPLIANCE El artefacto cuenta con rellenos de nylon ubicados en las cuatro esquinas inferiores. Para evitar dañar la APPAREIL base de la repisa, con cuidado levante el artefacto dentro de la repisa mientras evita tocar el borde delantero STEP 2: INSERT de la base de la repisa. -
Page 38: Instalación Del Artefacto En La Pared
(73.6c (58.4cm) 41” instalación (104.1cm) 4.5.2 instalación del artefacto en la pared Prepare la tirantería para los conductos siguiendo las dimensiones recomendadas, vea la Figura 1. Seleccione una ubicación que no sea propensa a tener humedad y se ubique a al menos 36” (91.4cm) lejos de materiales combustibles como cortinados, muebles, ropa de cama, papel, etc. -
Page 39: Terminación
5.0 terminación finishing ADVERTENCIA • El servicio de suministro eléctrico debe completarse antes de la terminación. • Los orificios de salida del calor y las aberturas de aire no pueden estar cubiertos en ninguna circunstancia. remoción e instalación de la puerta de vidrio ADVERTENCIA •... -
Page 40: Diagrama Del Cableado
wiring diagram 6.0 diagrama del cableado ADVERTENCIA • Apague totalmente el artefacto y déjelo enfriar antes de hacerle cualquier servicio. Solo una persona de servicio calificada debe dar servicio y reparar este artefacto eléctrico. DECORATION / DÉCORATION / DECORACIÓN FLAME / DISPLAY CN3 / FLAMME / AFFICHAGE /... -
Page 41: Operación
7.0 operación operation Una vez que el artefacto se haya enchufado a un toma eléctrico puesto a tierra o se haya conectado a un suministro eléctrico de 120V exclusivo, está listo para funcionar. ATENCIÓN: Asegúrese de que los disyuntores del suministro eléctrico de la vivienda estén encendidos. Al conectar inicialmente el artefacto a una fuente de electricidad, el artefacto realizará... -
Page 42: Operación Por Control Remote
operación operación por control remote ADVERTENCIA • Para evitar el peligro de sofocación, mantenga la bolsa de empaque lejos de los bebés y los niños. Esta bolsa no es un juguete. Átela antes de desecharla. nota: Al operar el control remoto, debe dirigirlo hacia el centro del frente del artefacto. 1. -
Page 43: Reemplazos
reemplazos 8.0 reemplazos ADVERTENCIA • Si las piezas no se colocan según este manual o si no se usan únicamente las piezas aprobadas específi camente para este artefacto, pueden producirse daños a la propiedad o lesiones personales. Comuníquese con su distribuidor si tiene preguntas sobre los precios y las políticas de las piezas de reem- plazo. -
Page 44: Descripción General
reemplazos descripción general nota: Debe tenerse cuidado al retirar y desechar vidrios rotos o componentes dañados. Asegúrese de aspirar cual- quier resto de vidrios rotos que haya quedado dentro del artefacto antes de hacerlo funcionar. W415-1755 / 05.03.17... -
Page 45: Resolución De Problemas
troubleshooting resolución de problemas ADVERTENCIA • Apague totalmente el artefacto y déjelo enfriar antes de hacerle cualquier servicio. Solo una persona de servicio califi cada debe dar servicio y reparar este artefacto eléctrico. síntoma problema solución de prueba Llama tenue o sin No se seleccionó... - Page 46 El control remoto no Baterías bajas/agotadas. Reemplace las baterías del control remoto. funciona. El receptor remoto no Asegúrese de que el receptor remoto no esté bloqueado. resolución de problemas funciona bien. Reemplace el panel de control. síntoma problema solución de prueba El calefactor Hace demasiado calor en la El calefactor tiene un termostato incorporado que se cerrará...
-
Page 47: Garantia
Pueden aplicarse honorarios de servicio adicionales si usted procura servicio en garantía de un distribuidor. Todas las especifi caciones y diseño están sujetos a cambio sin aviso previo debido a mejoras al producto en curso. Napoleon es una marca comercial registrada de Wolf Steel Ltd. - Page 48 Fireplace Inserts • Charcoal Grills • Gas Fireplaces • Waterfalls • Wood Stoves Heating & Cooling • Electric Fireplaces • Outdoor Fireplaces • Gas Grills 24 Napoleon Road, Barrie, Ontario, Canada L4M 0G8 214 Bayview Drive, Barrie, Ontario, Canada L4N 4Y8...