Table of Contents
Advertisement
Quick Links
We advise you to read this manual carefully, which contains all the instructions for maintaining the
appliance's aesthetic and functional qualities. For further information on the product: www.smeg.com
PRECAUTIONS
General safety instructions
Risk of personal injury
• Keep children under the age of
8 at a safe distance unless they
are constantly supervised.
• This appliance may be used by
children aged at least 8 and by
people of reduced physical,
sensory or mental capacity, or
lacking in experience in the use
of electrical appliances,
provided that they are
supervised or instructed by
adults who are responsible for
their safety.
• This appliance is not suitable
for use by persons (including
children) with reduced
physical, sensory or mental
20 - PRECAUTIONS
20
20
22
24
24
24
24
25
25
25
25
25
25
26
26
26
27
capacity, or by those without
experience or knowledge,
unless they are supervised or
instructed on the use of the
appliance by a person
responsible for their safety.
• Children must be supervised to
ensure that they do not play
with the appliance.
• According to current
regulations, children between 3
and 8 years of age can take or
load food from the appliance,
but it is highly discouraged to
allow children under 8 years of
age to perform these
operations and in general to
use the appliance.
• Children must never play with
the appliance.
27
27
27
27
29
30
30
32
32
32
33
33
33
33
34
35
914779518/A
Advertisement
Table of Contents

Related Manuals for Smeg Classica CVI338LX3


Summary of Contents for Smeg Classica CVI338LX3
-
Page 1: Table Of Contents
Mounting (mm) Description of parts We advise you to read this manual carefully, which contains all the instructions for maintaining the appliance’s aesthetic and functional qualities. For further information on the product: www.smeg.com PRECAUTIONS General safety instructions capacity, or by those without... - Page 2 • Never try to put out a fire or APPLIANCE. flames with water: turn off the • Installation and servicing should appliance and smother the be carried out by qualified flames with a fire blanket or personnel in accordance with other appropriate cover.
-
Page 3: For This Appliance
extended periods. the appliance, make sure that • Bottles with a high alcohol the power supply cable is not content must be tightly closed. caught or damaged. • Do not place bottles sideways • CAUTION: do not place on the base of the wine cellar. portable multiple sockets or They could fall when the door is portable power supply units at... - Page 4 parts of it in ways other than exposed to direct sunlight. those specified in this manual. • The appliance must not be • Caution: risk of fire, flammable installed near heat sources. If materials. this is not possible, suitable insulation must be used. •...
-
Page 5: Appliance Purpose
the back of the appliance. inappropriate. • CAUTION: to avoid dangers • The appliance is not designed due to the instability of the to operate with external timers appliance, it must be fixed or with remote-control systems. according to the instructions. The appliance is designed for •... -
Page 6: Identification Plate
only. equipment waste, or return it to the retailer when purchasing an equivalent product, on • make sure you have the model and serial a one for one basis. number available on the identification plate. • Use original spare parts only. Our appliances are packaged in non-polluting and recyclable materials. -
Page 7: Description
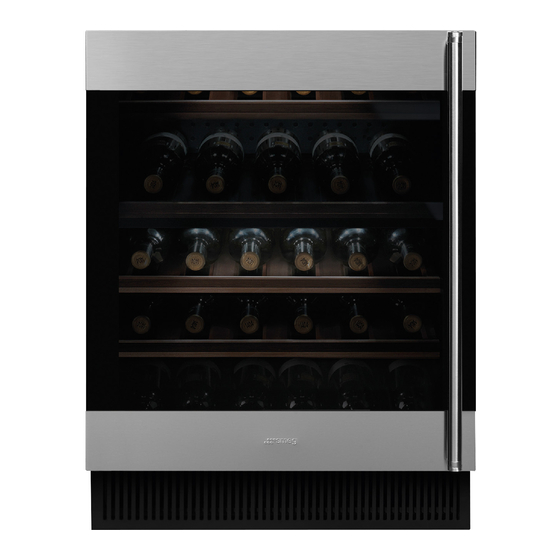
DESCRIPTION General Description 1 Control panel 6 Lower compartment interior lighting 2 Upper compartment interior lighting 7 Activated charcoal filter 3 Activated charcoal filter 8 Removable shelf 4 Removable shelf 9 Removable shelf 5 Fixed shelf 10 Fixed shelf Control panel ON/OFF key where you want to change the settings. -
Page 8: Description Of Parts
Keylock control key or when the light forced key on the control This key disables the control panel keys. panel is pressed (medium brightness). Description of parts Removable shelves Activated charcoal filters Ensure optimum air quality for wine storage. Fans (not visible) Distribute the temperature and reduce condensation on the shelves and other surfaces. - Page 9 Manual ventilation 5. press the fan key. The text will The fans switch on and off automatically appear on the display. to guarantee a constant temperature When demo mode is active, the display and provide suitable climate control for will show the message for 2 conservation of the wine.
-
Page 10: Using The Wine Cellar Compartments
Using the wine cellar compartments Do not place bottles horizontally on the Bottle arrangement base of the wine cellar. They could fall when the door is opened. Activated charcoal filter To maintain optimum air quality inside the wine cellar, the activated charcoal filter must be replaced at least once a year. -
Page 11: Alarms
Another normal wine cellar operating noise is a operation 1–2 times. gurgling due to the refrigerant flowing through If the alarm continues to occur, call the pipes in the circuit. This noise is normal and Technical Support. does not indicate an appliance malfunction. Turning the appliance off Alarm for door open Whenever the appliance is to remain unused for... - Page 12 Rosé wines 10°C. However, for prestige wines marked with the vintage, or sparkling wines that have been Generally, the rules for serving rosé wines are aged for a long time, even 12°C may be the same as for whites. However, it is important advisable to allow the development of the to consider these wines' tannin content and complex bouquet that has been slowly and...
-
Page 13: Cleaning And Maintenance
Type of wine Temp. (°C) Sweet and aromatic sparkling wines Sweet and aromatic red sparkling 10 - 12 wines “Charmat method” sparkling 8 - 10 wines “Long Charmat method” sparkling 10 - 12 wines “Traditional method” sparkling 8 - 10 wines without year “Traditional method”... -
Page 14: What To Do If
What to do if... too long. • Warm bottles have been placed inside the The appliance does not work: wine cellar. • Make sure that the appliance is plugged in • The door seal is damaged or dirty. Clean or and that the main switch is turned on. -
Page 15: Appliance Overall Dimensions (Mm)
feet on the lower front. Appliance overall dimensions (mm) Fixing to the furniture To fix the appliance to the furniture: 1. open the door; 2. tighten the 3 screws provided. 34 - INSTALLATION 914779518/A... -
Page 16: Mounting (Mm)
95° 95° Mounting (mm) Do not cover the ventilation holes. 914779518/A INSTALLATION - 35...